Work Orders — CAMO Side
An overdue inspection triggers a work order. Follow it from creation to closure — all from the CAMO engineer's desk.
What You'll Learn
- Create work orders in standard and wizard mode
- Walk through the full WO lifecycle (Created → Closed)
- Manage third-party (outsourced) work orders
- Use work packages for grouped maintenance events
- Export work orders as PDF
1 — Work Orders Landing & Dashboard
Step 1 — Module Landing Page
Navigate to Work Orders in the sidebar. The landing page shows entry points for internal work orders, third-party WOs, and work packages.
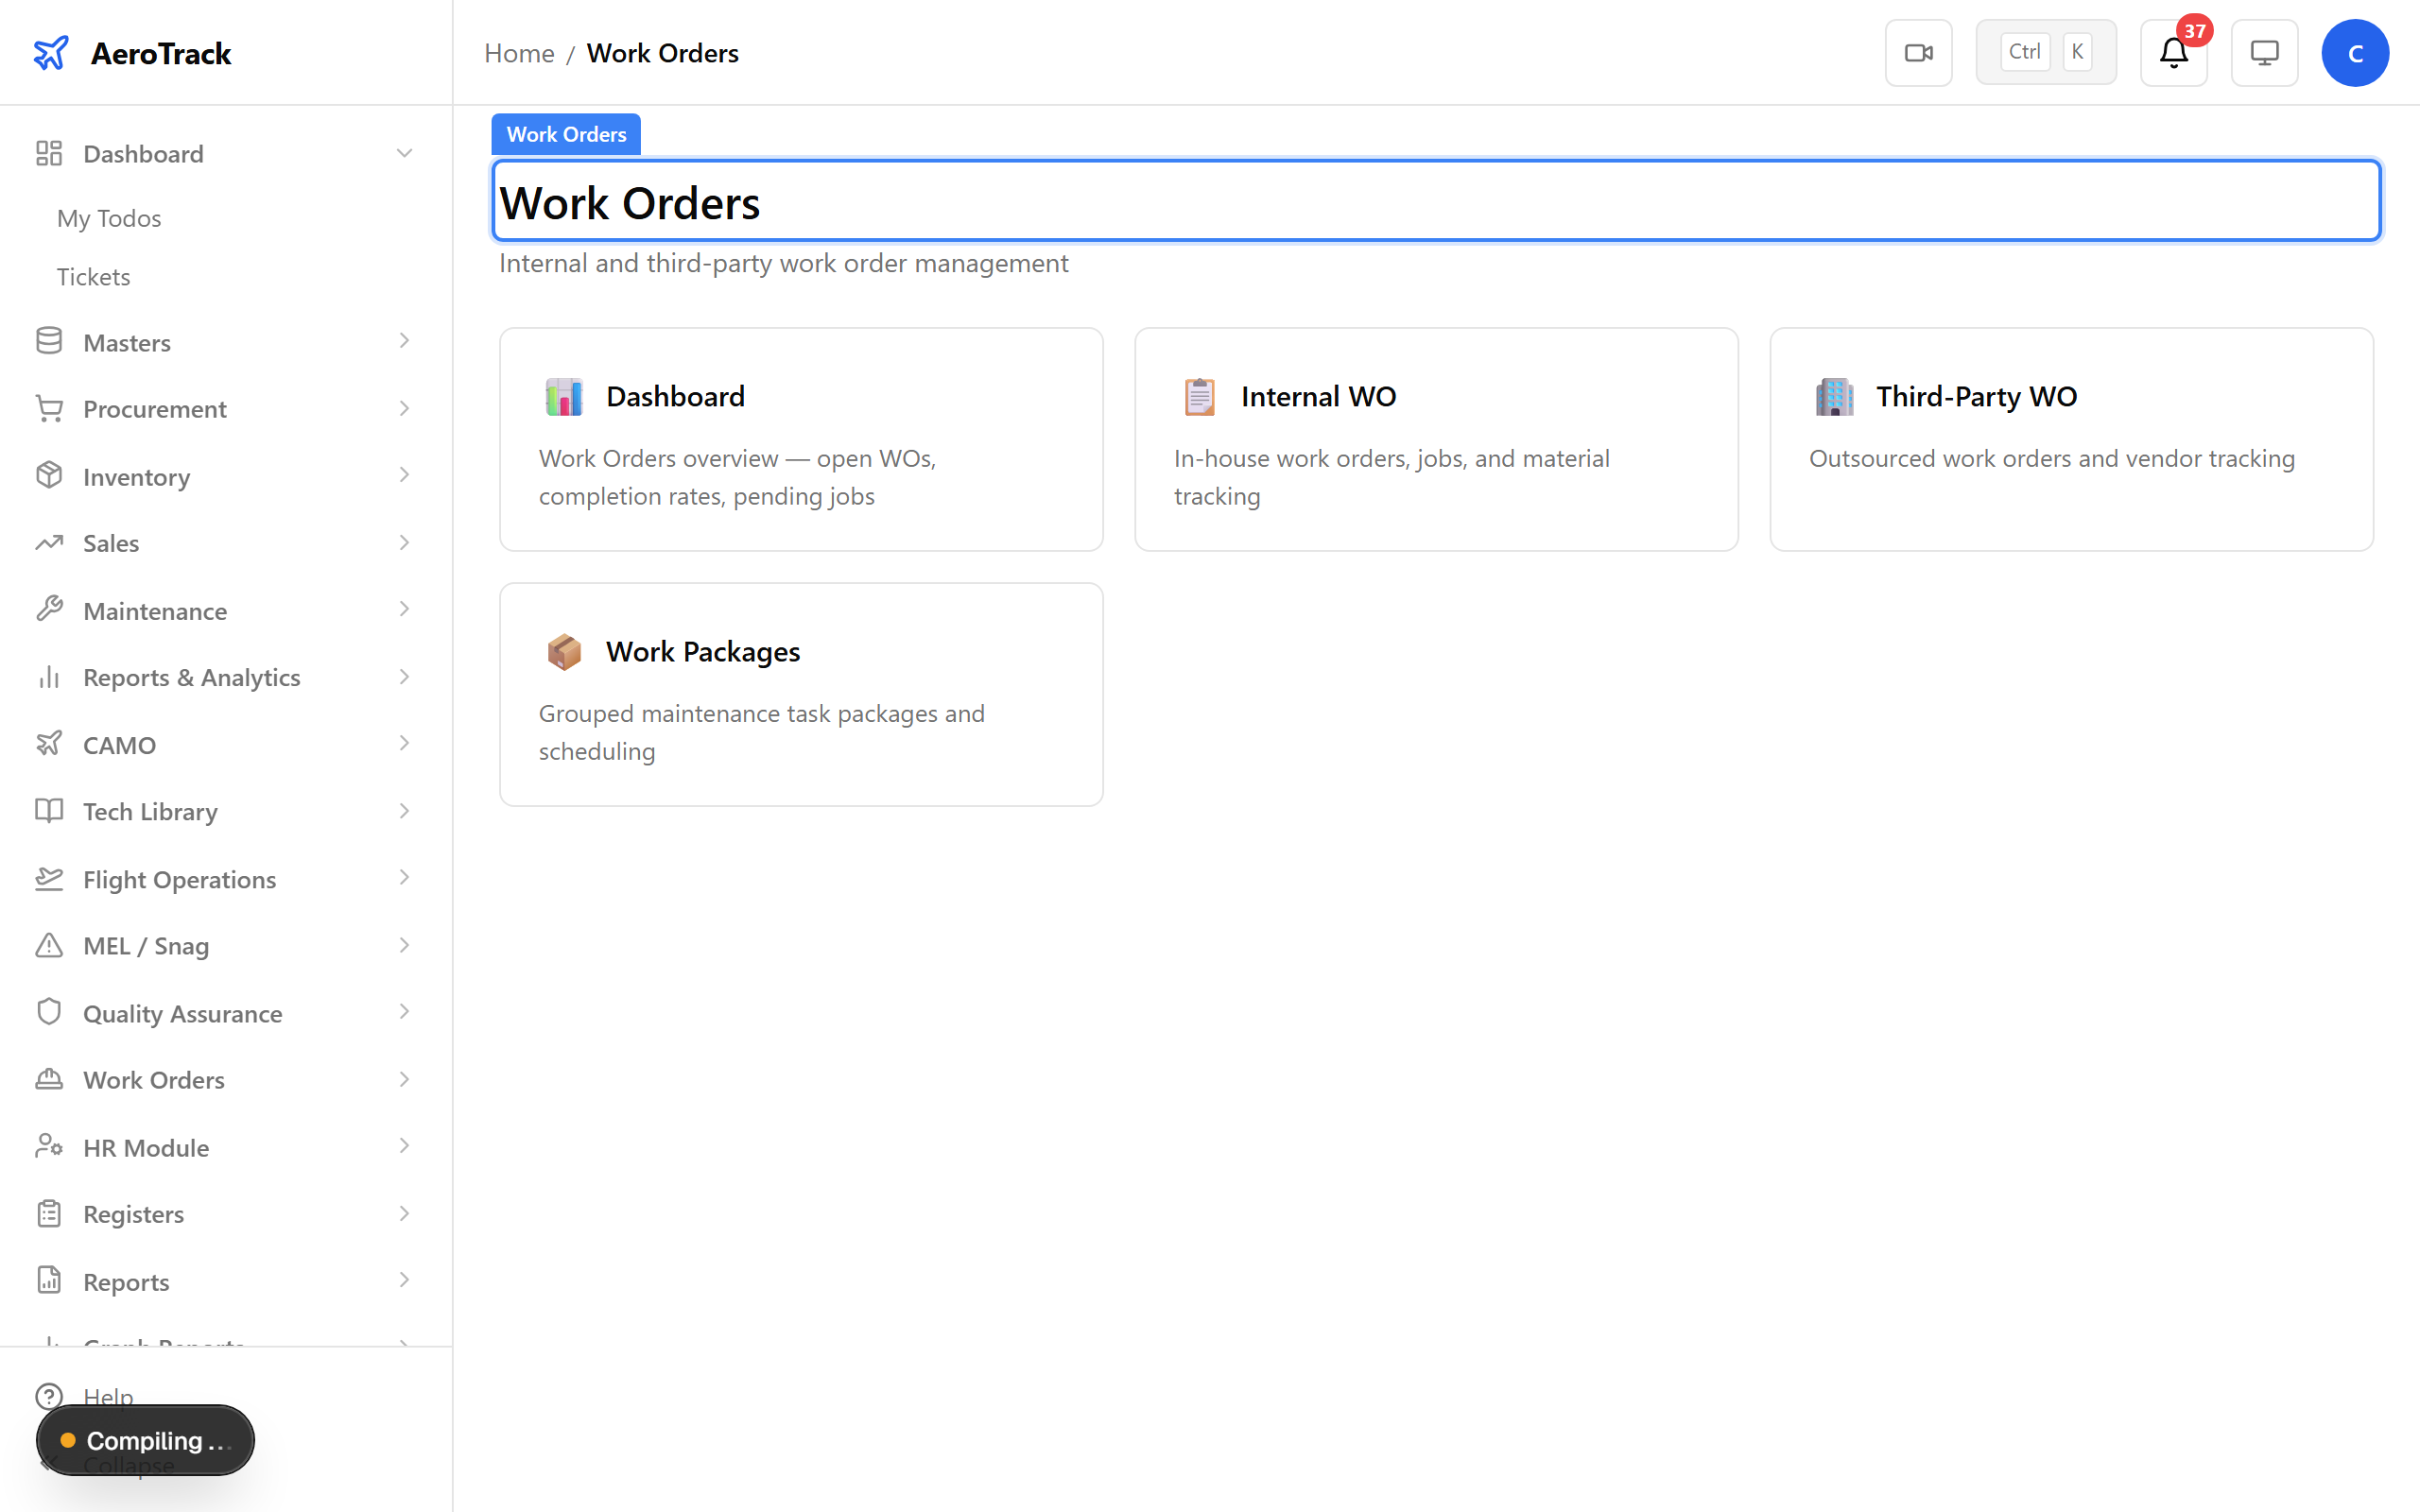
Work Orders — manage internal and third-party maintenance tasks.
Step 2 — Dashboard Overview
The dashboard shows summary KPI cards — open WOs, status distribution, overdue items, and cost tracking.
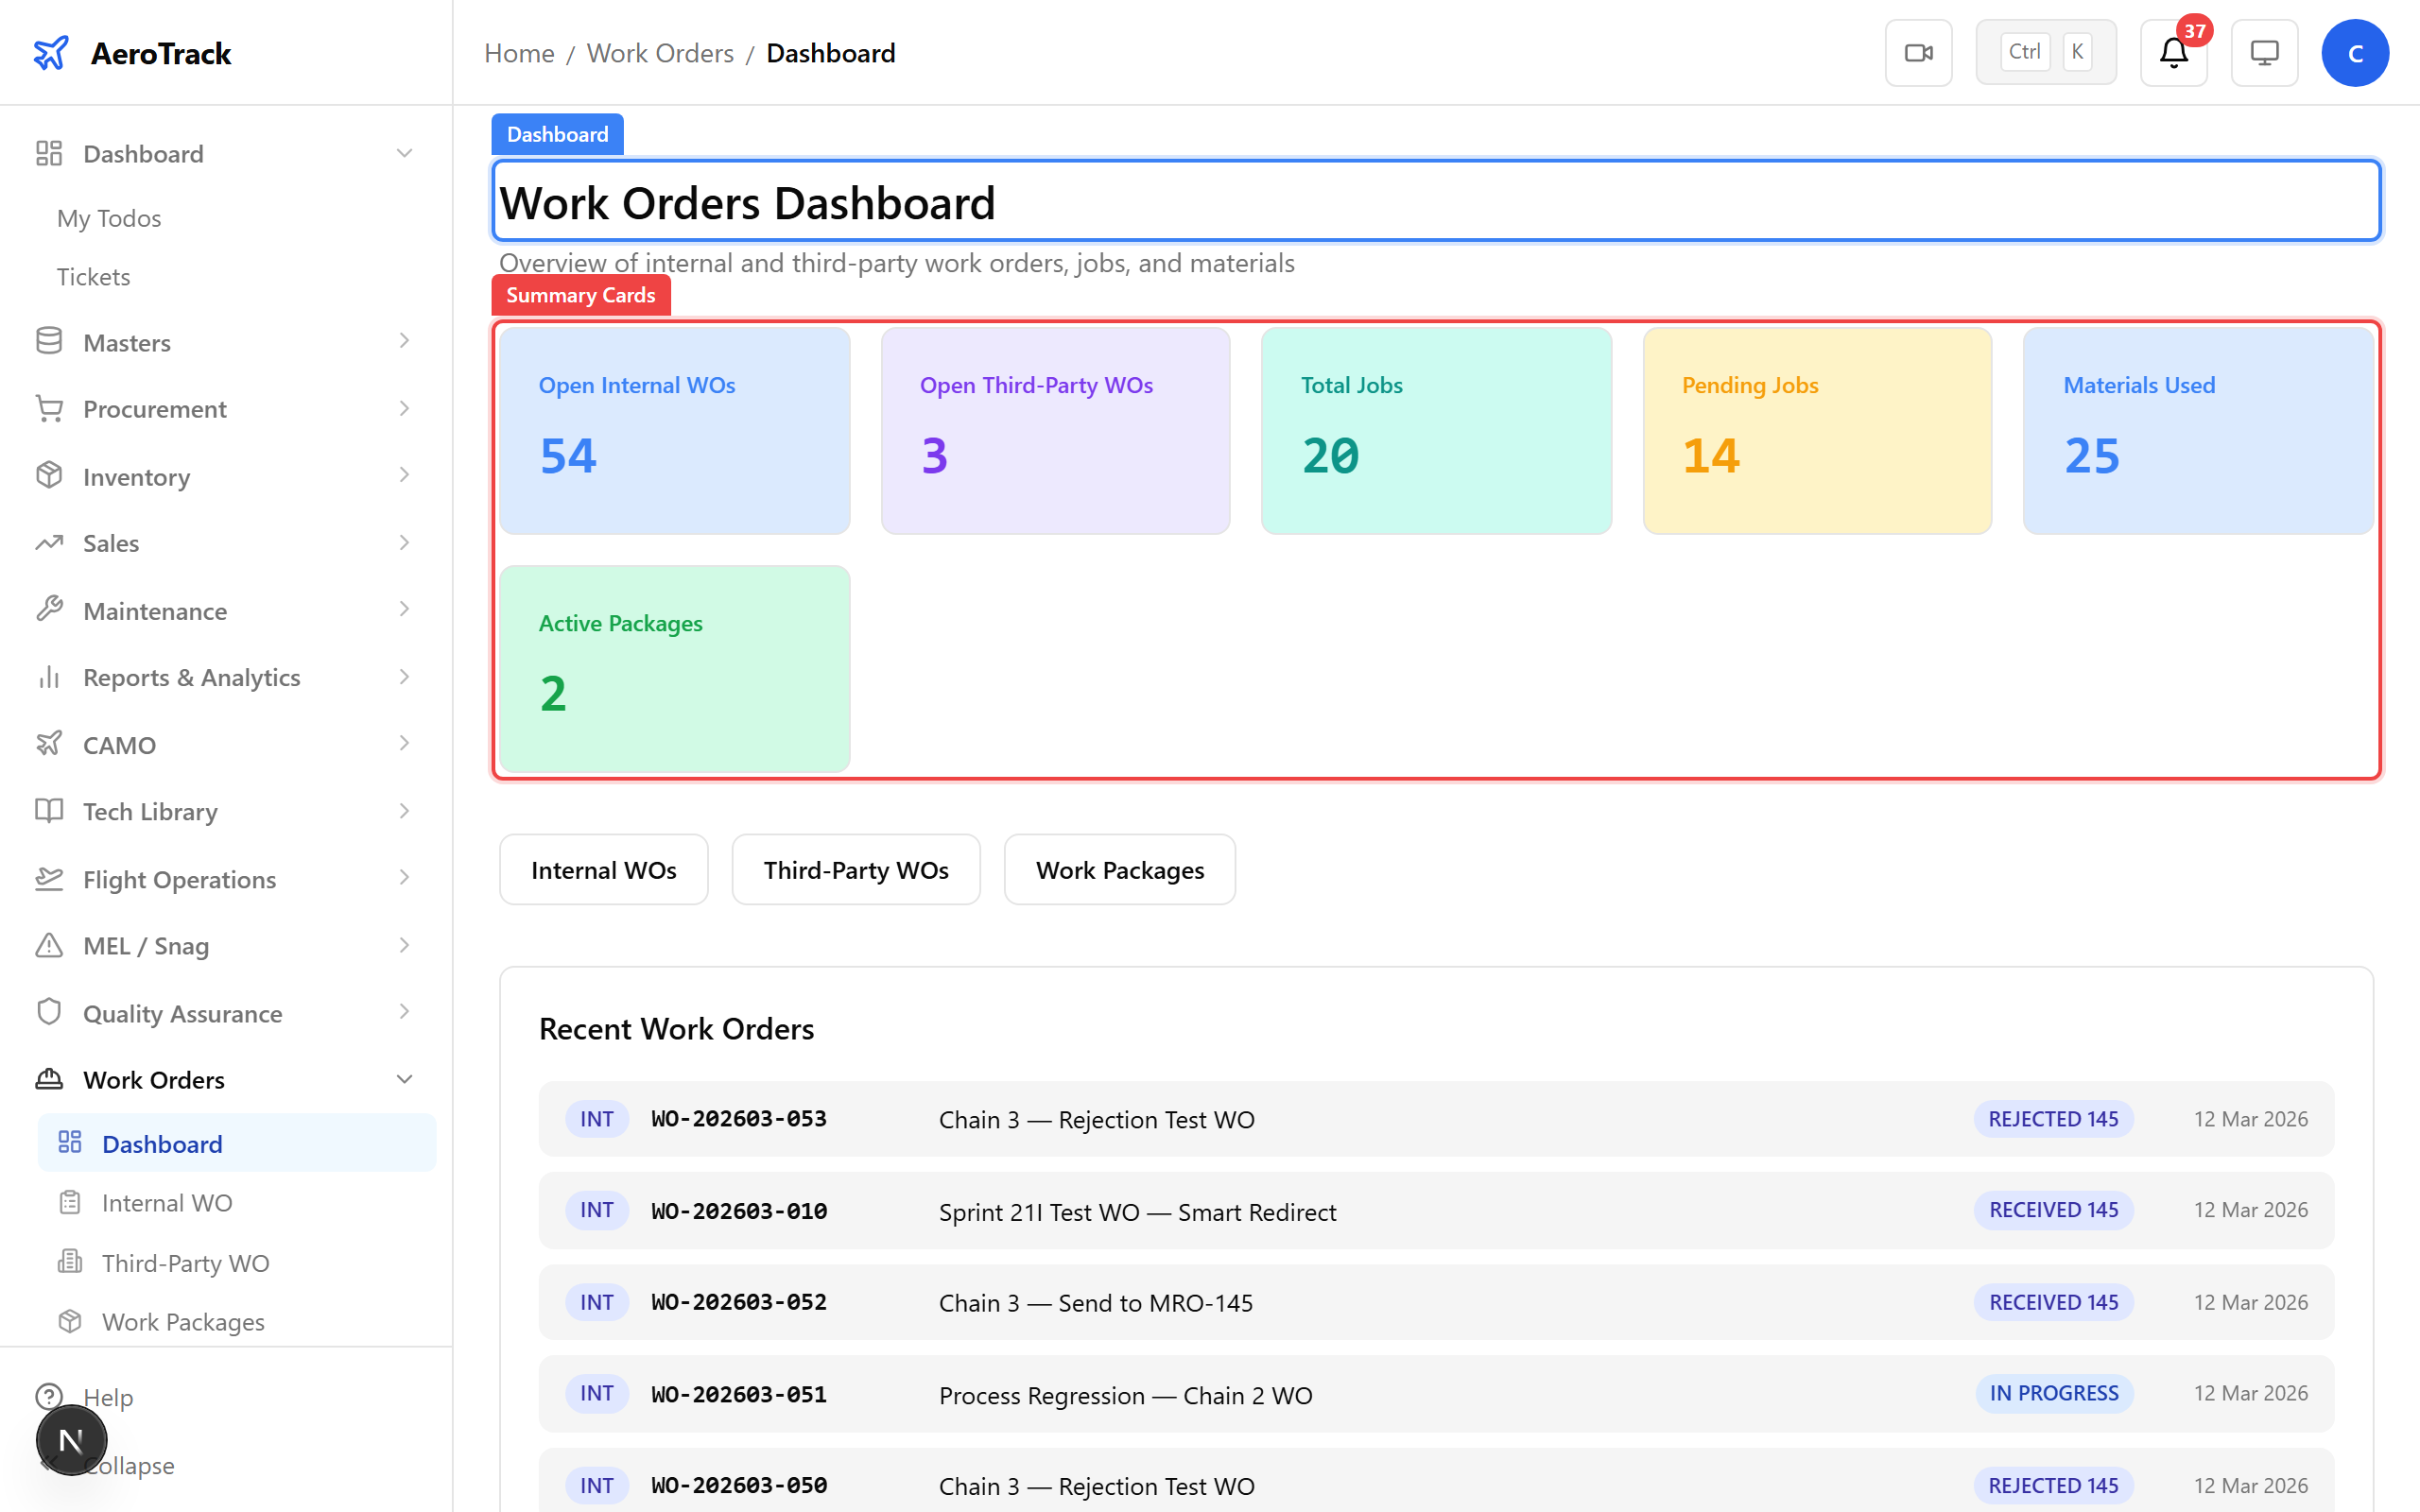
Dashboard — work order status, backlog, and overdue items at a glance.
2 — Creating a Work Order (Standard Mode)
Step 3 — Internal Work Order List
Open Internal to see all internal work orders. Filter by aircraft, priority, or status. Click + New to create a work order.
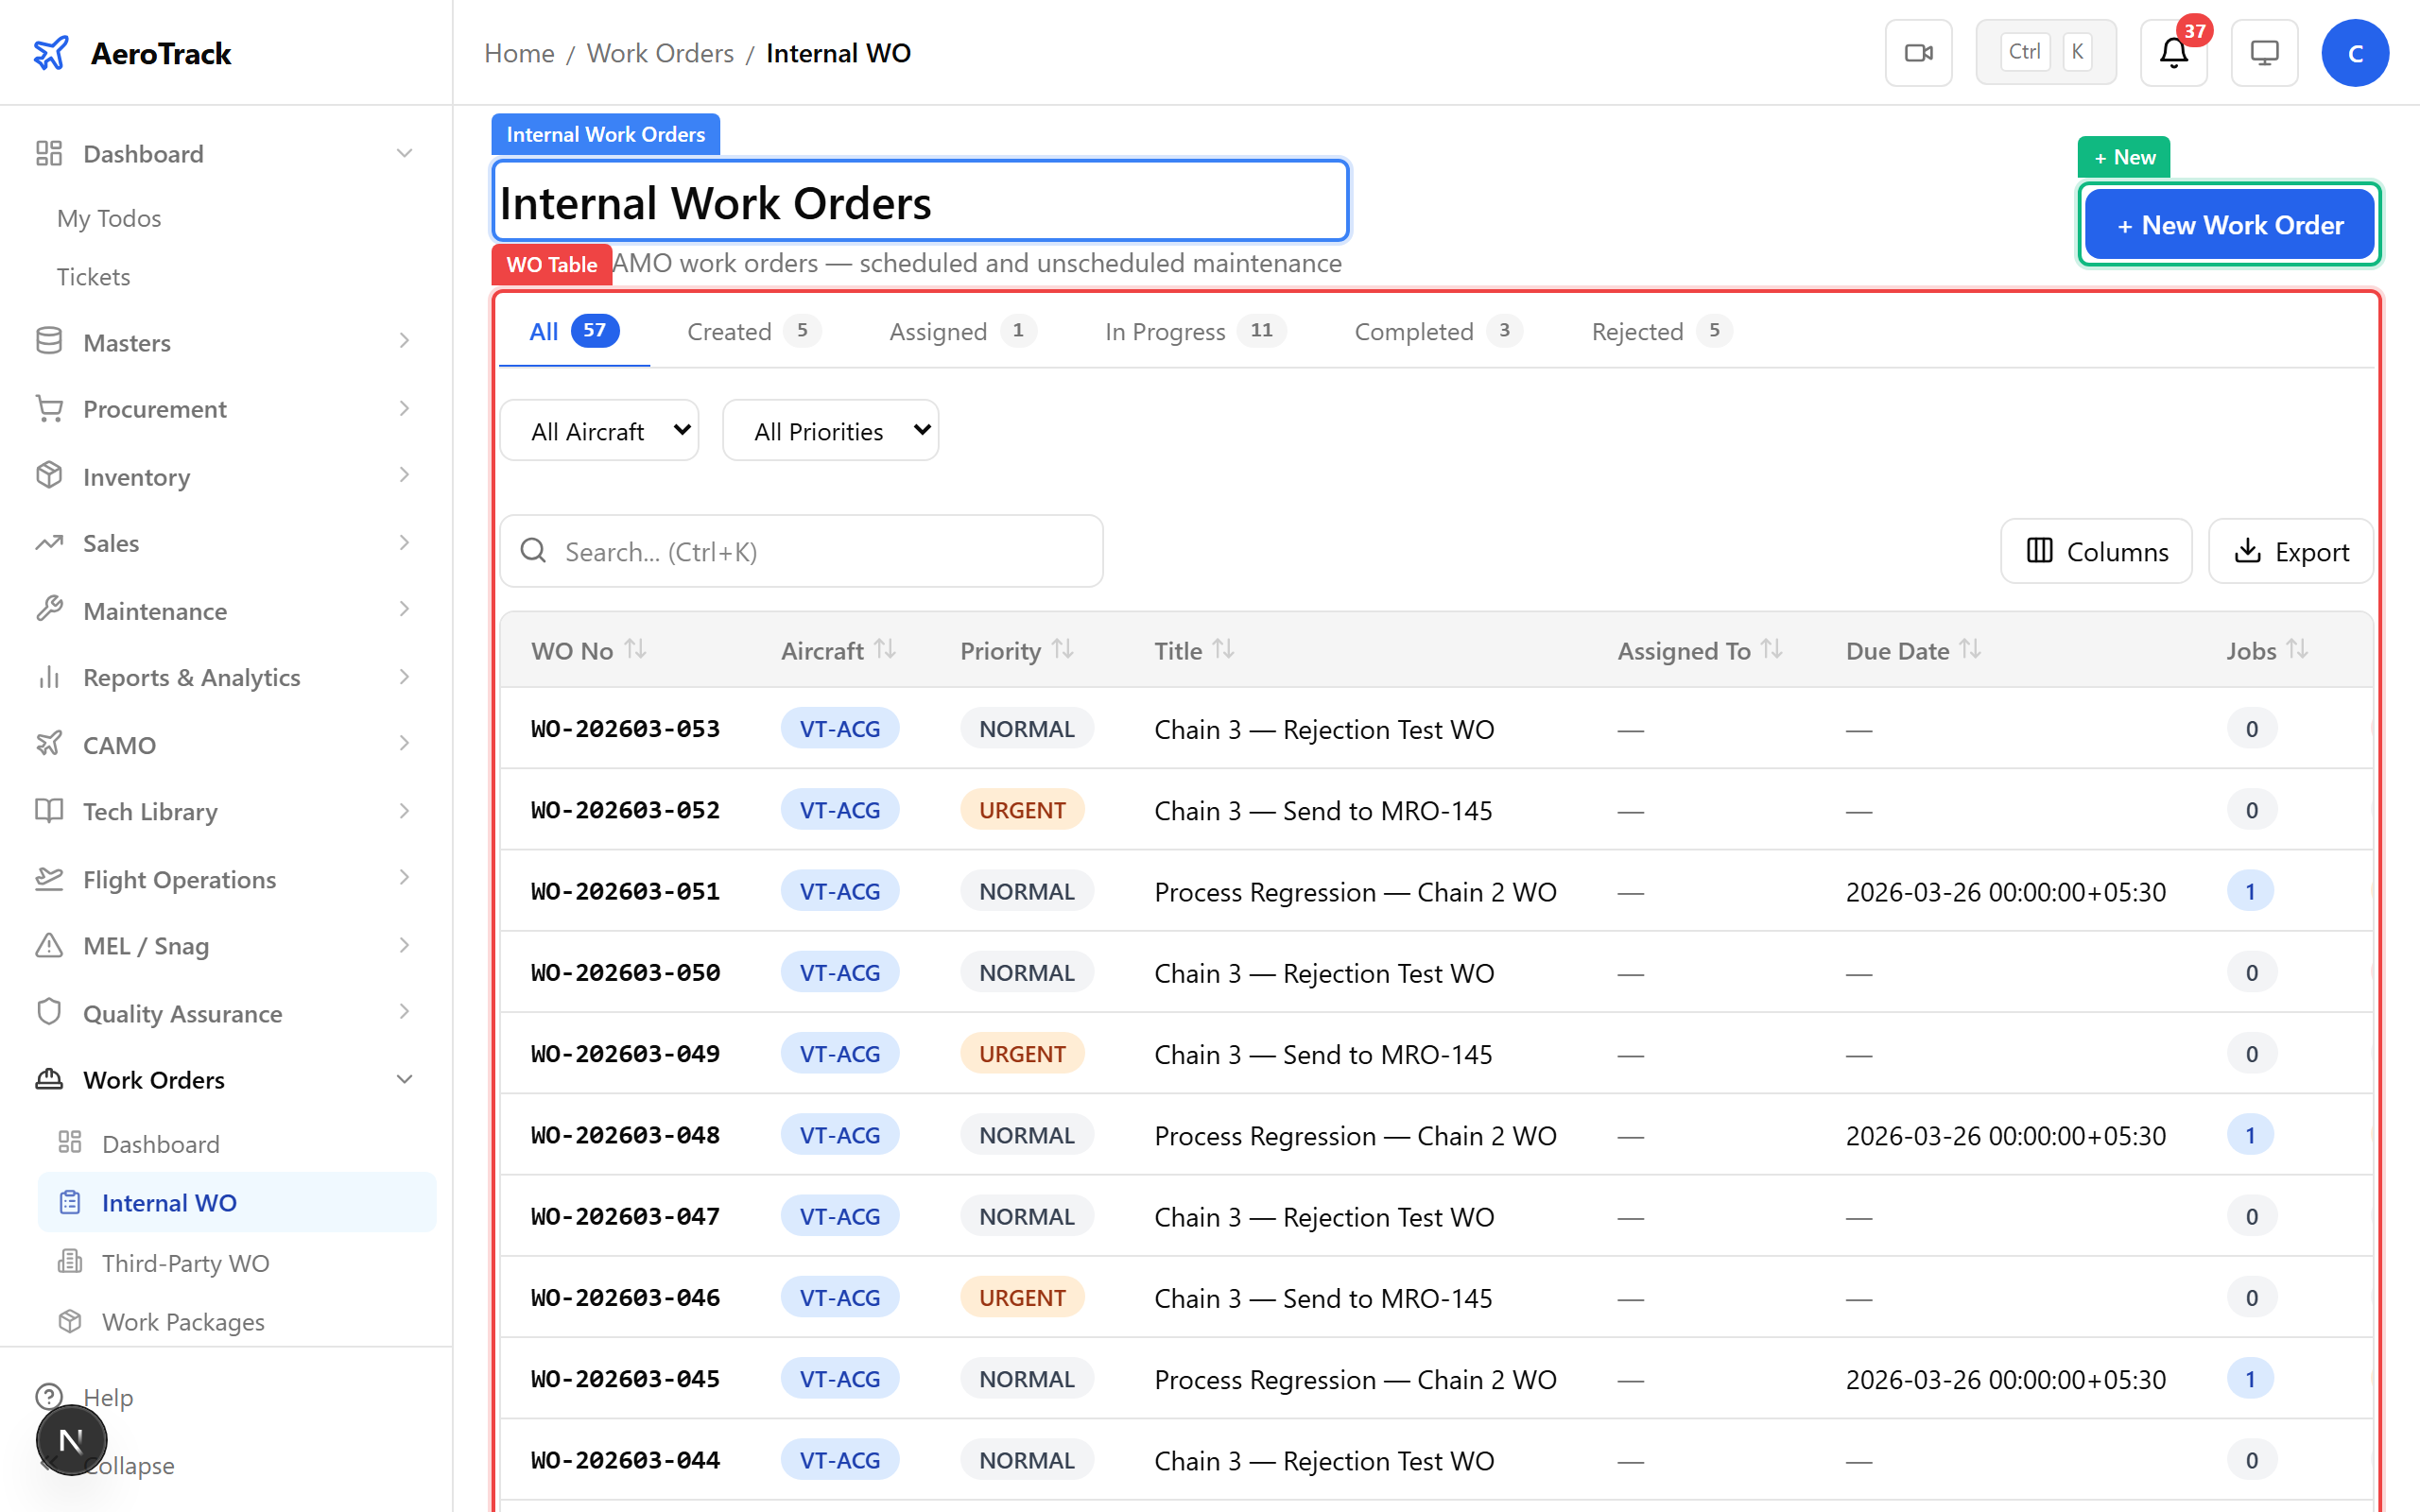
Internal work orders — tasks handled by your own maintenance team.
| Field | Type | Required | Notes |
|---|---|---|---|
| Aircraft | SearchableSelect | Yes | Active fleet only |
| Title | Text | Yes | Short description of the work |
| Description | Textarea | No | Detailed scope and instructions |
| Priority | Select | Yes | Normal / Urgent / AOG |
| ATA Chapter | SearchableSelect | No | Links to ATA system classification |
| Assigned To | Text | No | Technician or team lead name |
| Package Name | Text | No | Groups WOs into a work package |
| Due Date | Date | No | Target completion date |
| Est. Hours | Number | No | Estimated man-hours |
| Est. Cost | Number | No | Budget estimate in INR |
| Remarks | Textarea | No | Internal notes |
Step 4 — Fill the Standard Form
Select the aircraft, set priority to Urgent, enter the inspection title and description, assign a technician, and set the due date.
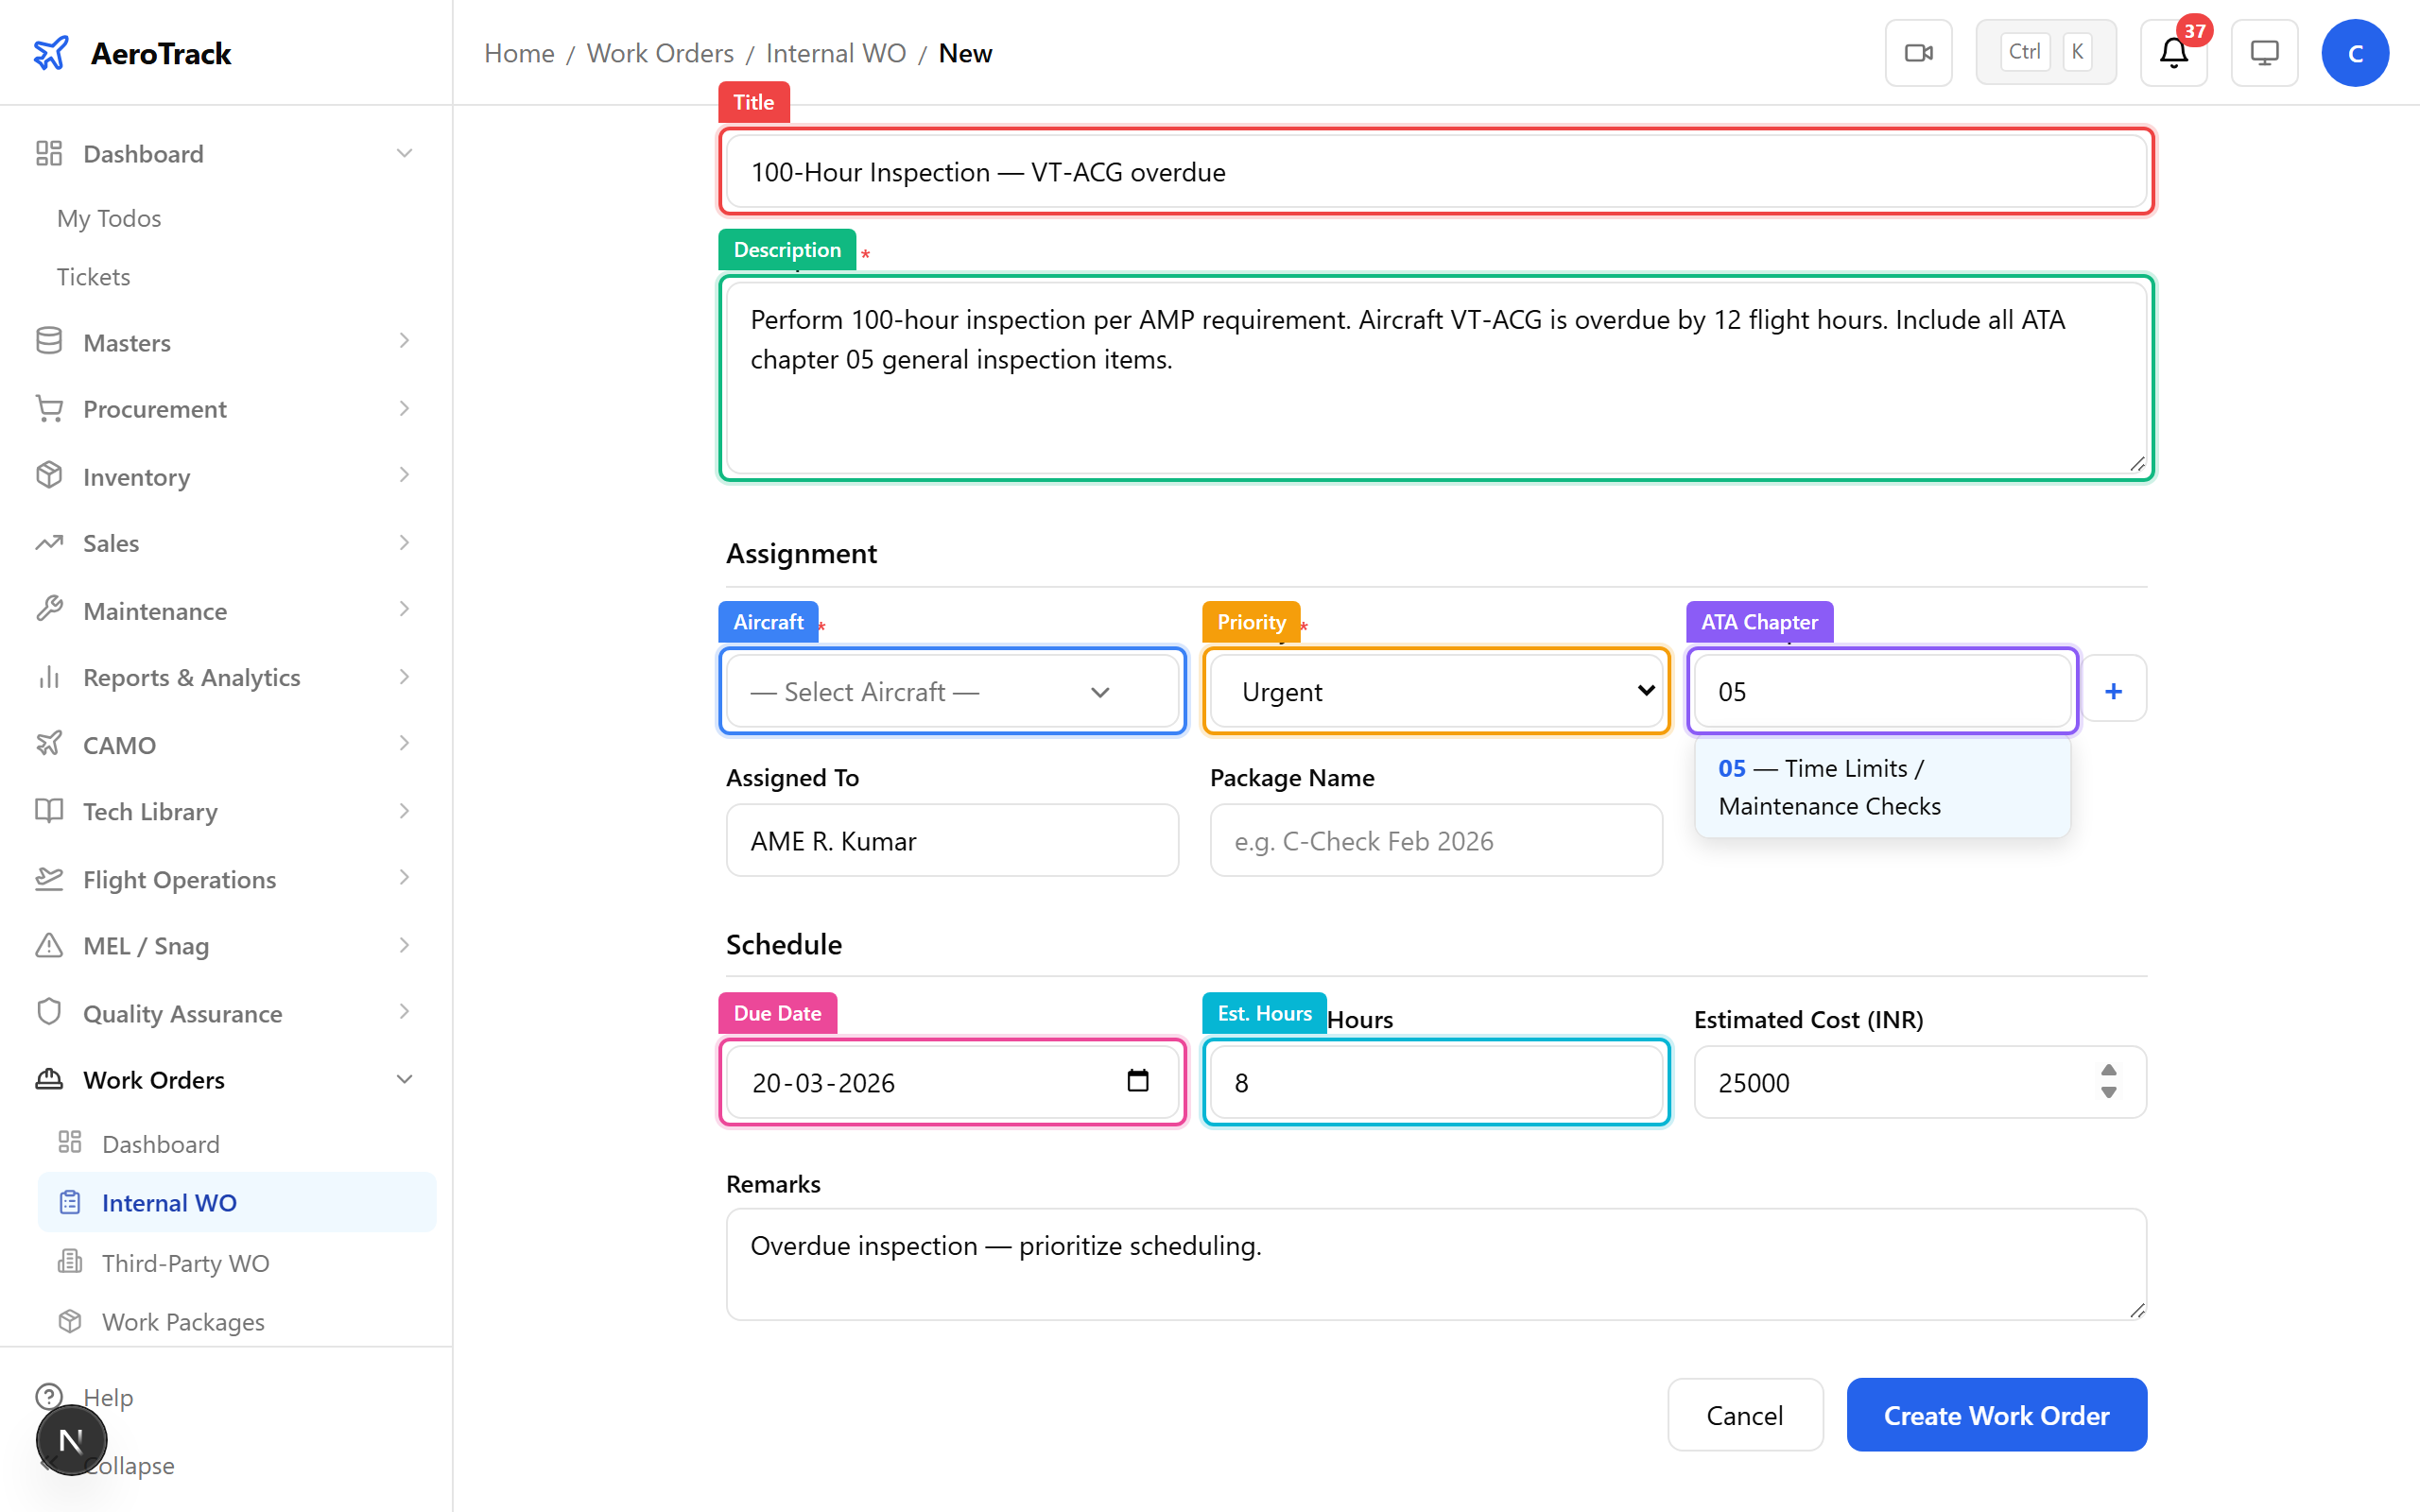
Creating a work order for an overdue 100-hour inspection on VT-ACG.
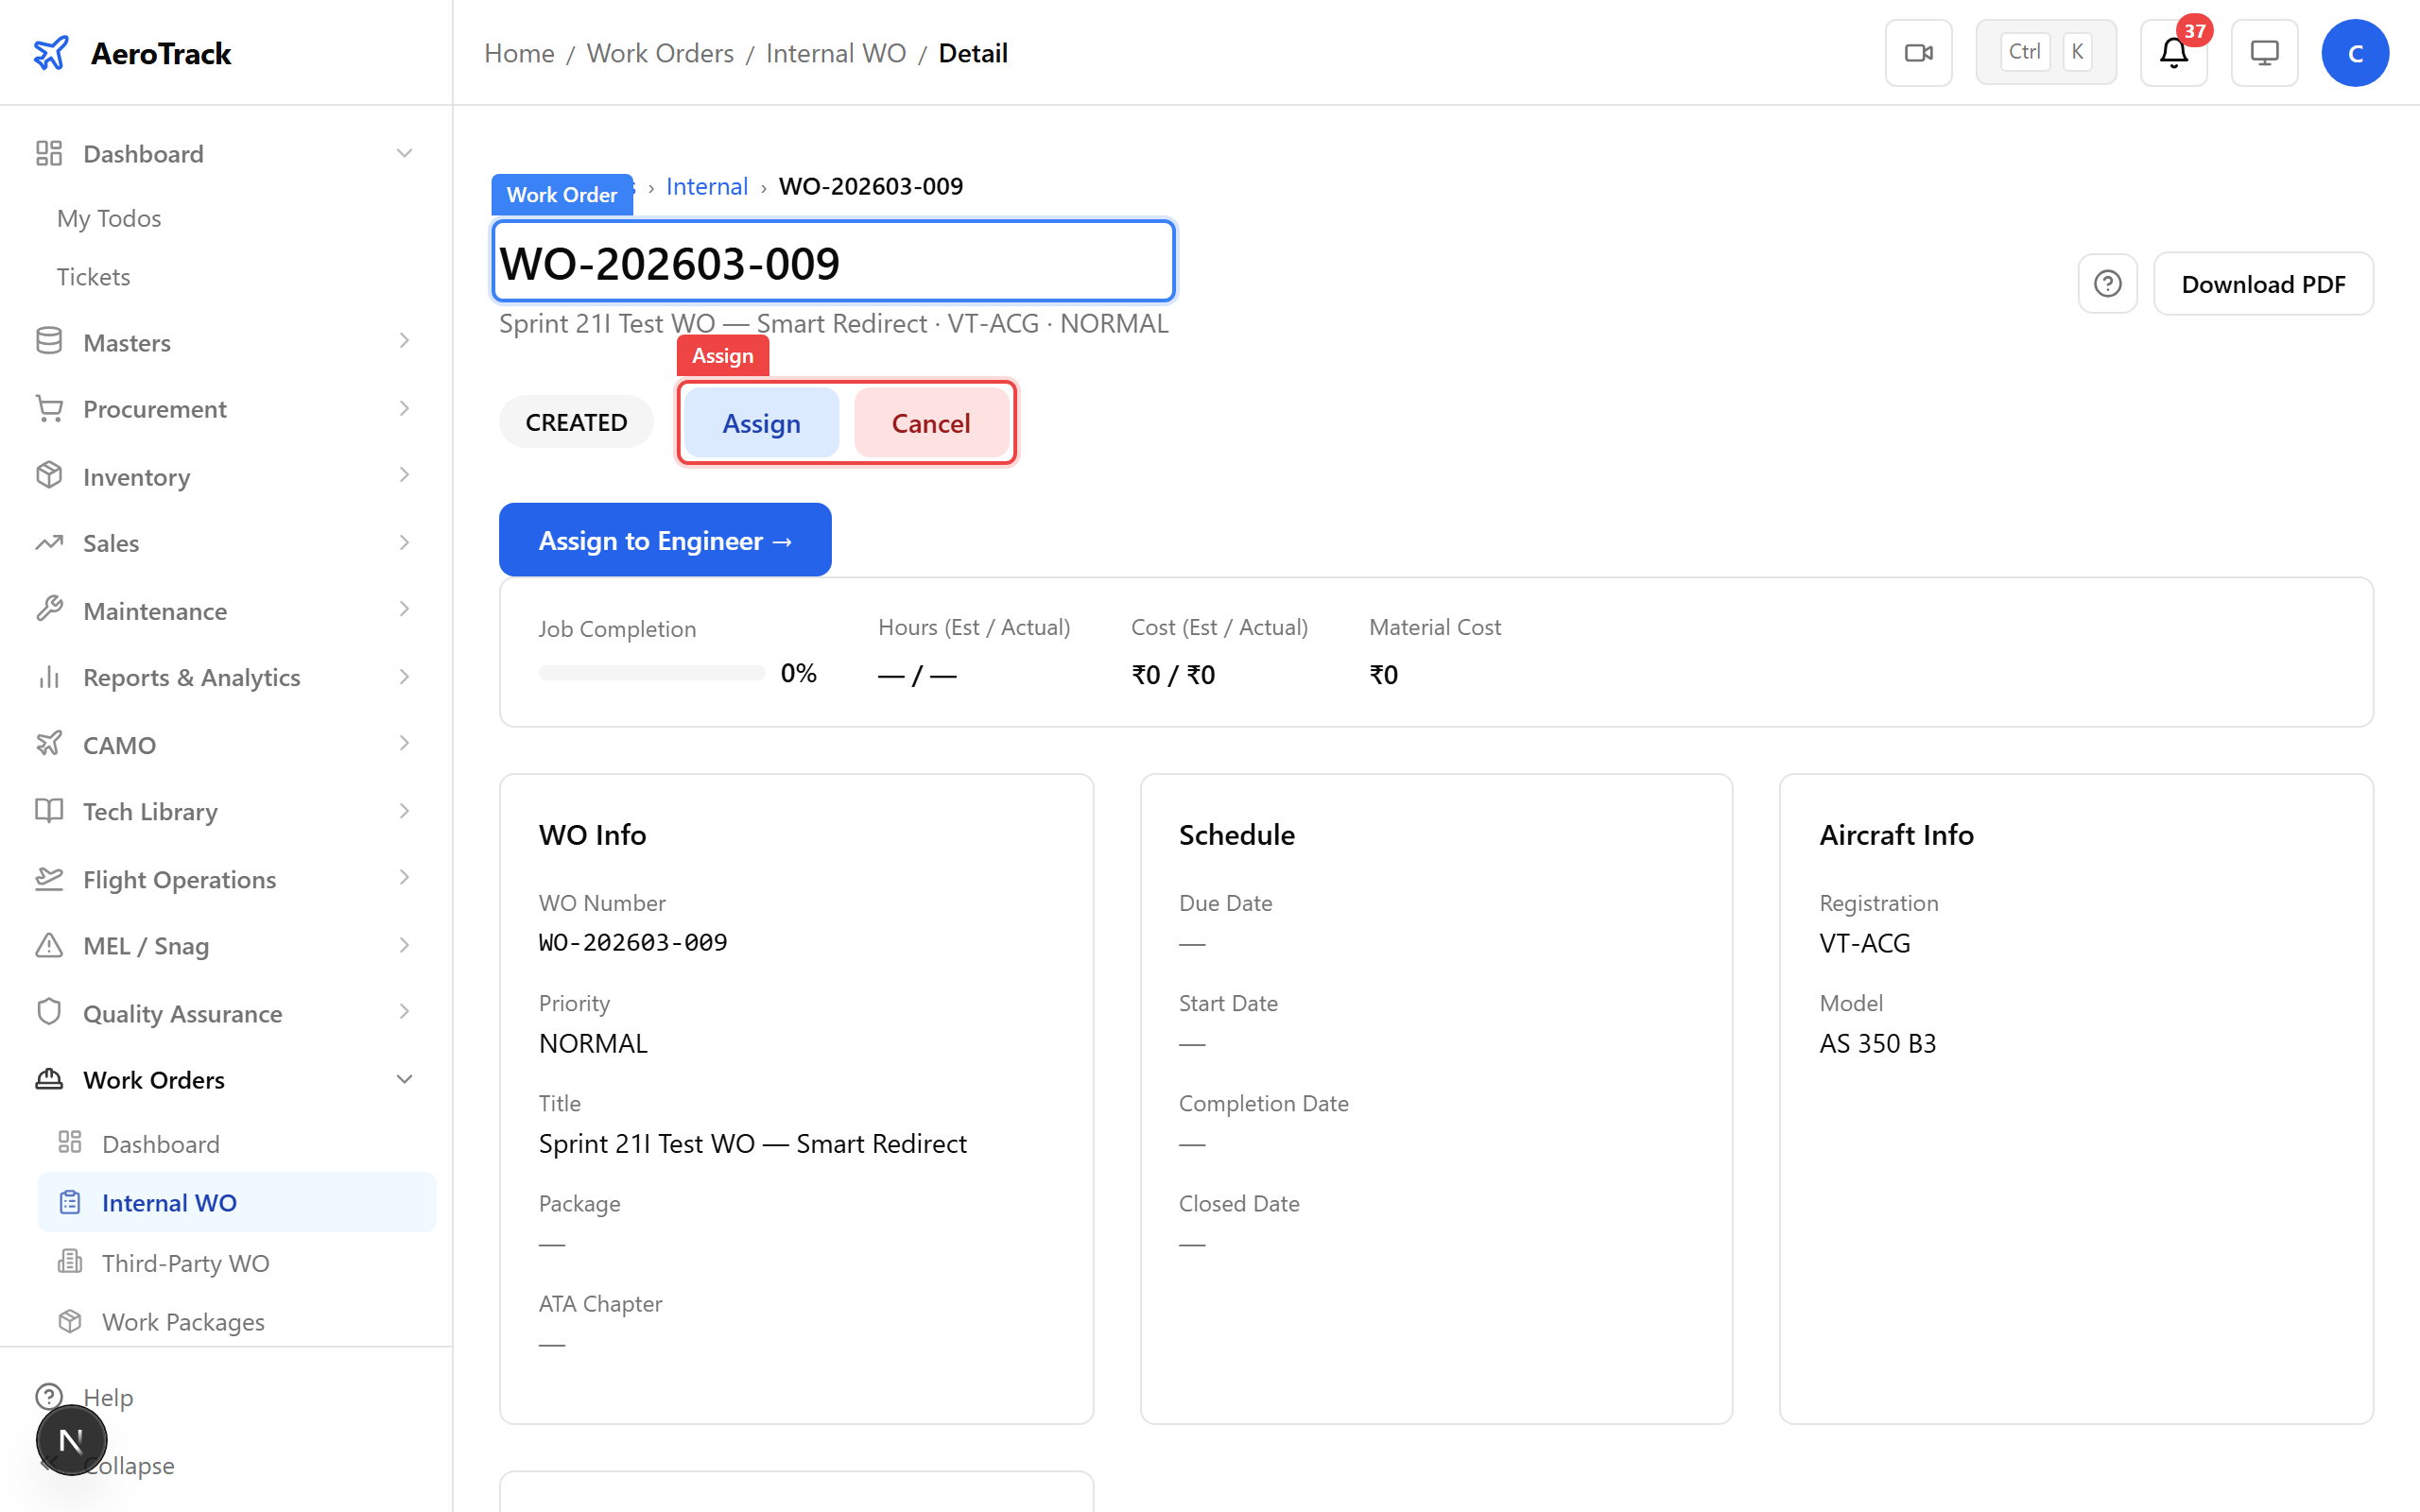
Step 5 — Work Order Created
After saving, the detail page shows the WO number, status CREATED, and available actions (Assign / Cancel).
Work order created — ready for assignment and scheduling.
3 — Wizard Mode (3-Step WO Creation)
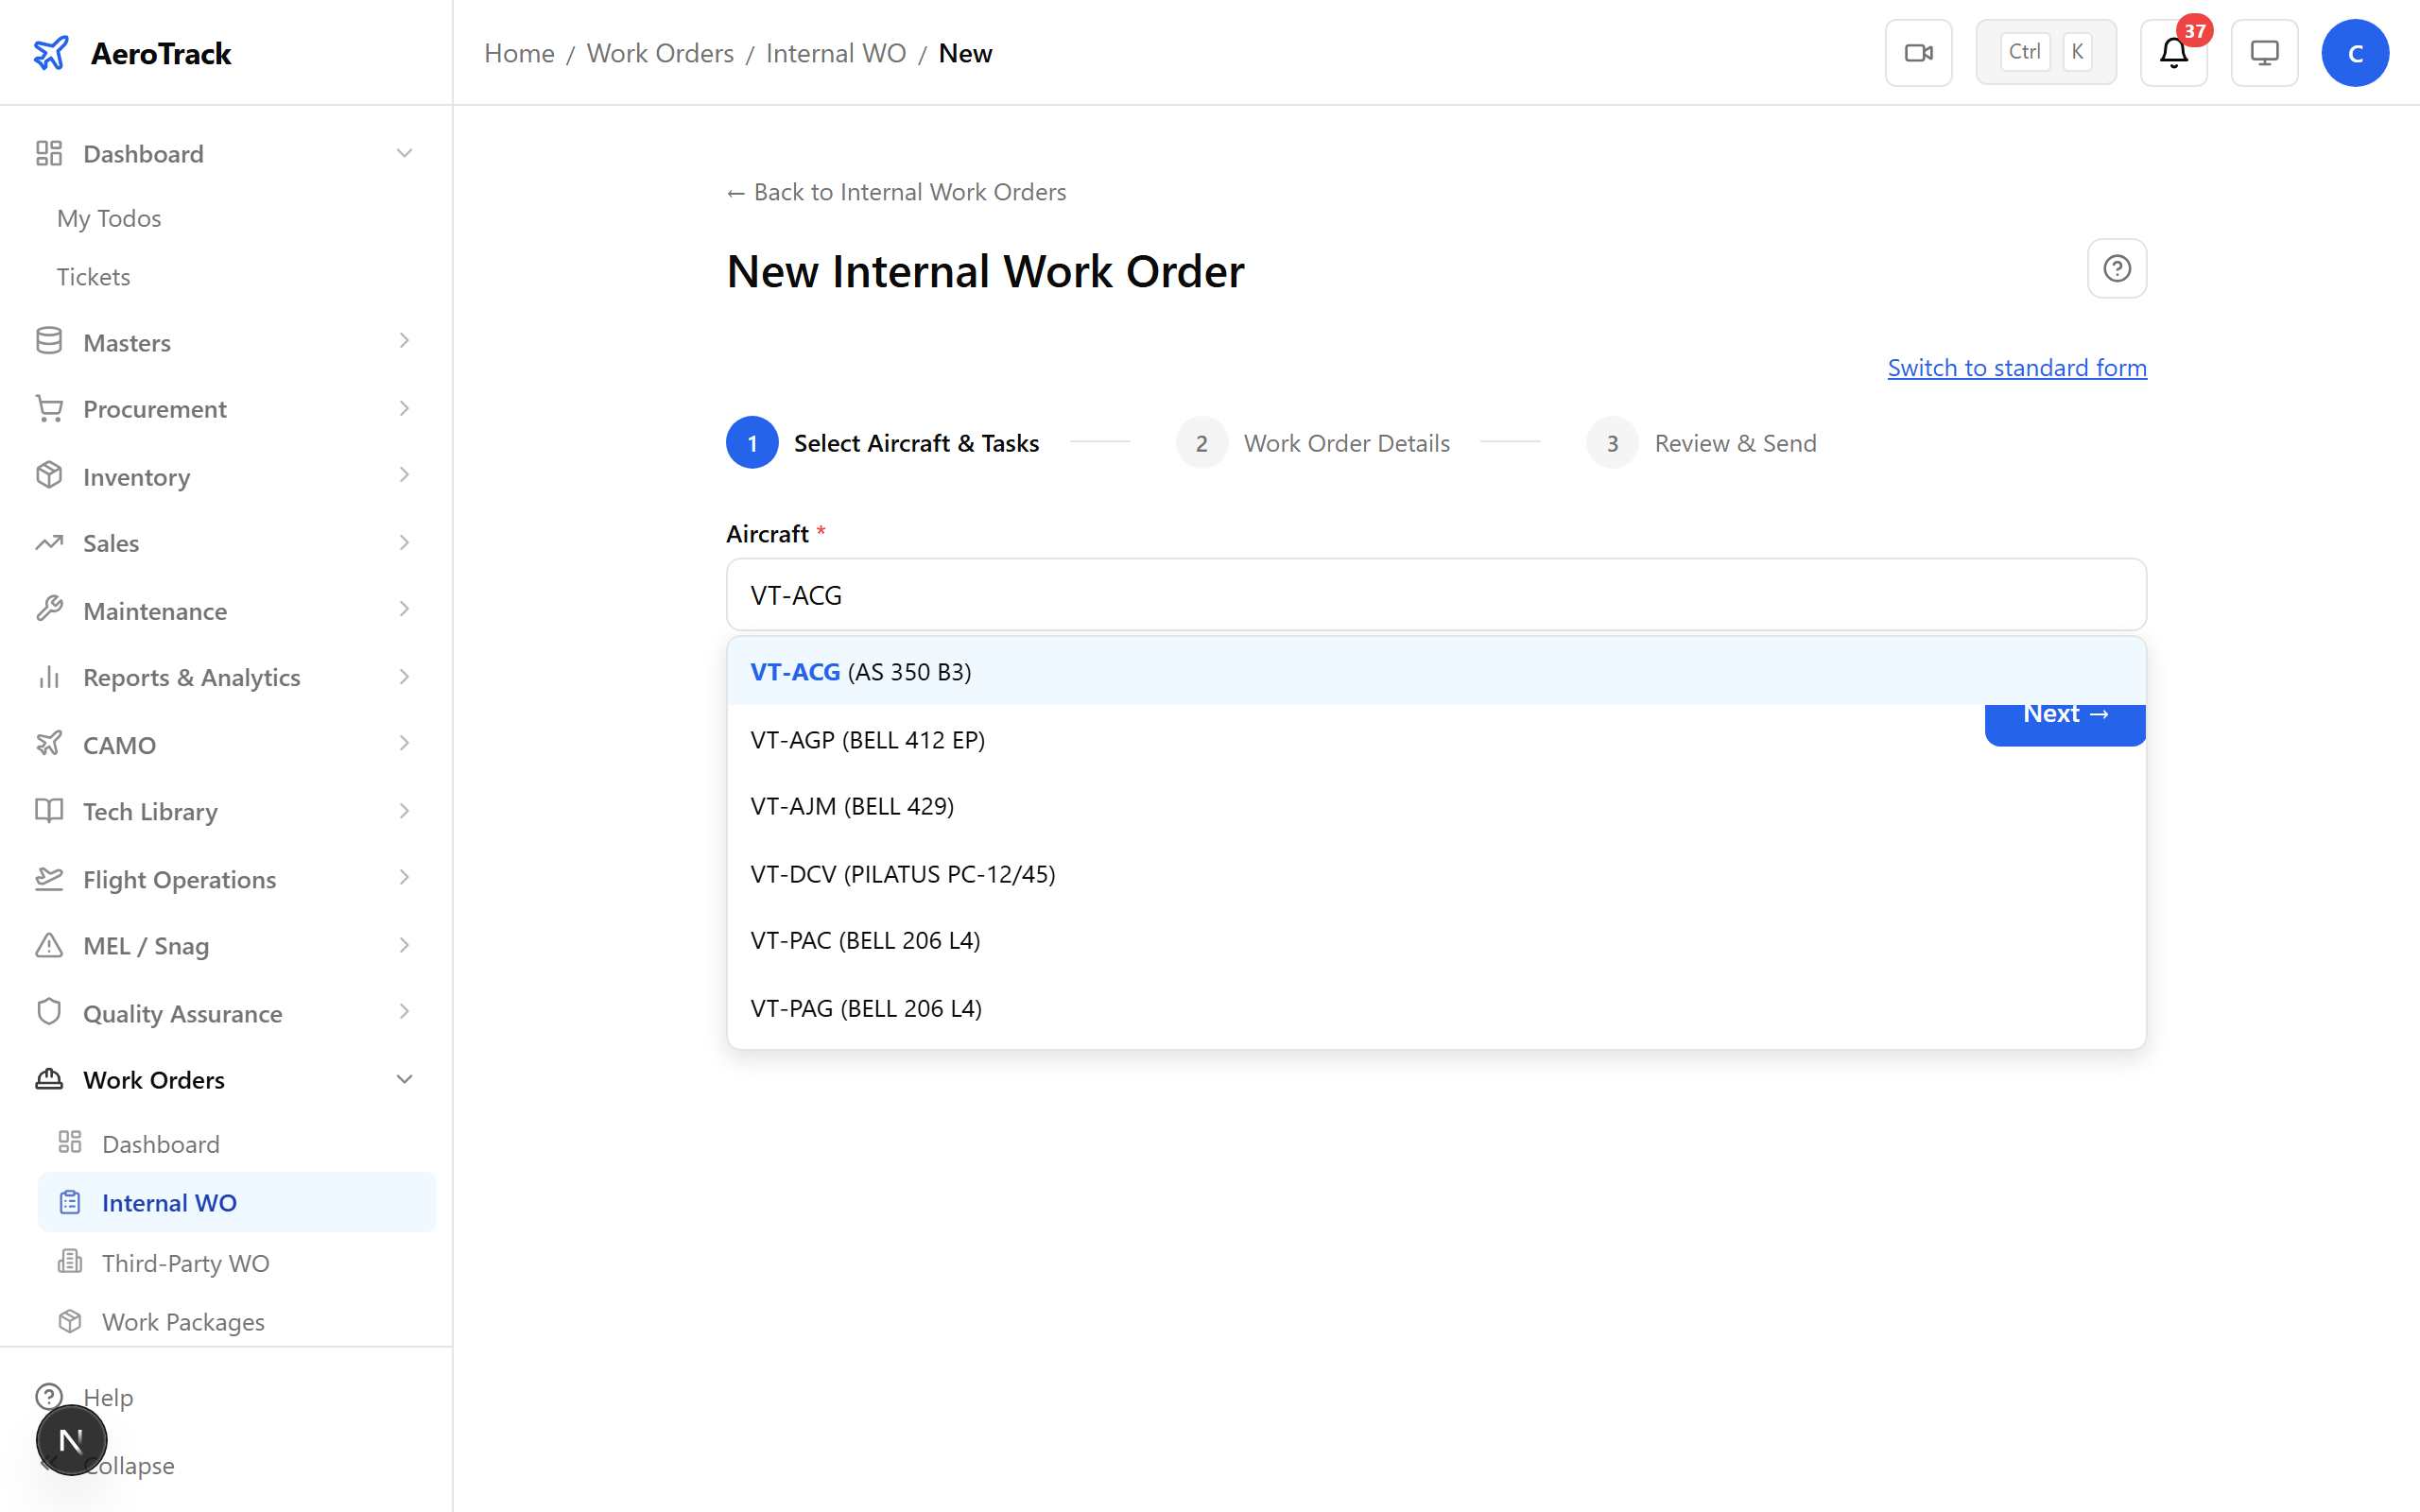
Step 6 — Wizard Step 1
On the New Work Order page, switch to Wizard Mode. Step 1 asks you to select the aircraft and review any overdue inspections that may drive the work order.
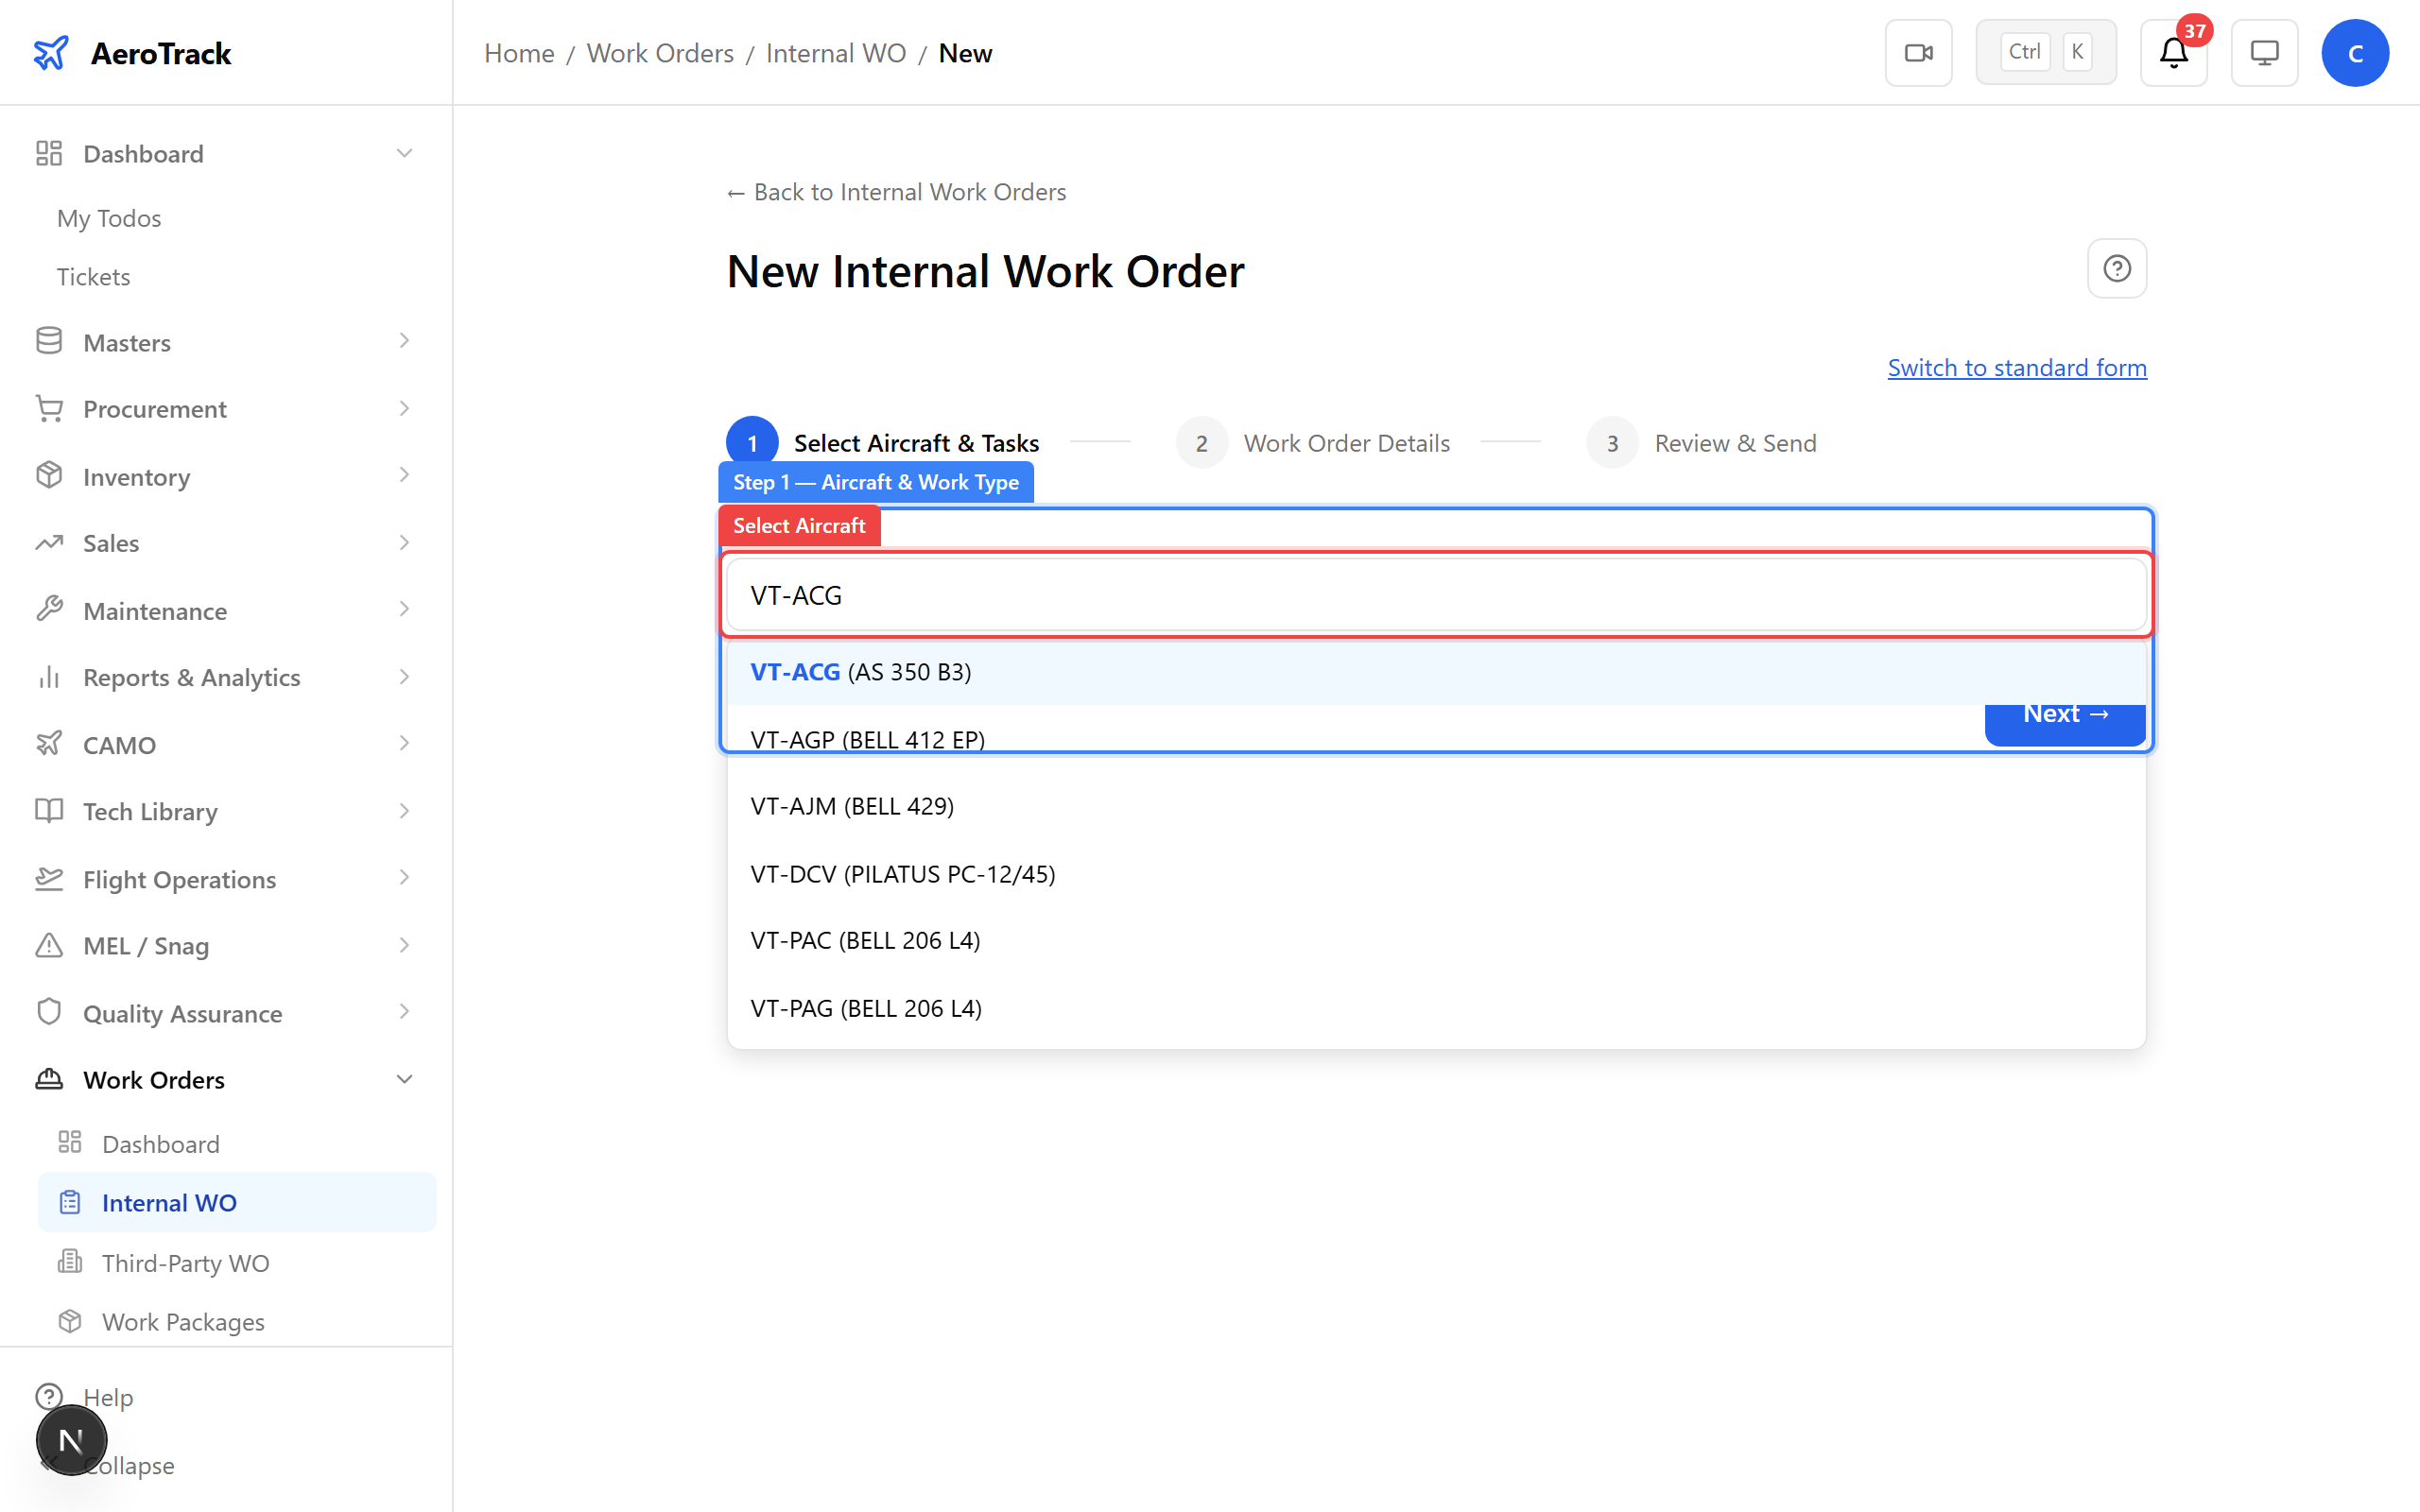
Wizard mode Step 1 — select aircraft and work type with guided prompts.
Step 7 — Wizard Step 2
Enter task details — title, description, priority, and due date. The wizard guides you through each field in sequence.

Step 2 — task details, priority, and scheduling.
Step 8 — Wizard Step 3 (Review)
Review all entered information before creating the work order. You can also send the WO directly to MRO-145 from this step.
Step 3 — review and confirm before creating the work order.
4 — Work Order Lifecycle
Each internal work order follows a defined workflow: CREATED → ASSIGNED → IN_PROGRESS → QA_CHECK → COMPLETED → CLOSED.
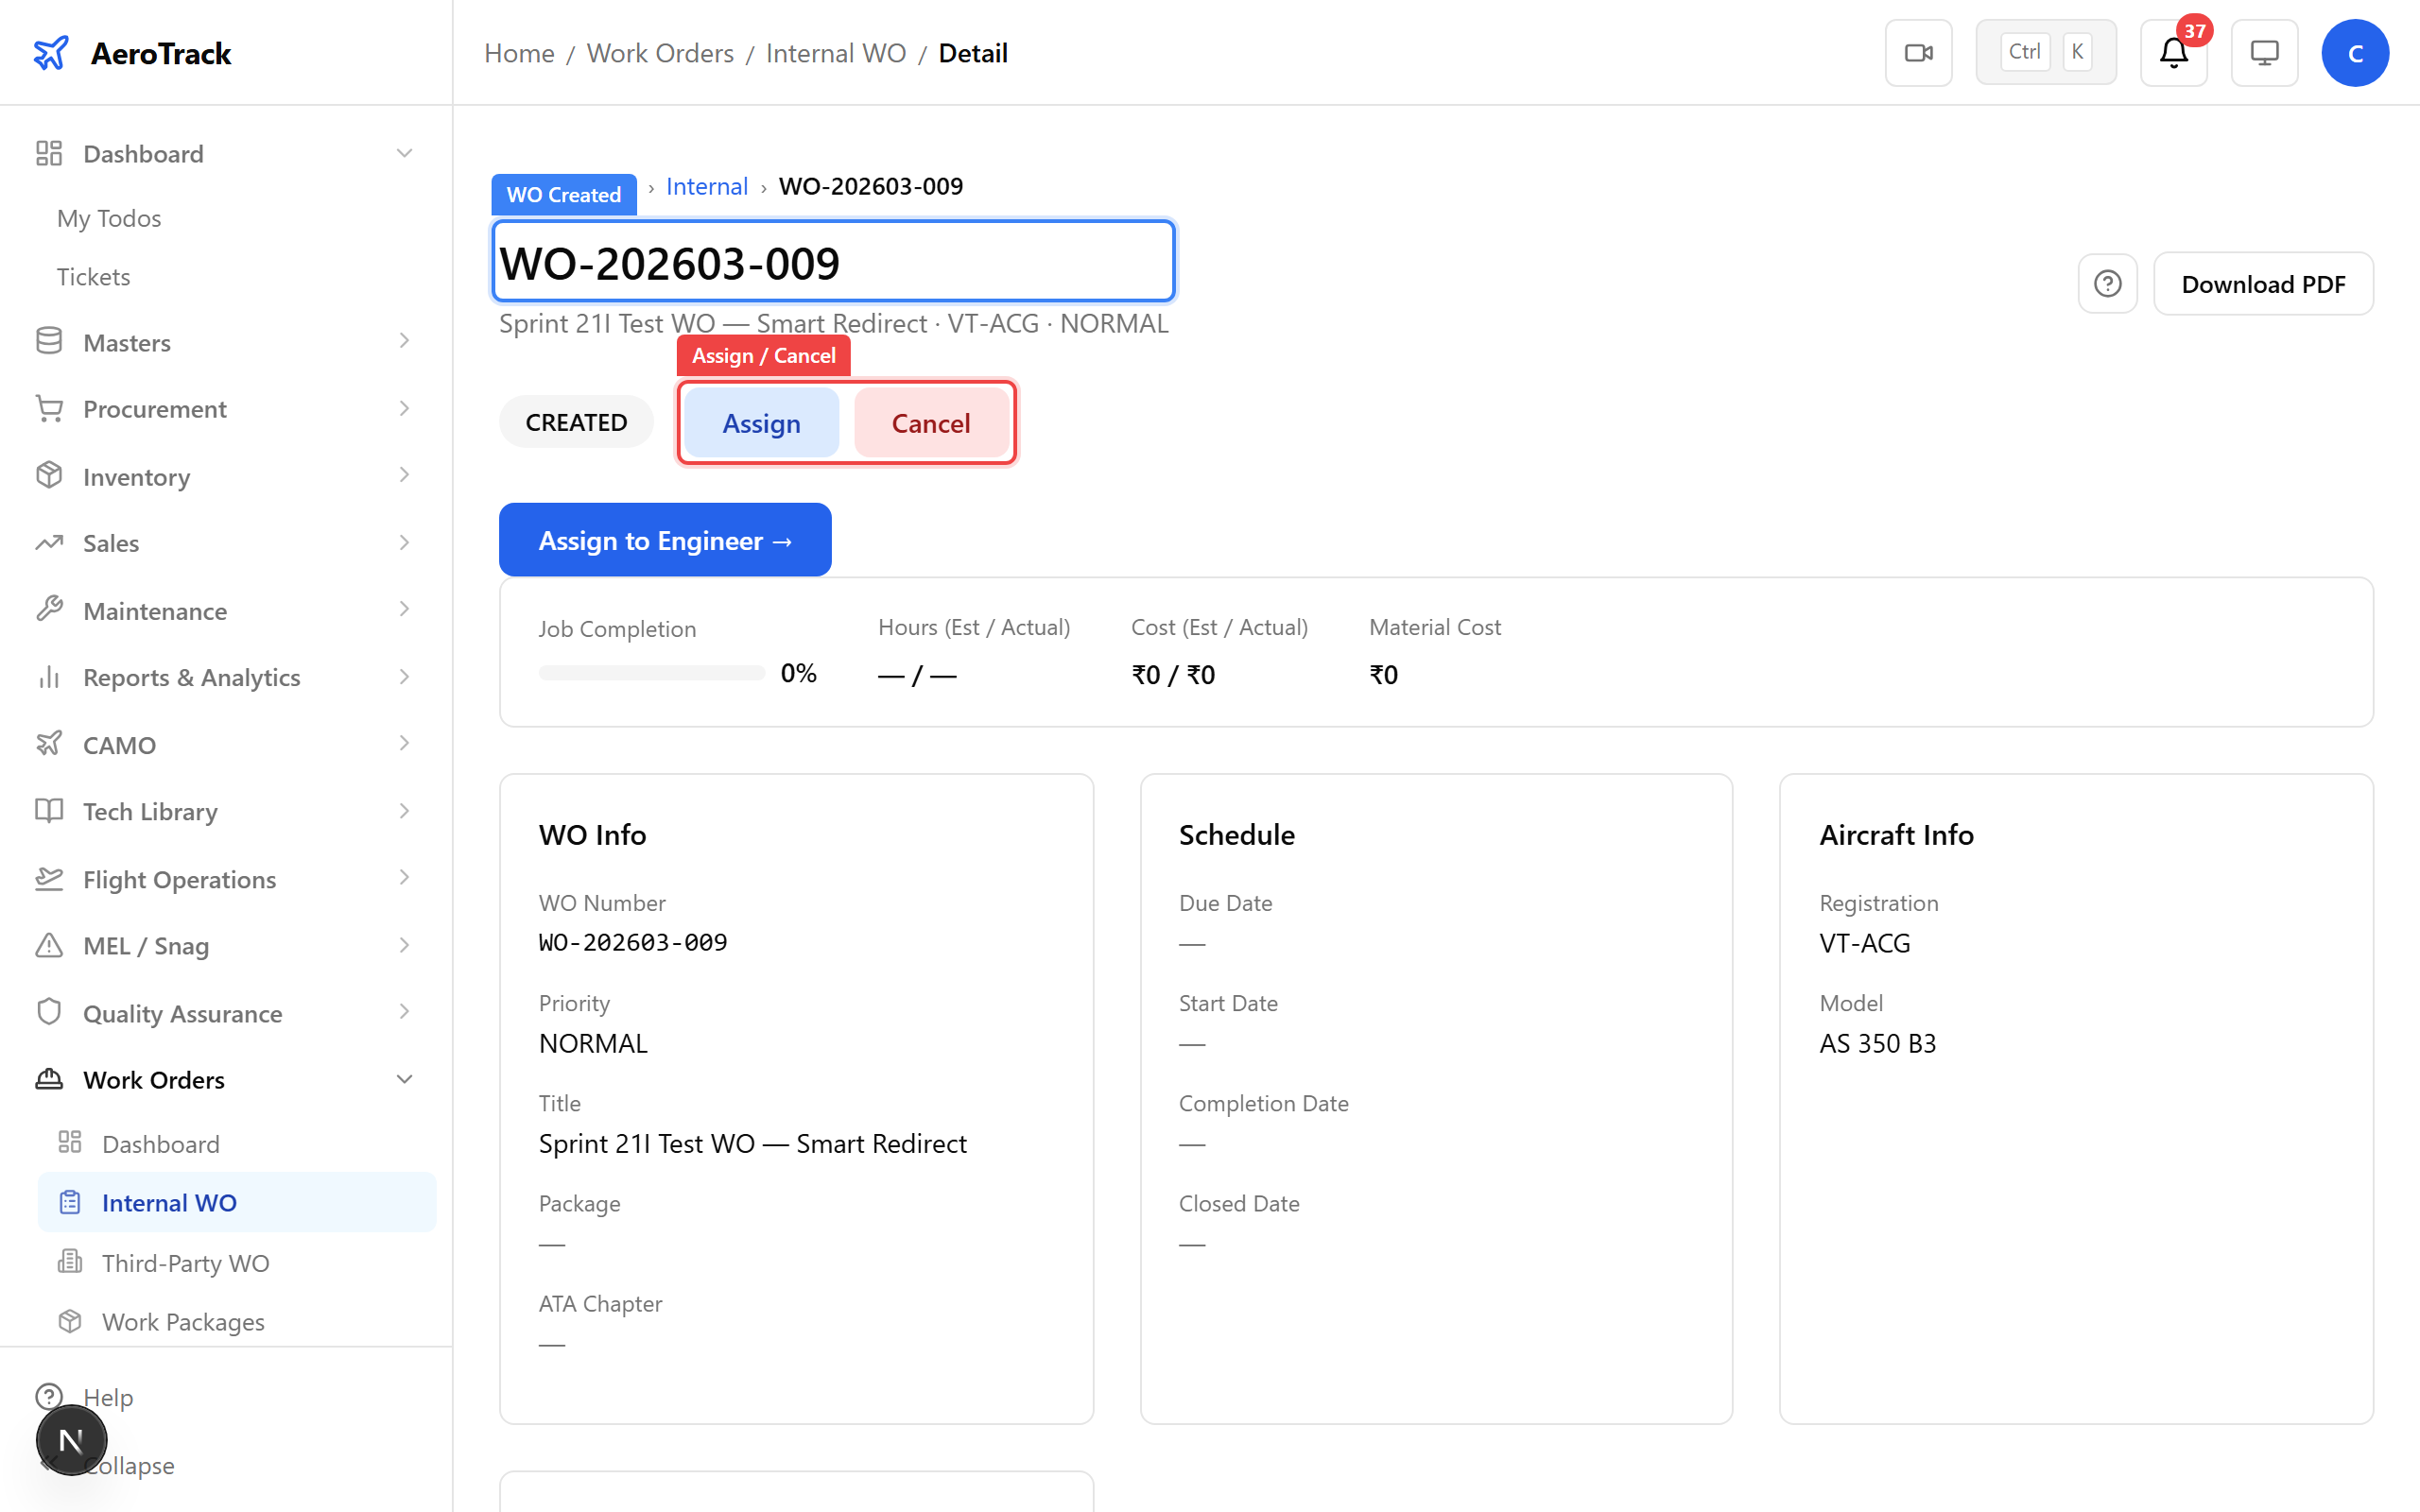
Step 9 — Assign the Work Order
On the WO detail page, click Assign to allocate the work order to the assigned technician.
Assigning the work order to a technician.
Step 10 — Assigned
Status changes to ASSIGNED. The technician can now begin work. Available action: Start Work.
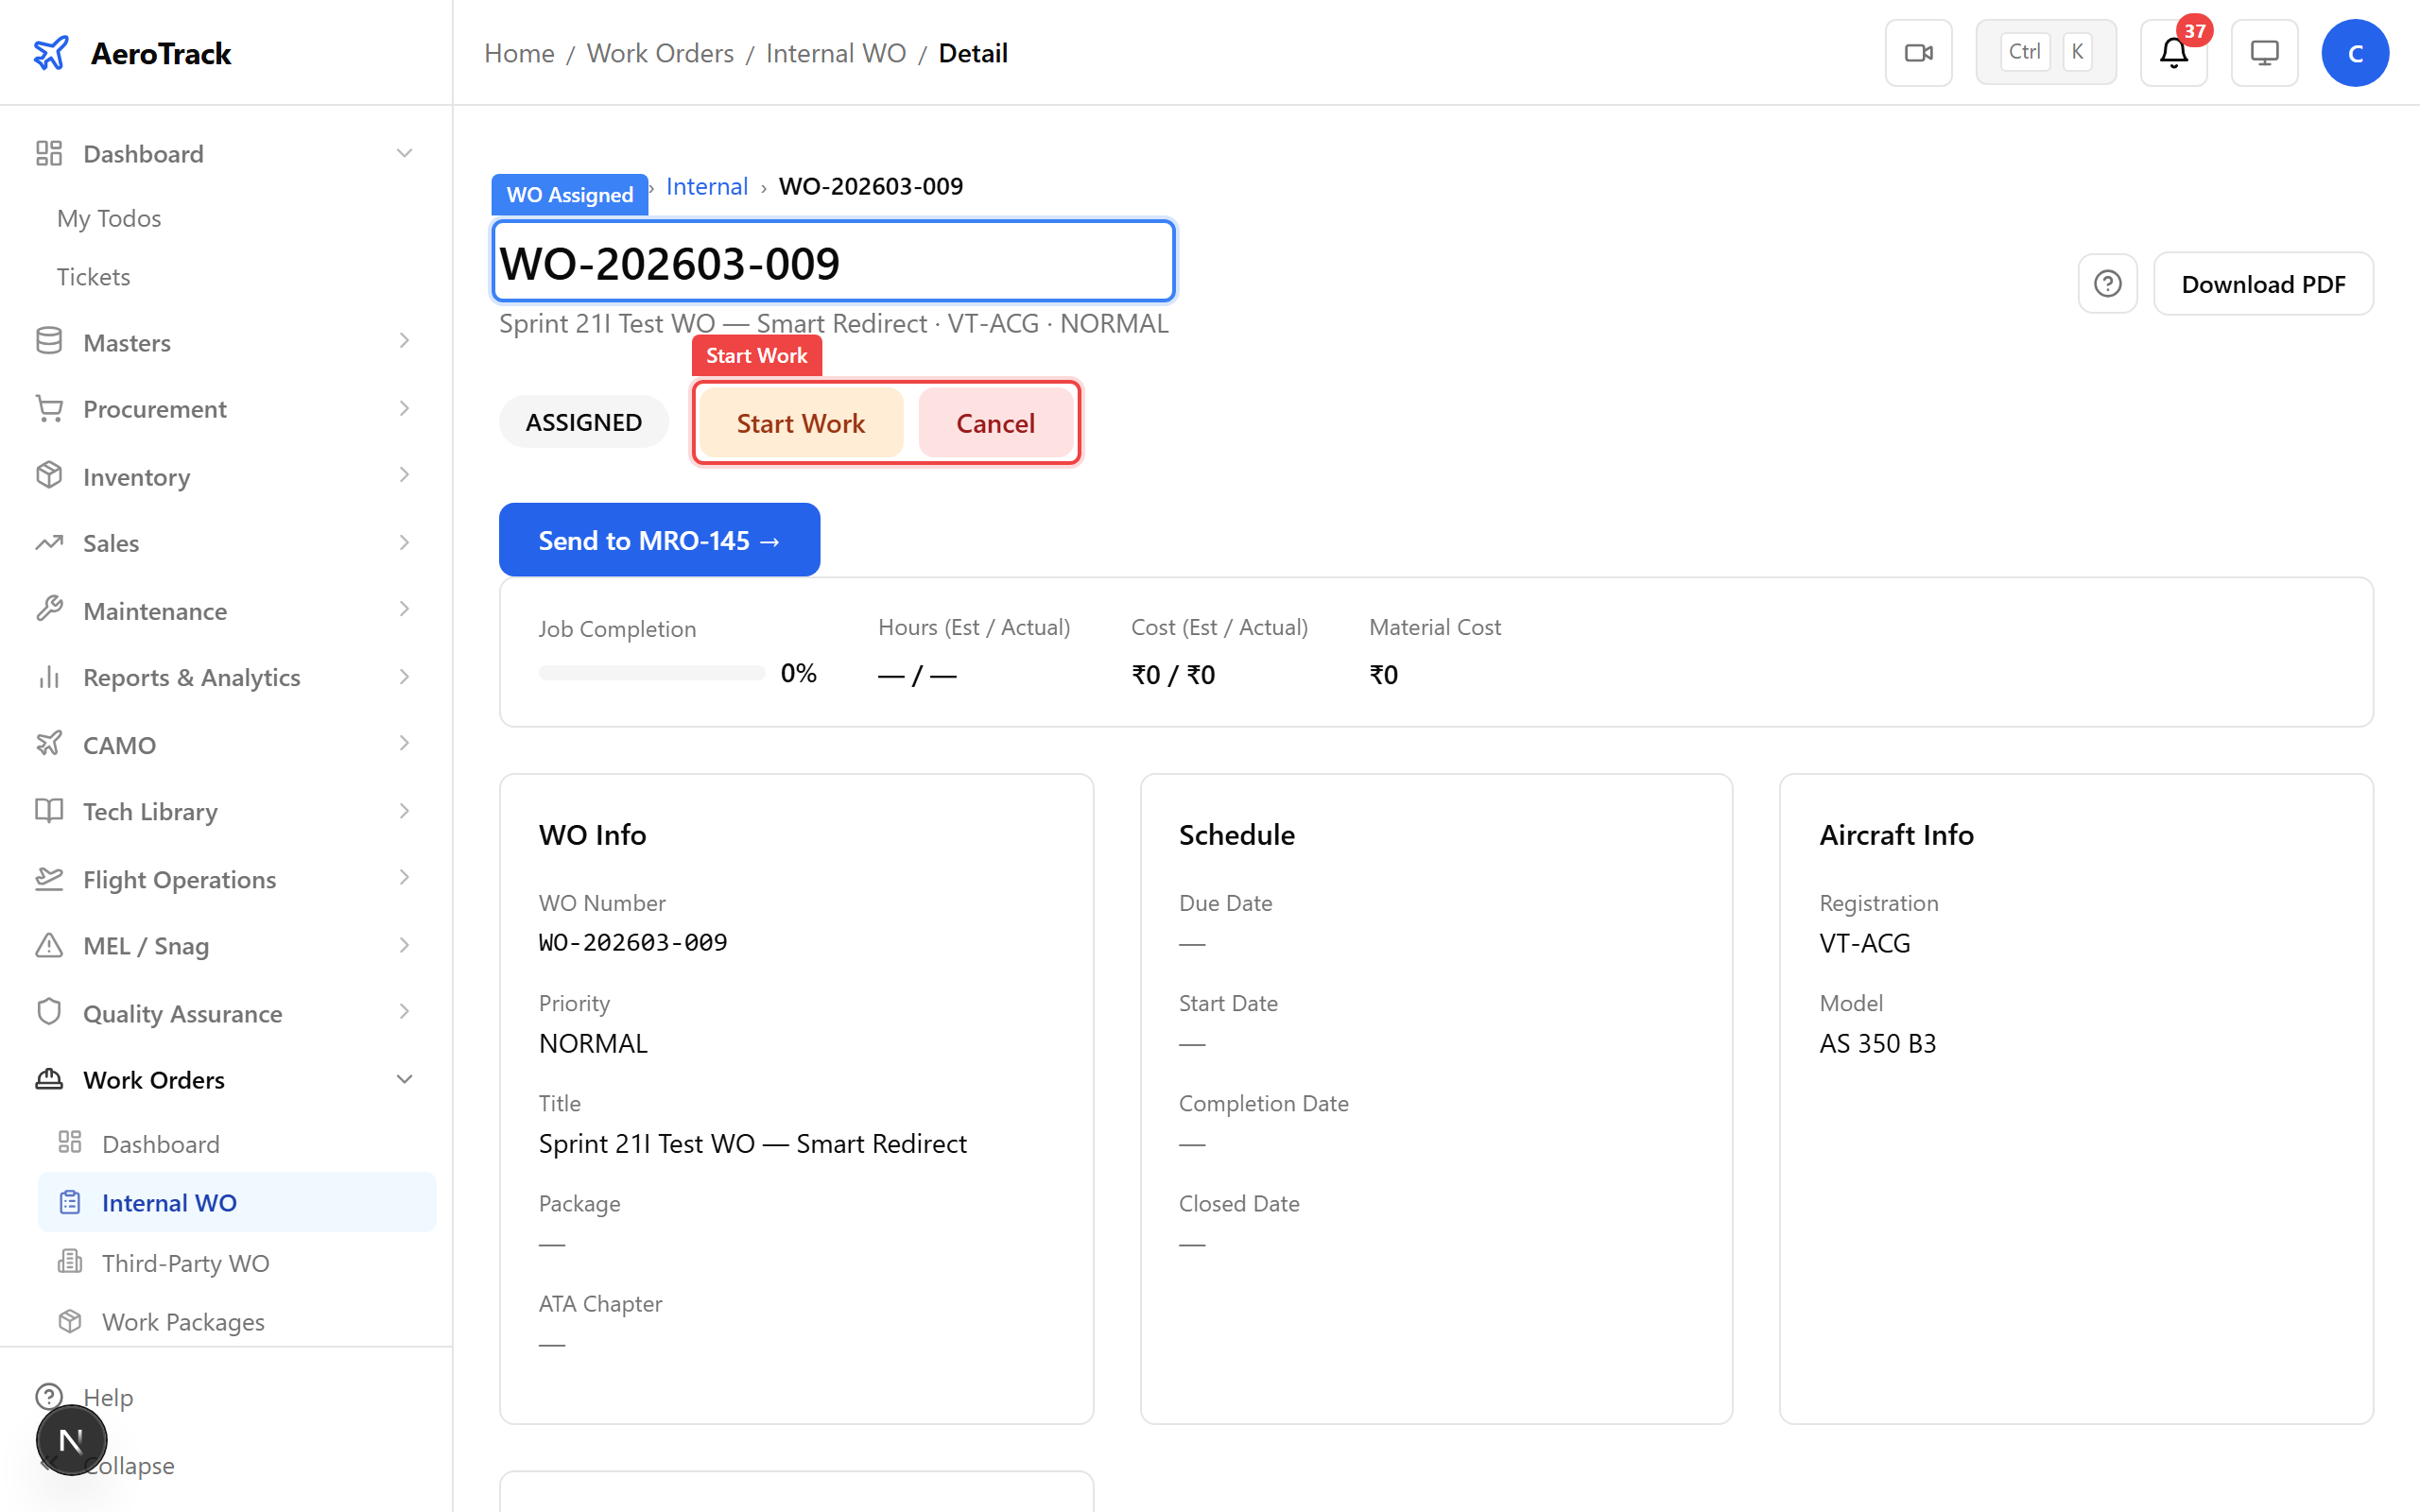
Assigned — technician can now begin work.
Step 11 — In Progress
Click Start Work to begin. The start date is automatically set to today.
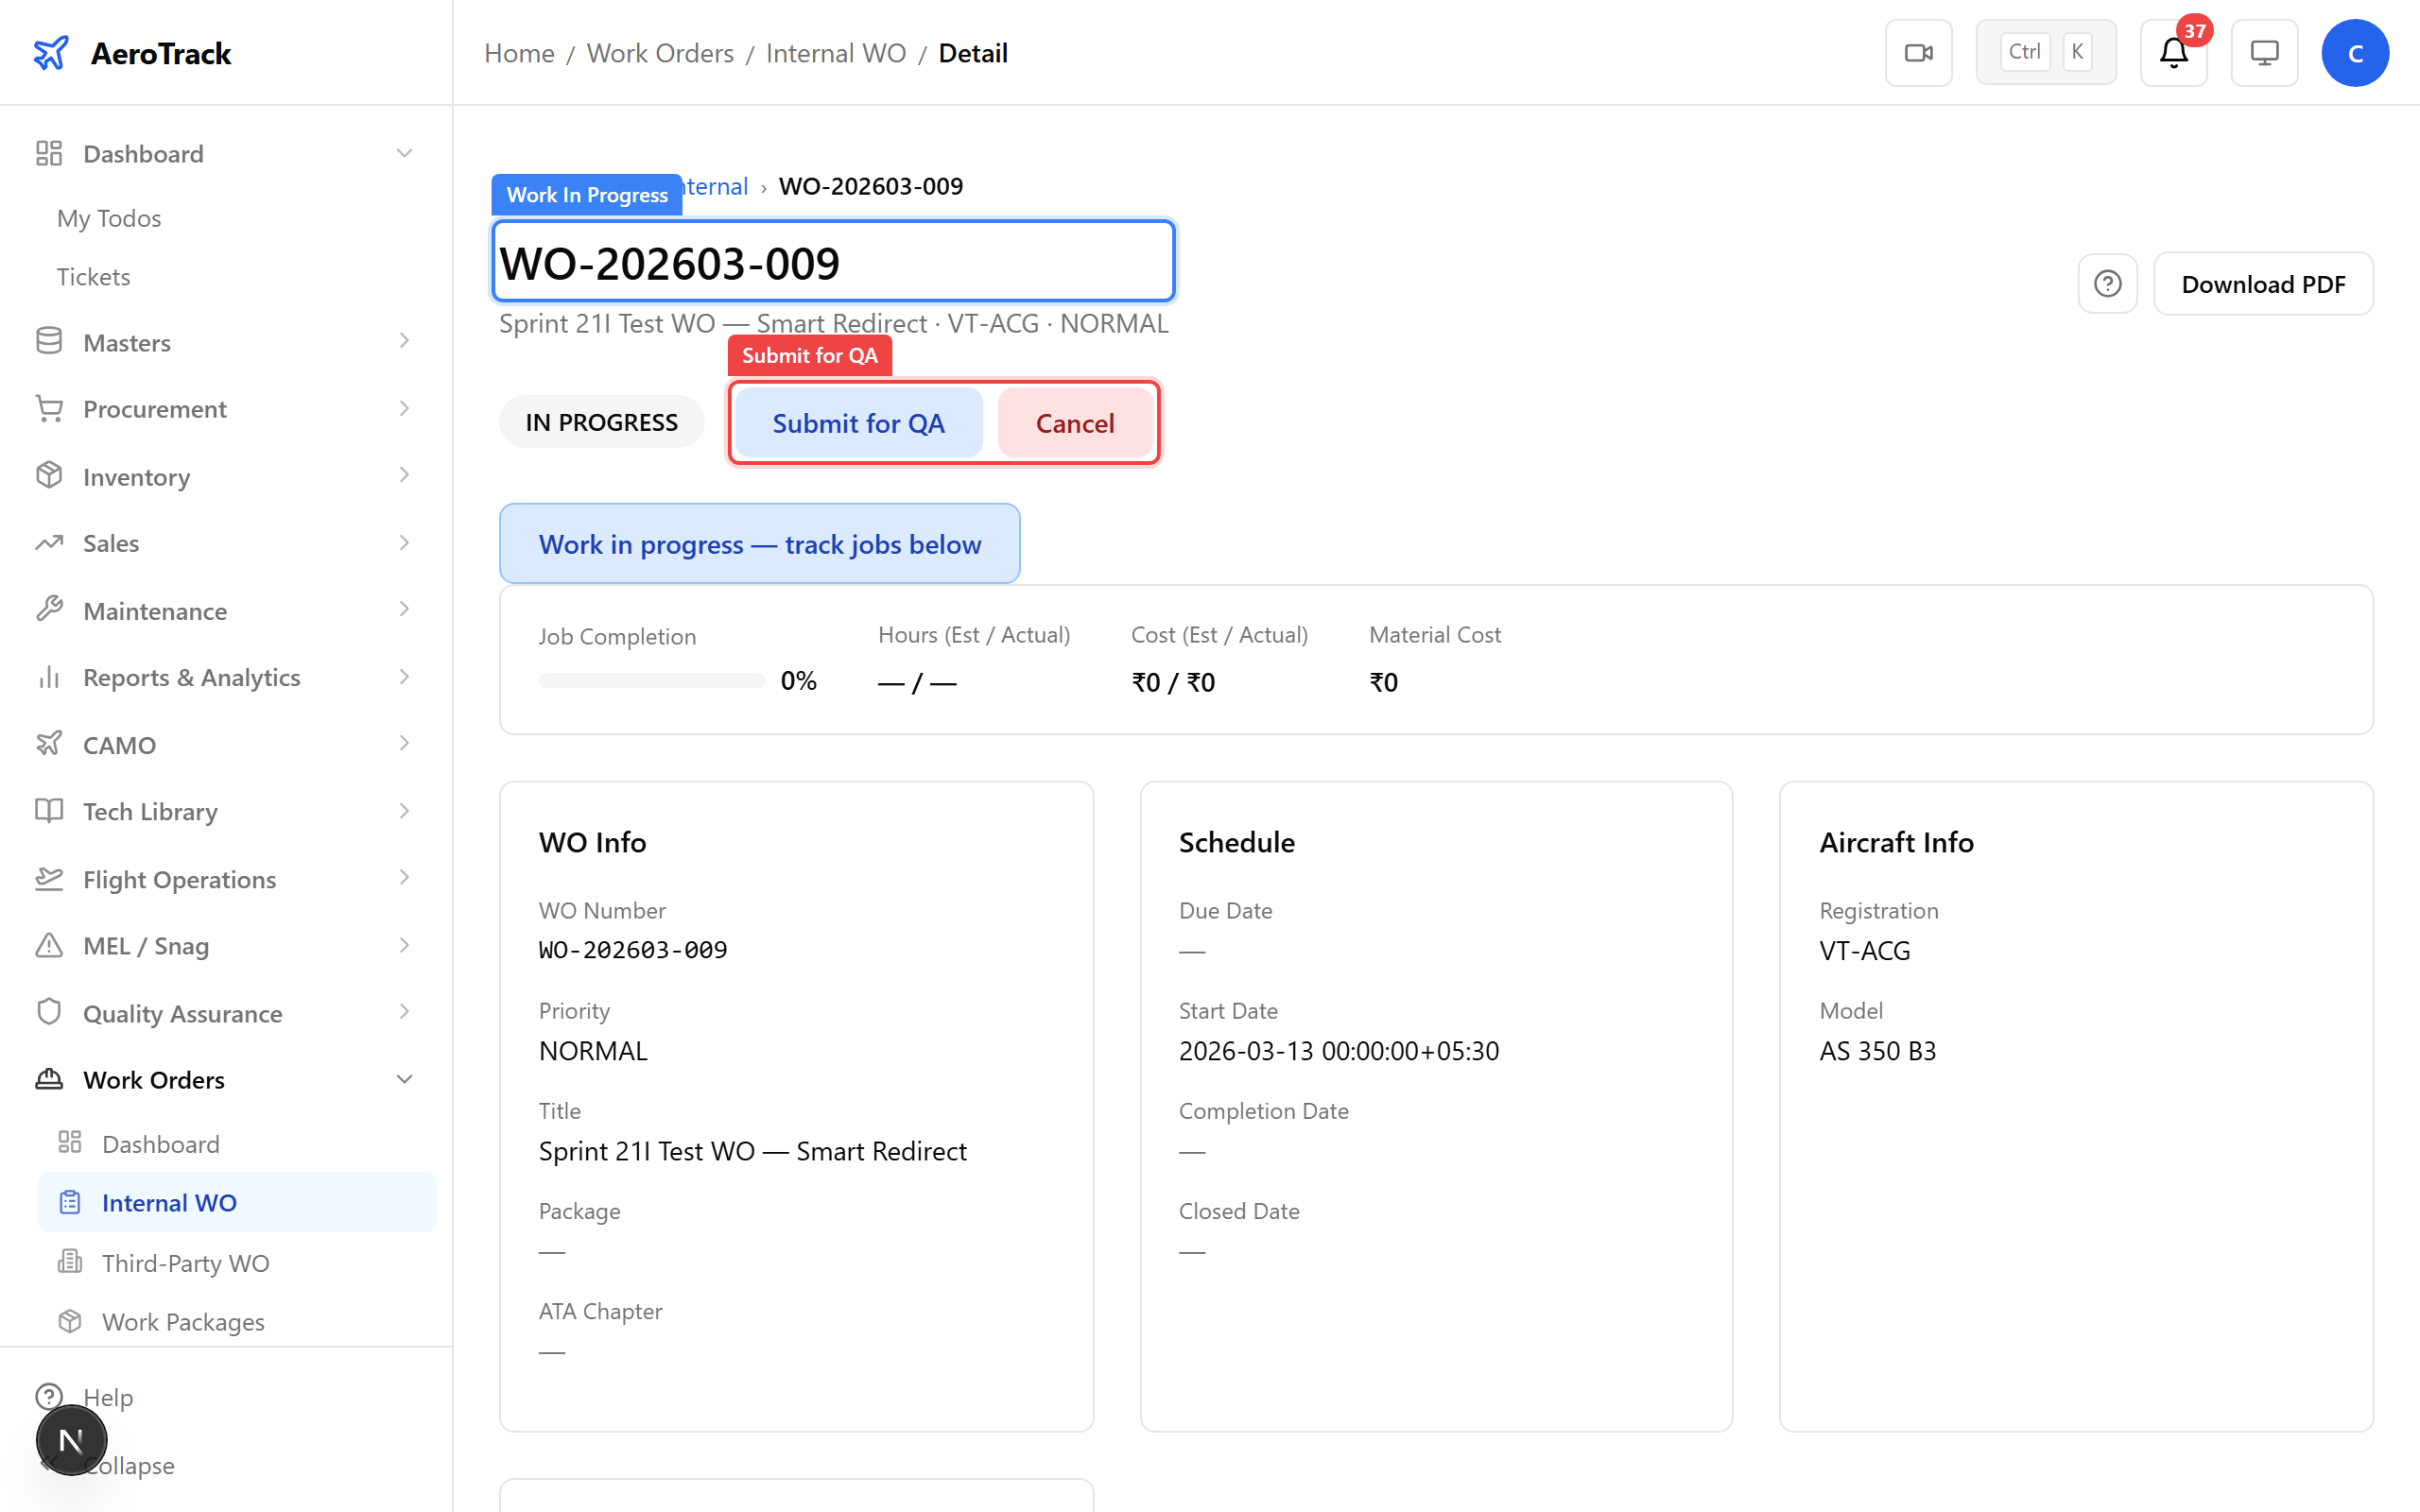
Work begun — the inspection is underway.
Step 12 — QA Check
When work is complete, click Submit for QA. The quality team reviews the work before final approval.
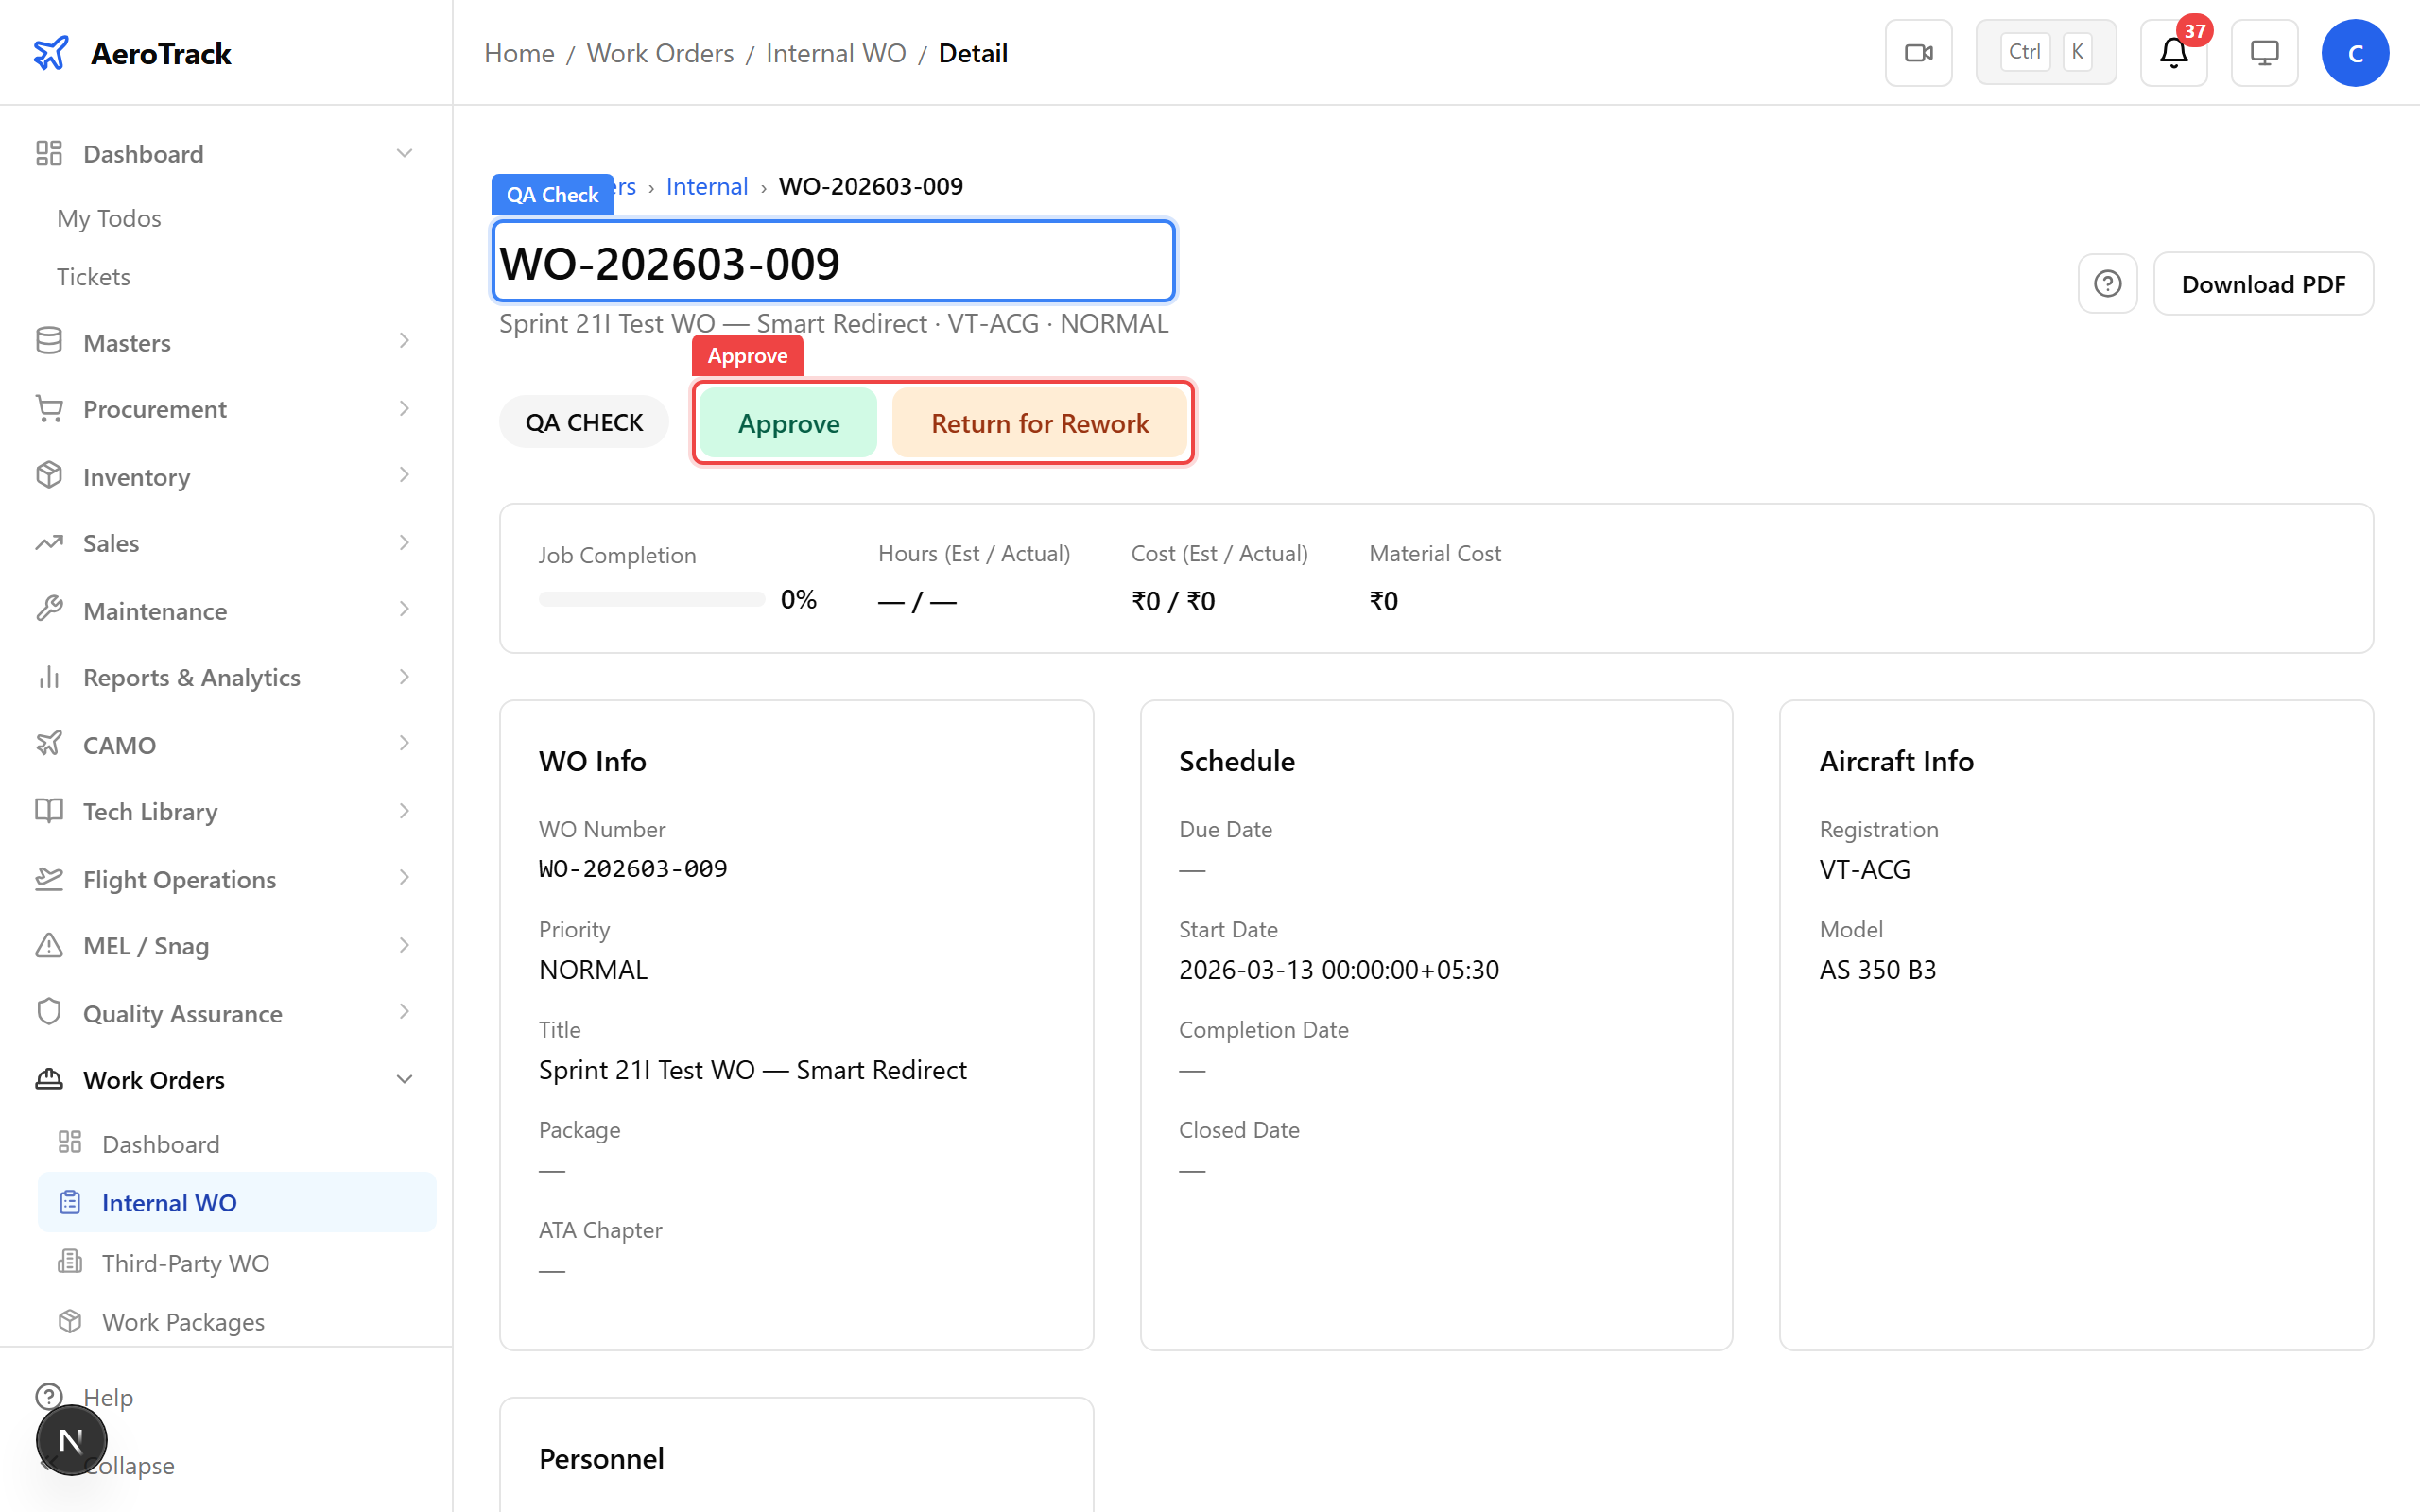
Submitted for QA check — quality review before completion.
Step 13 — Completed
After QA approval, the work order moves to COMPLETED. The CAMO engineer can now close it.
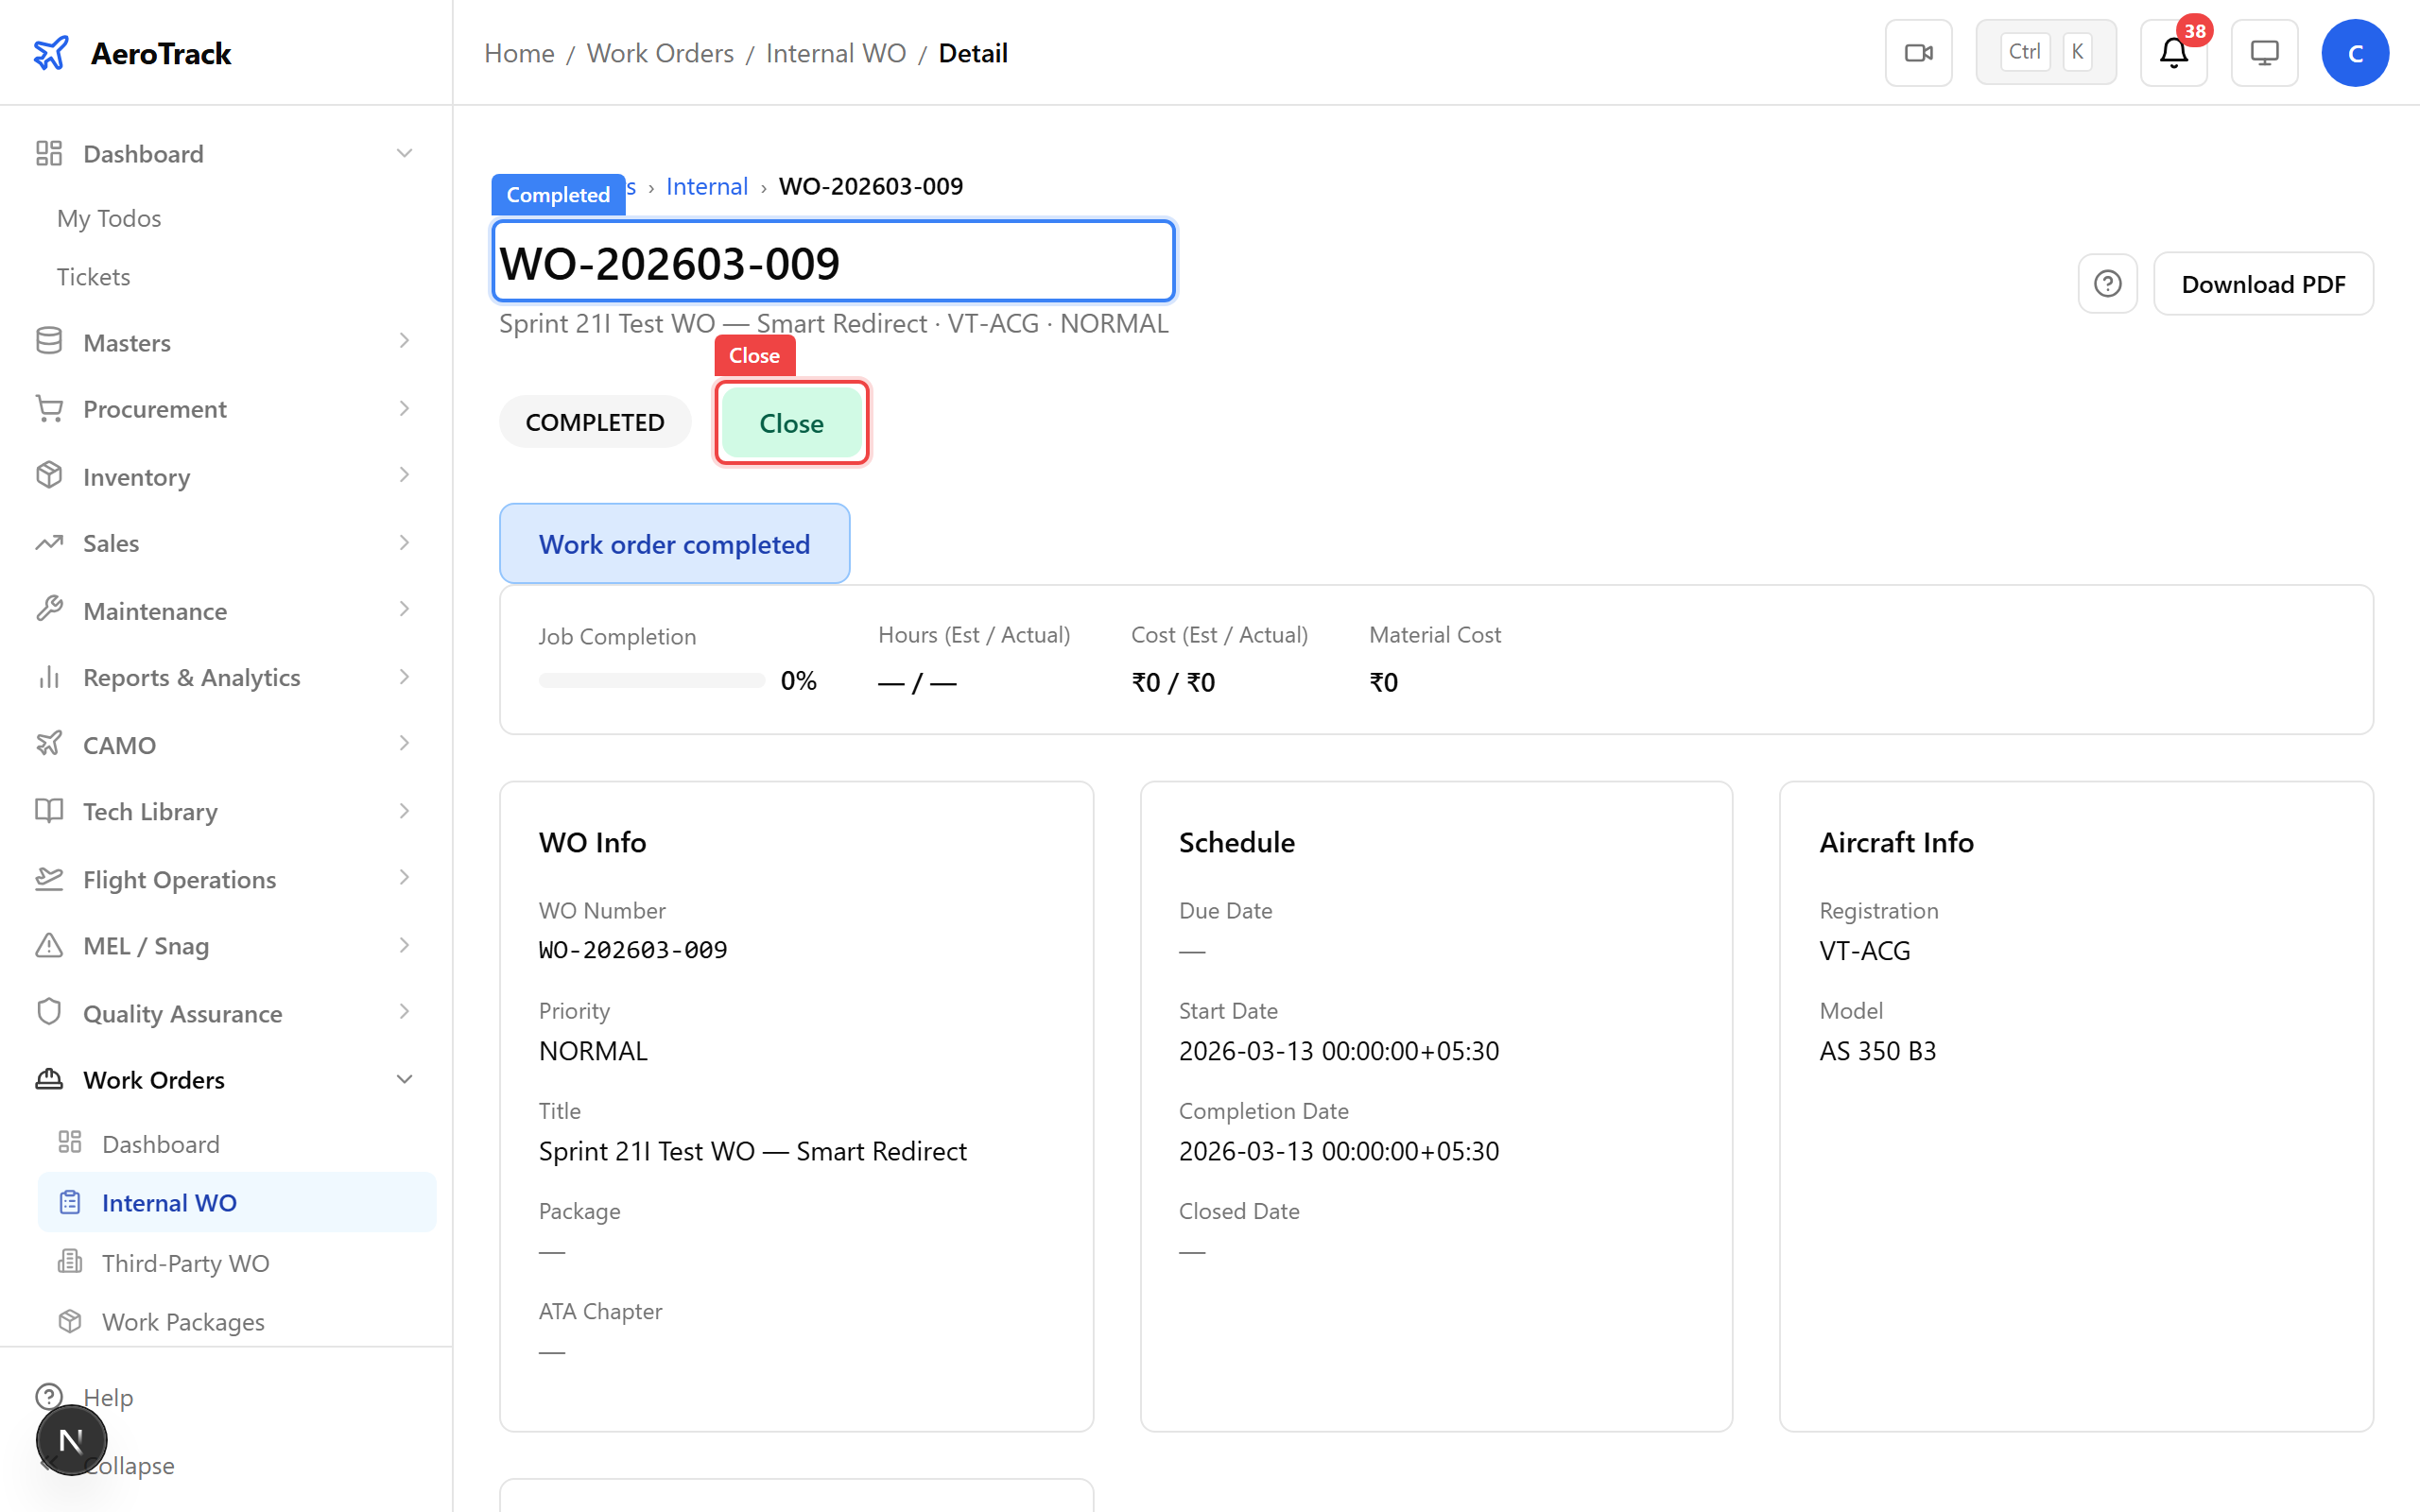
Work completed — pending final closure by CAMO.
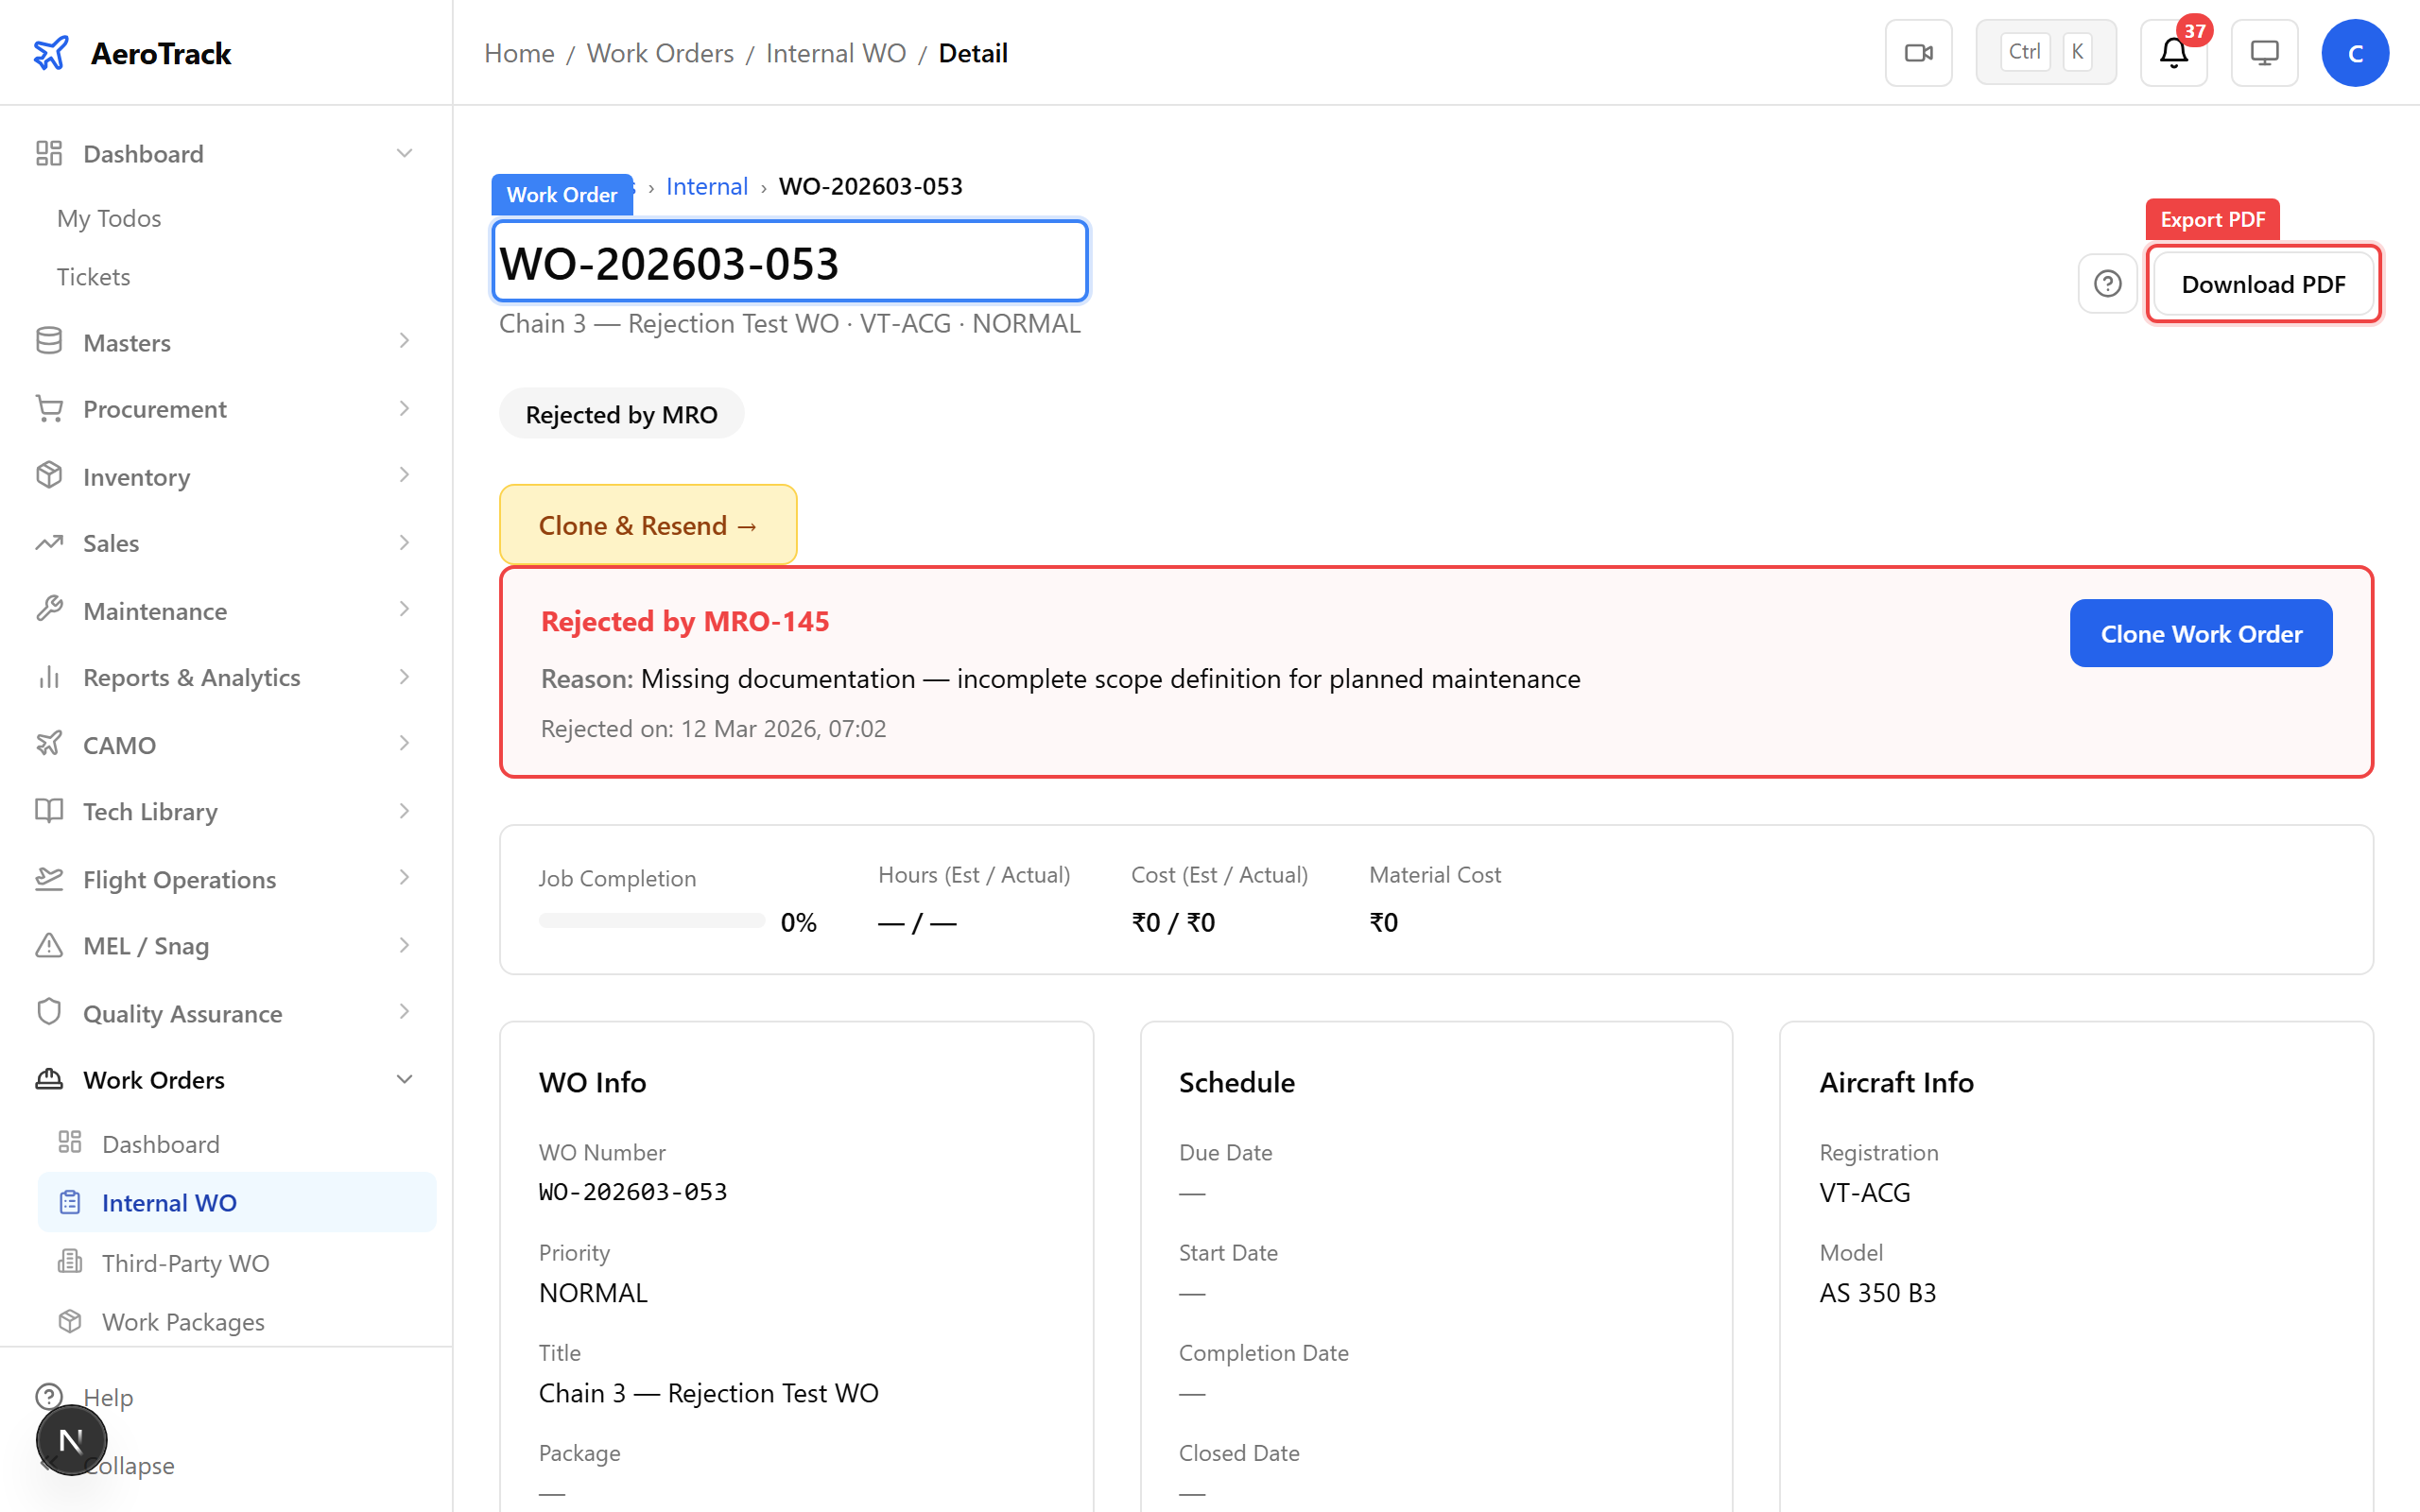
Step 14 — Close the Work Order
Click Close to open the closure dialog. Review job completion status, attach documents if needed, and add closure notes.
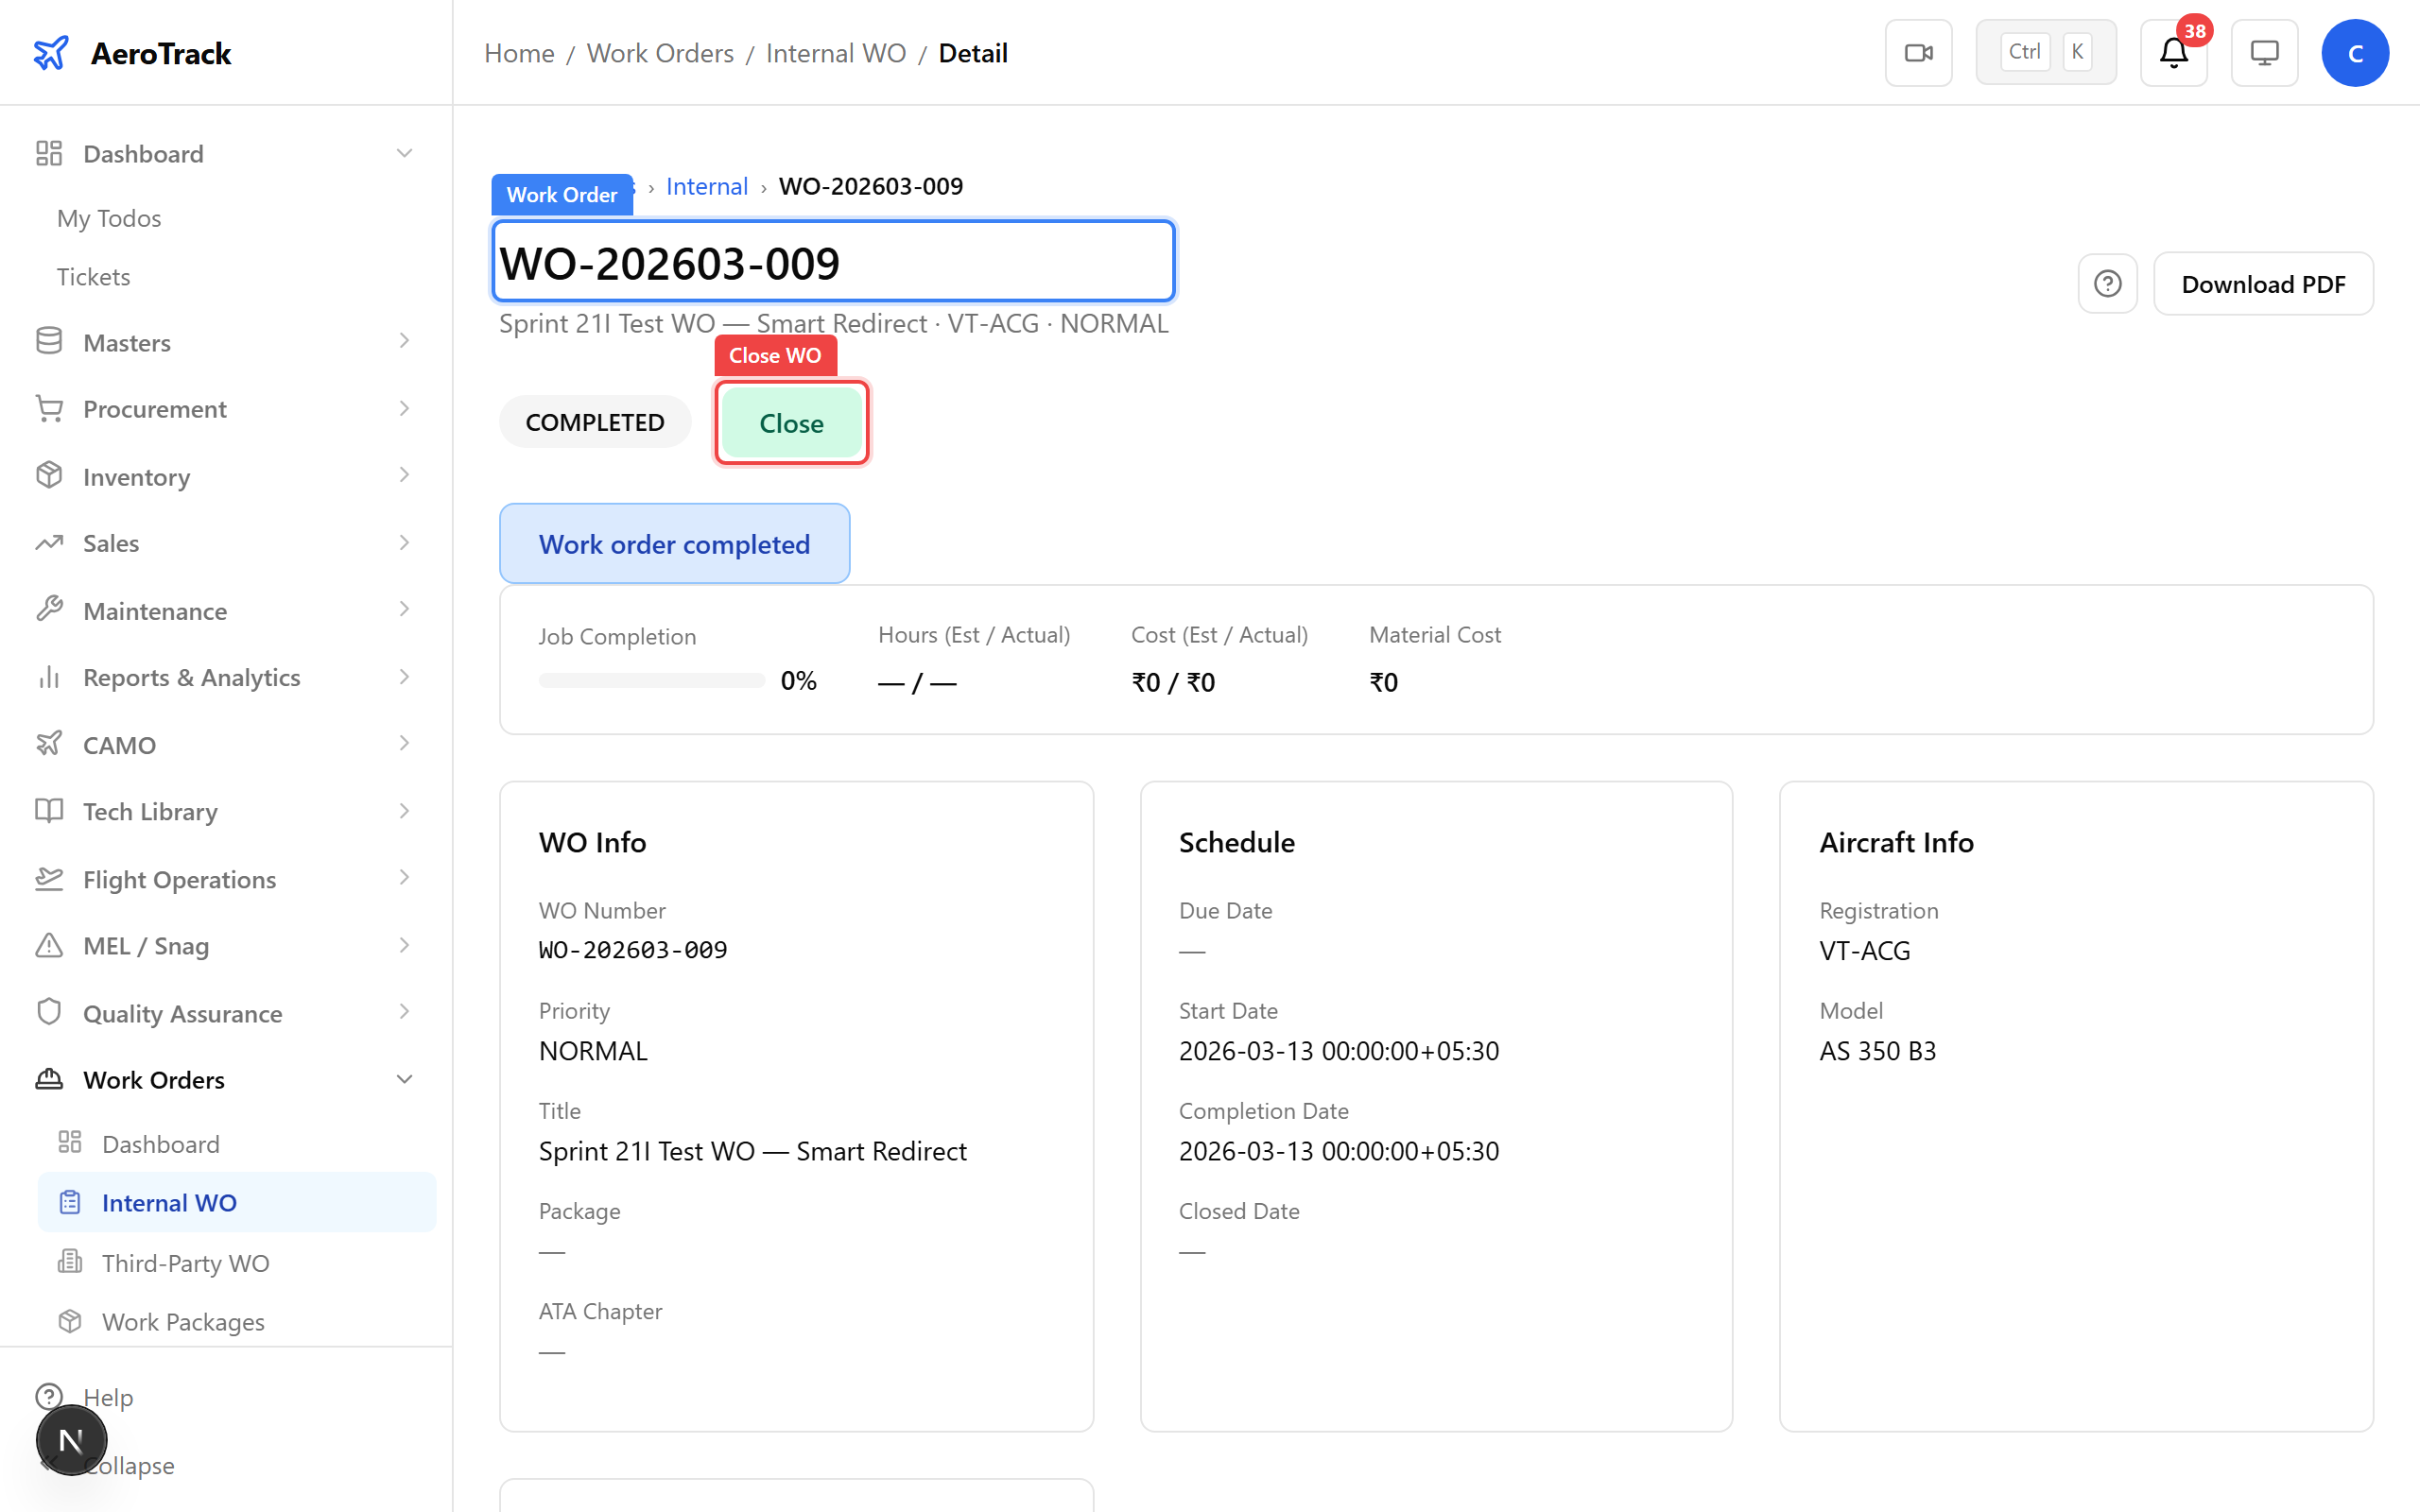
Closing the work order — all tasks verified and documented.
Step 15 — Closed
The work order is now CLOSED. No further transitions are available. The full lifecycle is complete.
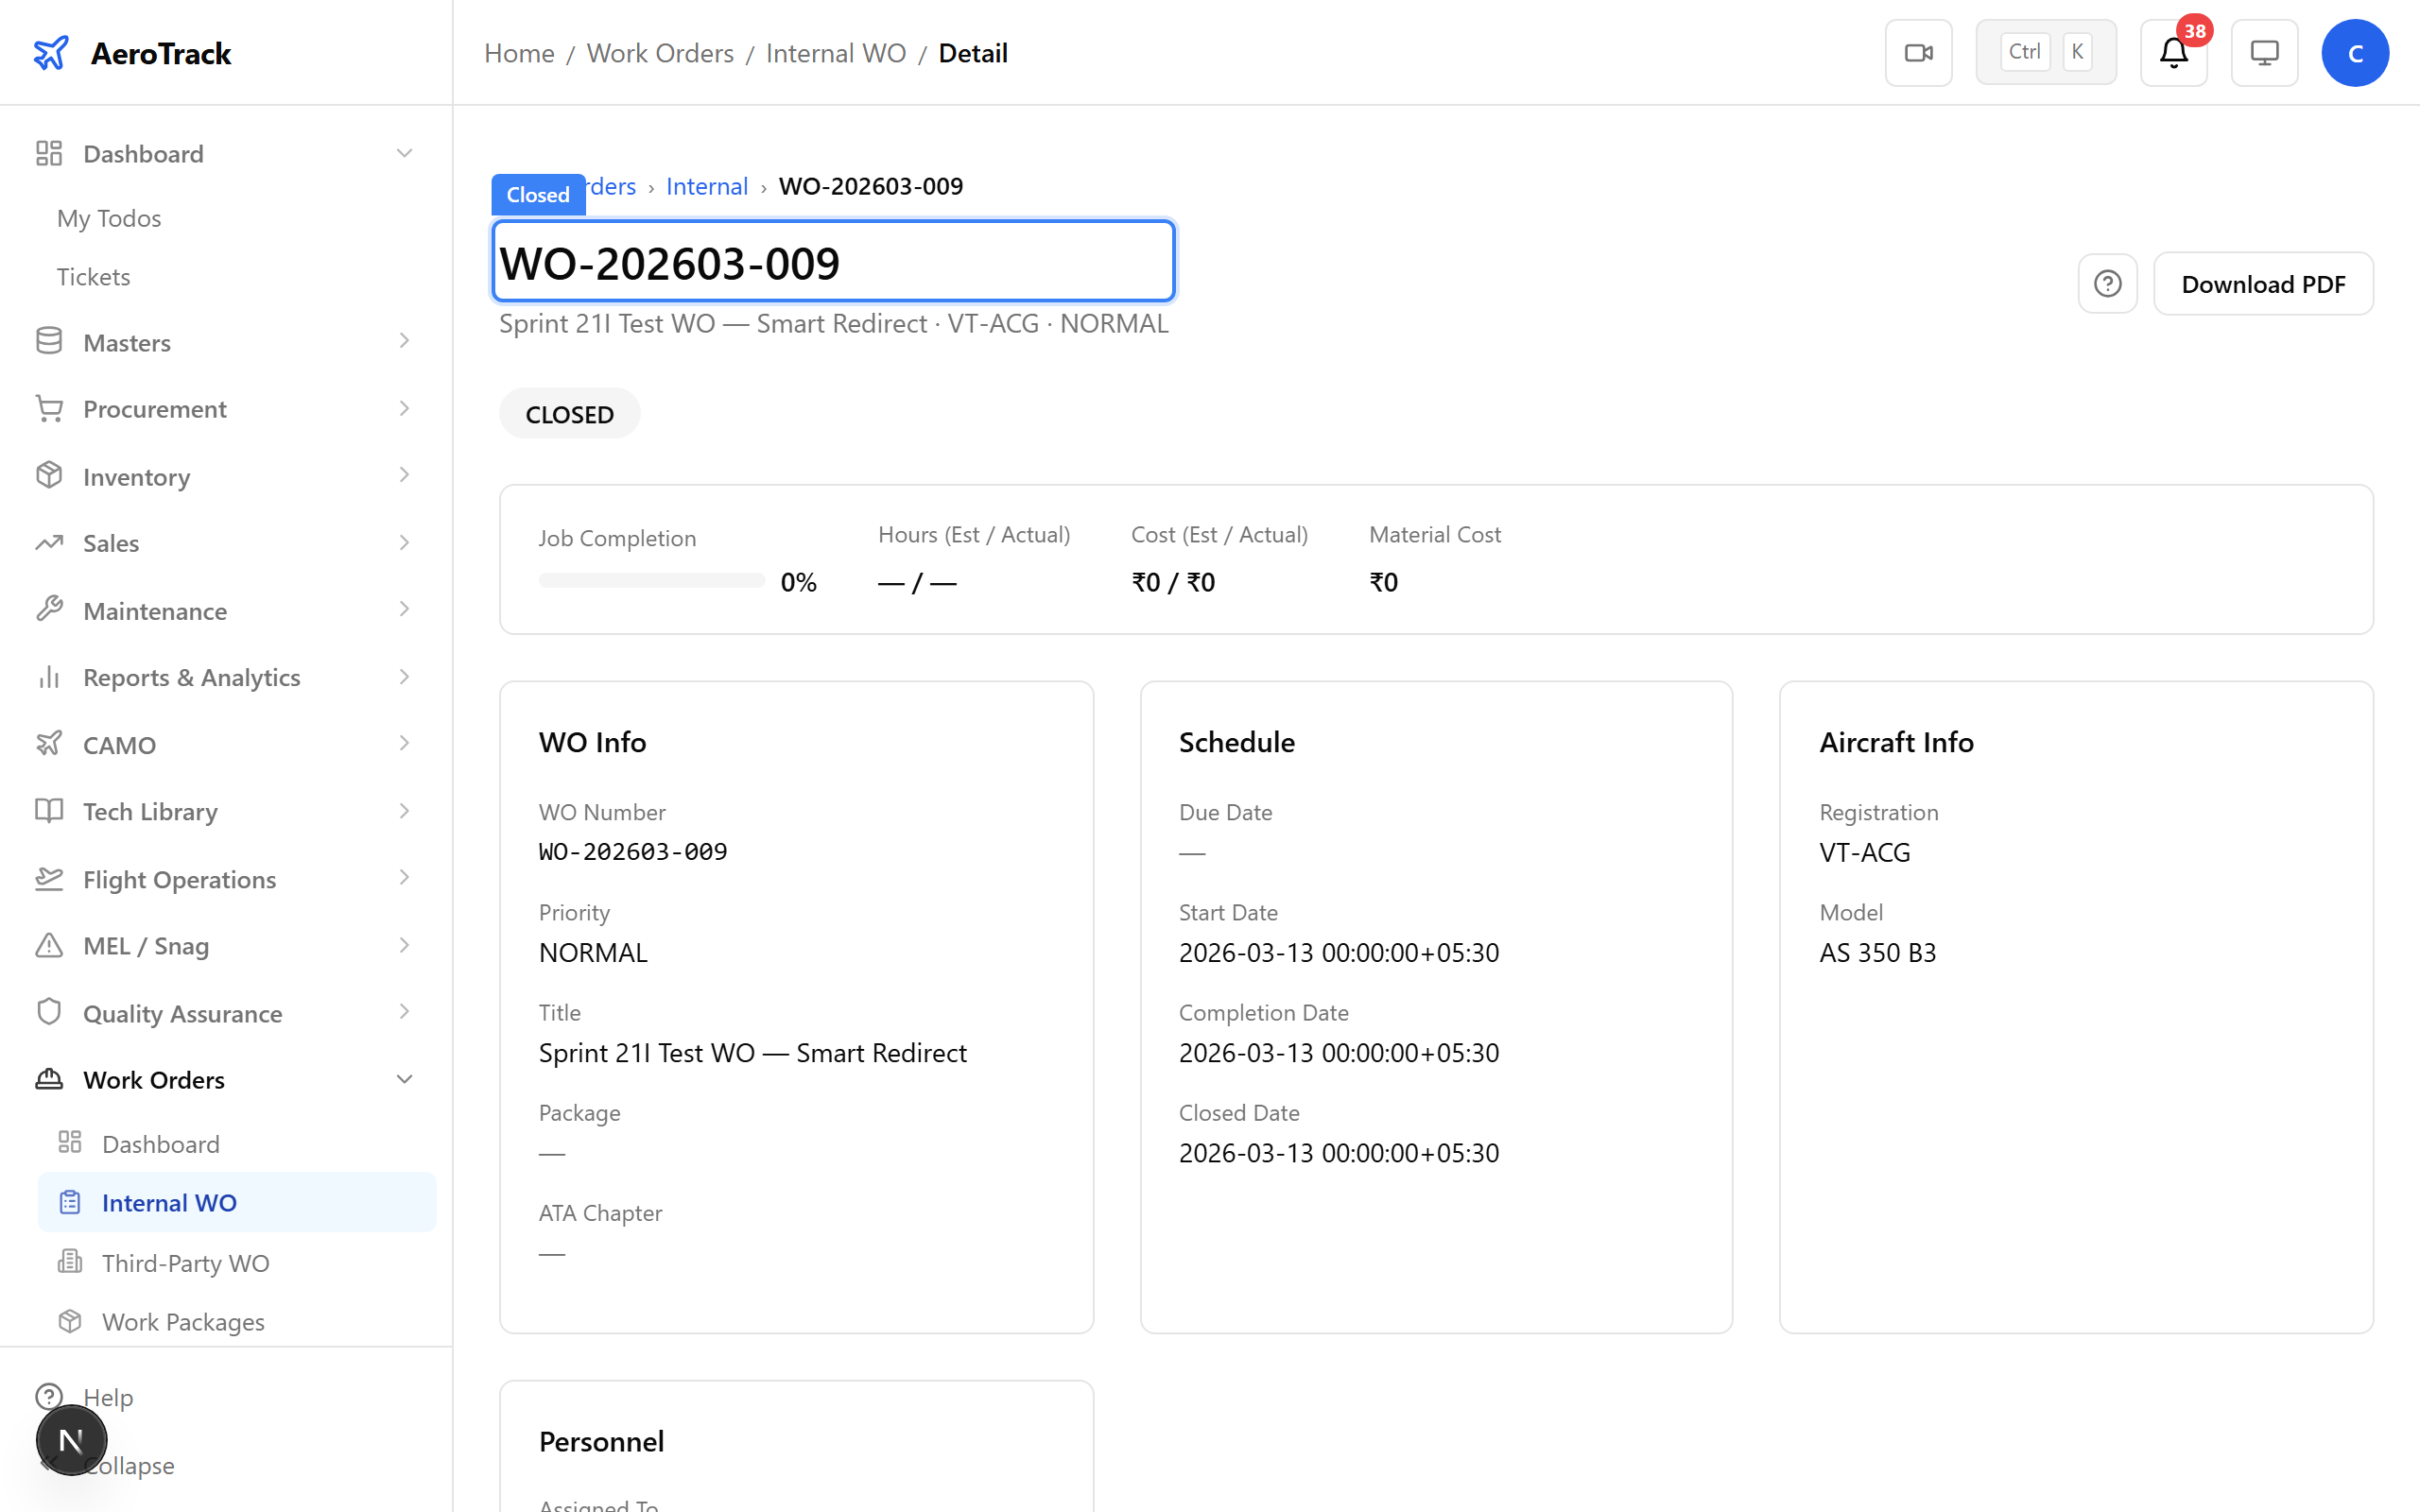
Closed — the full internal work order lifecycle complete.
5 — Third-Party Work Orders
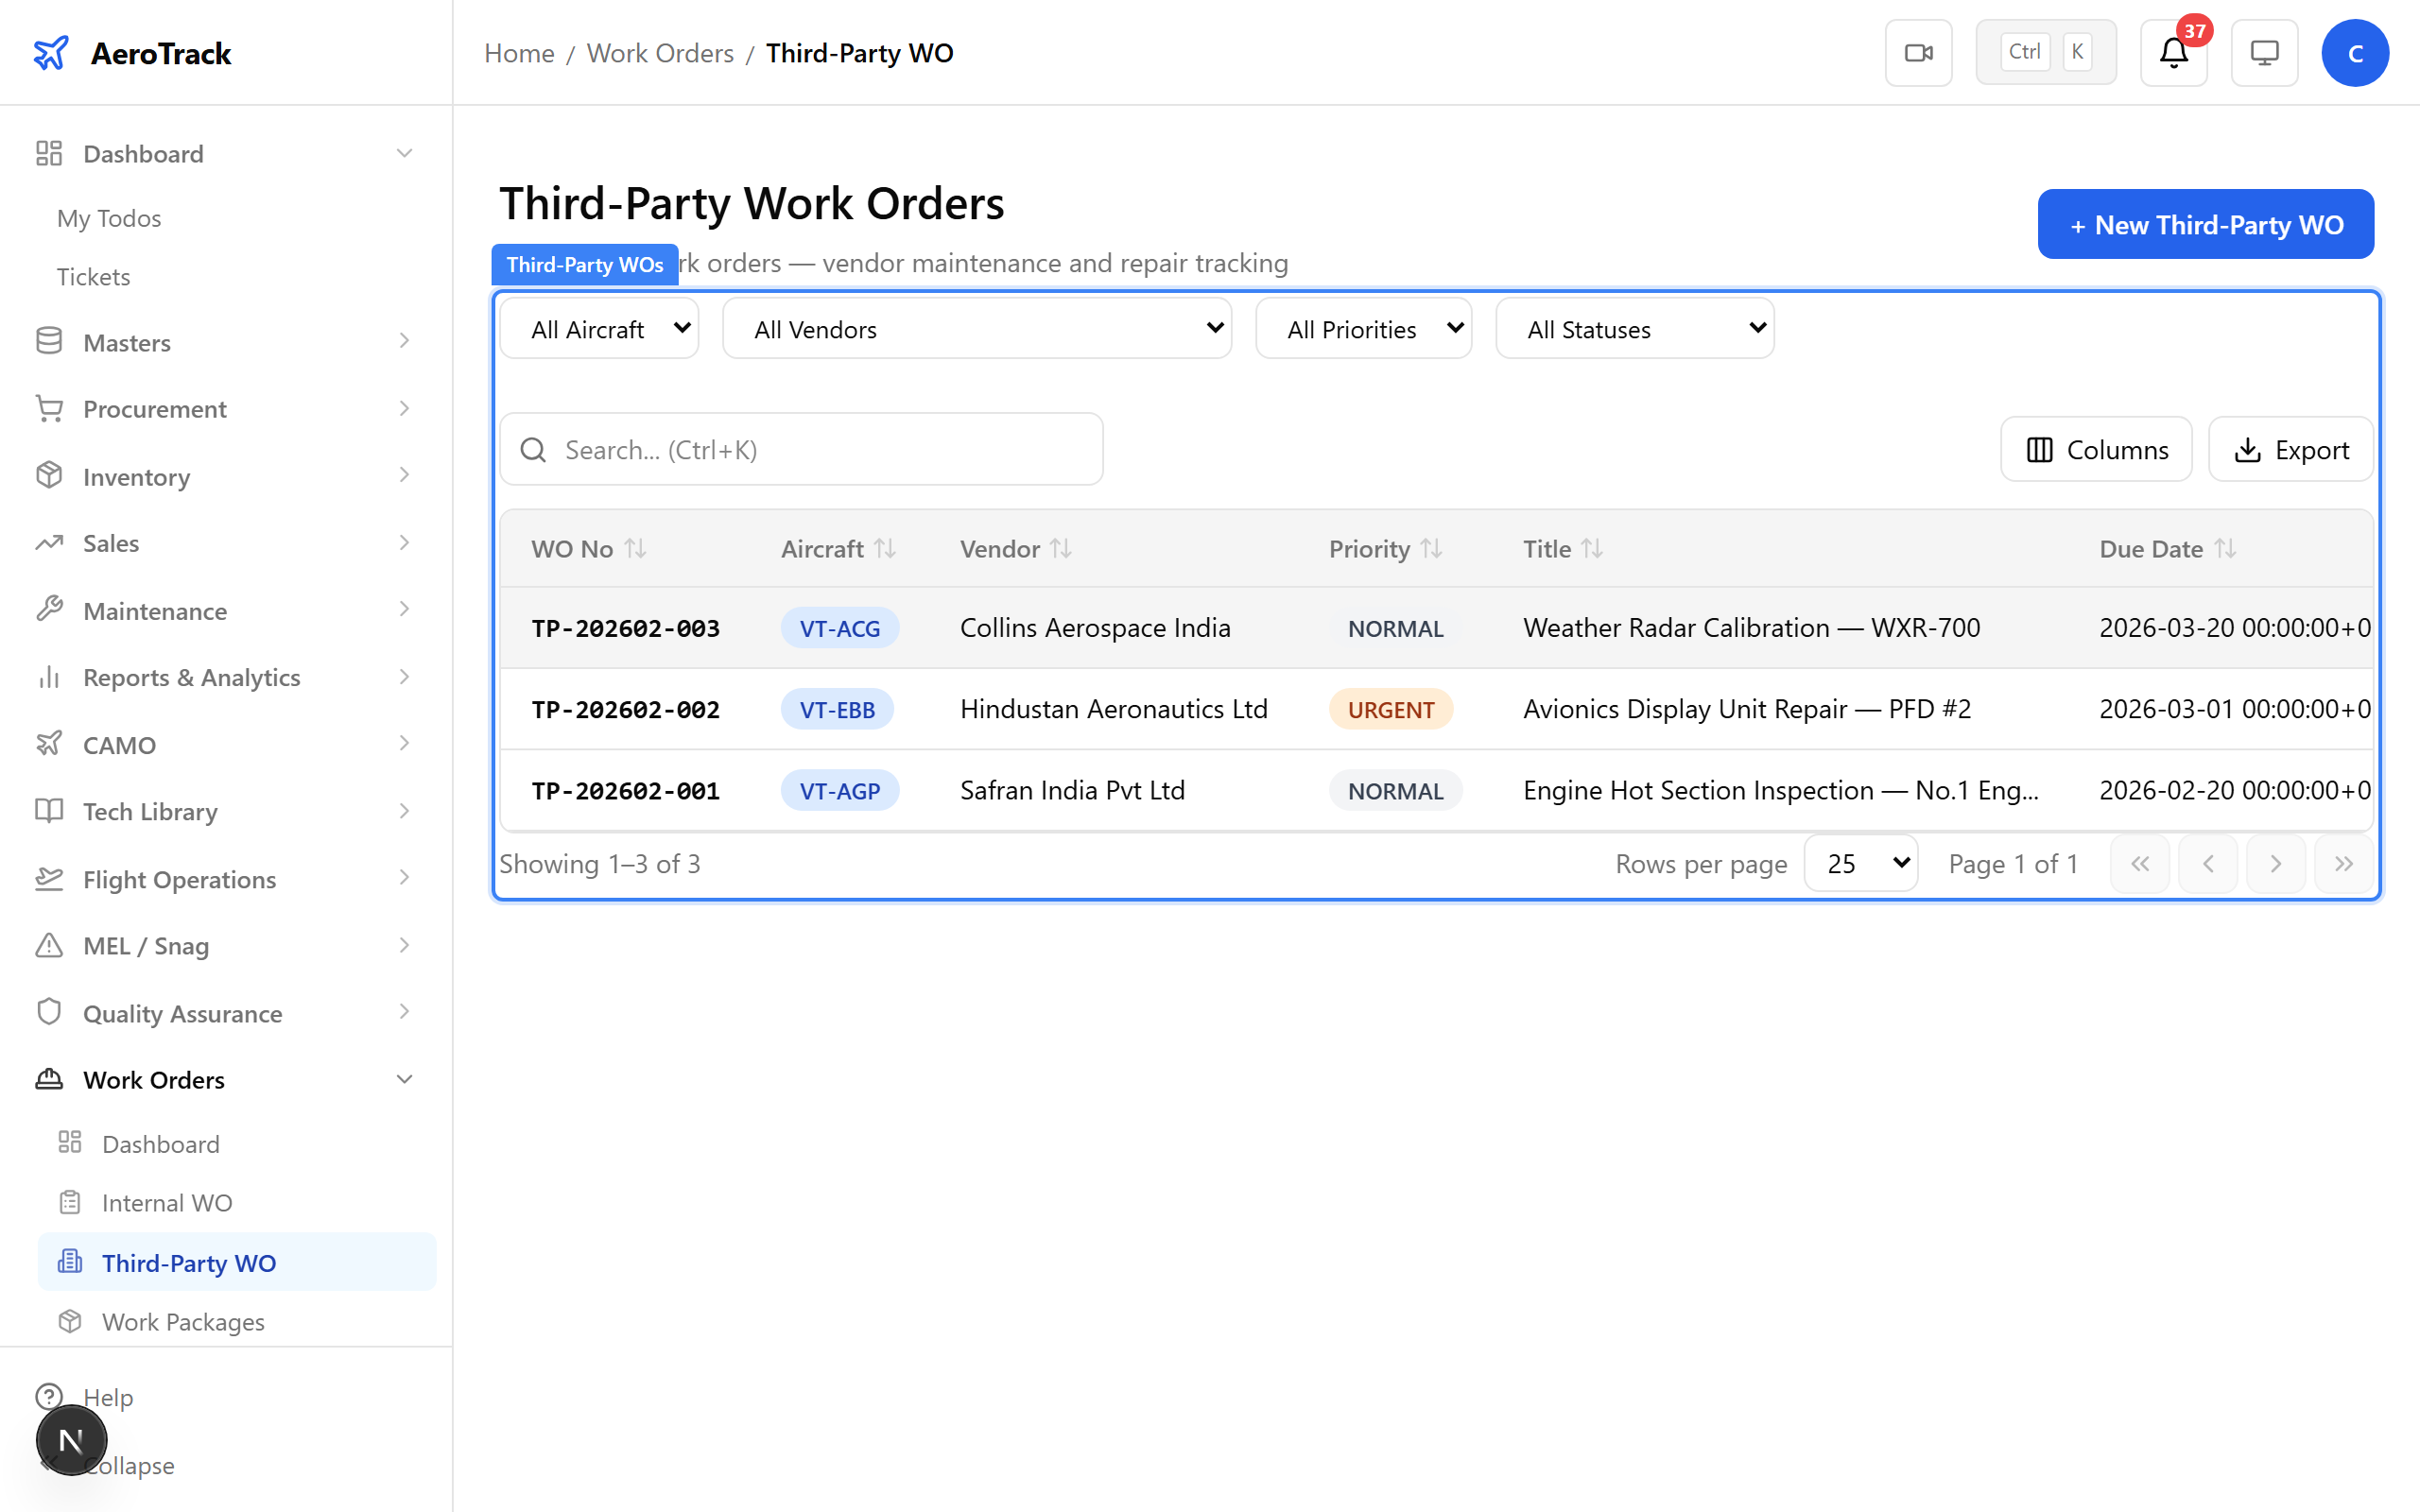
Step 16 — Third-Party WO List
Navigate to Third-Party to see outsourced work orders. Filter by vendor, aircraft, priority, or status.
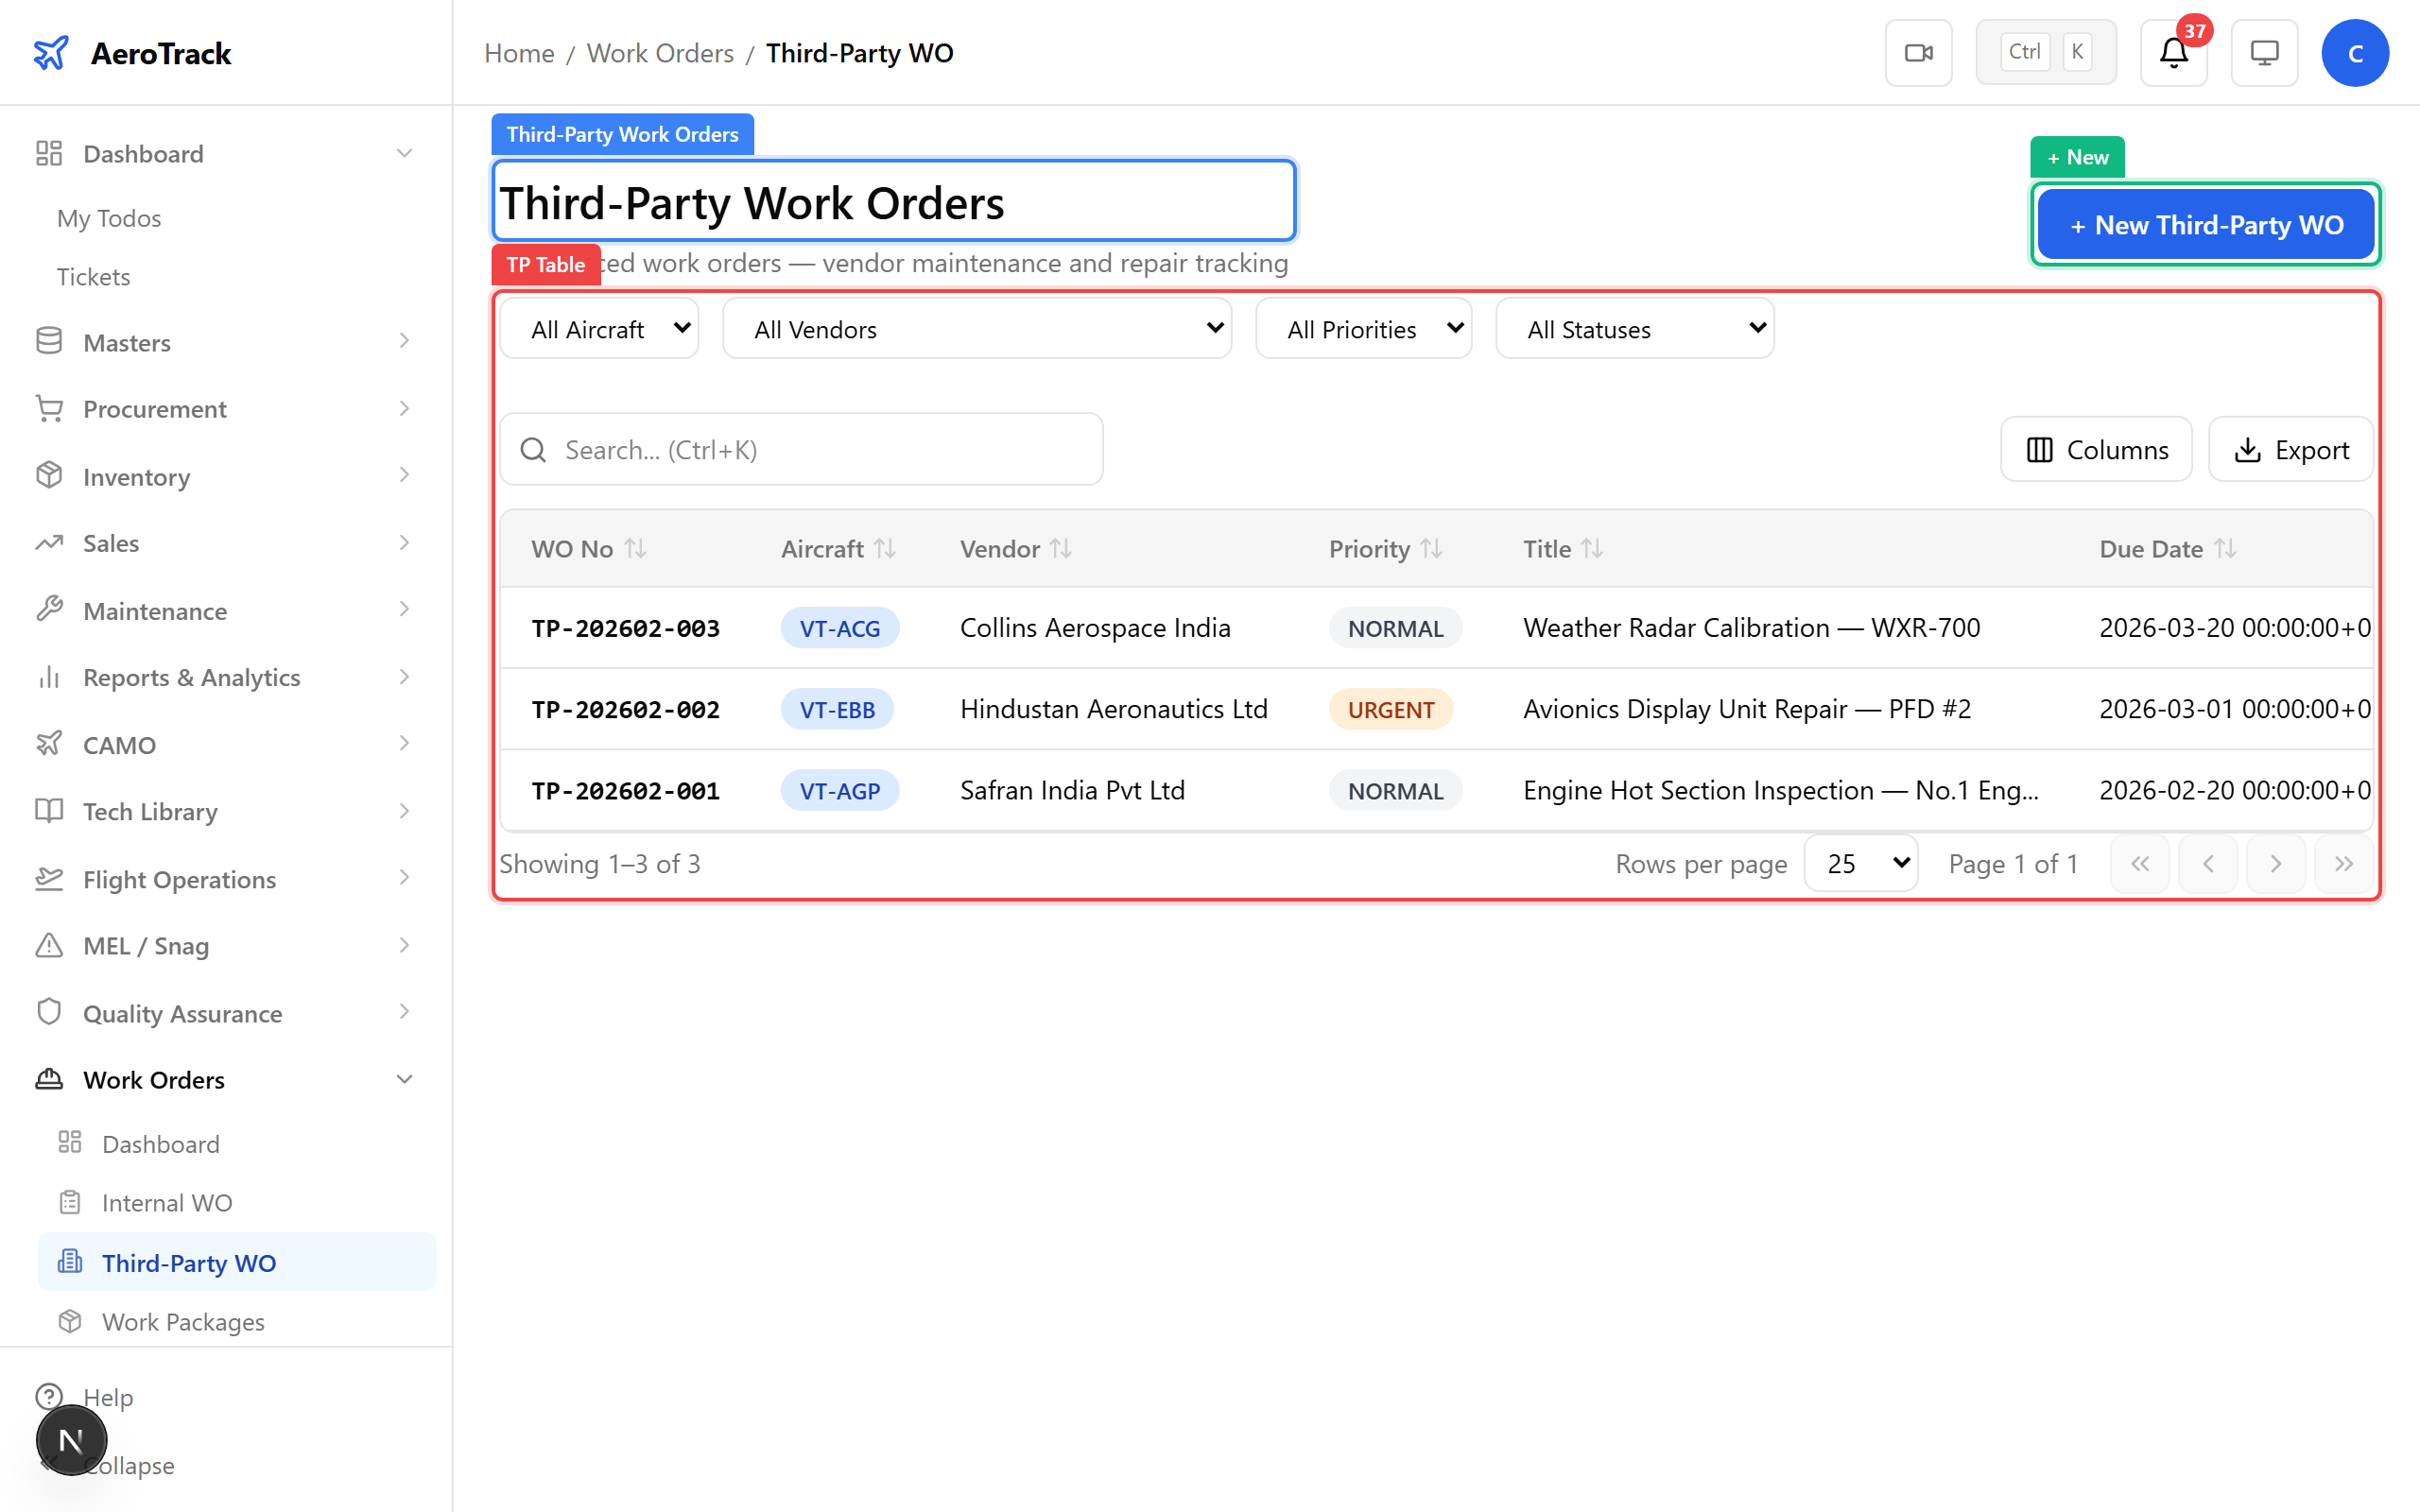
Third-party work orders — tasks outsourced to external MRO shops.
| Field | Type | Required | Notes |
|---|---|---|---|
| Aircraft | SearchableSelect | Yes | Active fleet only |
| Vendor | SearchableSelect | Yes | Approved MRO vendor |
| ATA Chapter | SearchableSelect | No | System classification |
| Priority | Select | Yes | Normal / Urgent / AOG |
| Due Date | Date | No | Target completion |
| Title | Text | Yes | Short description |
| Description | Textarea | No | Detailed scope of work |
| Est. Hours | Number | No | Estimated man-hours |
| Est. Cost | Number | No | Vendor quote amount |
| Remarks | Textarea | No | Internal notes |
Step 17 — Create a Third-Party WO
Click + New, select the vendor, aircraft, and fill in scope details with estimated cost and turnaround time.
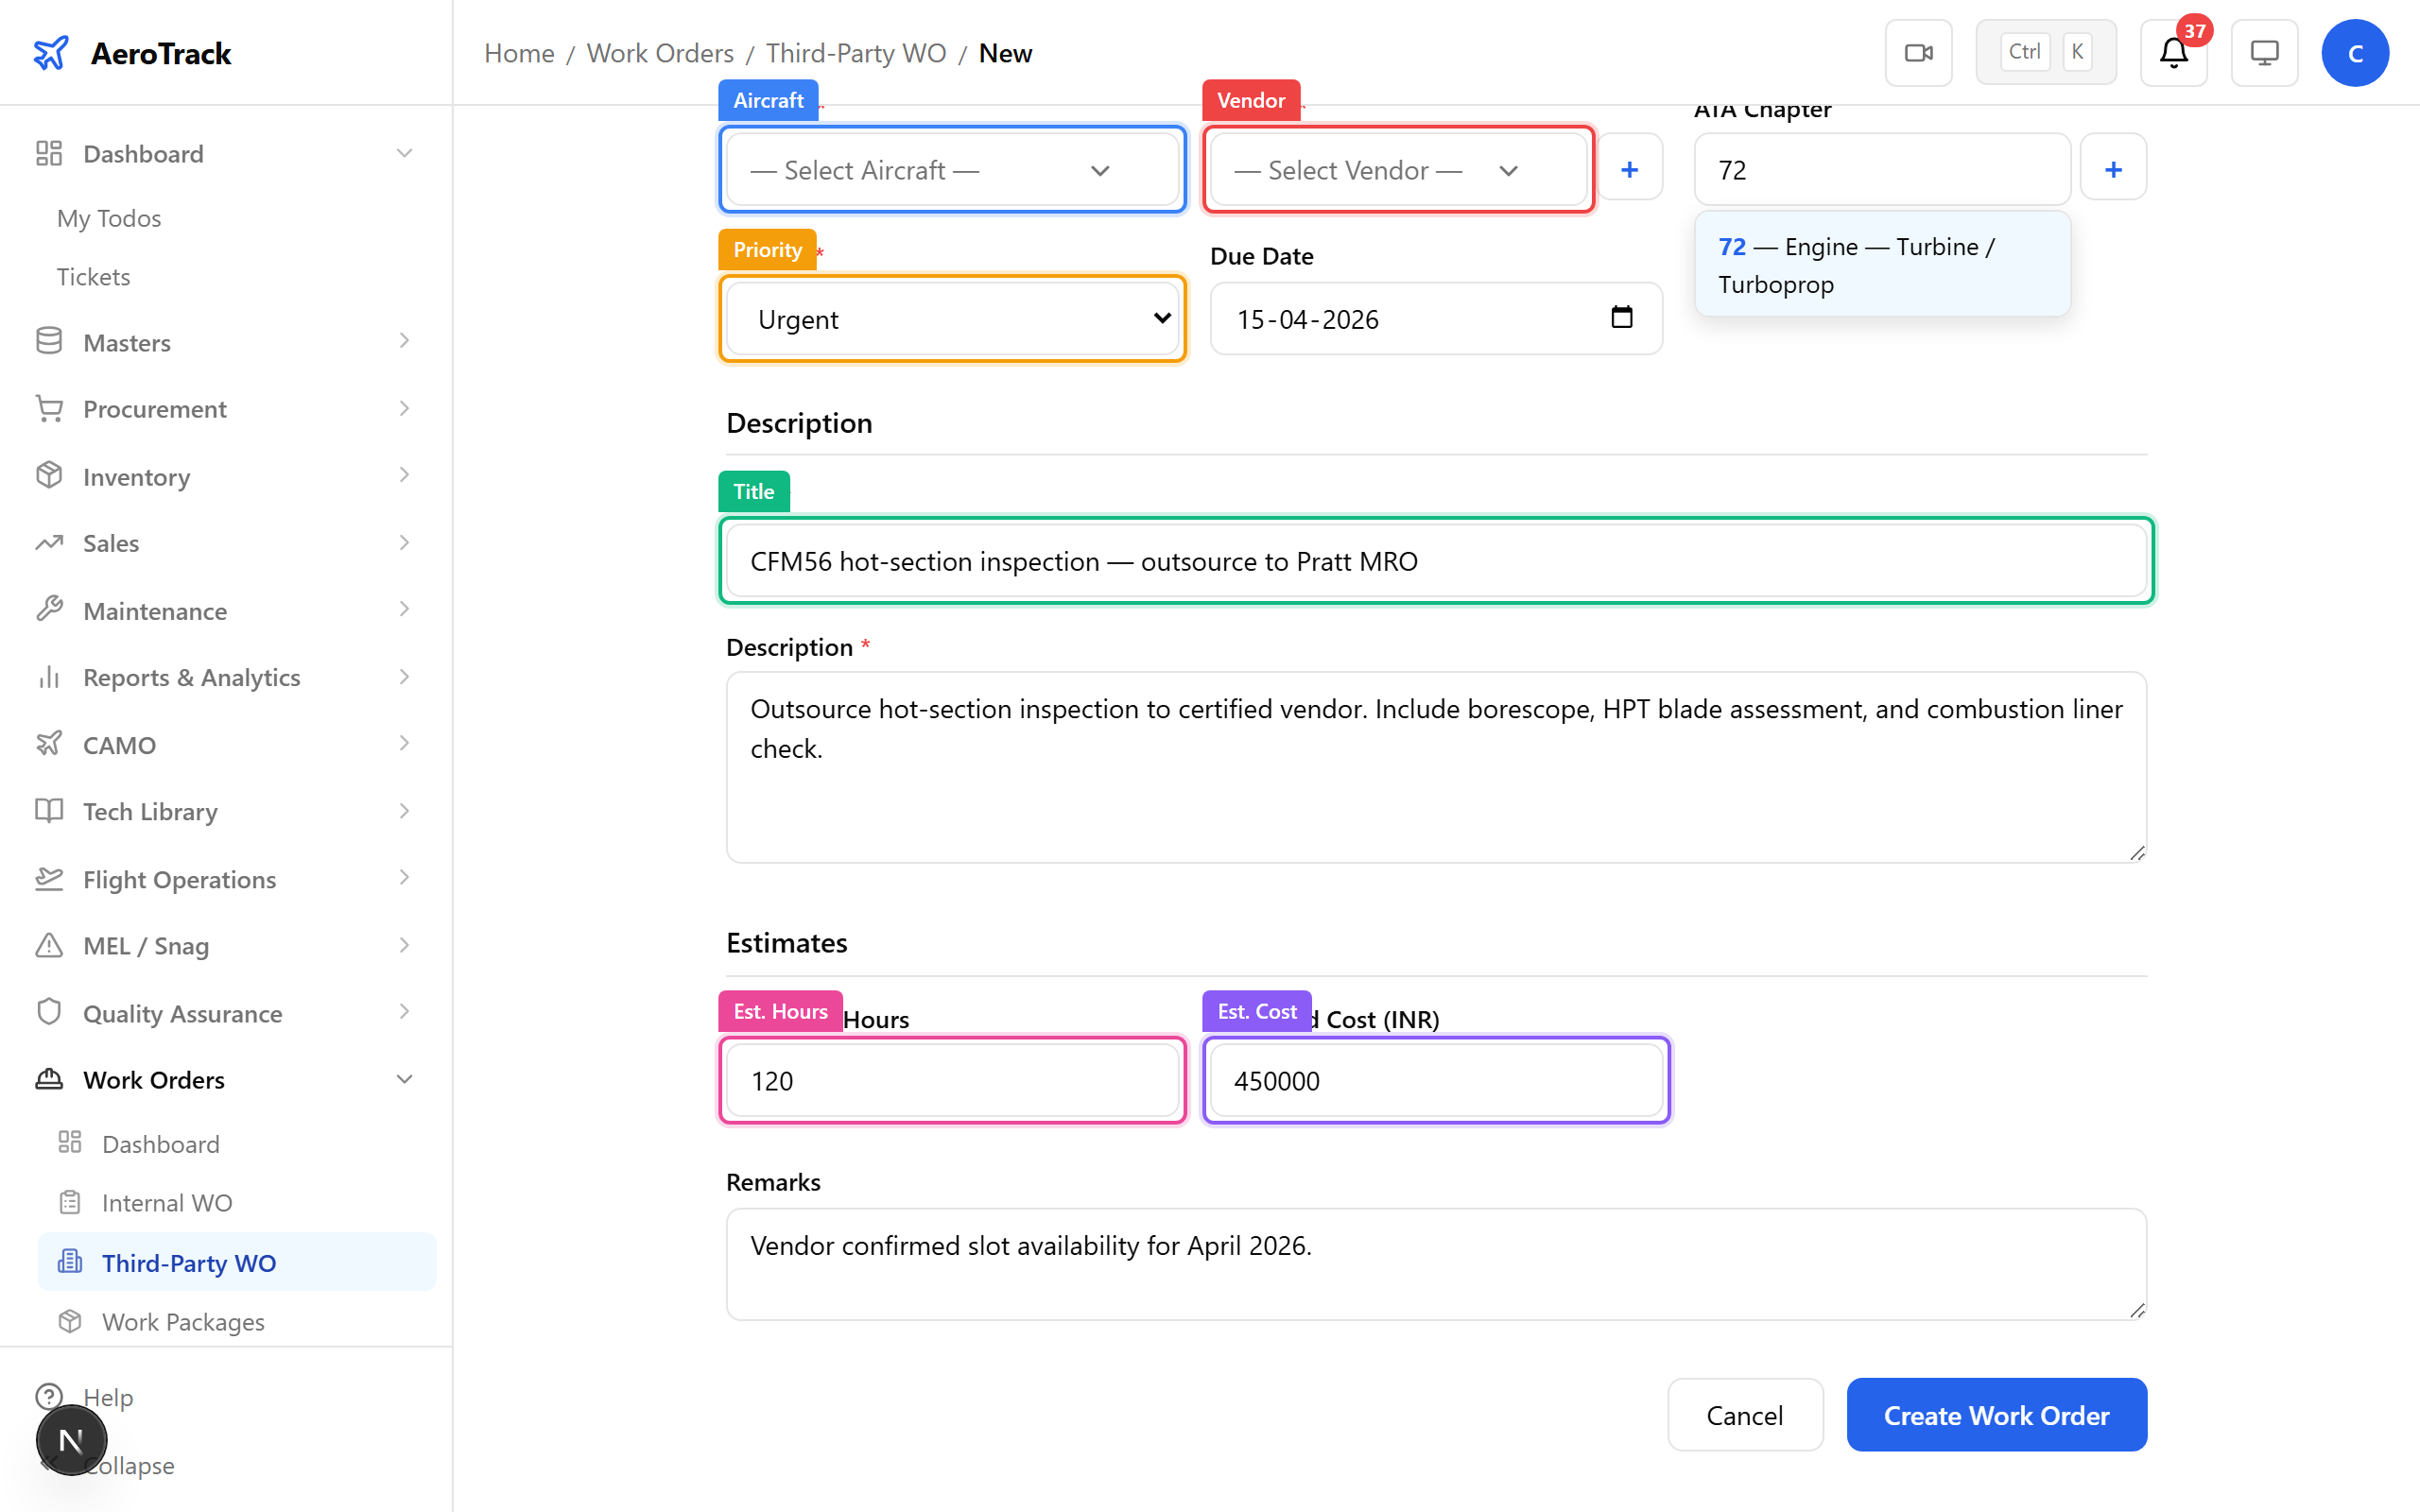
Creating a third-party work order — outsourcing a heavy check.
Step 18 — Third-Party WO Created
The detail page shows the vendor information, job and material sections, and the workflow actions (Send → Acknowledge → Complete → Invoice).
Third-party WO created — tracking outsourced work alongside internal tasks.
6 — Work Packages & PDF Export
Step 19 — Work Packages
Work packages group related work orders for a scheduled maintenance event (e.g. "A-Check March 2026"). Navigate to Packages to see all packages and their WO counts.
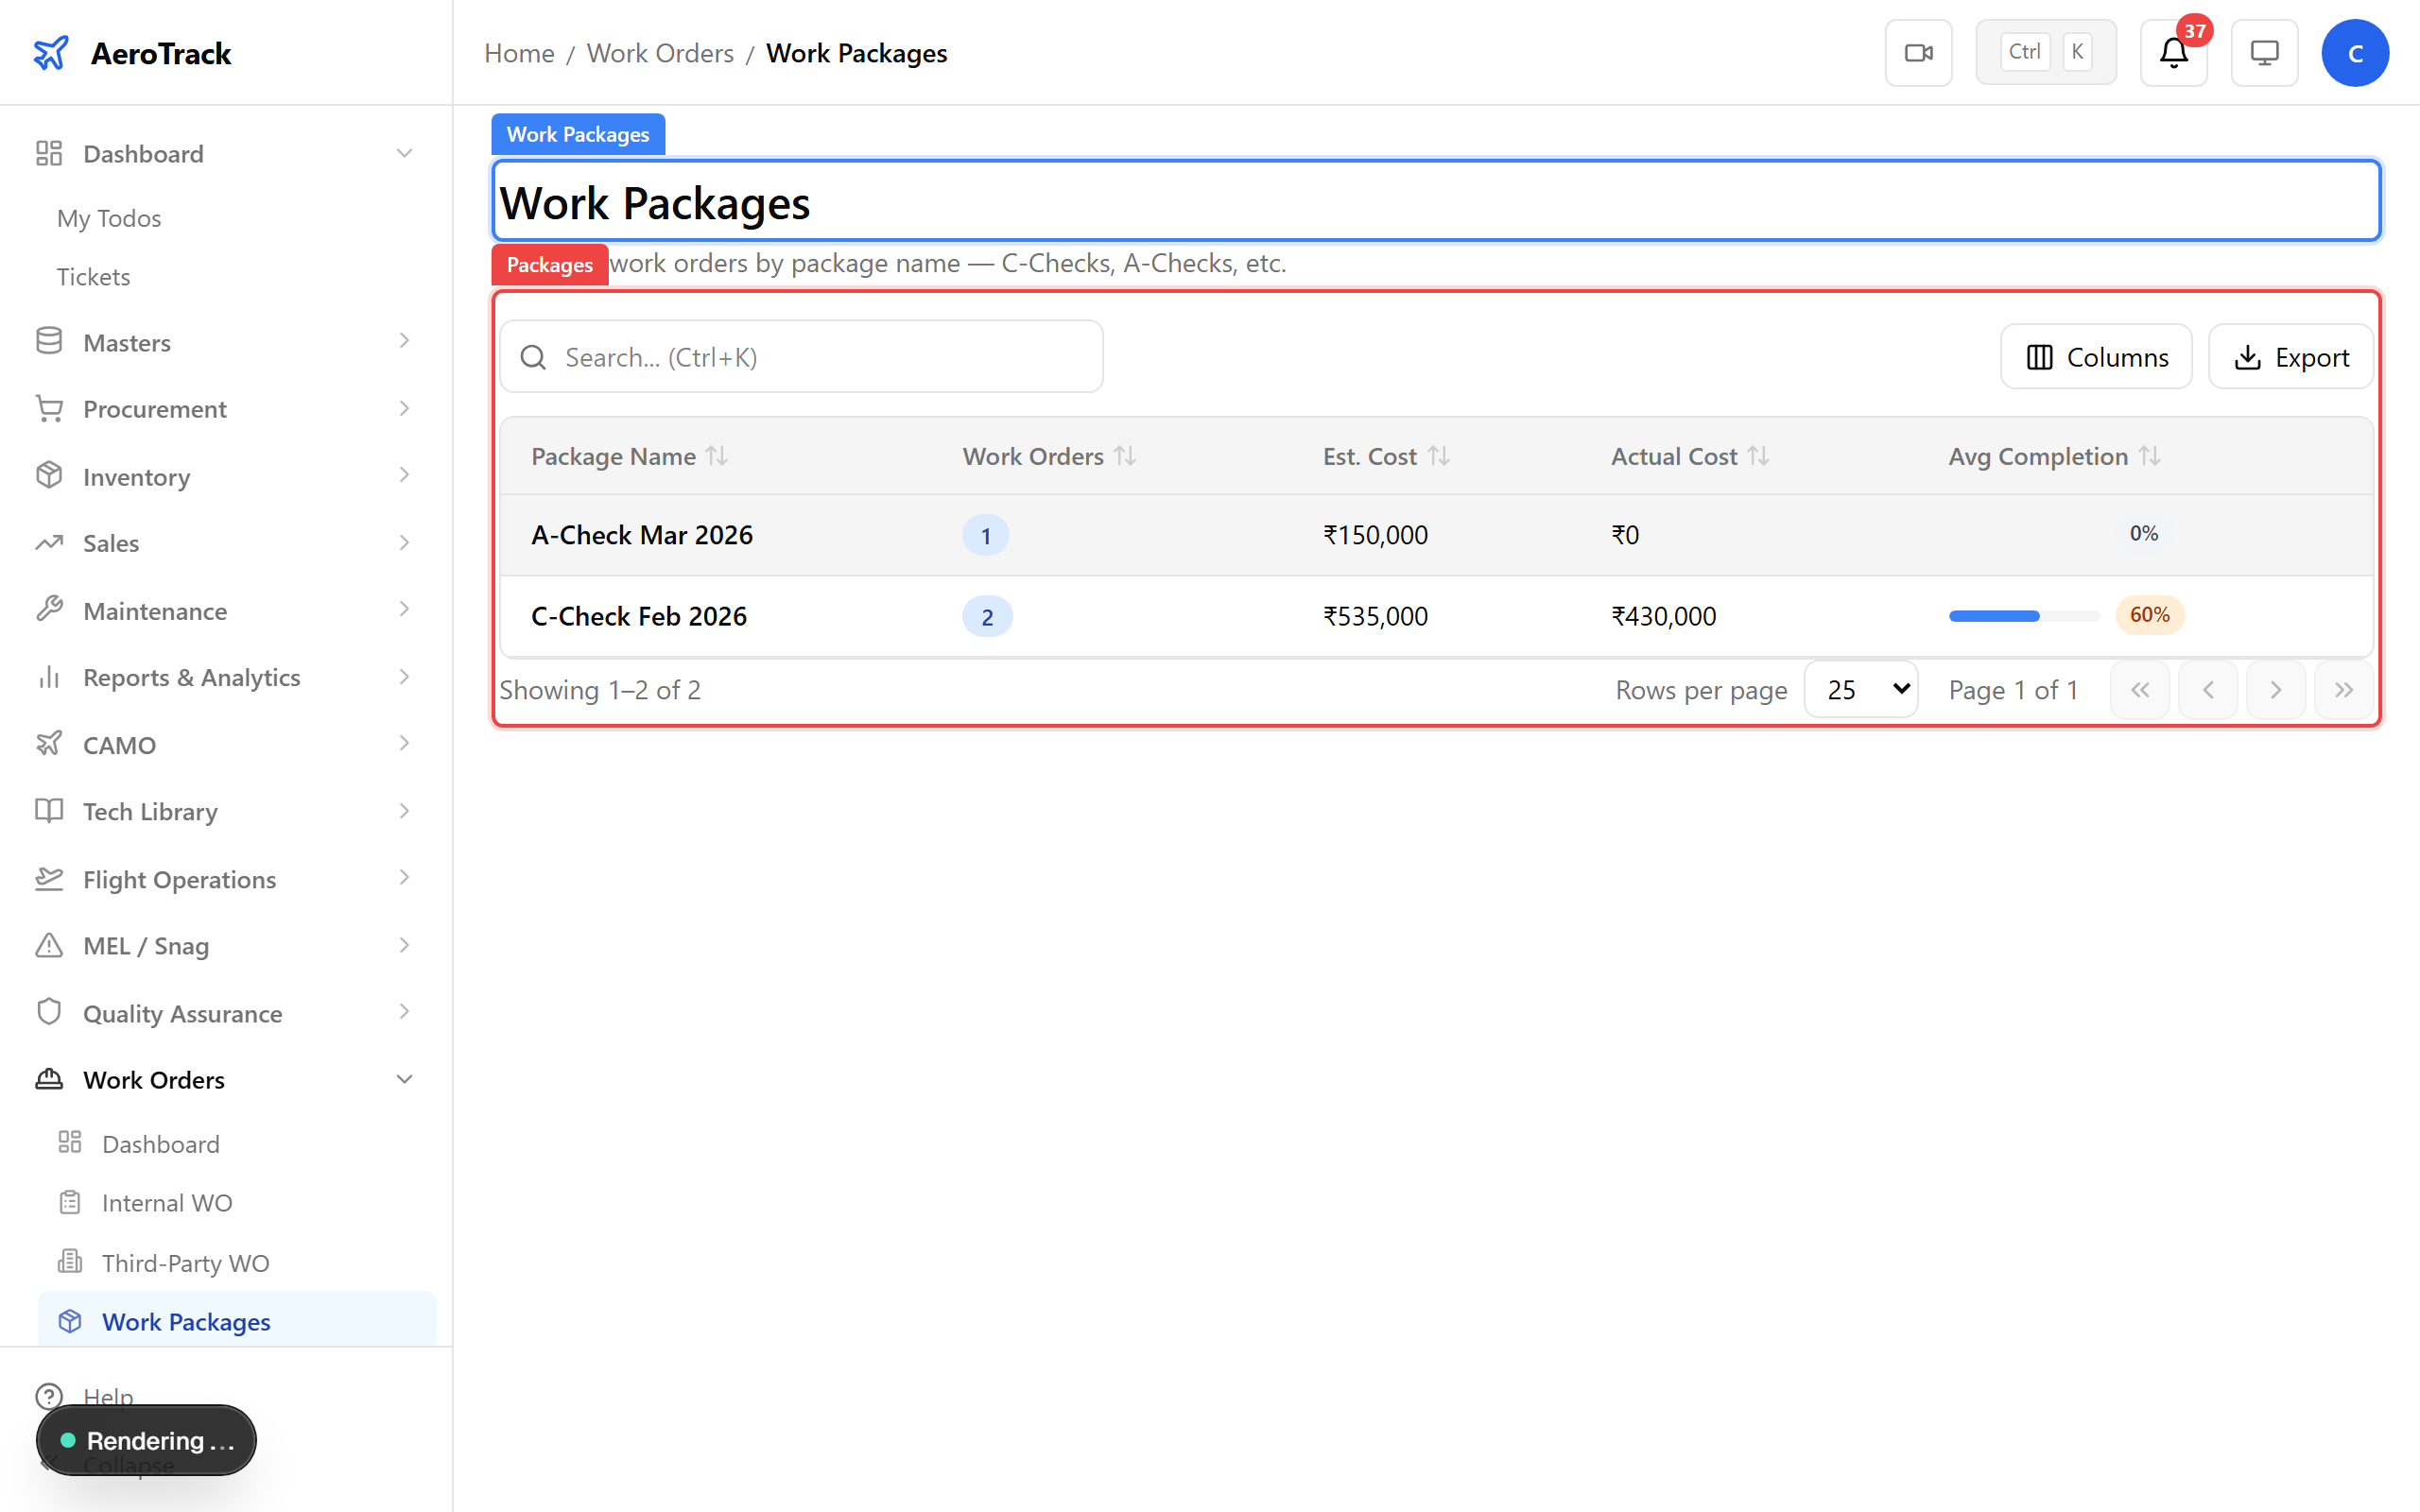
Work packages — grouping related work orders for scheduled maintenance events.
Step 20 — Export as PDF
On any WO detail page, click the Export PDF button to generate a printable PDF with WO details, job list, materials, and sign-off section.
Export work order as PDF — for regulatory filing and shop floor use.