Open your browser and navigate to your AeroTrack instance. Enter your email and password, then click Sign In. Your organisation admin will have provided these credentials.
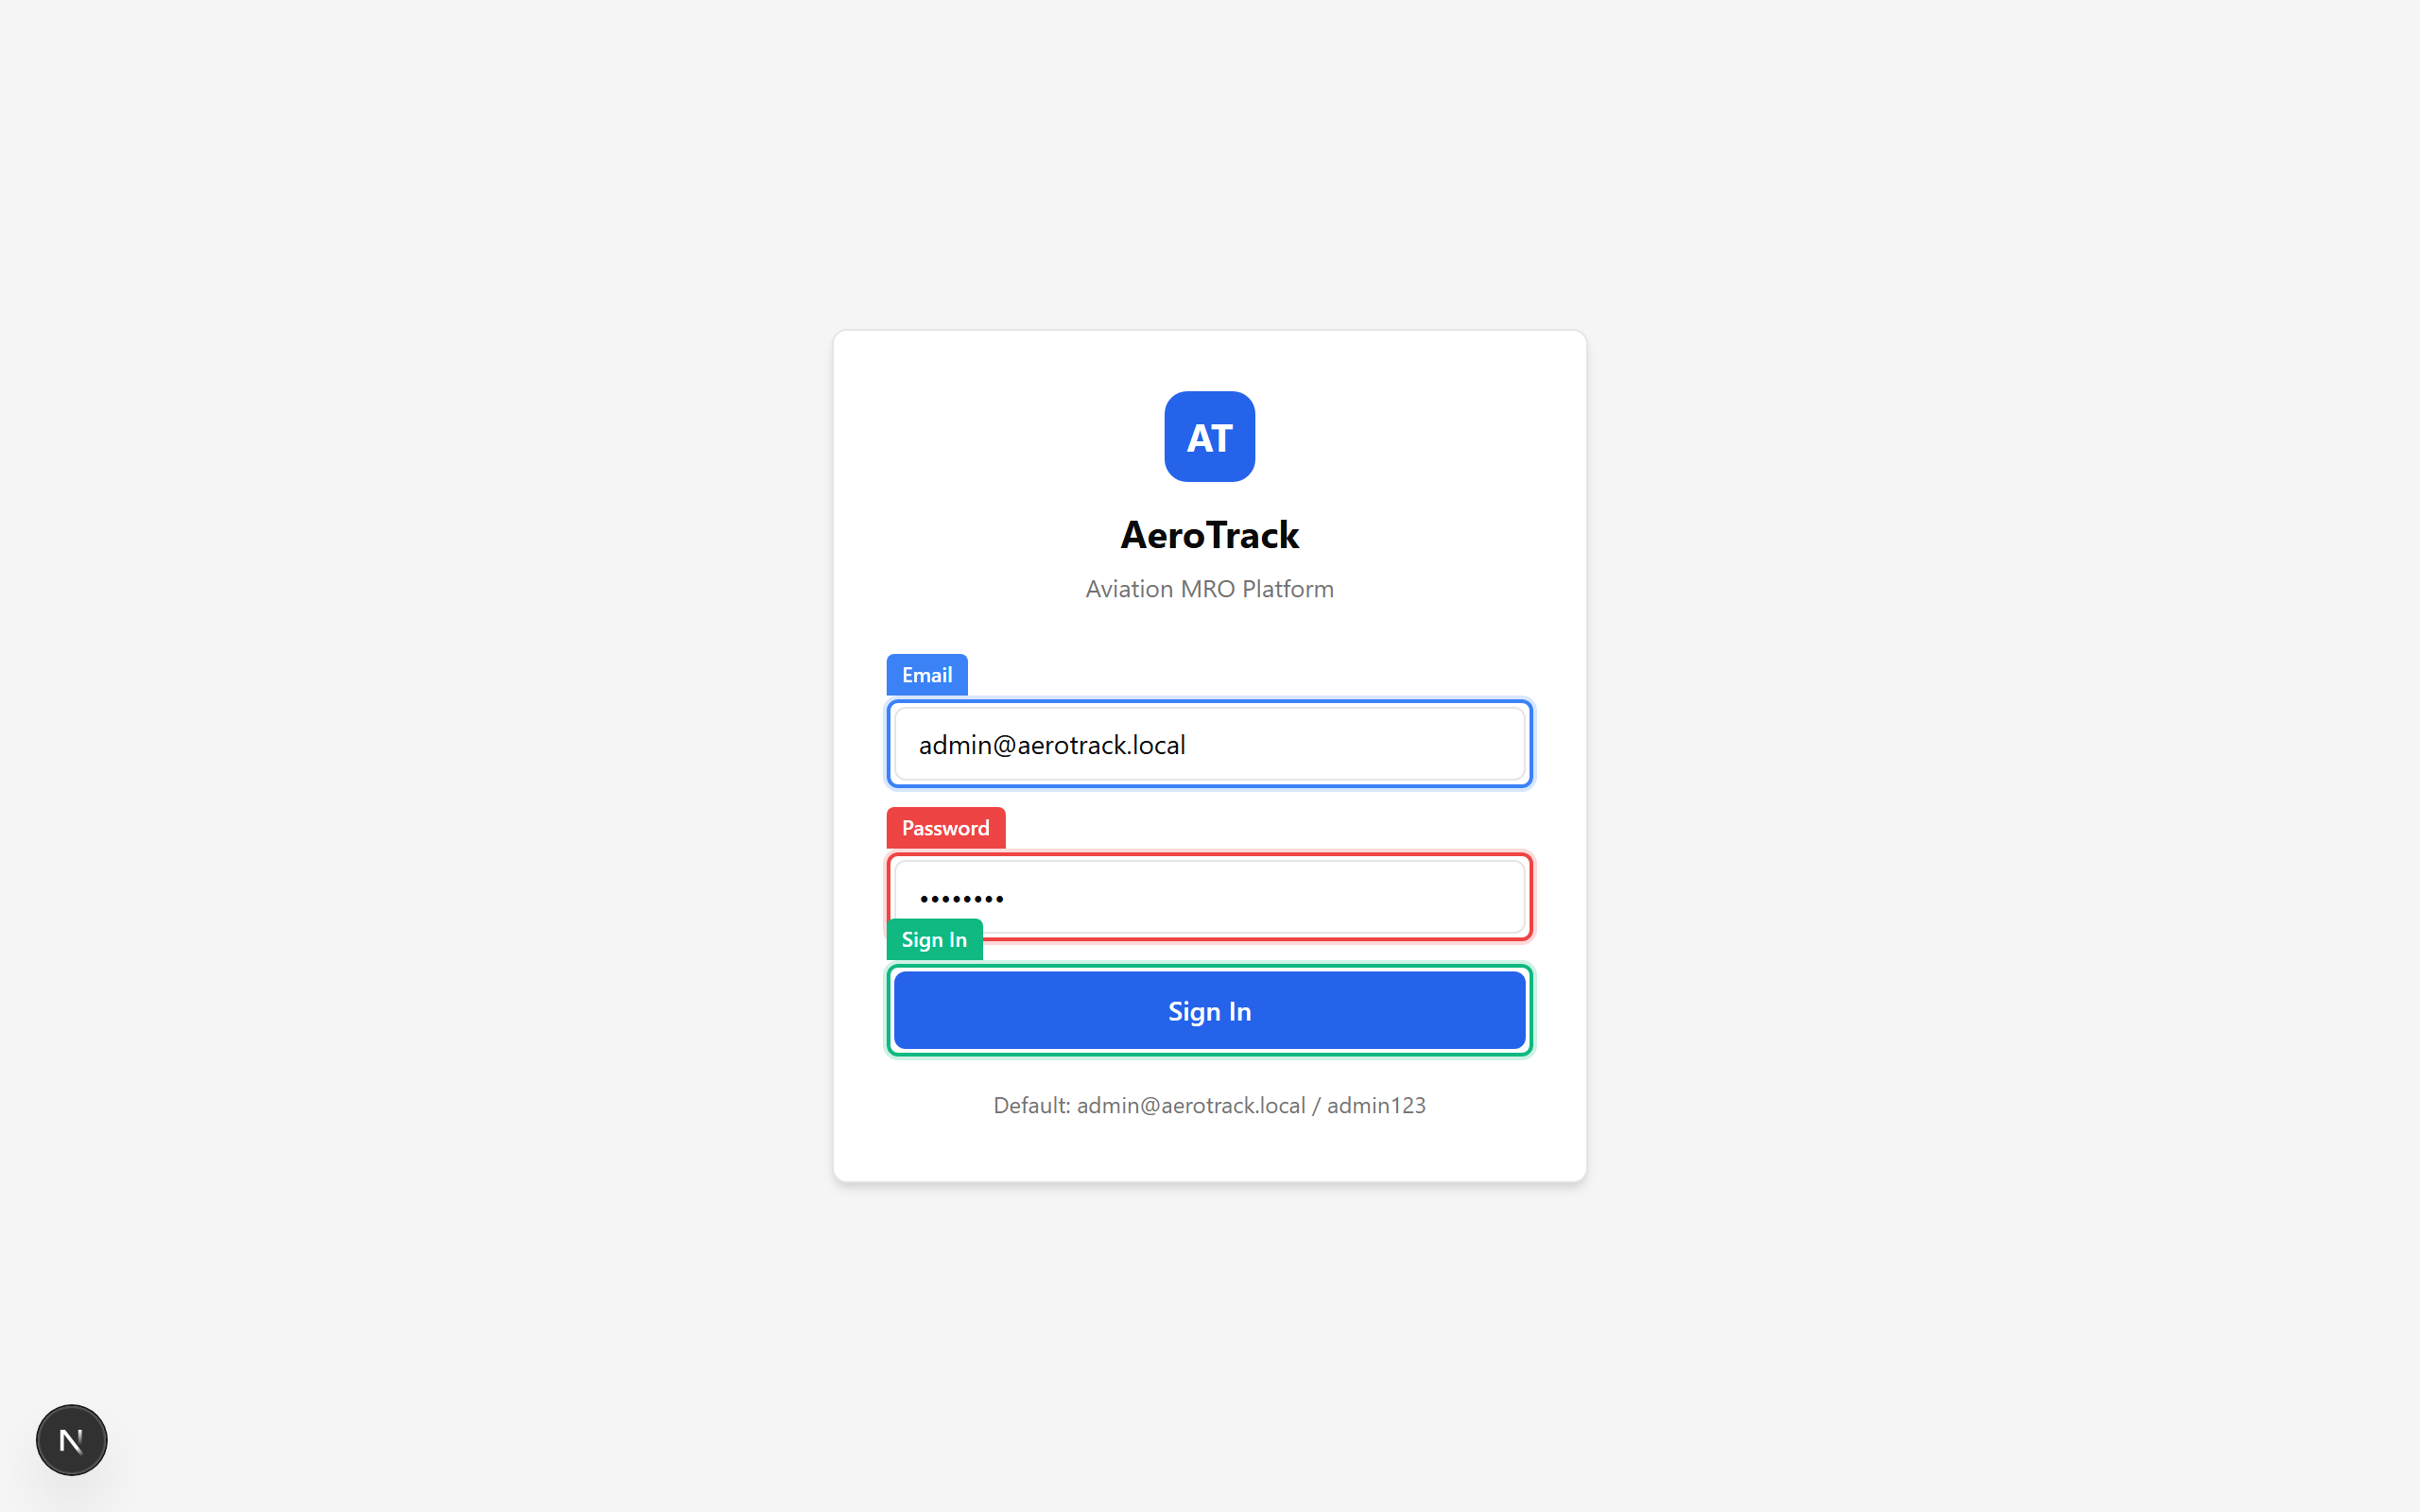
▲ The login page — enter your email and password. If your organisation uses SSO, you'll see a separate button below the form.
After login you land on the dashboard. What you see here depends on your role — admins get a high-level overview with KPI cards, the sidebar on the left, and notifications in the top bar.
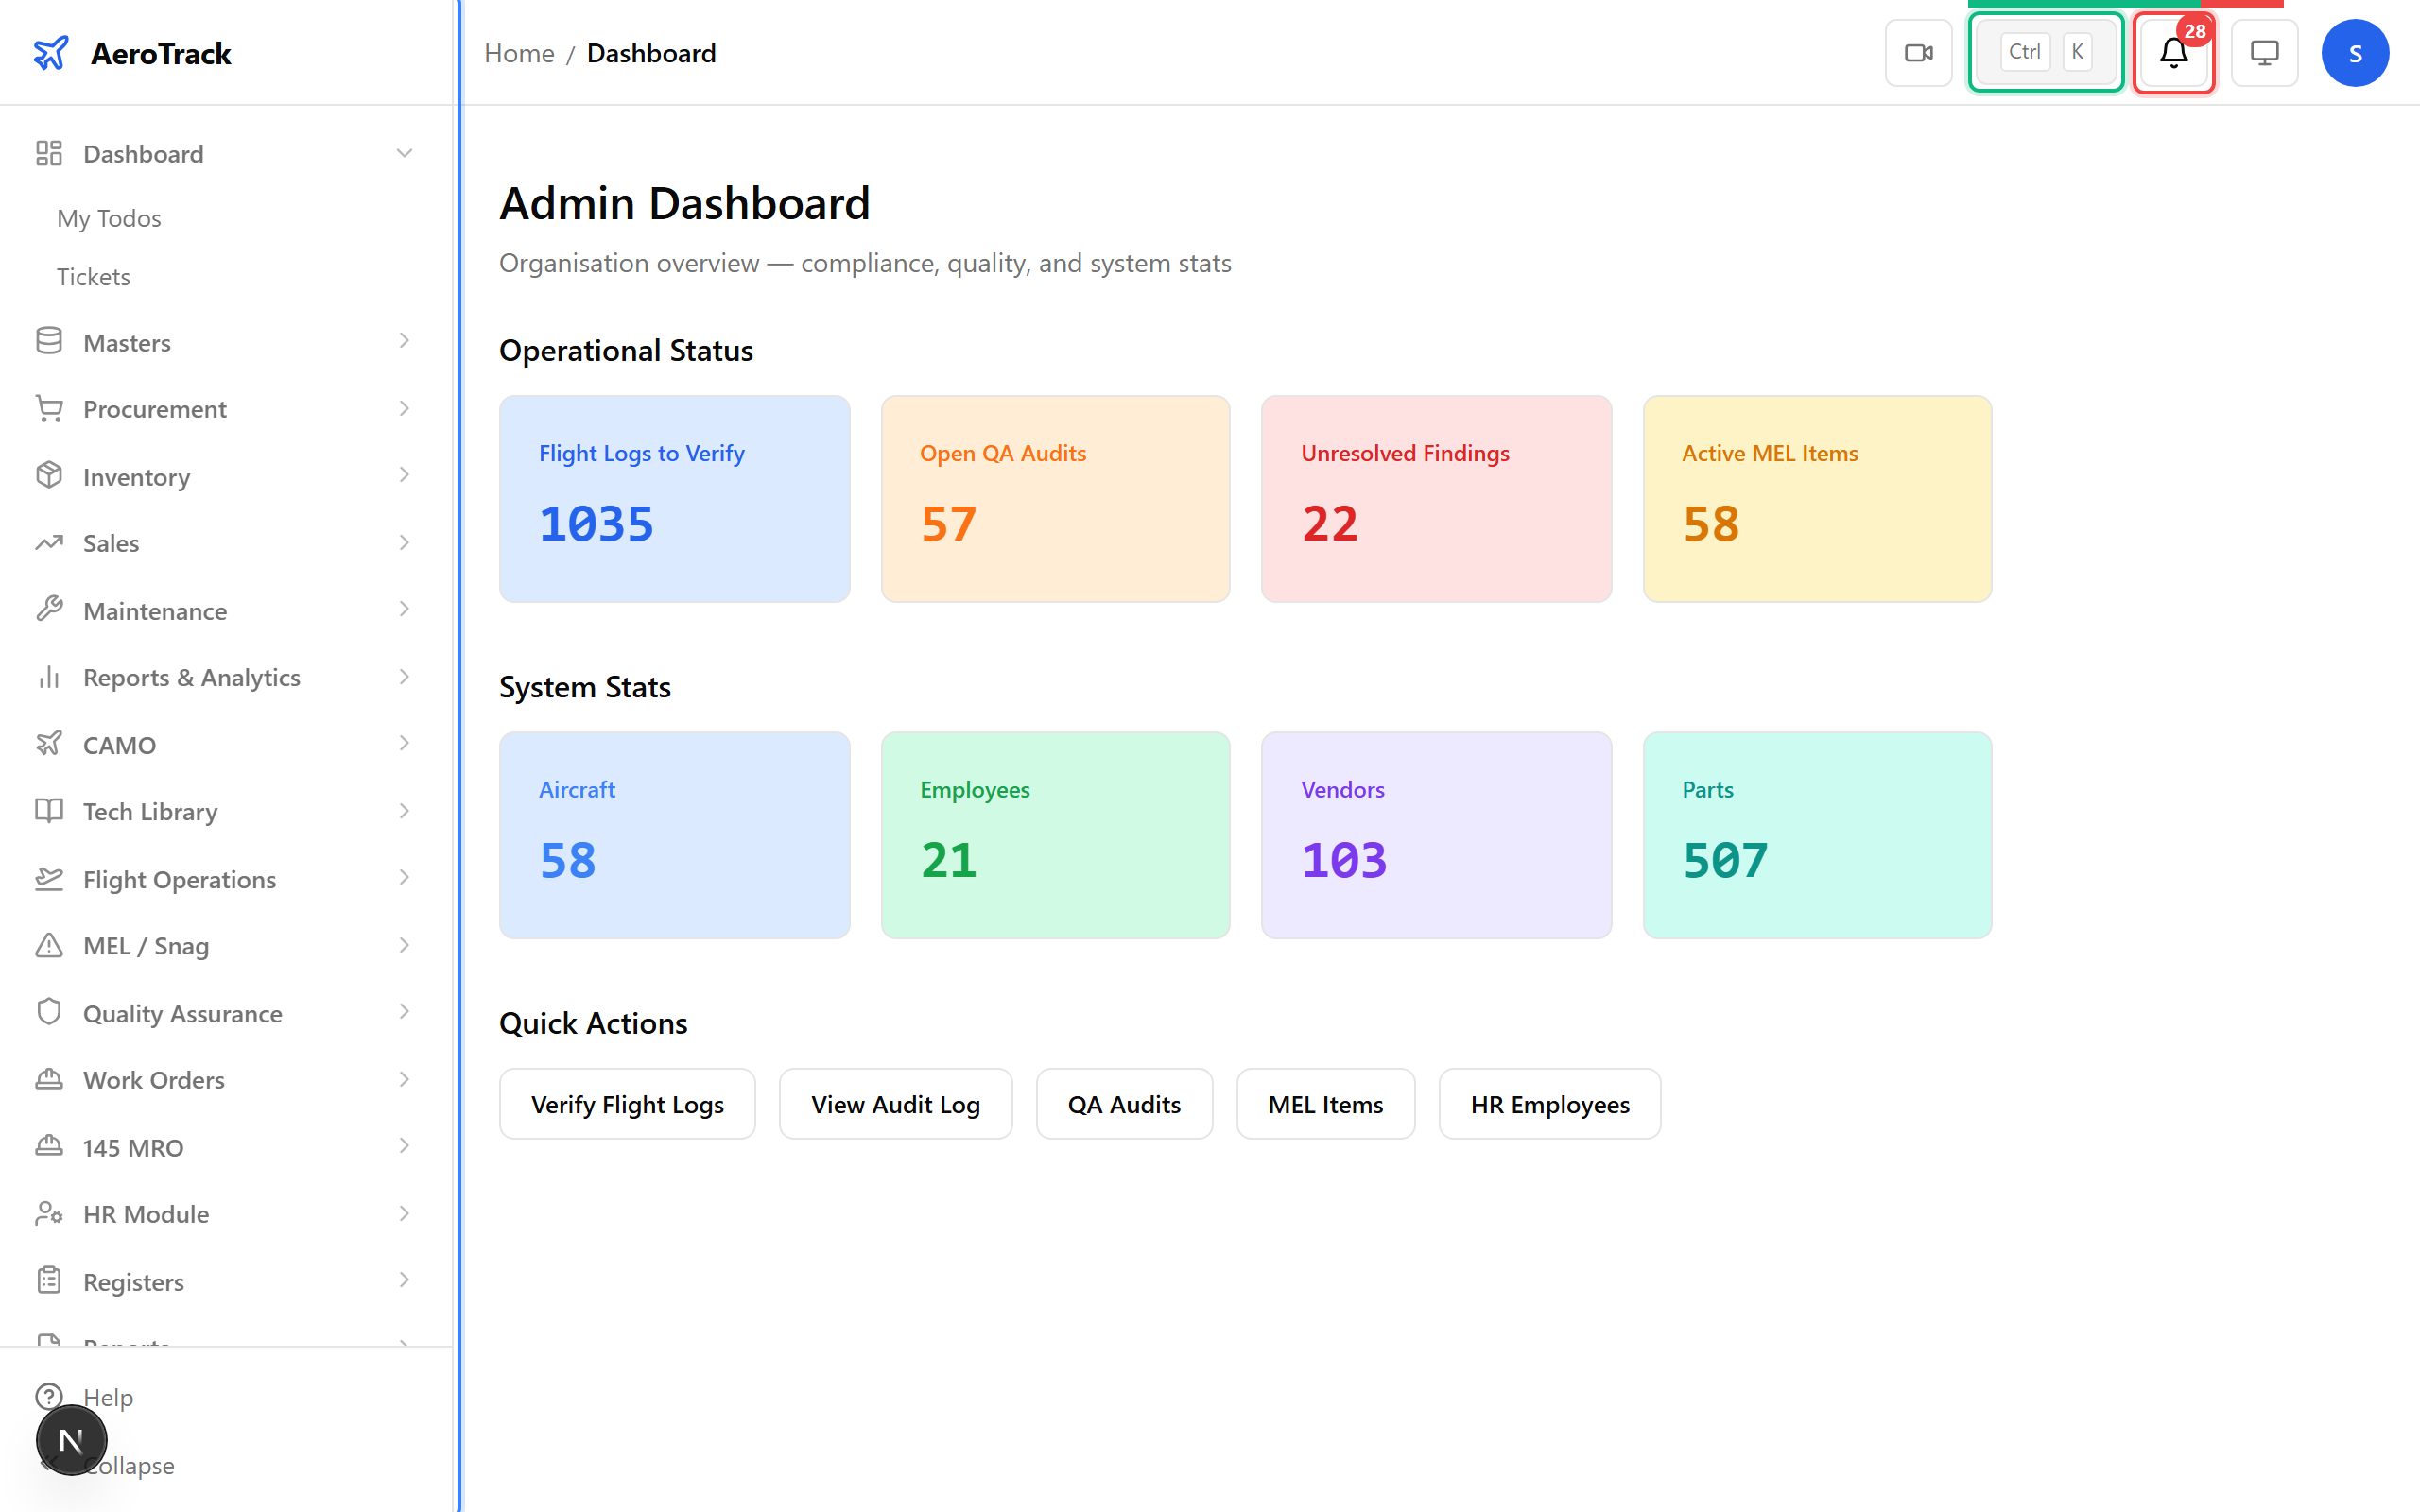
▲ The admin dashboard — sidebar navigation on the left, notification bell and quick-search hint (Ctrl+K) in the header. The KPI cards update in real time.
The sidebar groups every AeroTrack module — Dashboard, CAMO, Masters, Procurement, Inventory, Sales, Maintenance, Reports, HR, Quality, and more. Click a group to expand it and see its sub-pages. Press Ctrl+B to collapse the sidebar for more screen space.
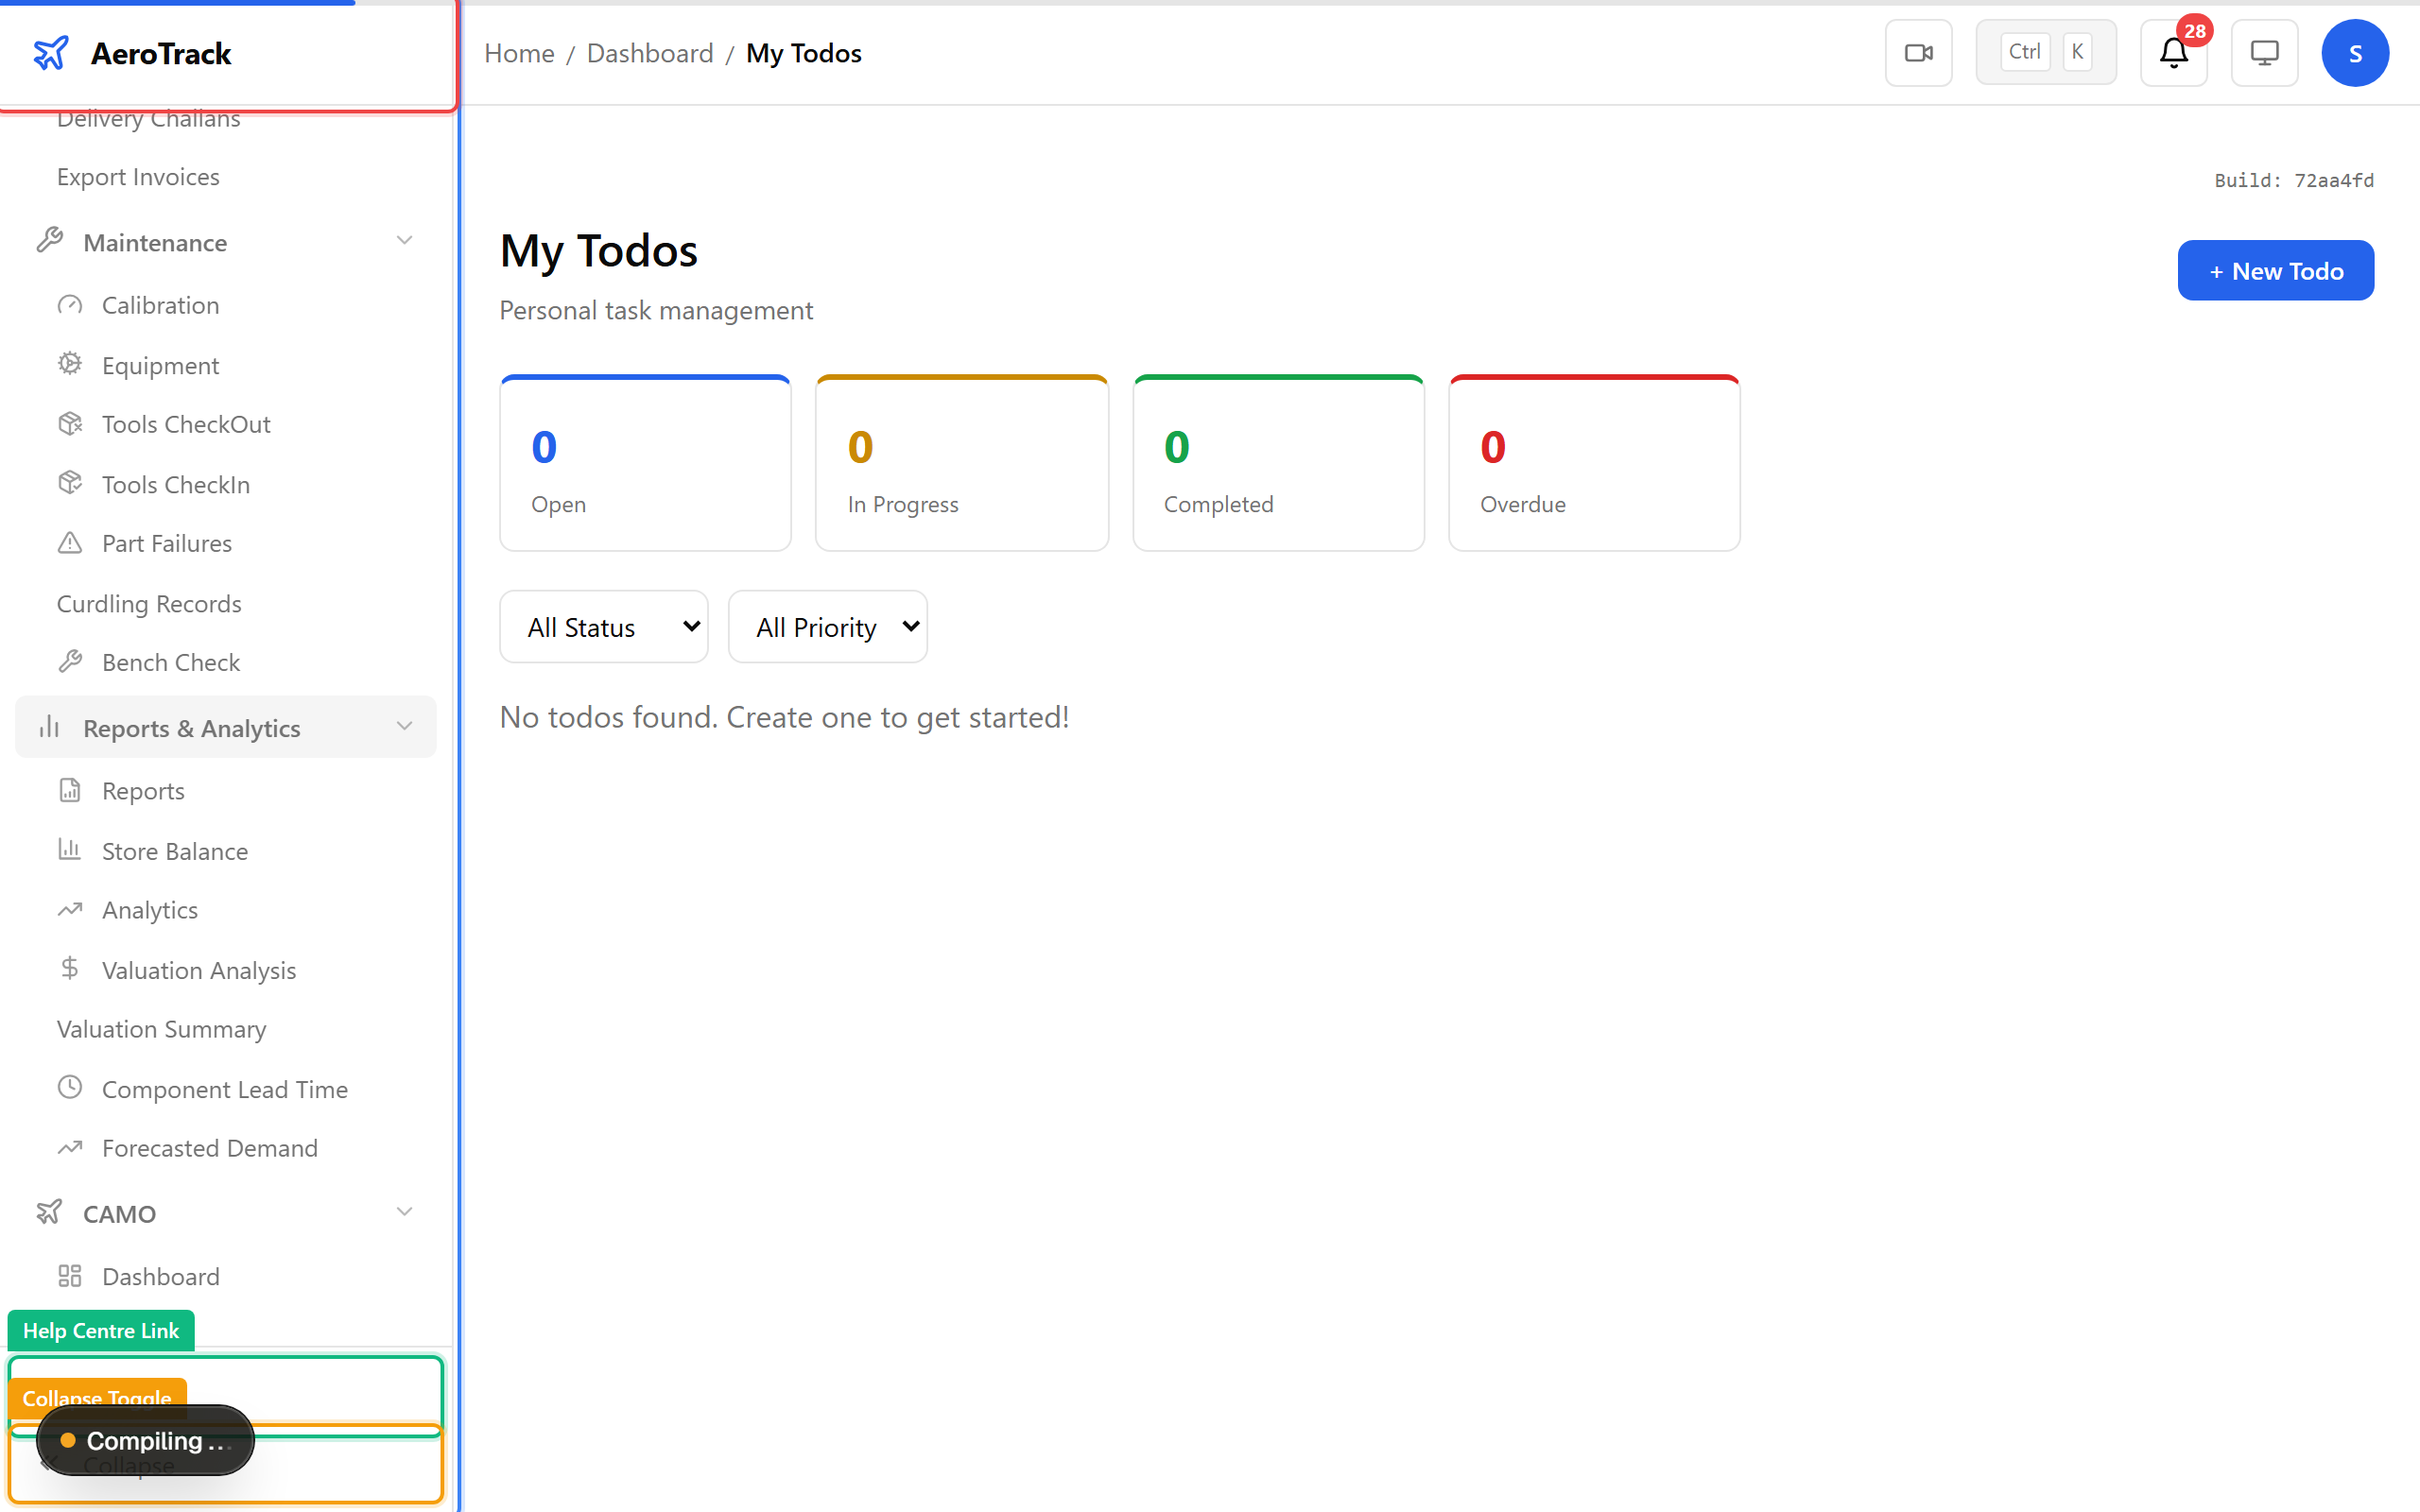
▲ The sidebar with several groups expanded. Your role determines which groups are visible — a technician won't see Admin or HR. The help link at the bottom opens these guides.
Click the bell icon in the top-right to open the notification panel. It shows work order updates, flight log alerts, inspection reminders, and more. The red badge shows your unread count (polled every 60 seconds). Click any notification to jump straight to the relevant page.
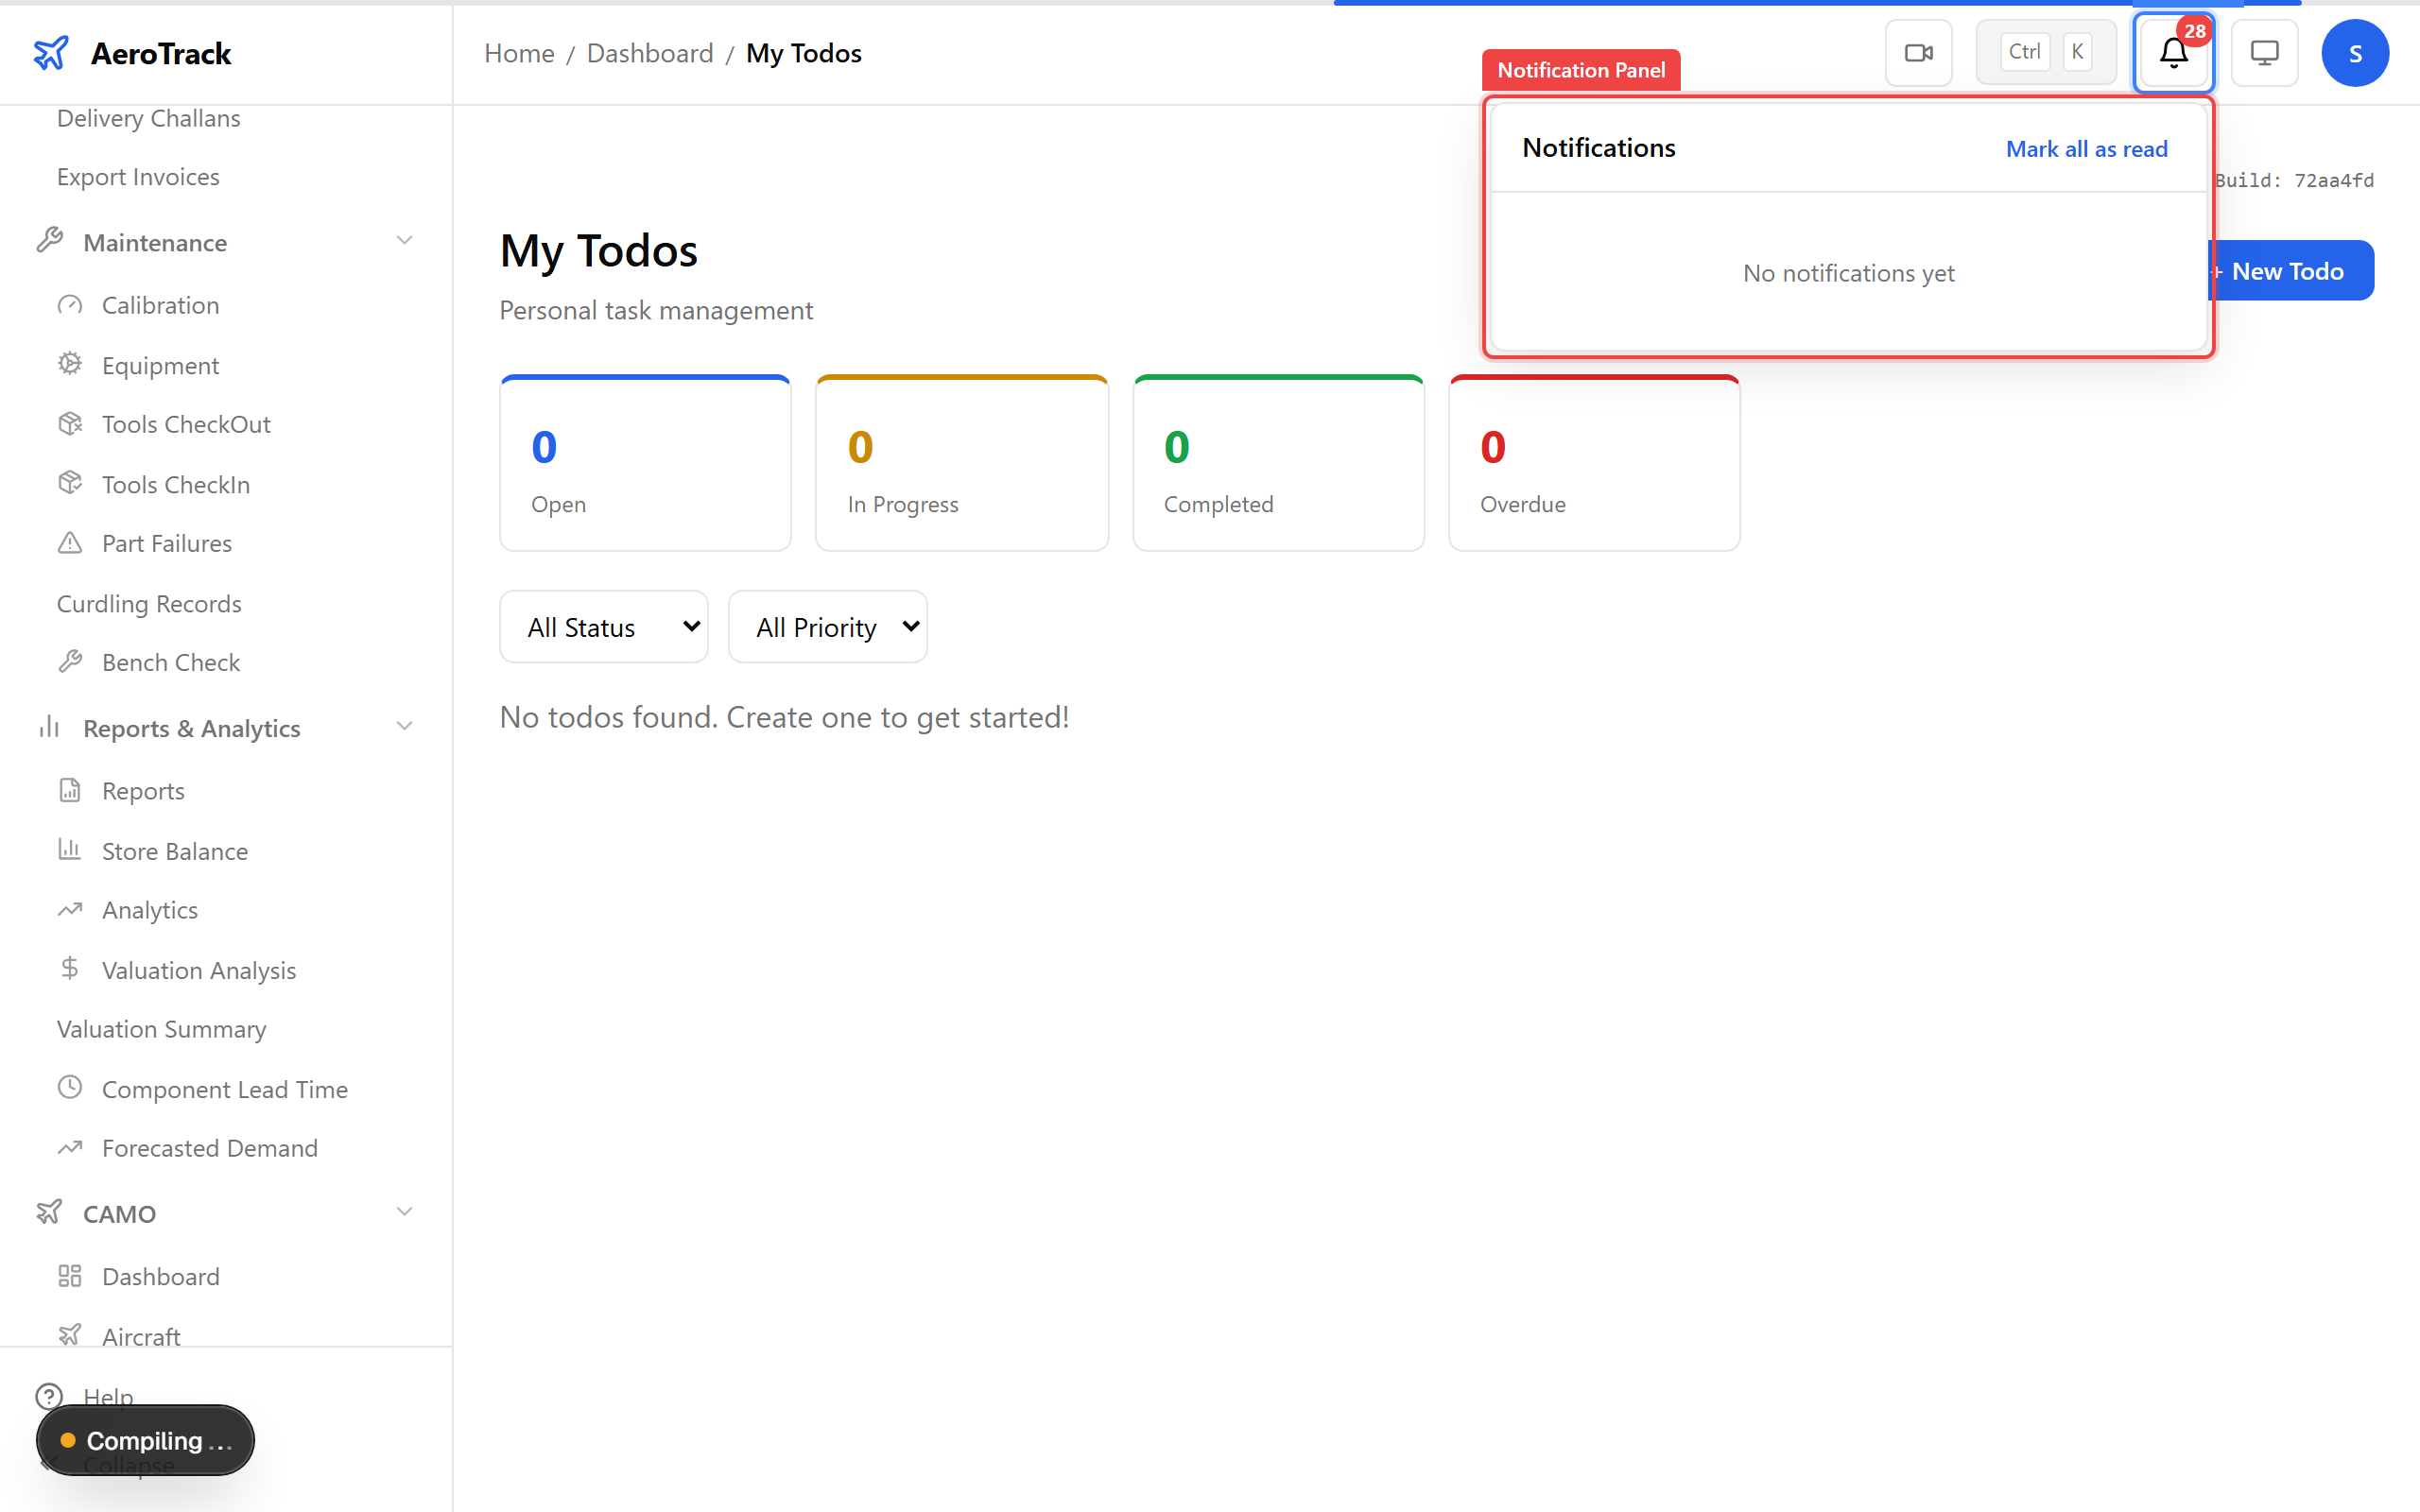
▲ The notification panel — each item shows a type icon, message, and time ago. Click "Mark all read" to clear the badge.
When you navigate to a detail page (a specific work order, aircraft, or part), the header shows breadcrumbs so you always know where you are. Click any segment to jump back up the hierarchy.
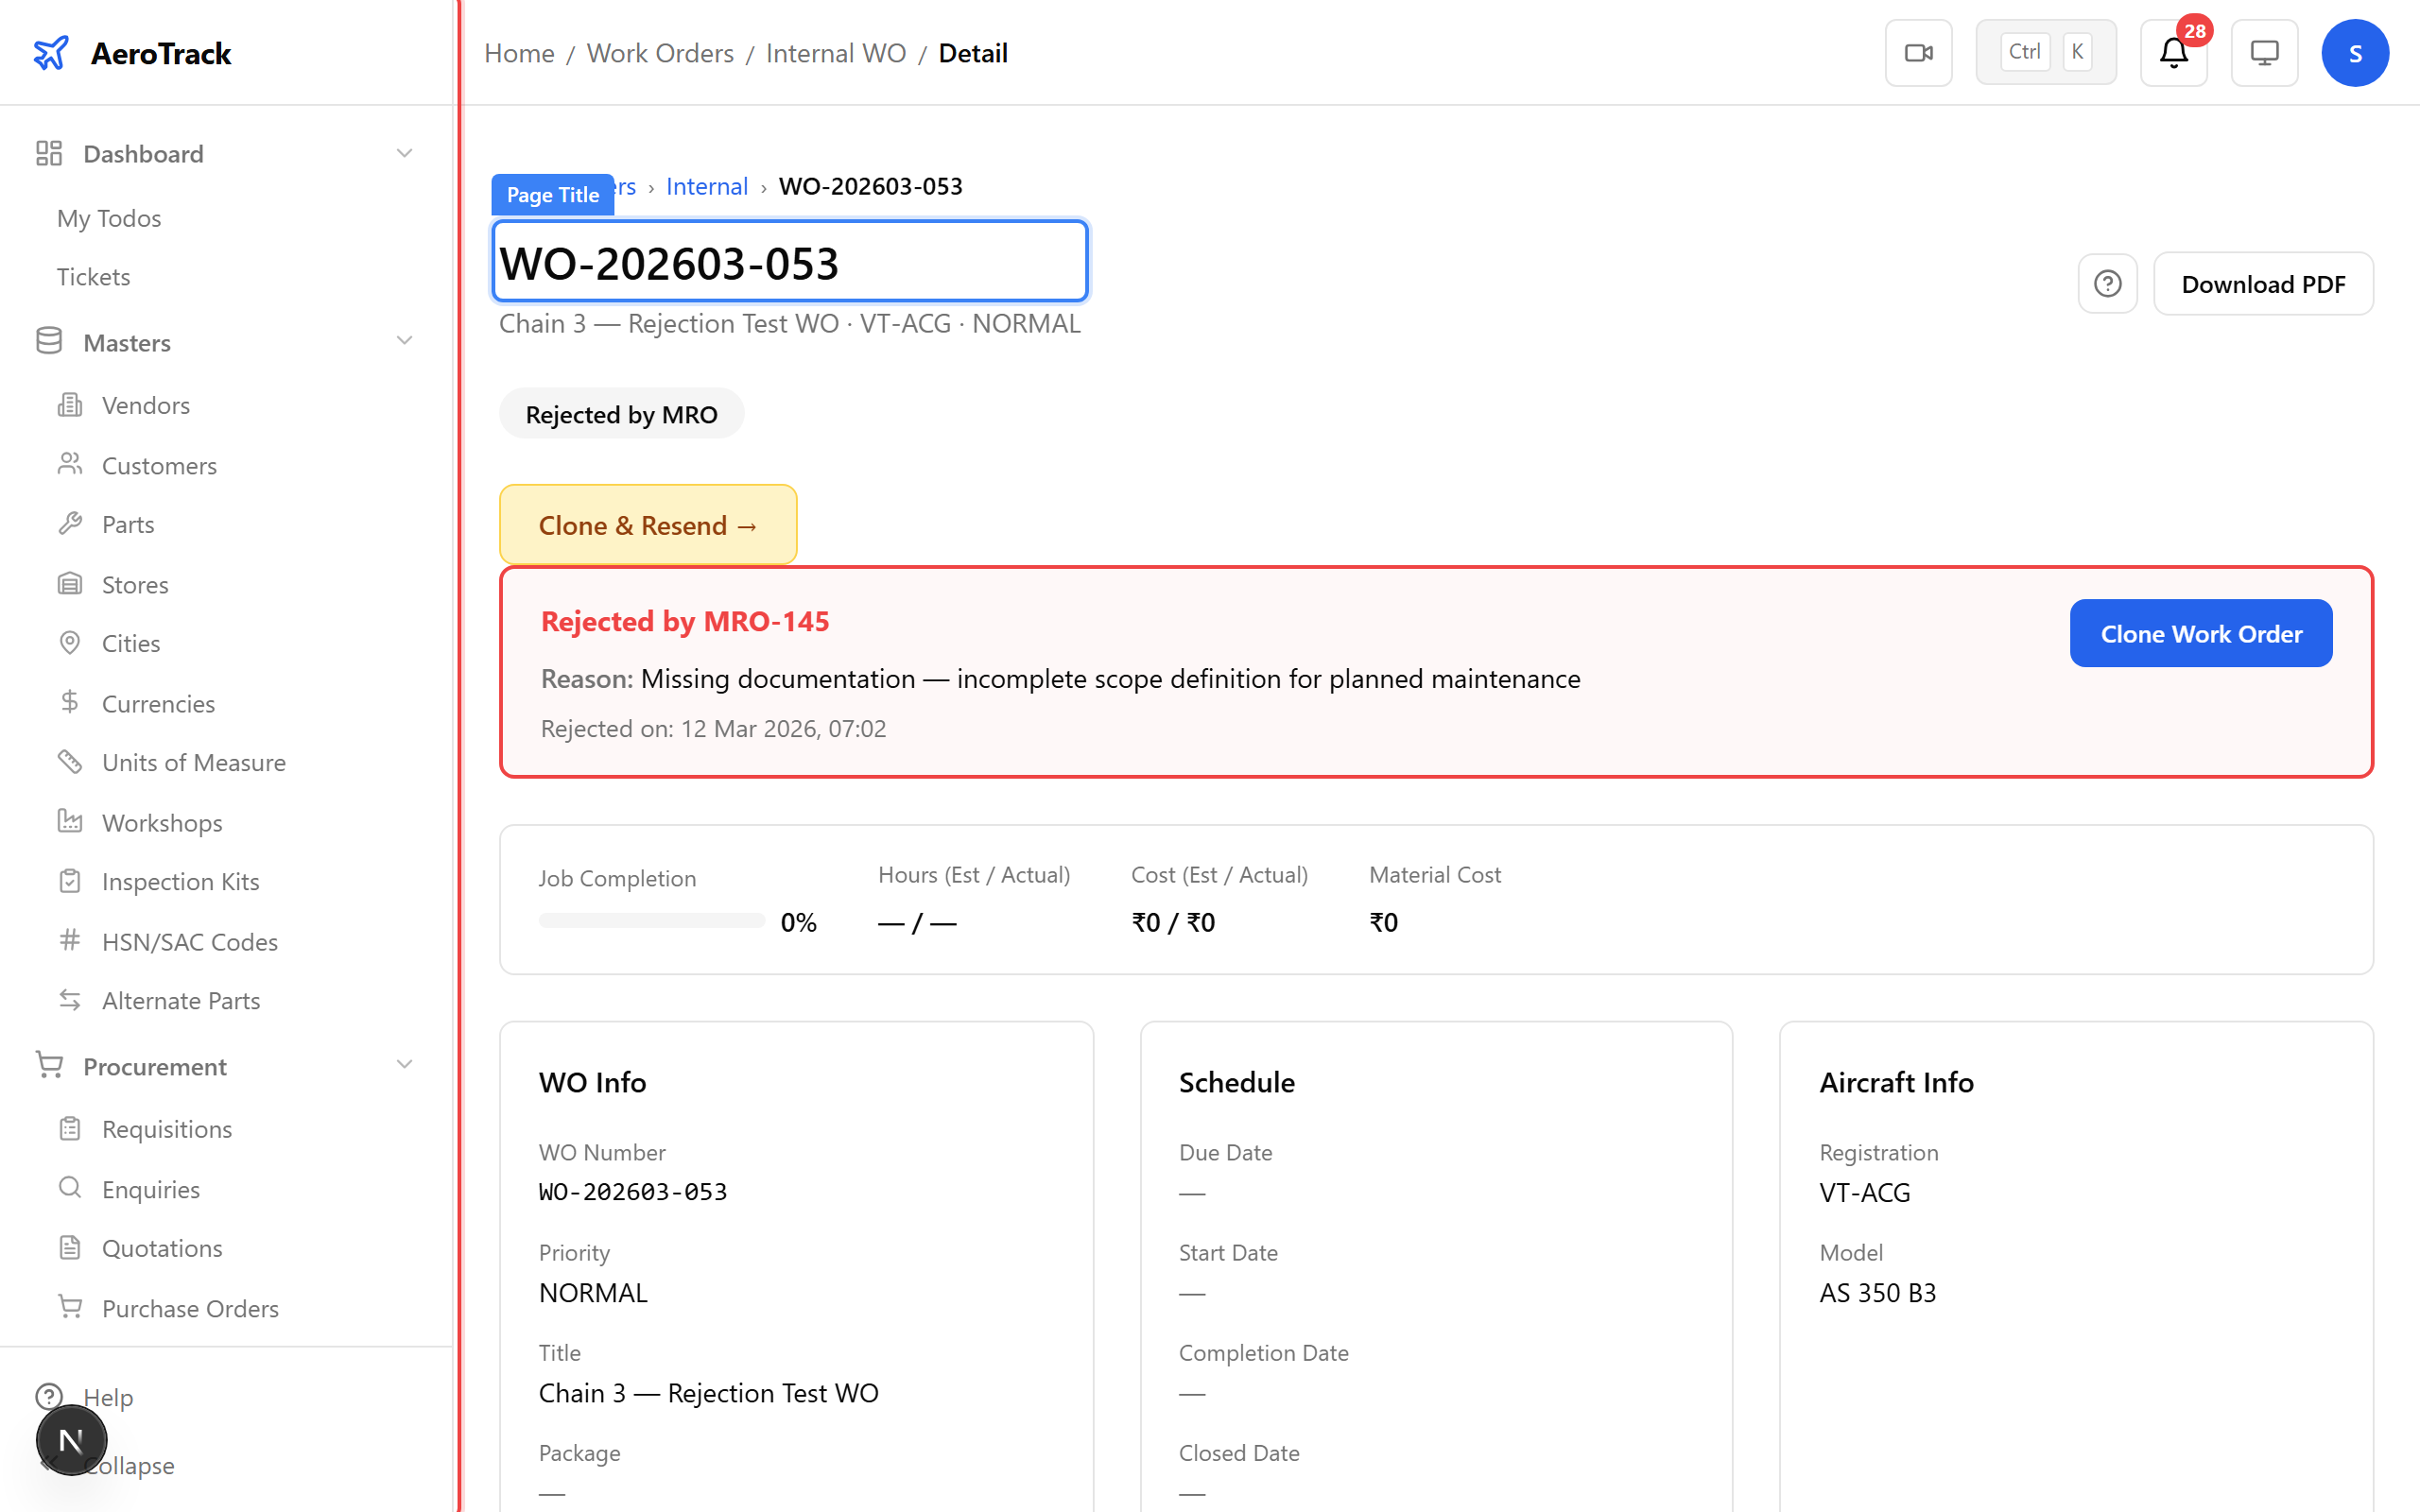
▲ A detail page with breadcrumbs — you can see the trail from Dashboard to the current record. The page title sits prominently below.
Navigate to Dashboard → My Todos to see tasks assigned to you. These are generated automatically — when a work order needs sign-off, an inspection is due, or a finding needs your attention, it appears here.
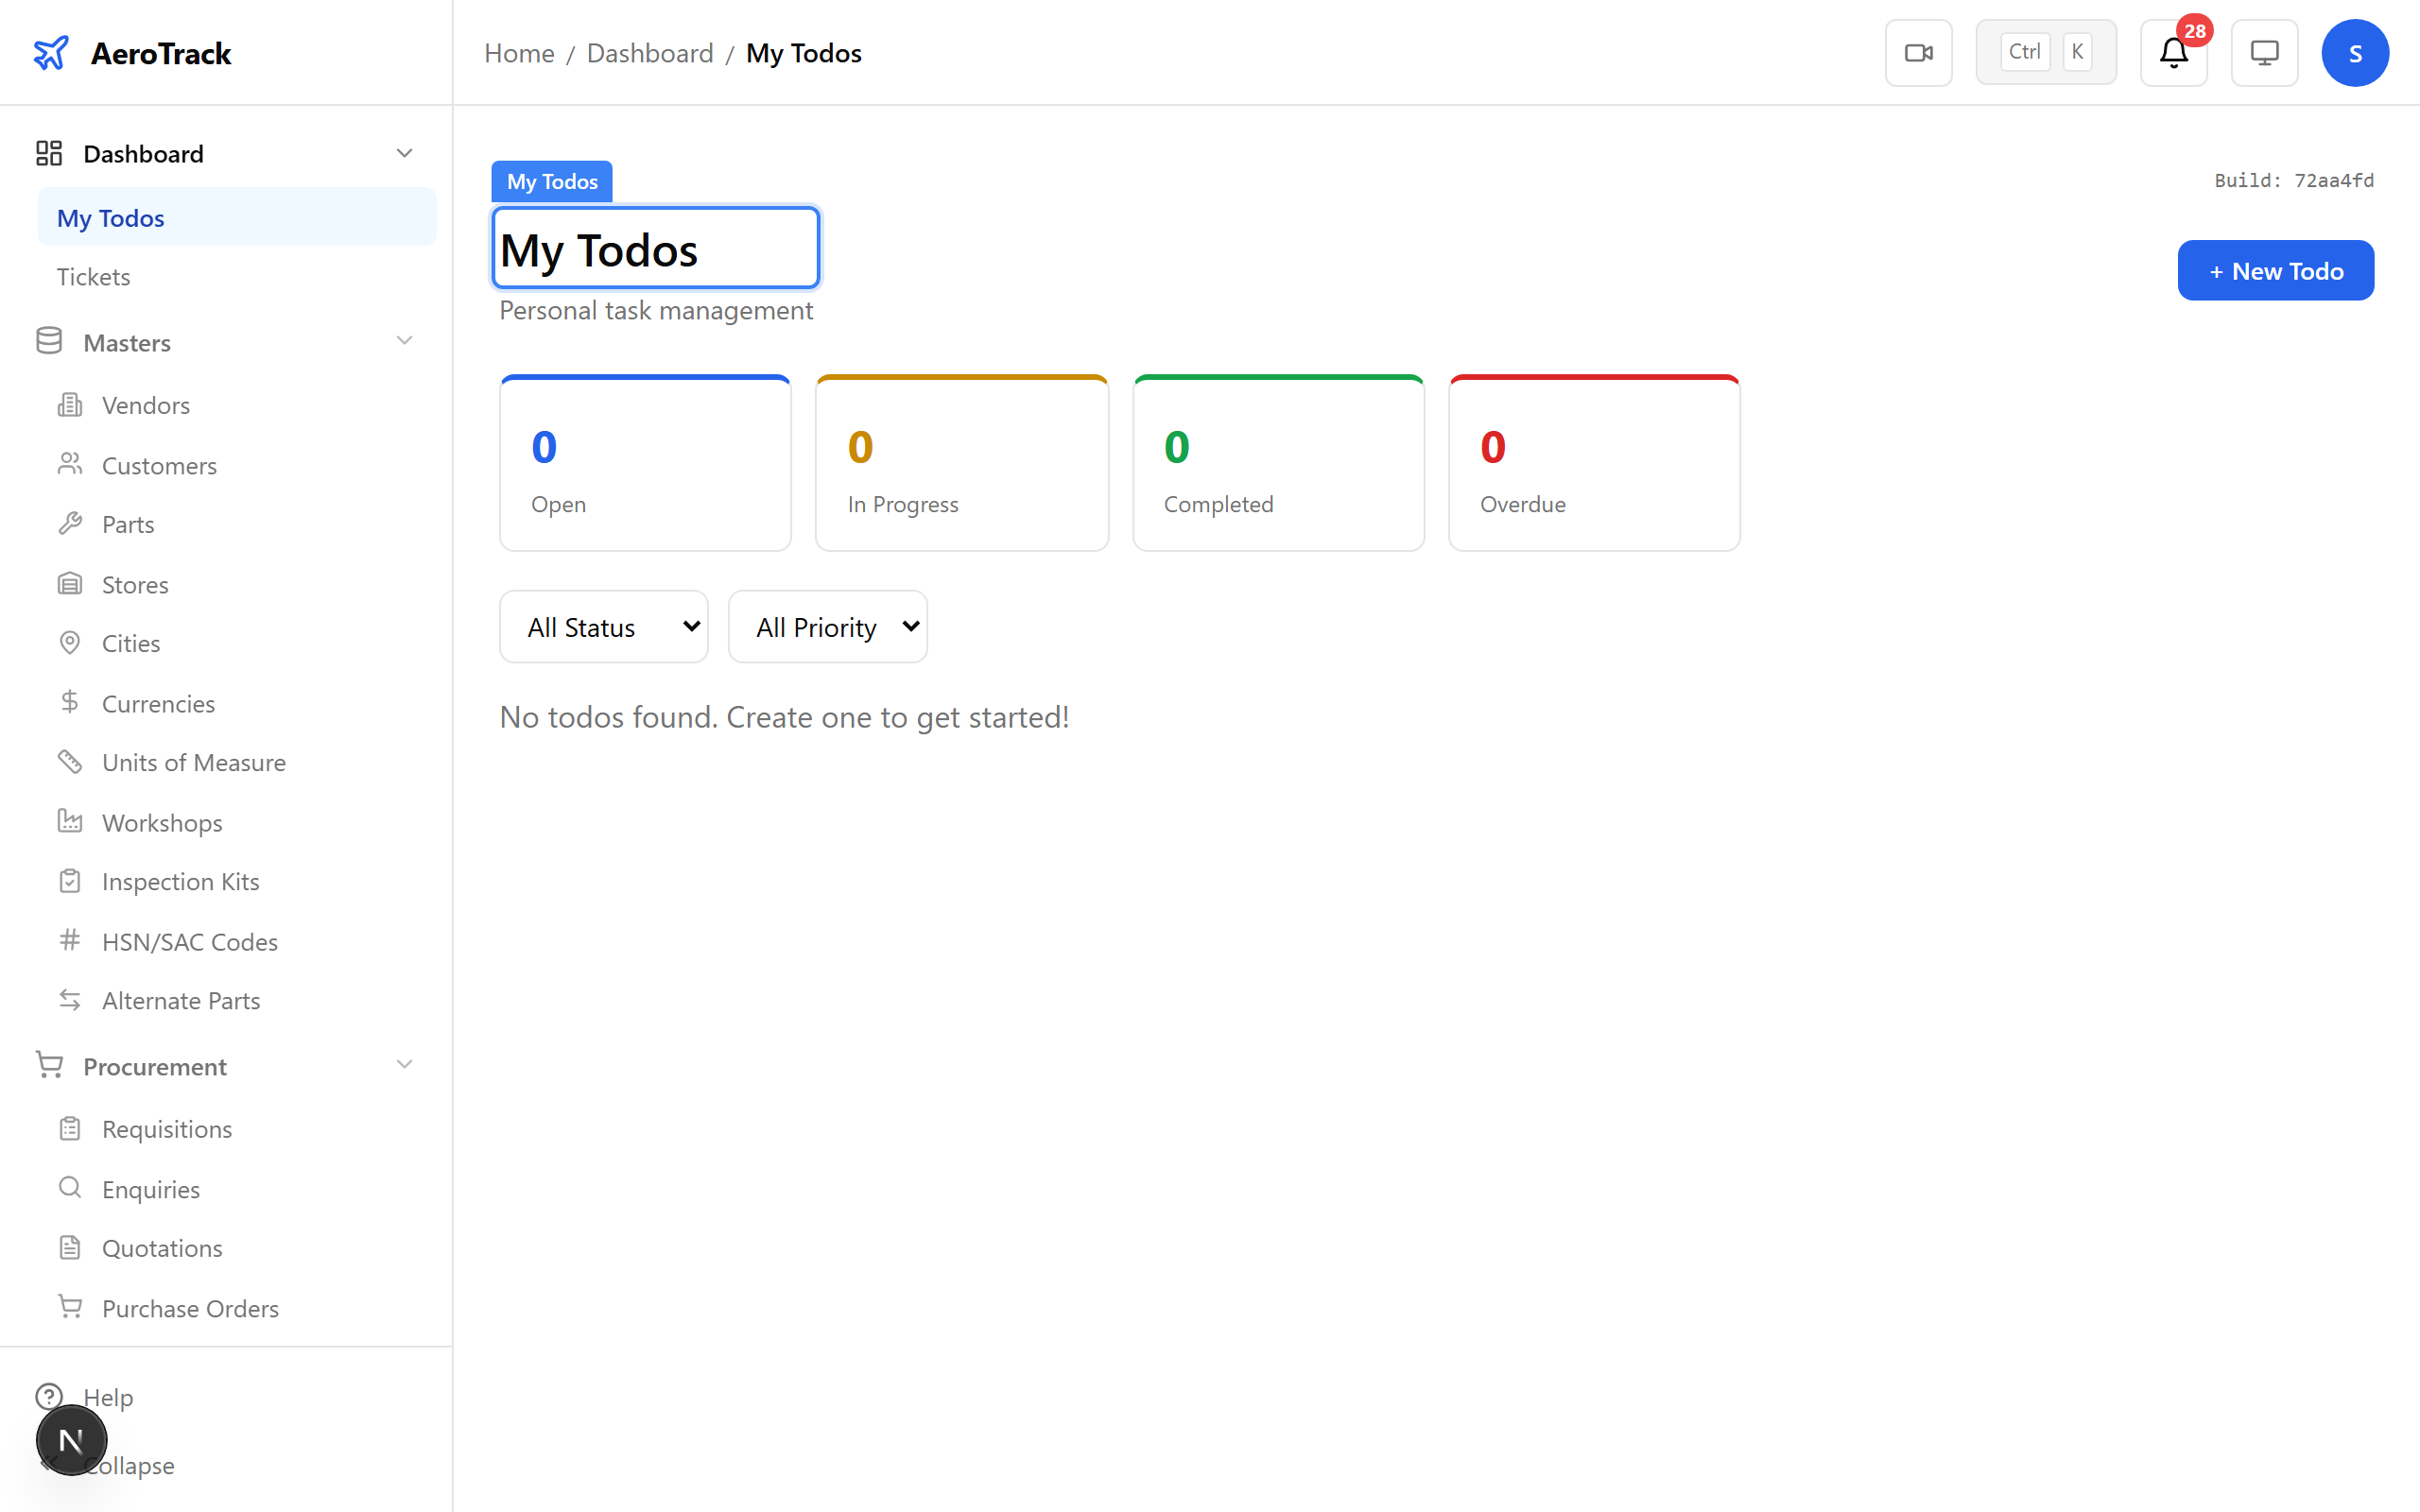
▲ Your personal todo list — items are created by the system when something requires your action. Clear them by completing the underlying task.
The Tickets page is your internal support board. Raise a ticket for IT issues, data correction requests, or anything that needs another team's help.
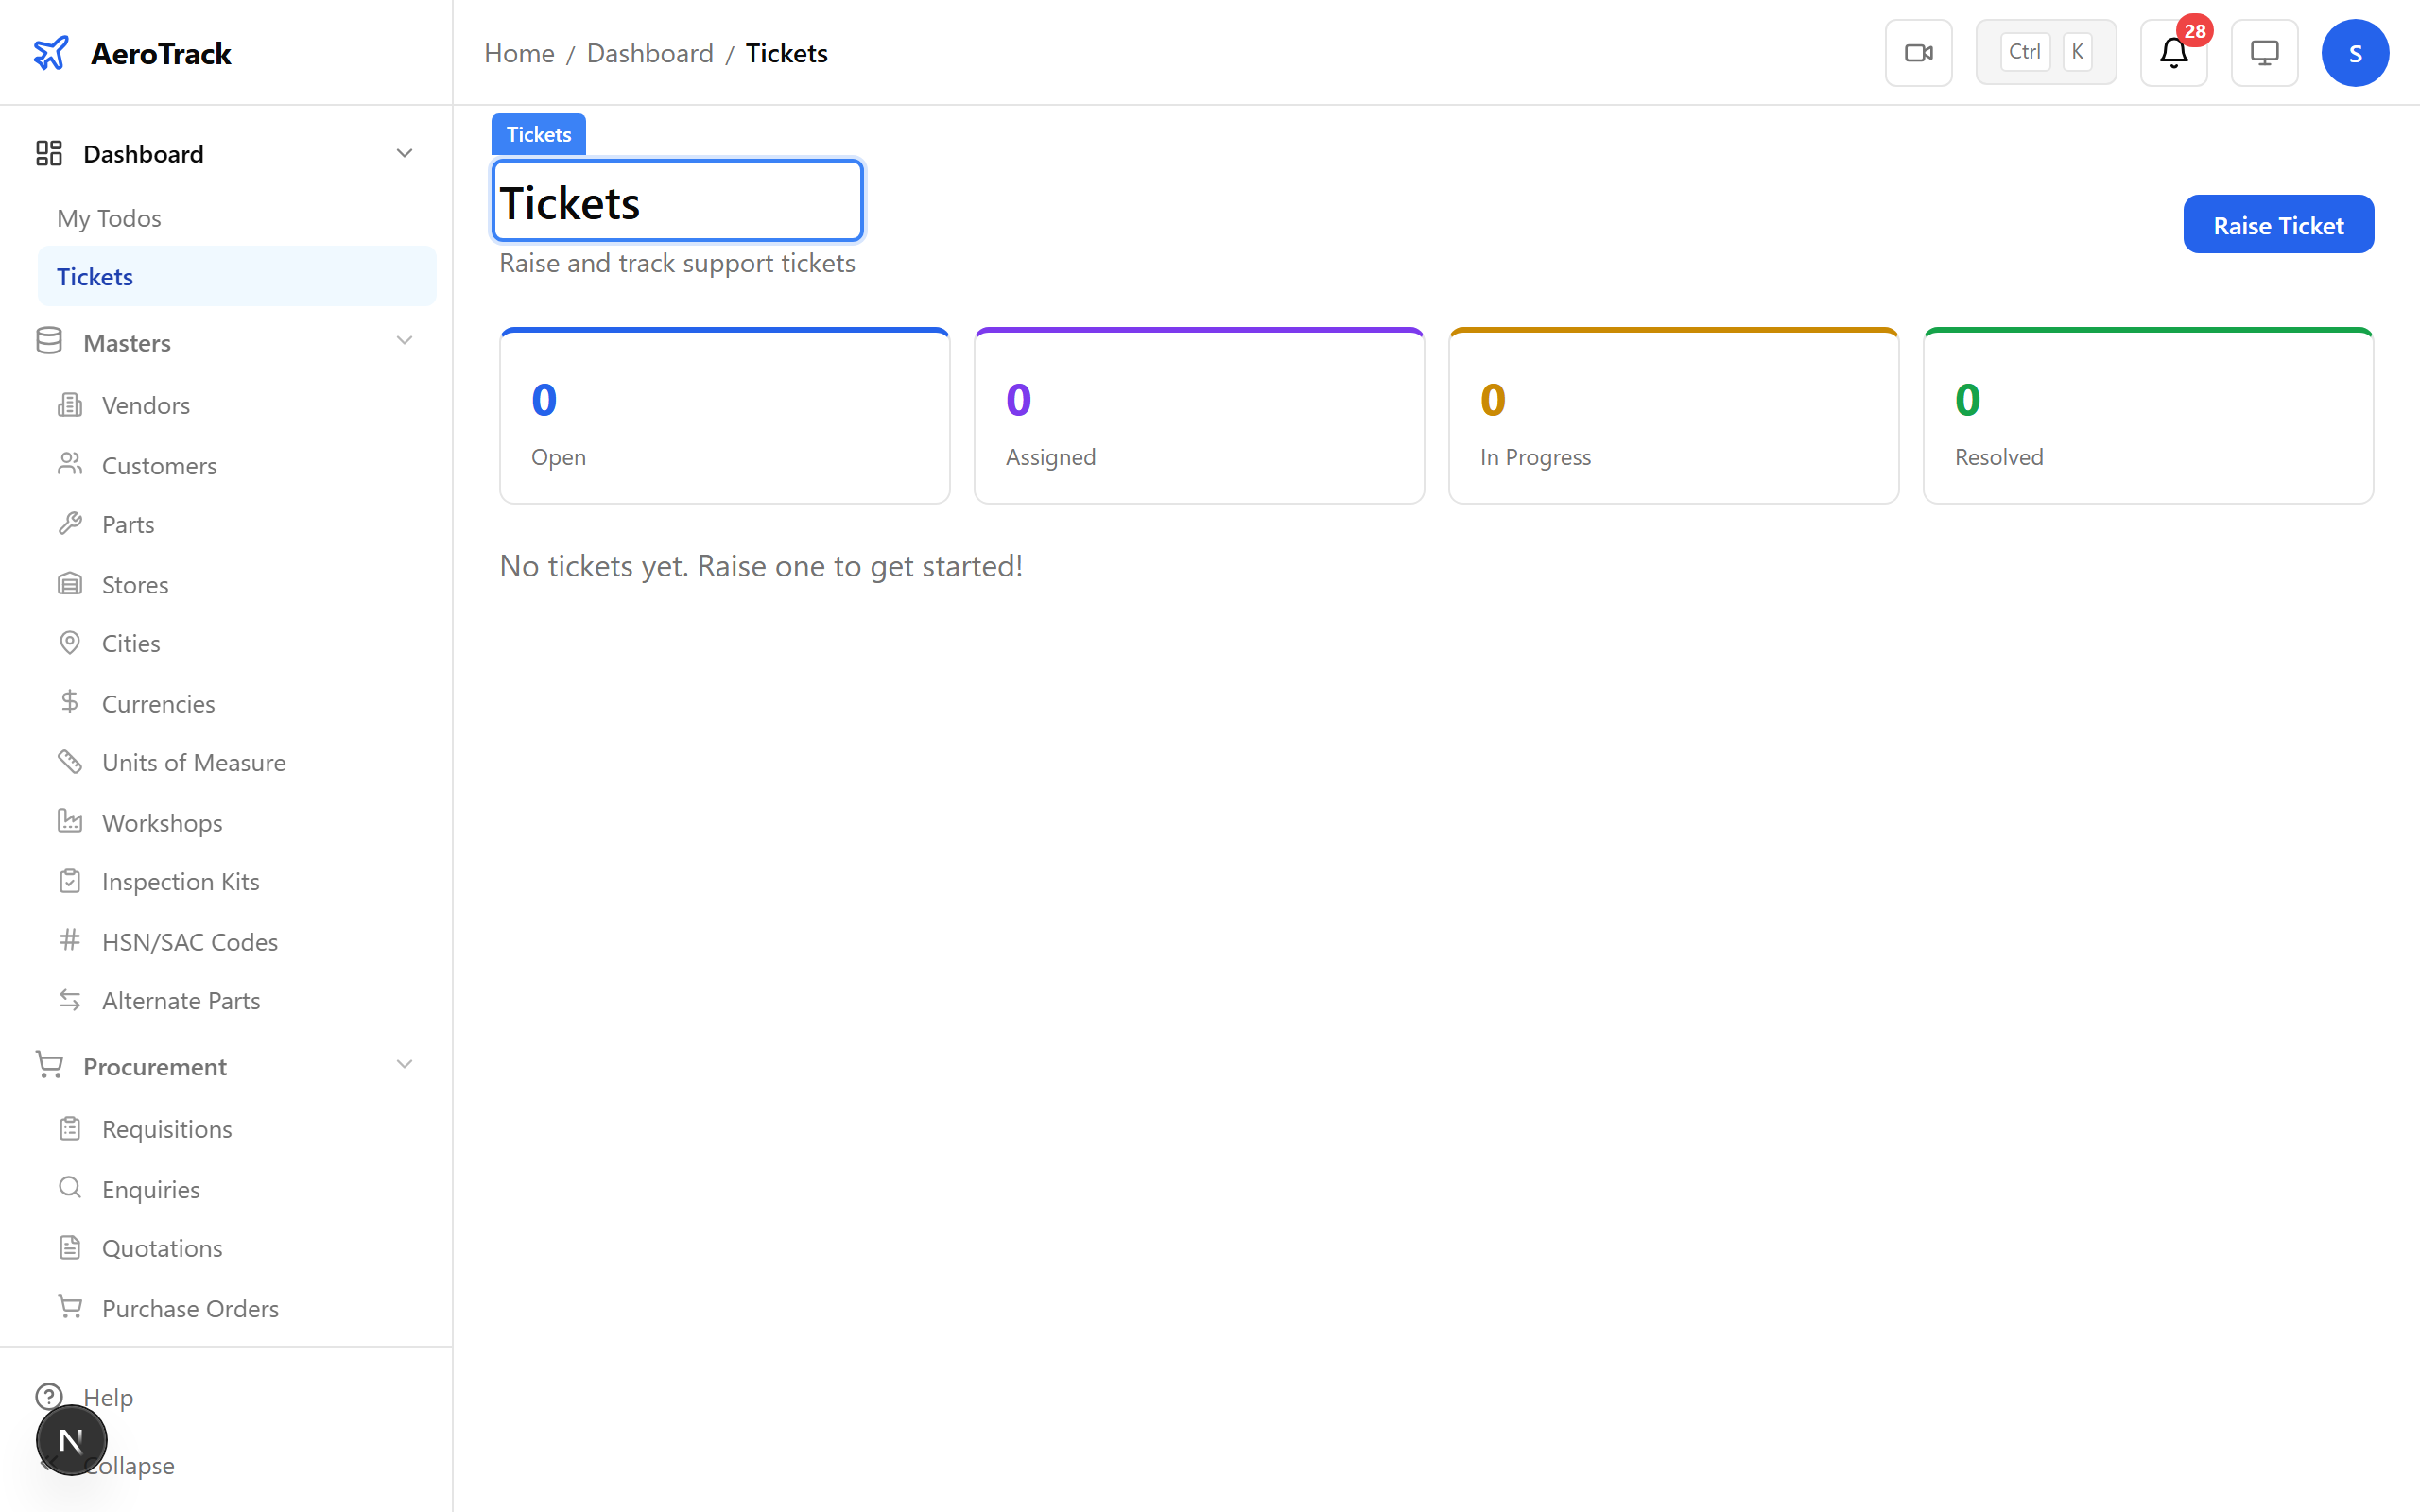
▲ The ticket board — create, assign, and track internal support requests without leaving AeroTrack.
The CAMO dashboard shows fleet-level KPIs — aircraft count, active MEL items, overdue inspections, and work order status. When a CAMO engineer logs in, this is their home view. Admins can access it at CAMO → Dashboard.
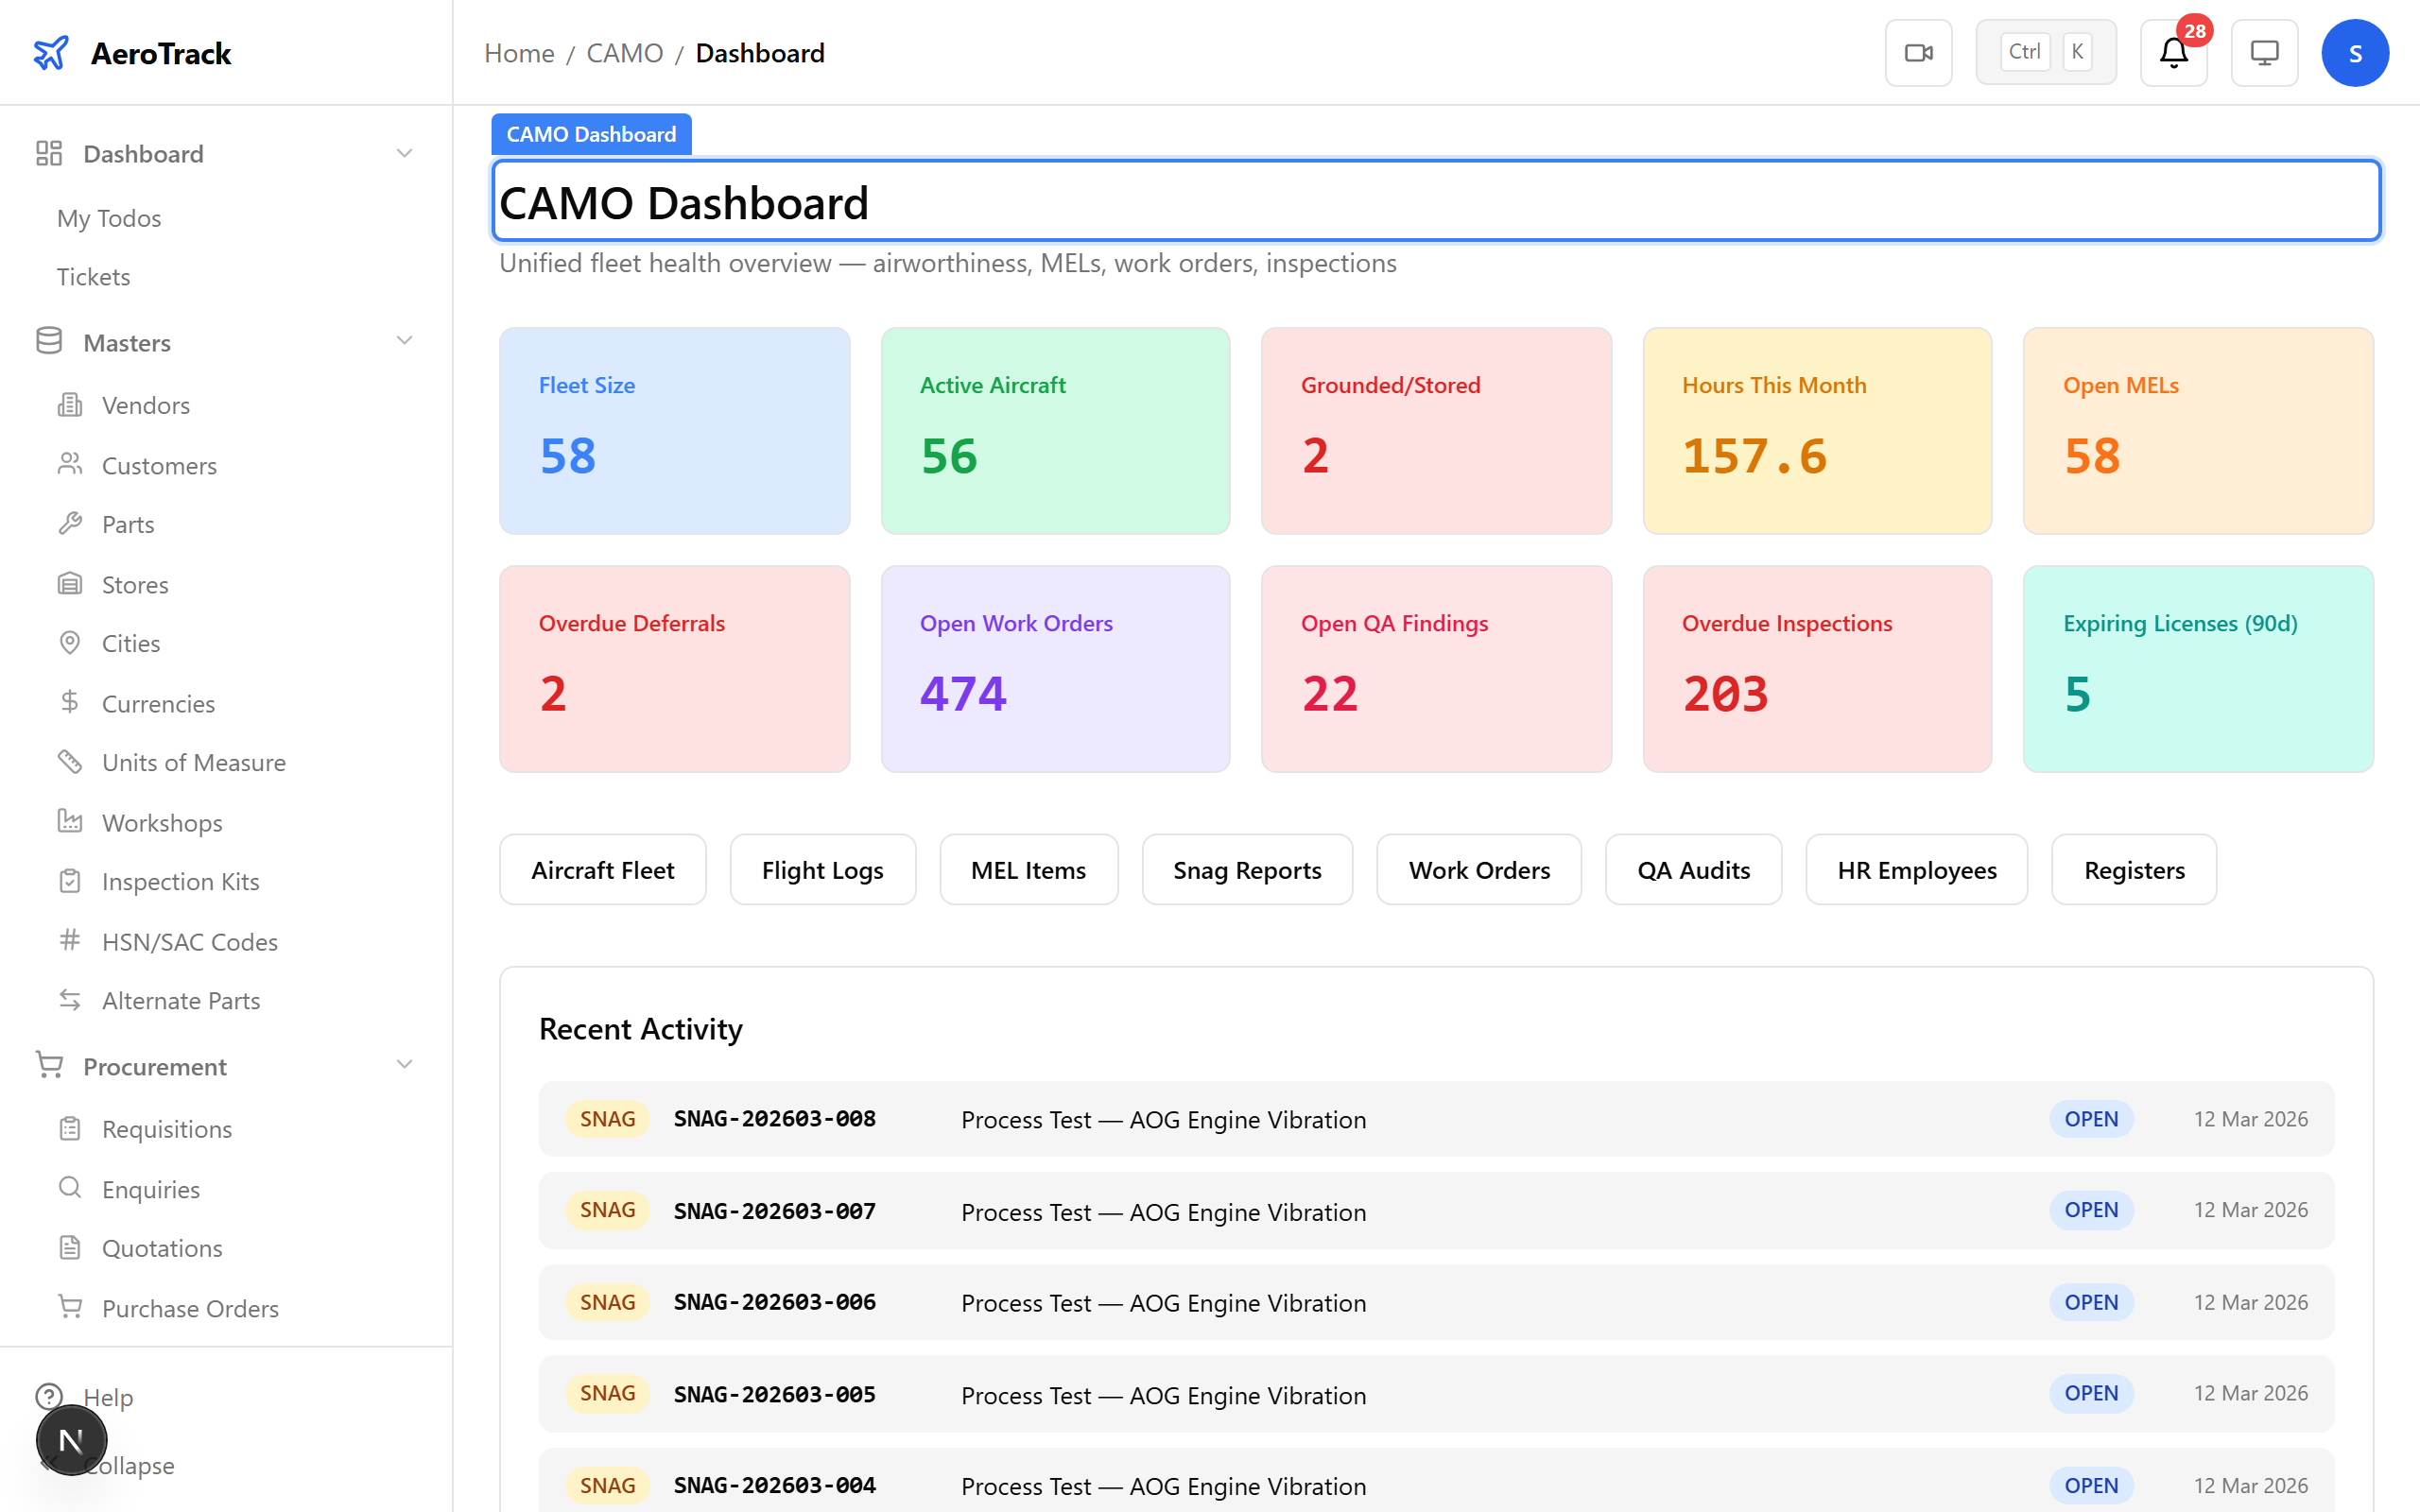
▲ The CAMO dashboard — fleet health at a glance. Overdue inspection counts here mean someone needs to raise work orders today.
MRO engineers land on this dashboard — it tracks received work orders, jobs in progress, and items awaiting sign-off. Think of it as the maintenance shop floor's command centre.
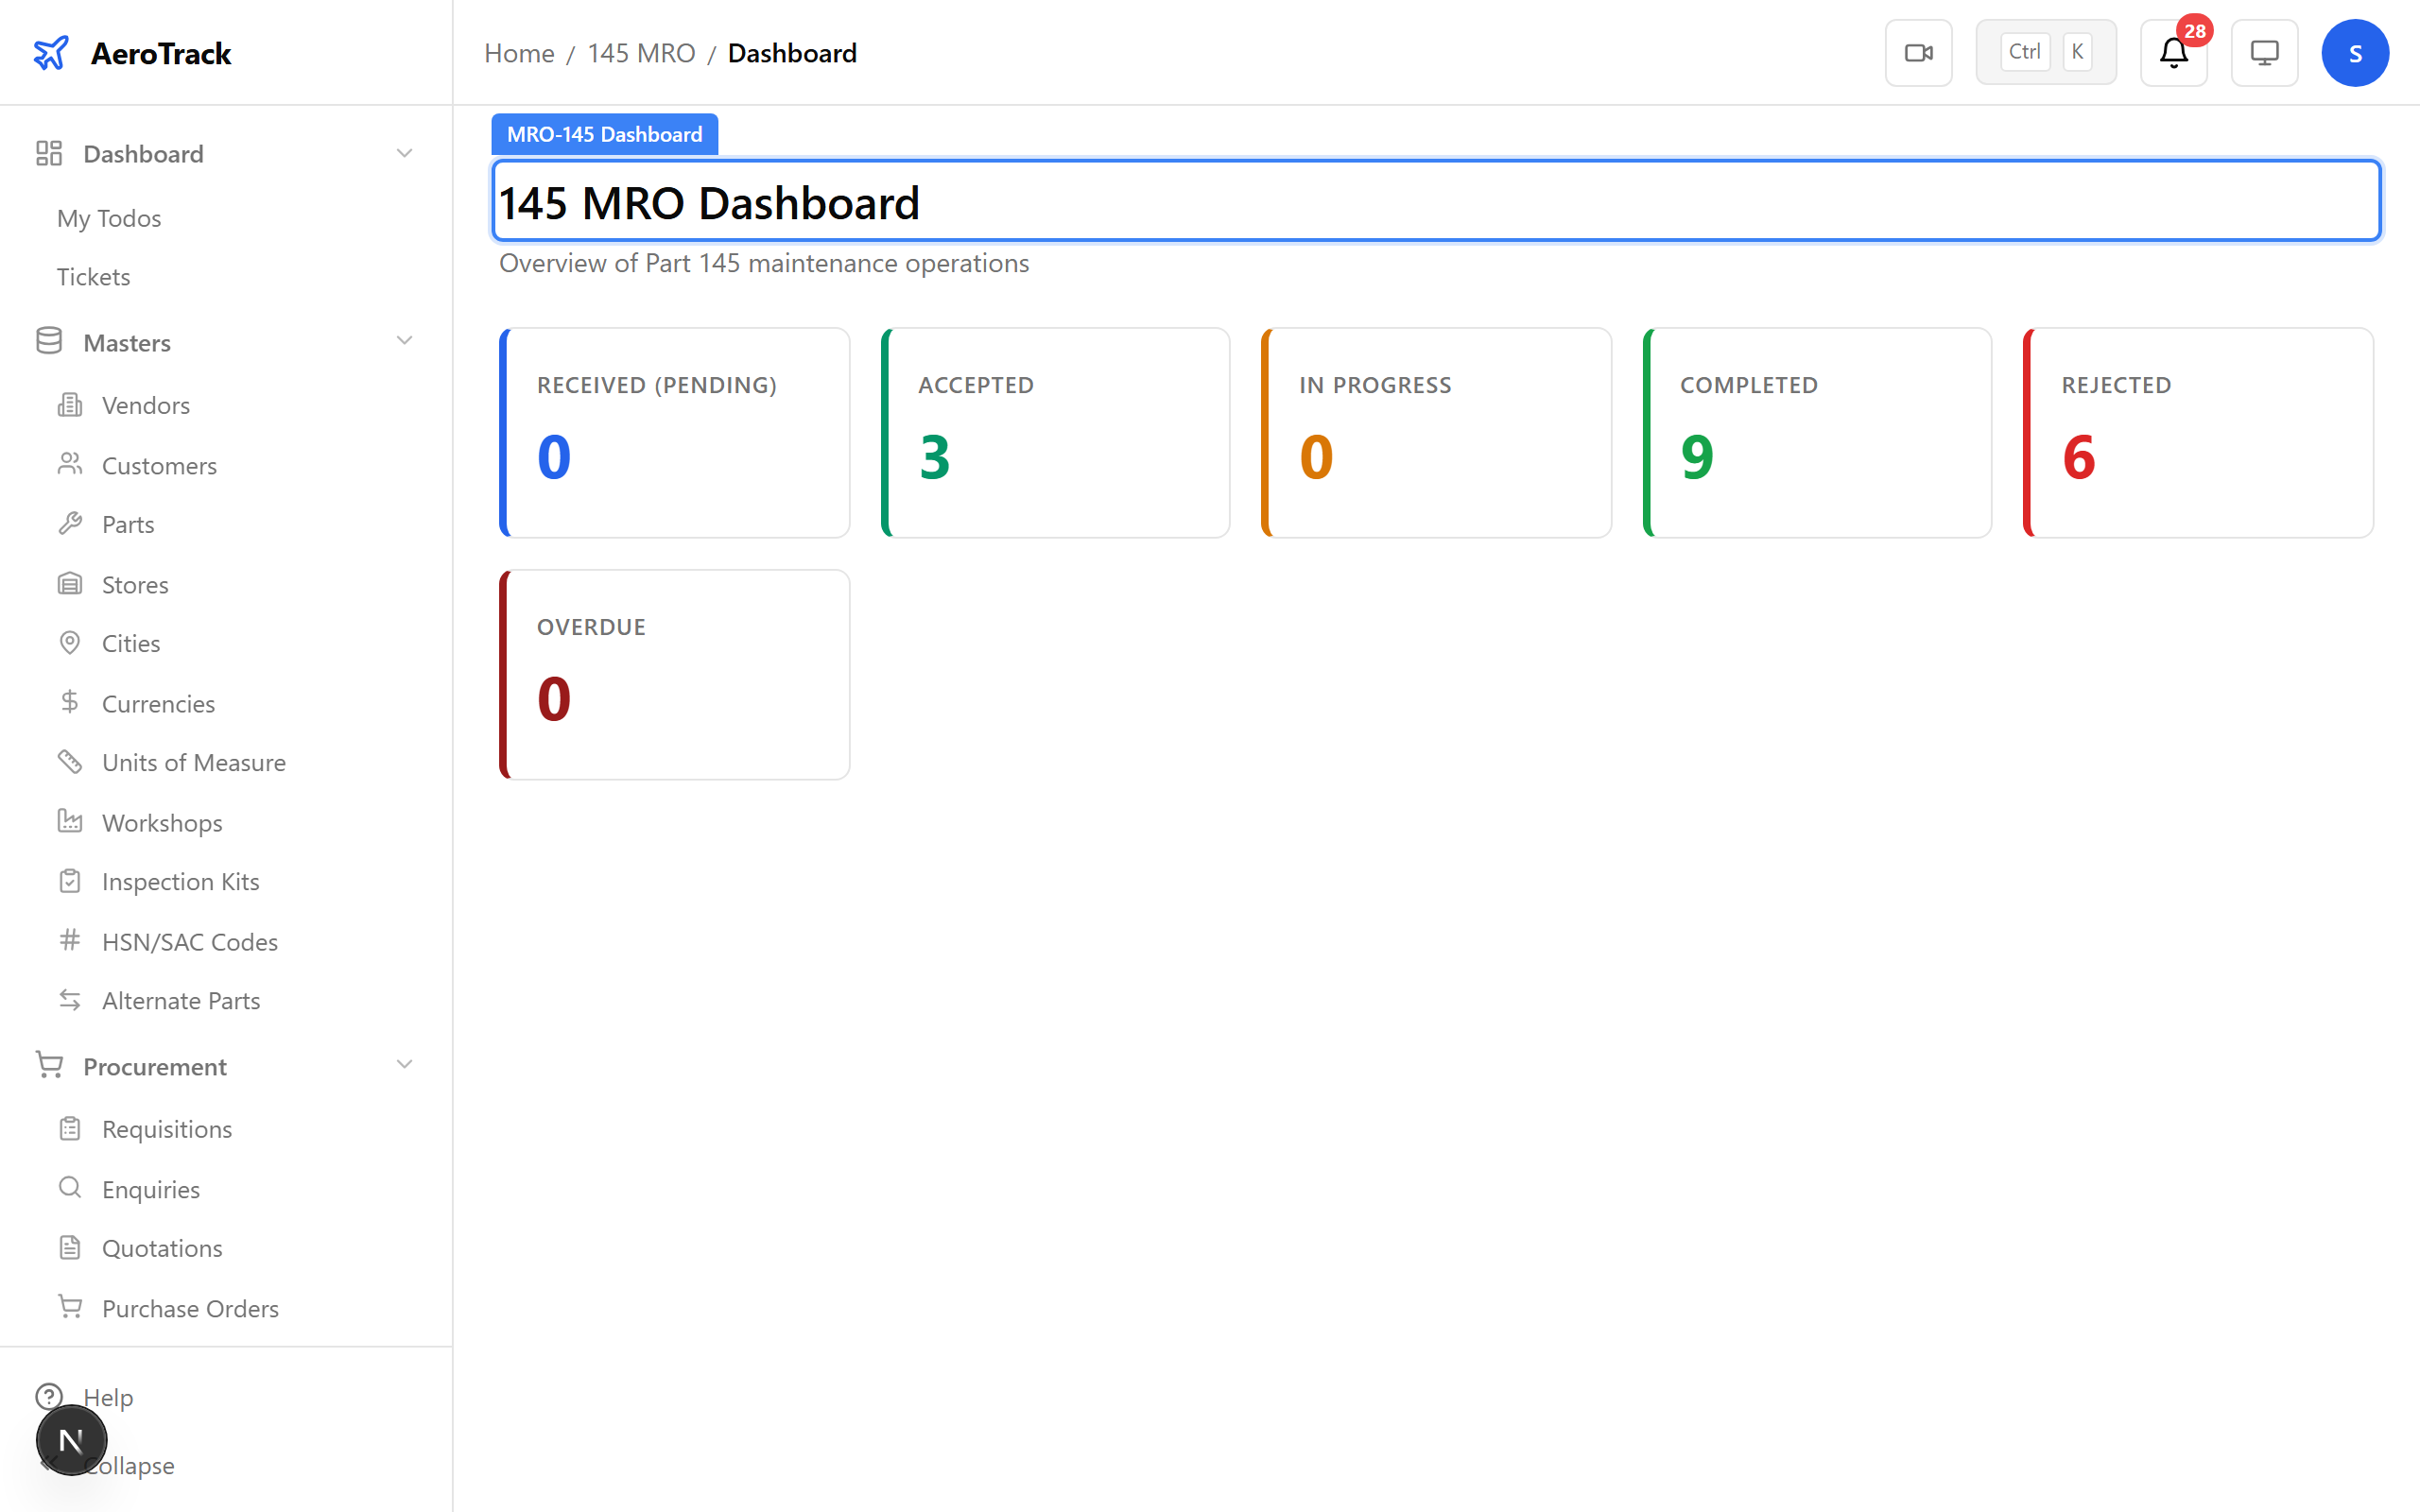
▲ The MRO-145 dashboard — inbox count shows how many work orders are waiting for acceptance. The sign-off queue lists jobs ready for release.
AeroTrack has 8 roles: Super Admin, Admin, Manager, Officer, CAMO Engineer, MRO Engineer, Technician, and Viewer. Each role sees different sidebar modules and dashboard views. Admins manage users at Settings → User Management.
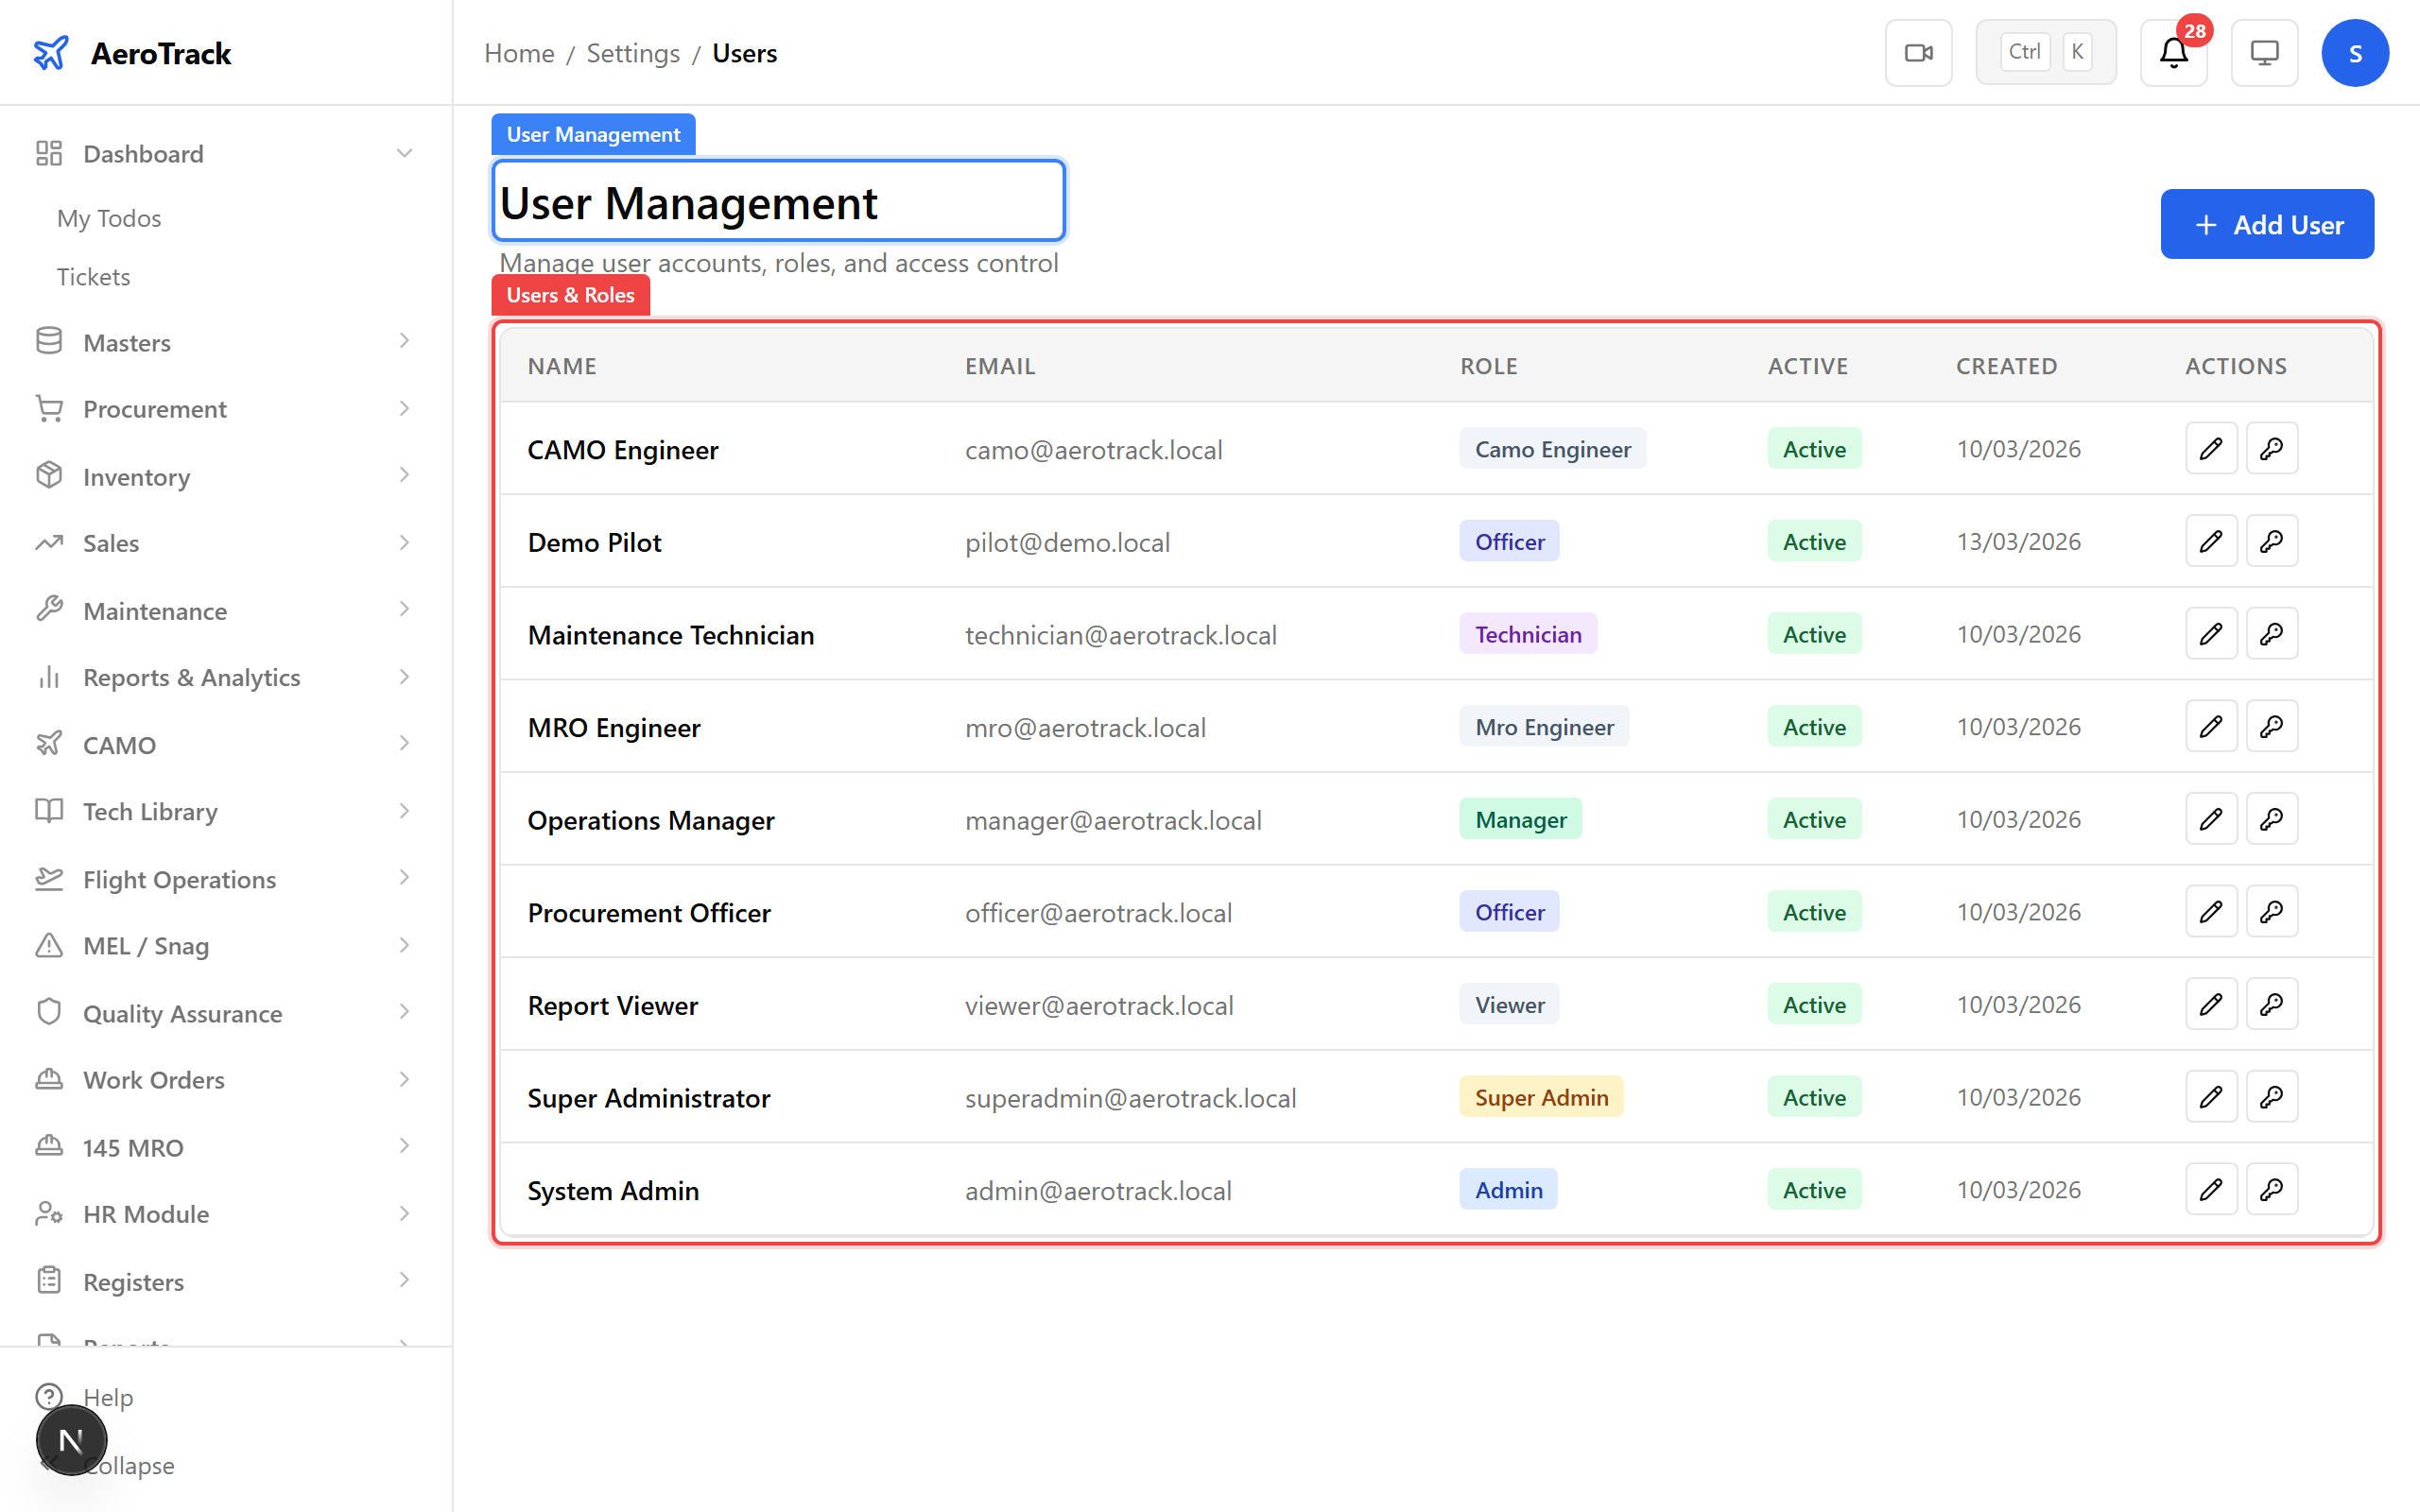
▲ The user management page — add new users, assign roles, and control who sees what. Role changes take effect on the user's next login.
Press Ctrl+K (or Cmd+K on Mac) anywhere in AeroTrack to open the command palette. Type what you're looking for — "work order", "new aircraft", "purchase request" — and jump directly there. It searches navigation routes and creation shortcuts.
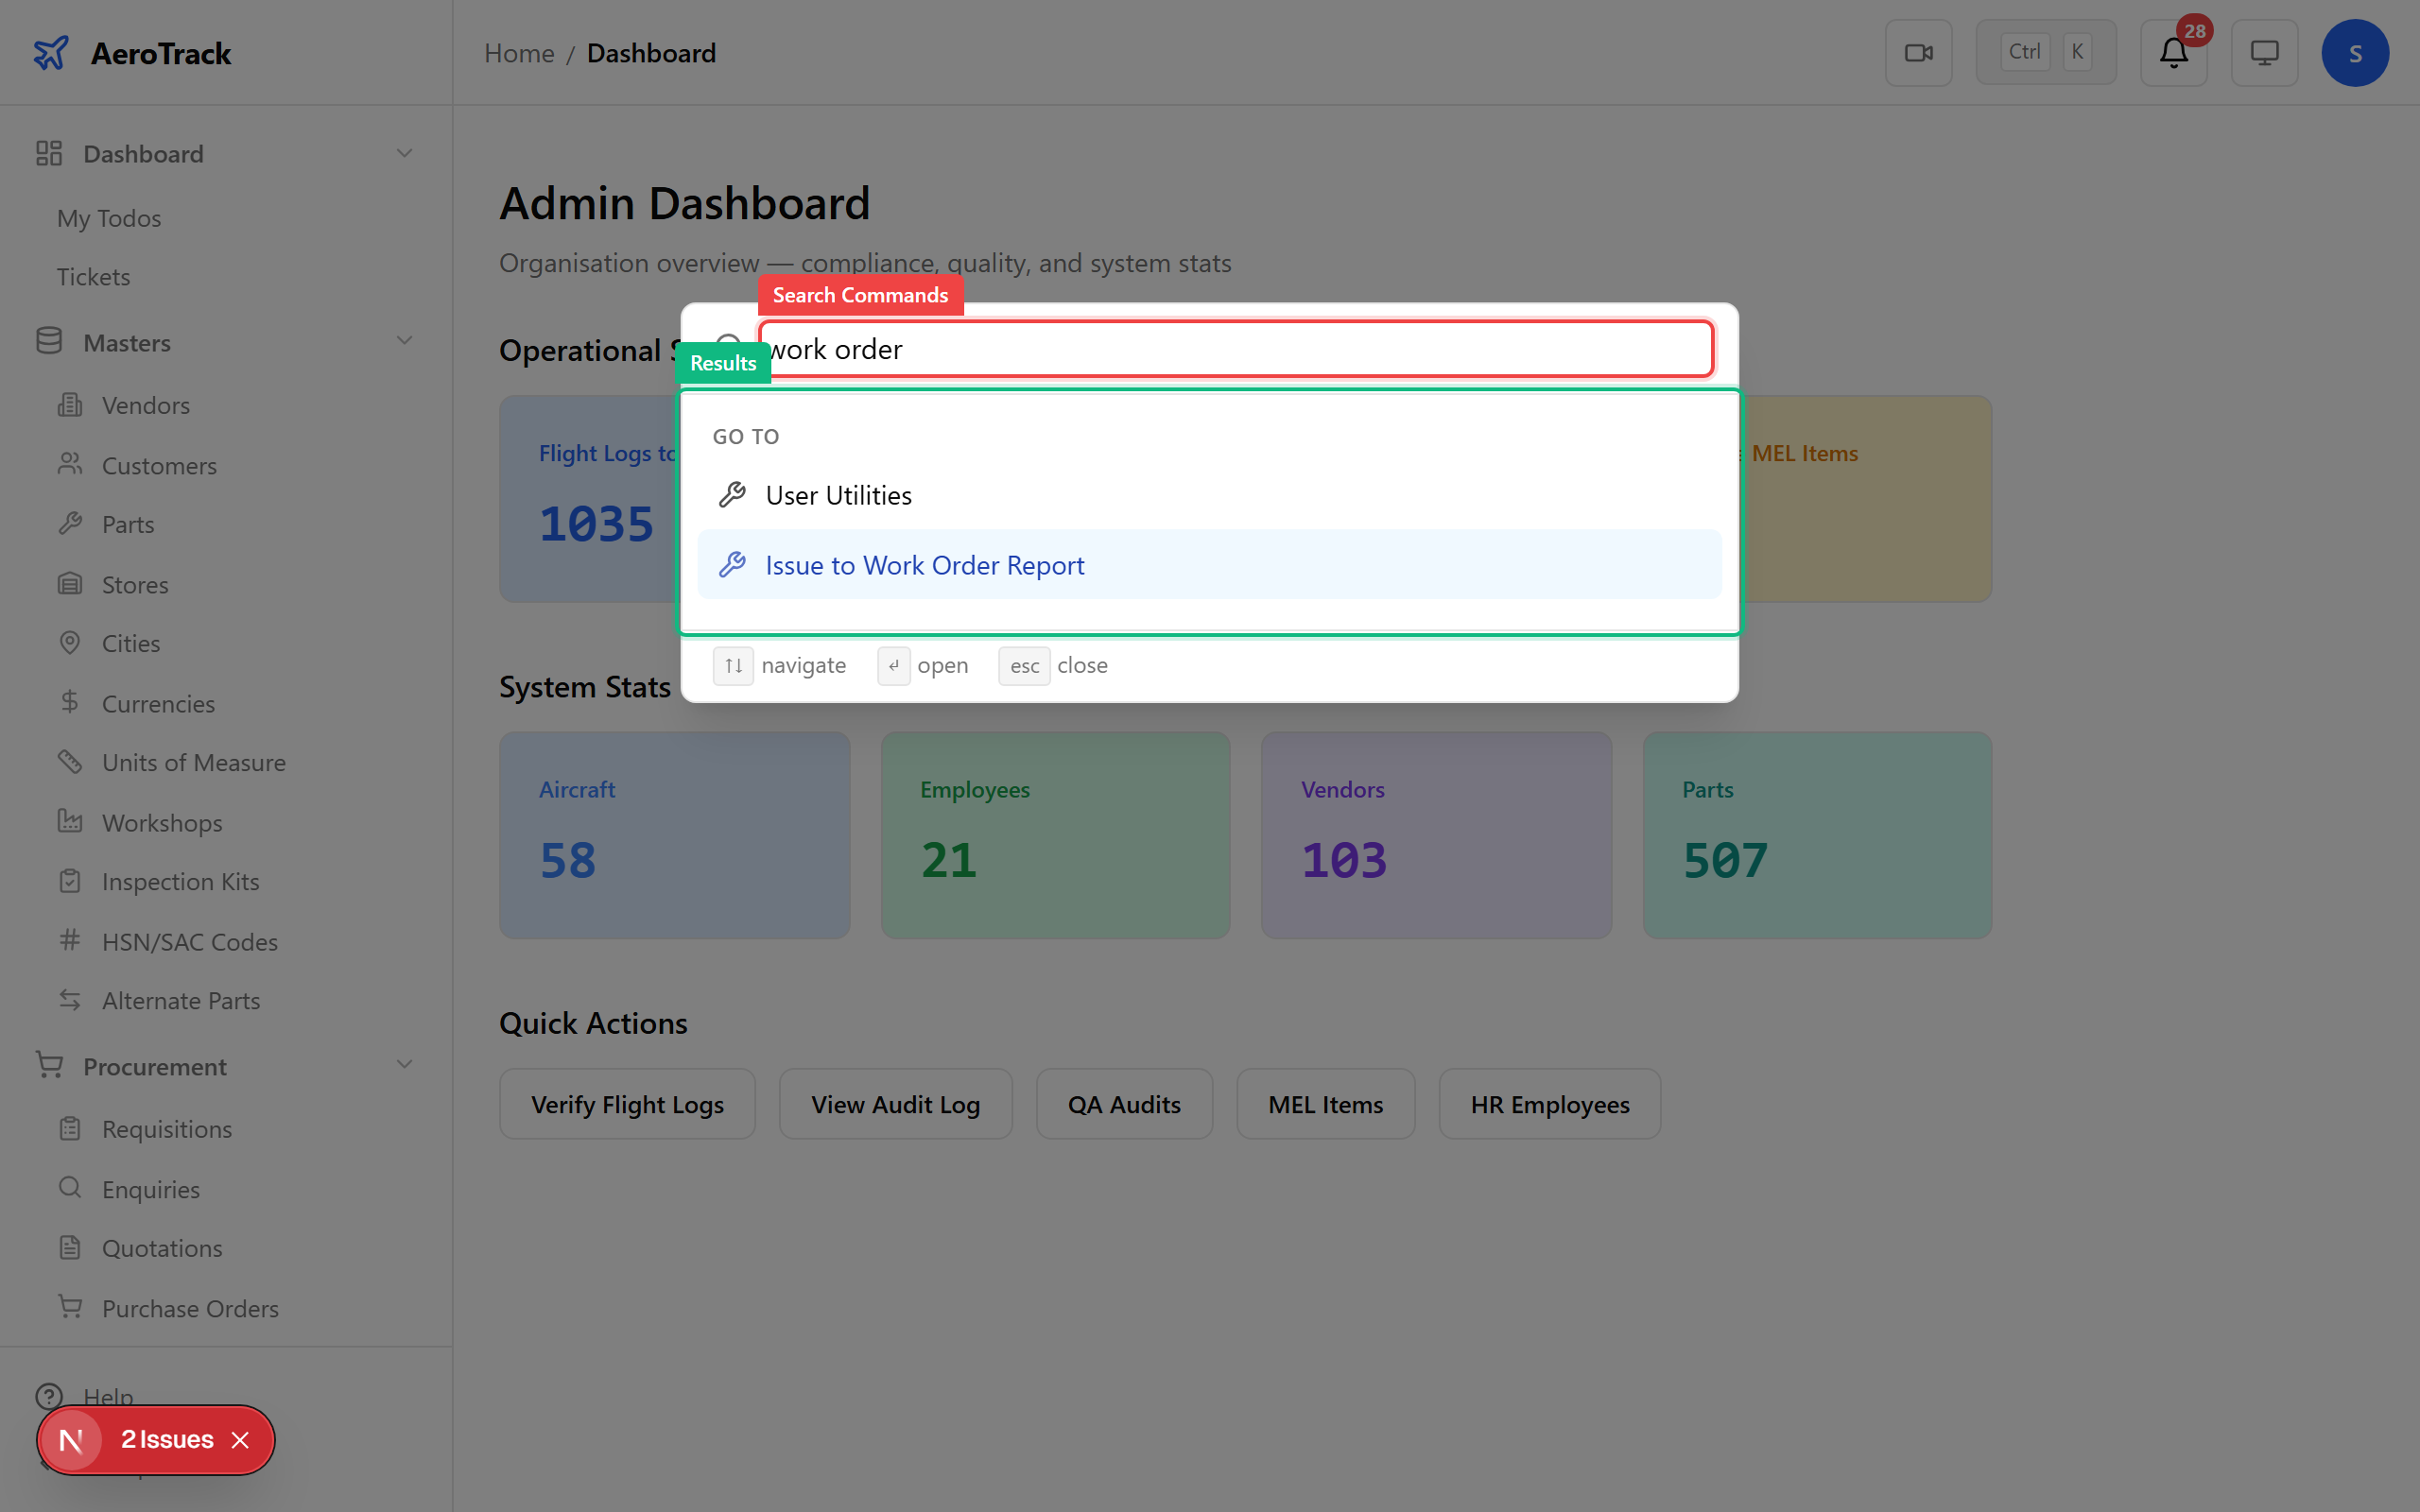
▲ The command palette — type a few letters and arrow-key through results. Enter to navigate, Escape to close. This is the fastest way to get anywhere in AeroTrack.
At the bottom of the sidebar you'll find the Help Centre link. It opens these guides — searchable walkthroughs for every module. You can also collapse the sidebar with Ctrl+B to get more room for data-heavy pages like reports and registers.

▲ The sidebar footer — the Help Centre link opens a searchable guide site. The collapse button (or Ctrl+B) gives you a slim icon-only sidebar.