The CAMO dashboard is your daily starting point — fleet health KPIs, overdue inspection counts, active MEL items, and work order status at a glance. Red numbers mean someone needs to act today.
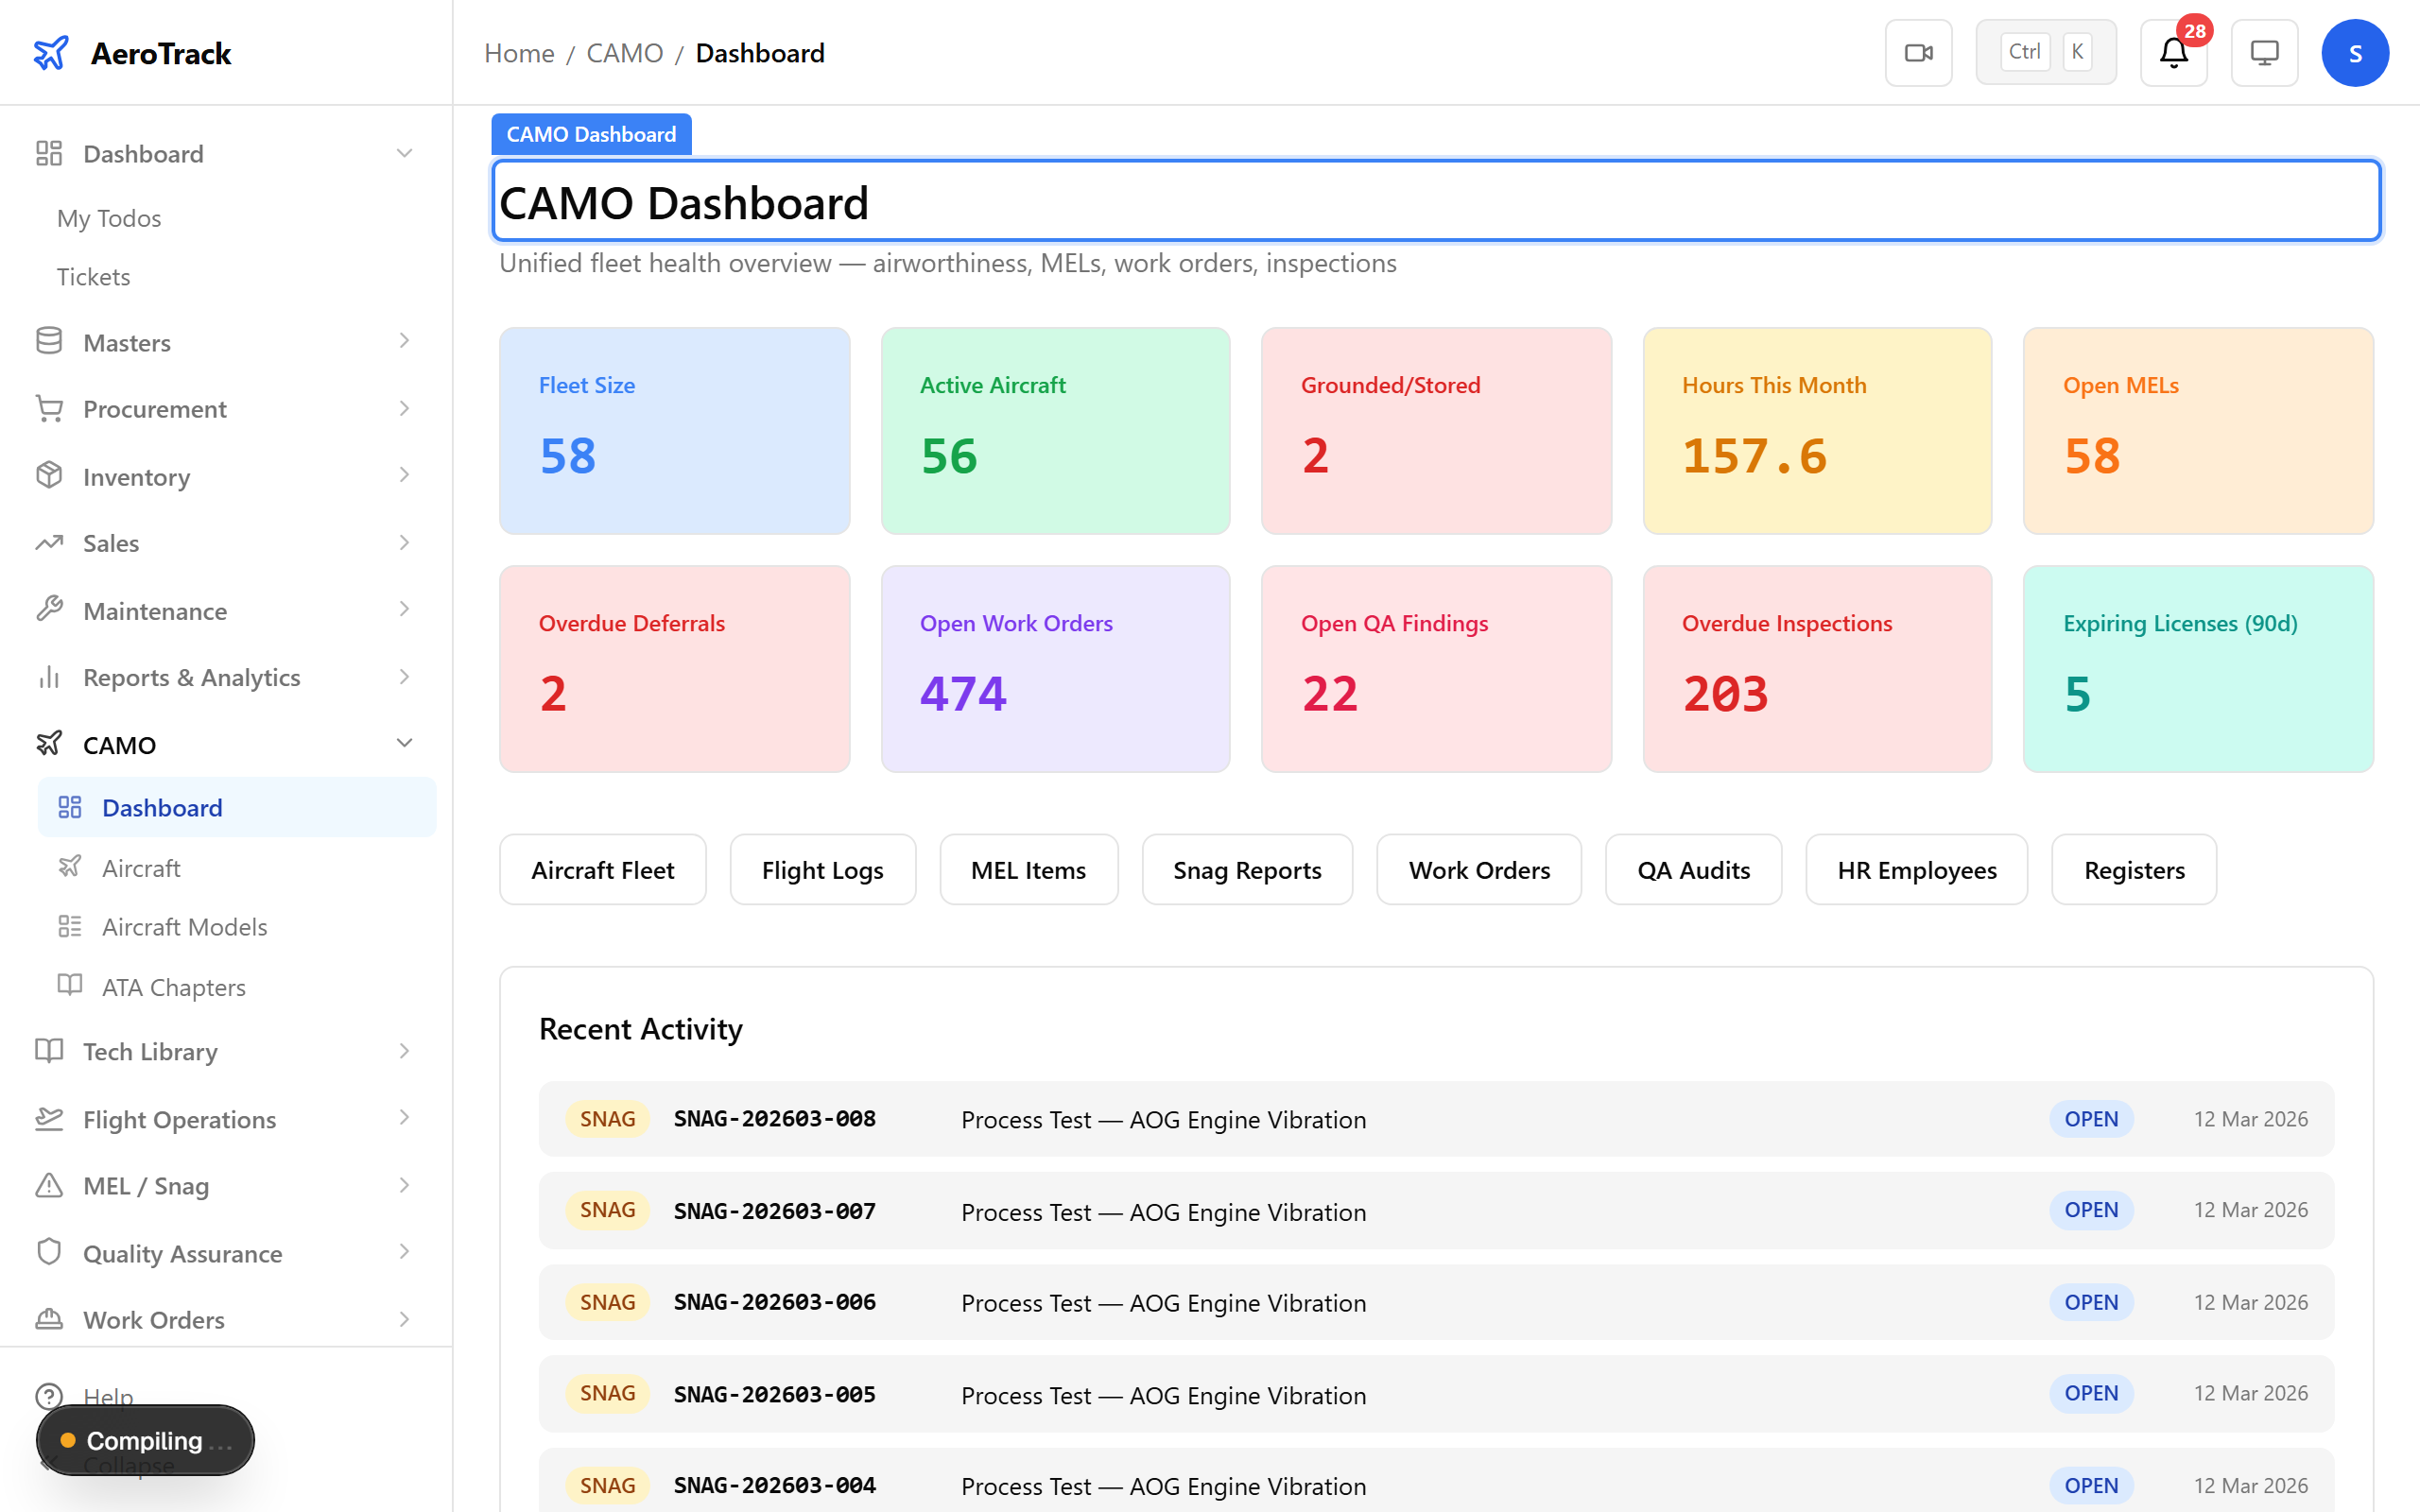
▲ The CAMO dashboard — red numbers mean someone needs to act today. Overdue inspections need work orders raised immediately.
Navigate to CAMO → Aircraft Models. Models define the aircraft type (Bell 412EP, Airbus H145, Cessna 172). Individual aircraft registrations are then linked to a model. Think of it as "model = type, registration = specific tail number."
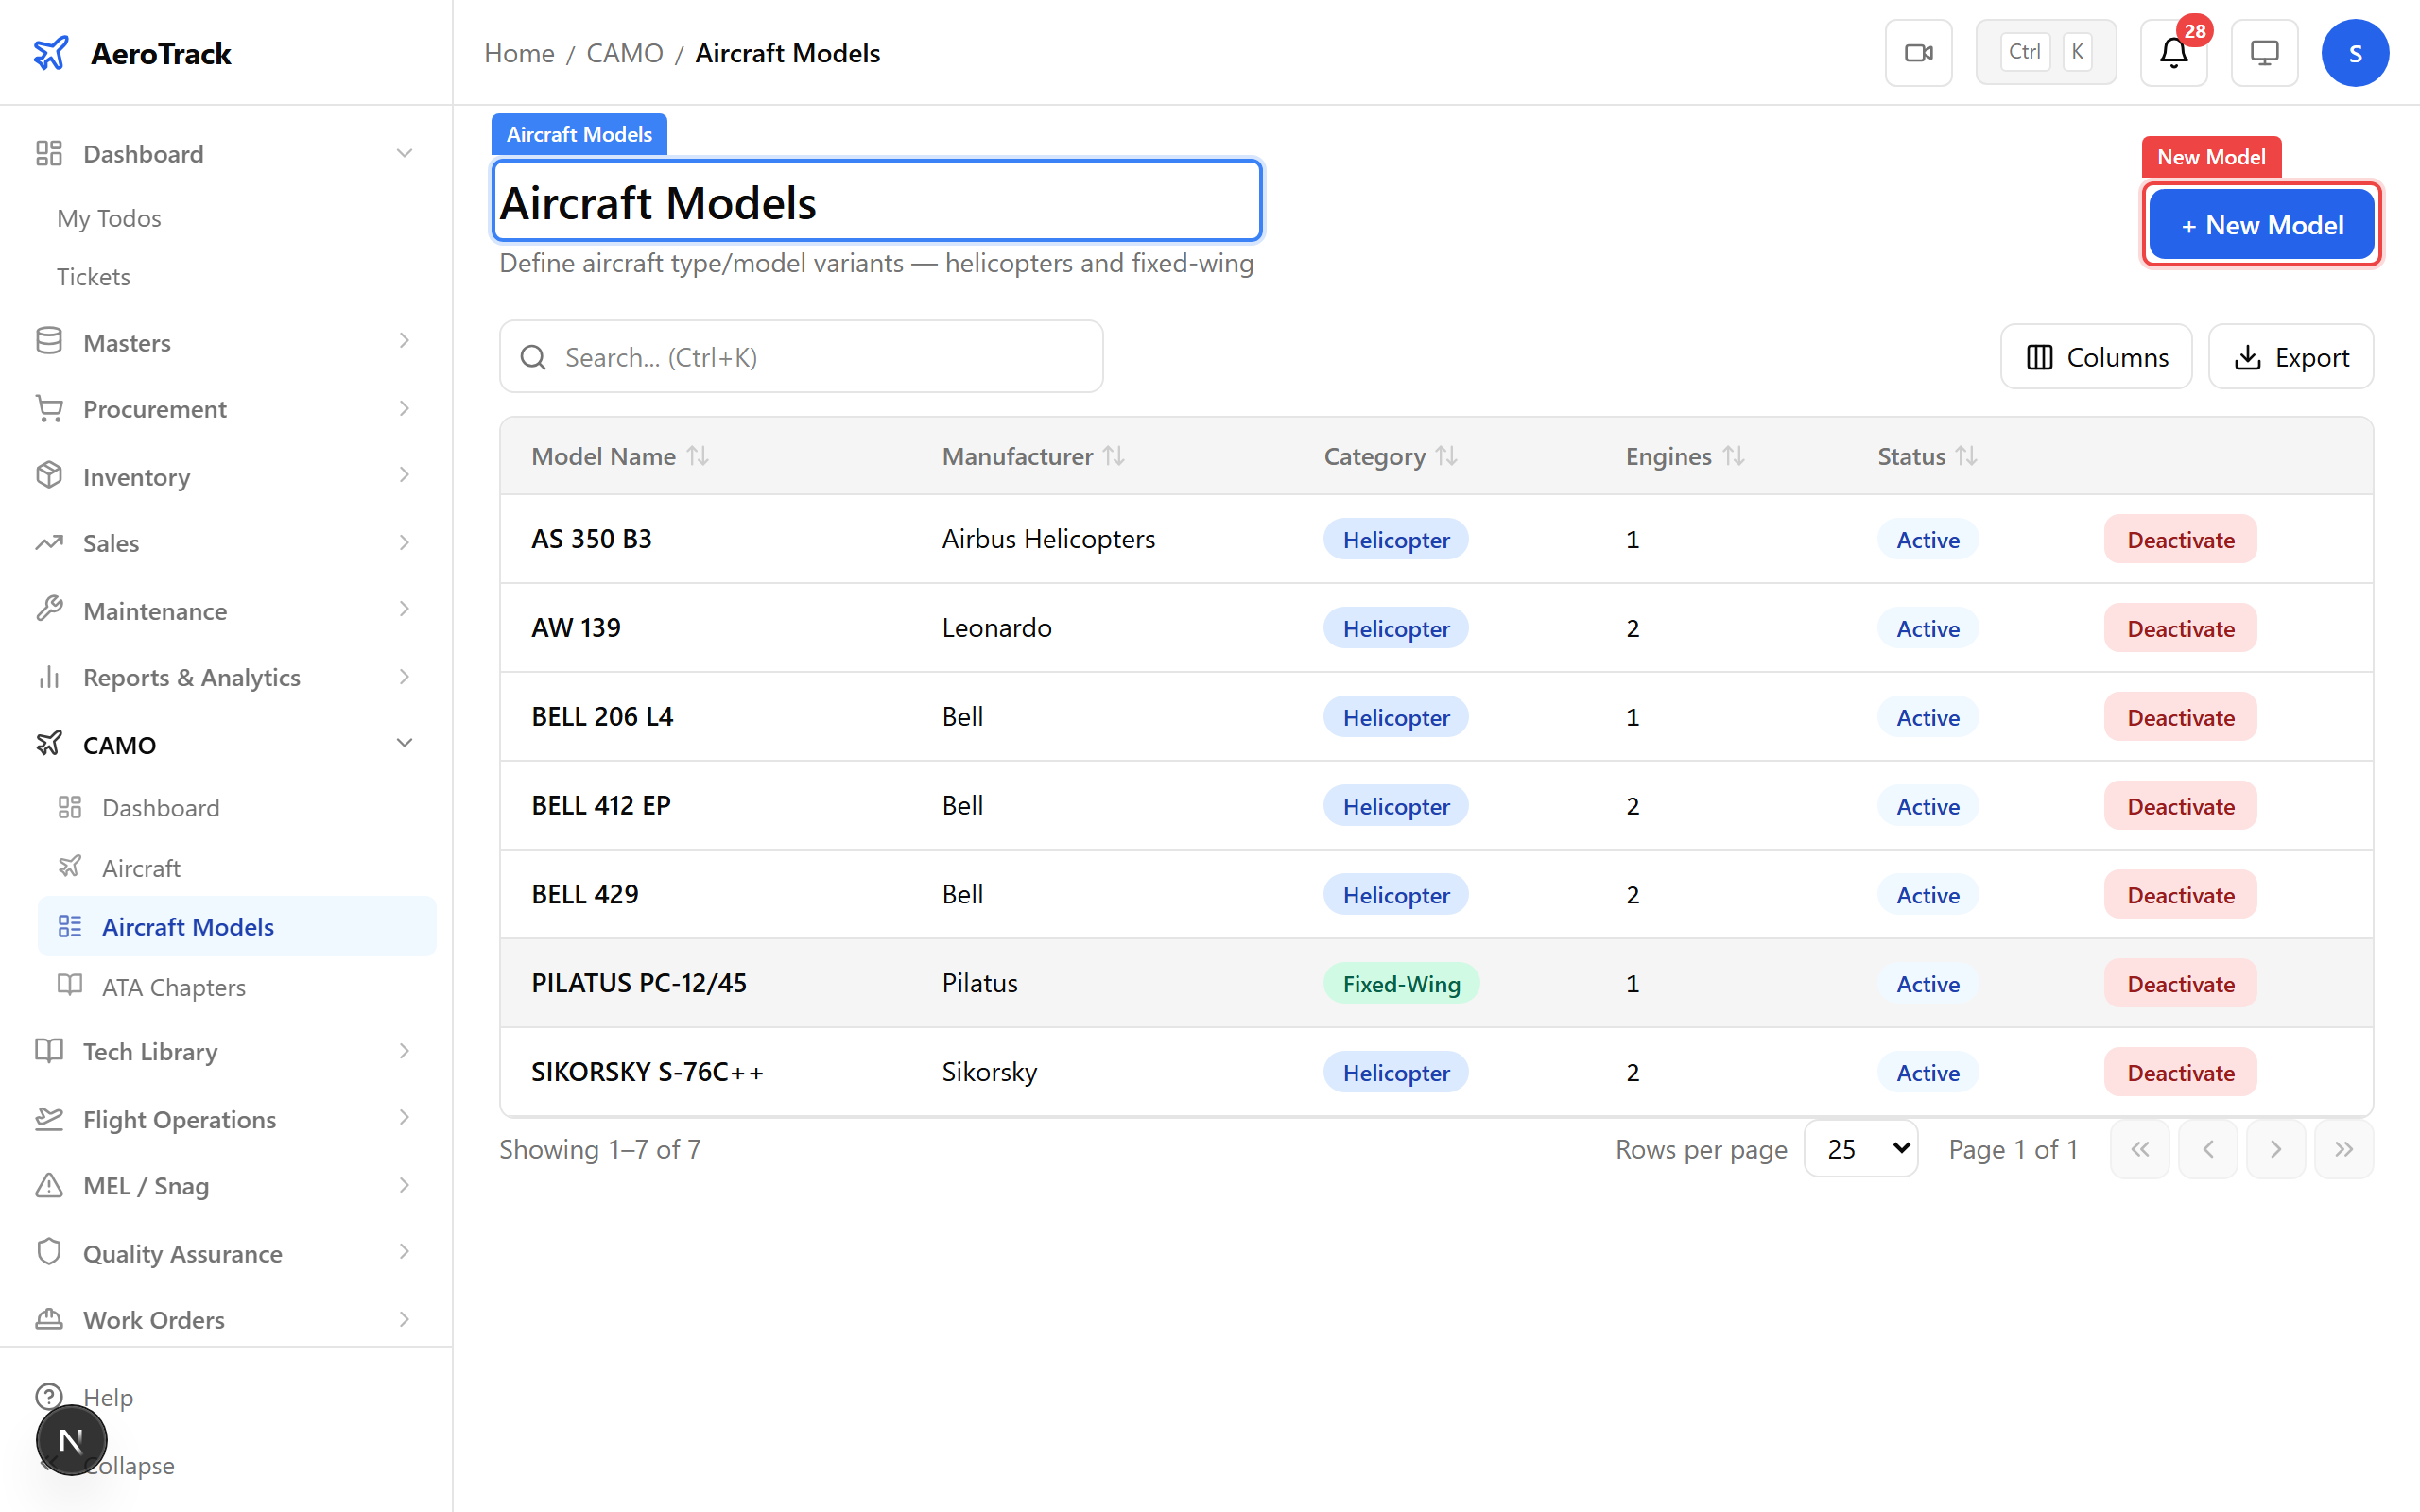
Click New Model. Enter the manufacturer, model name, and type. Models are referenced when registering aircraft and when the onboarding wizard copies inspection templates.
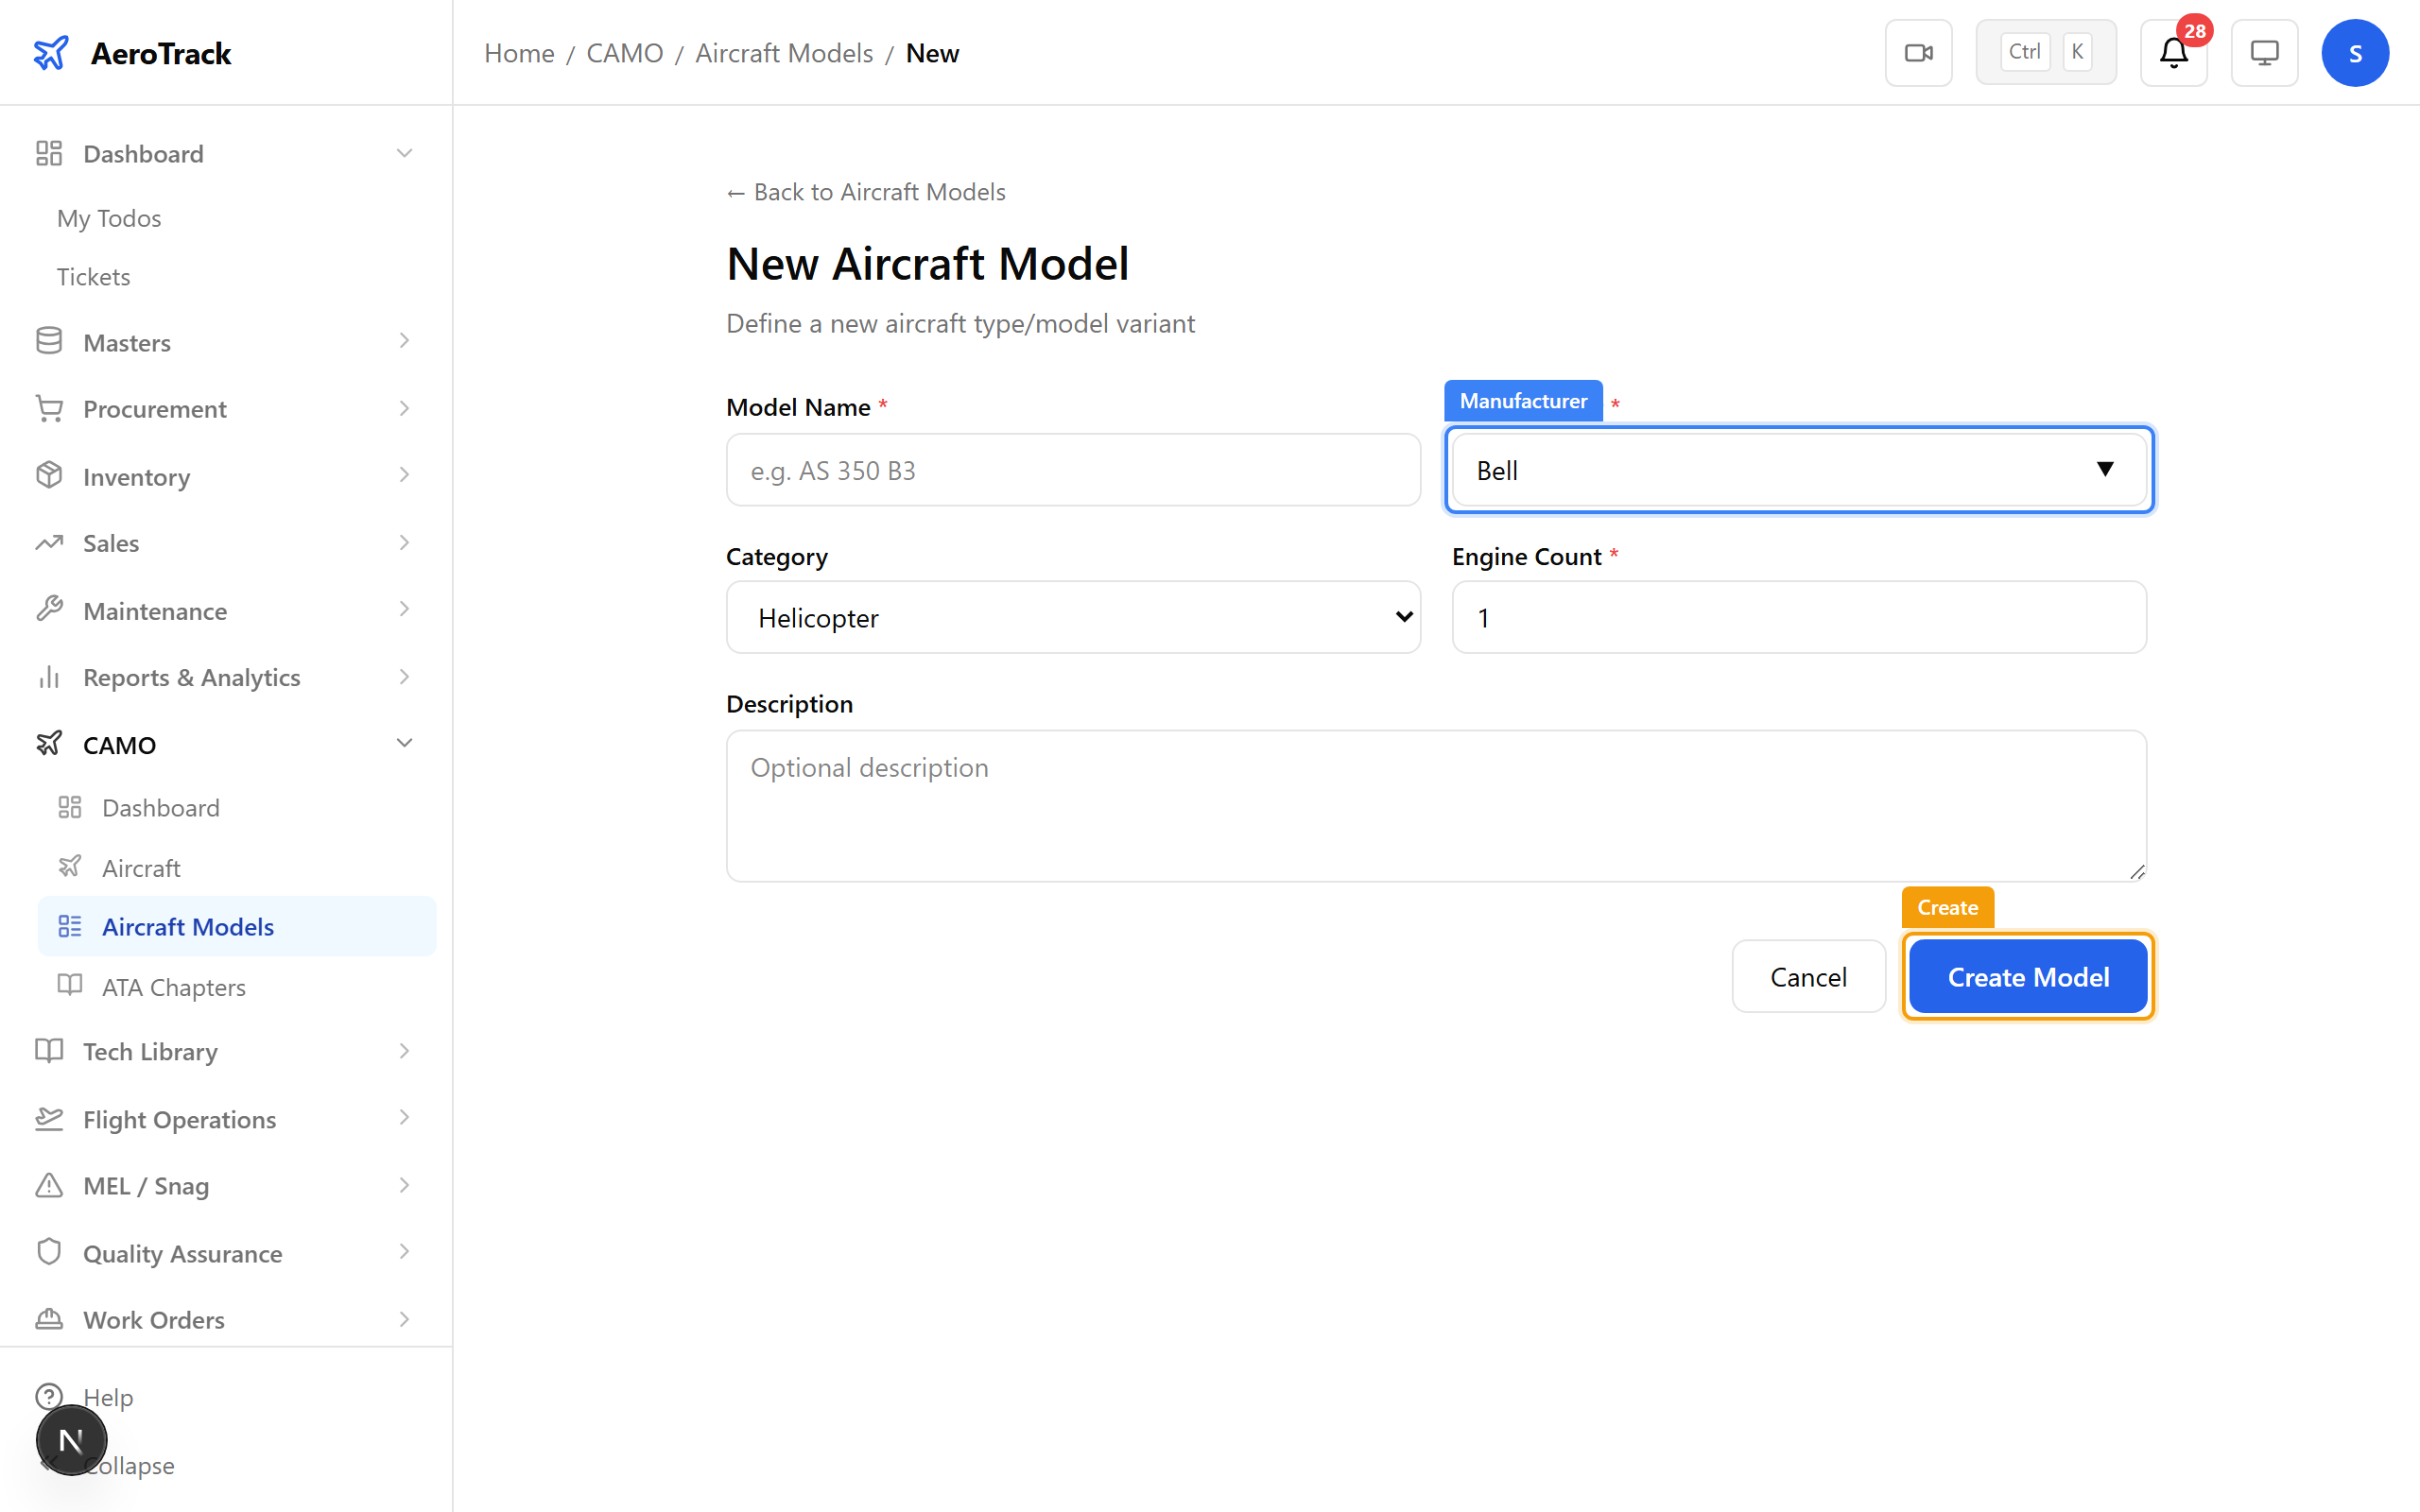
▲ Aircraft models define the type. Individual aircraft (registrations) are then linked to a model.
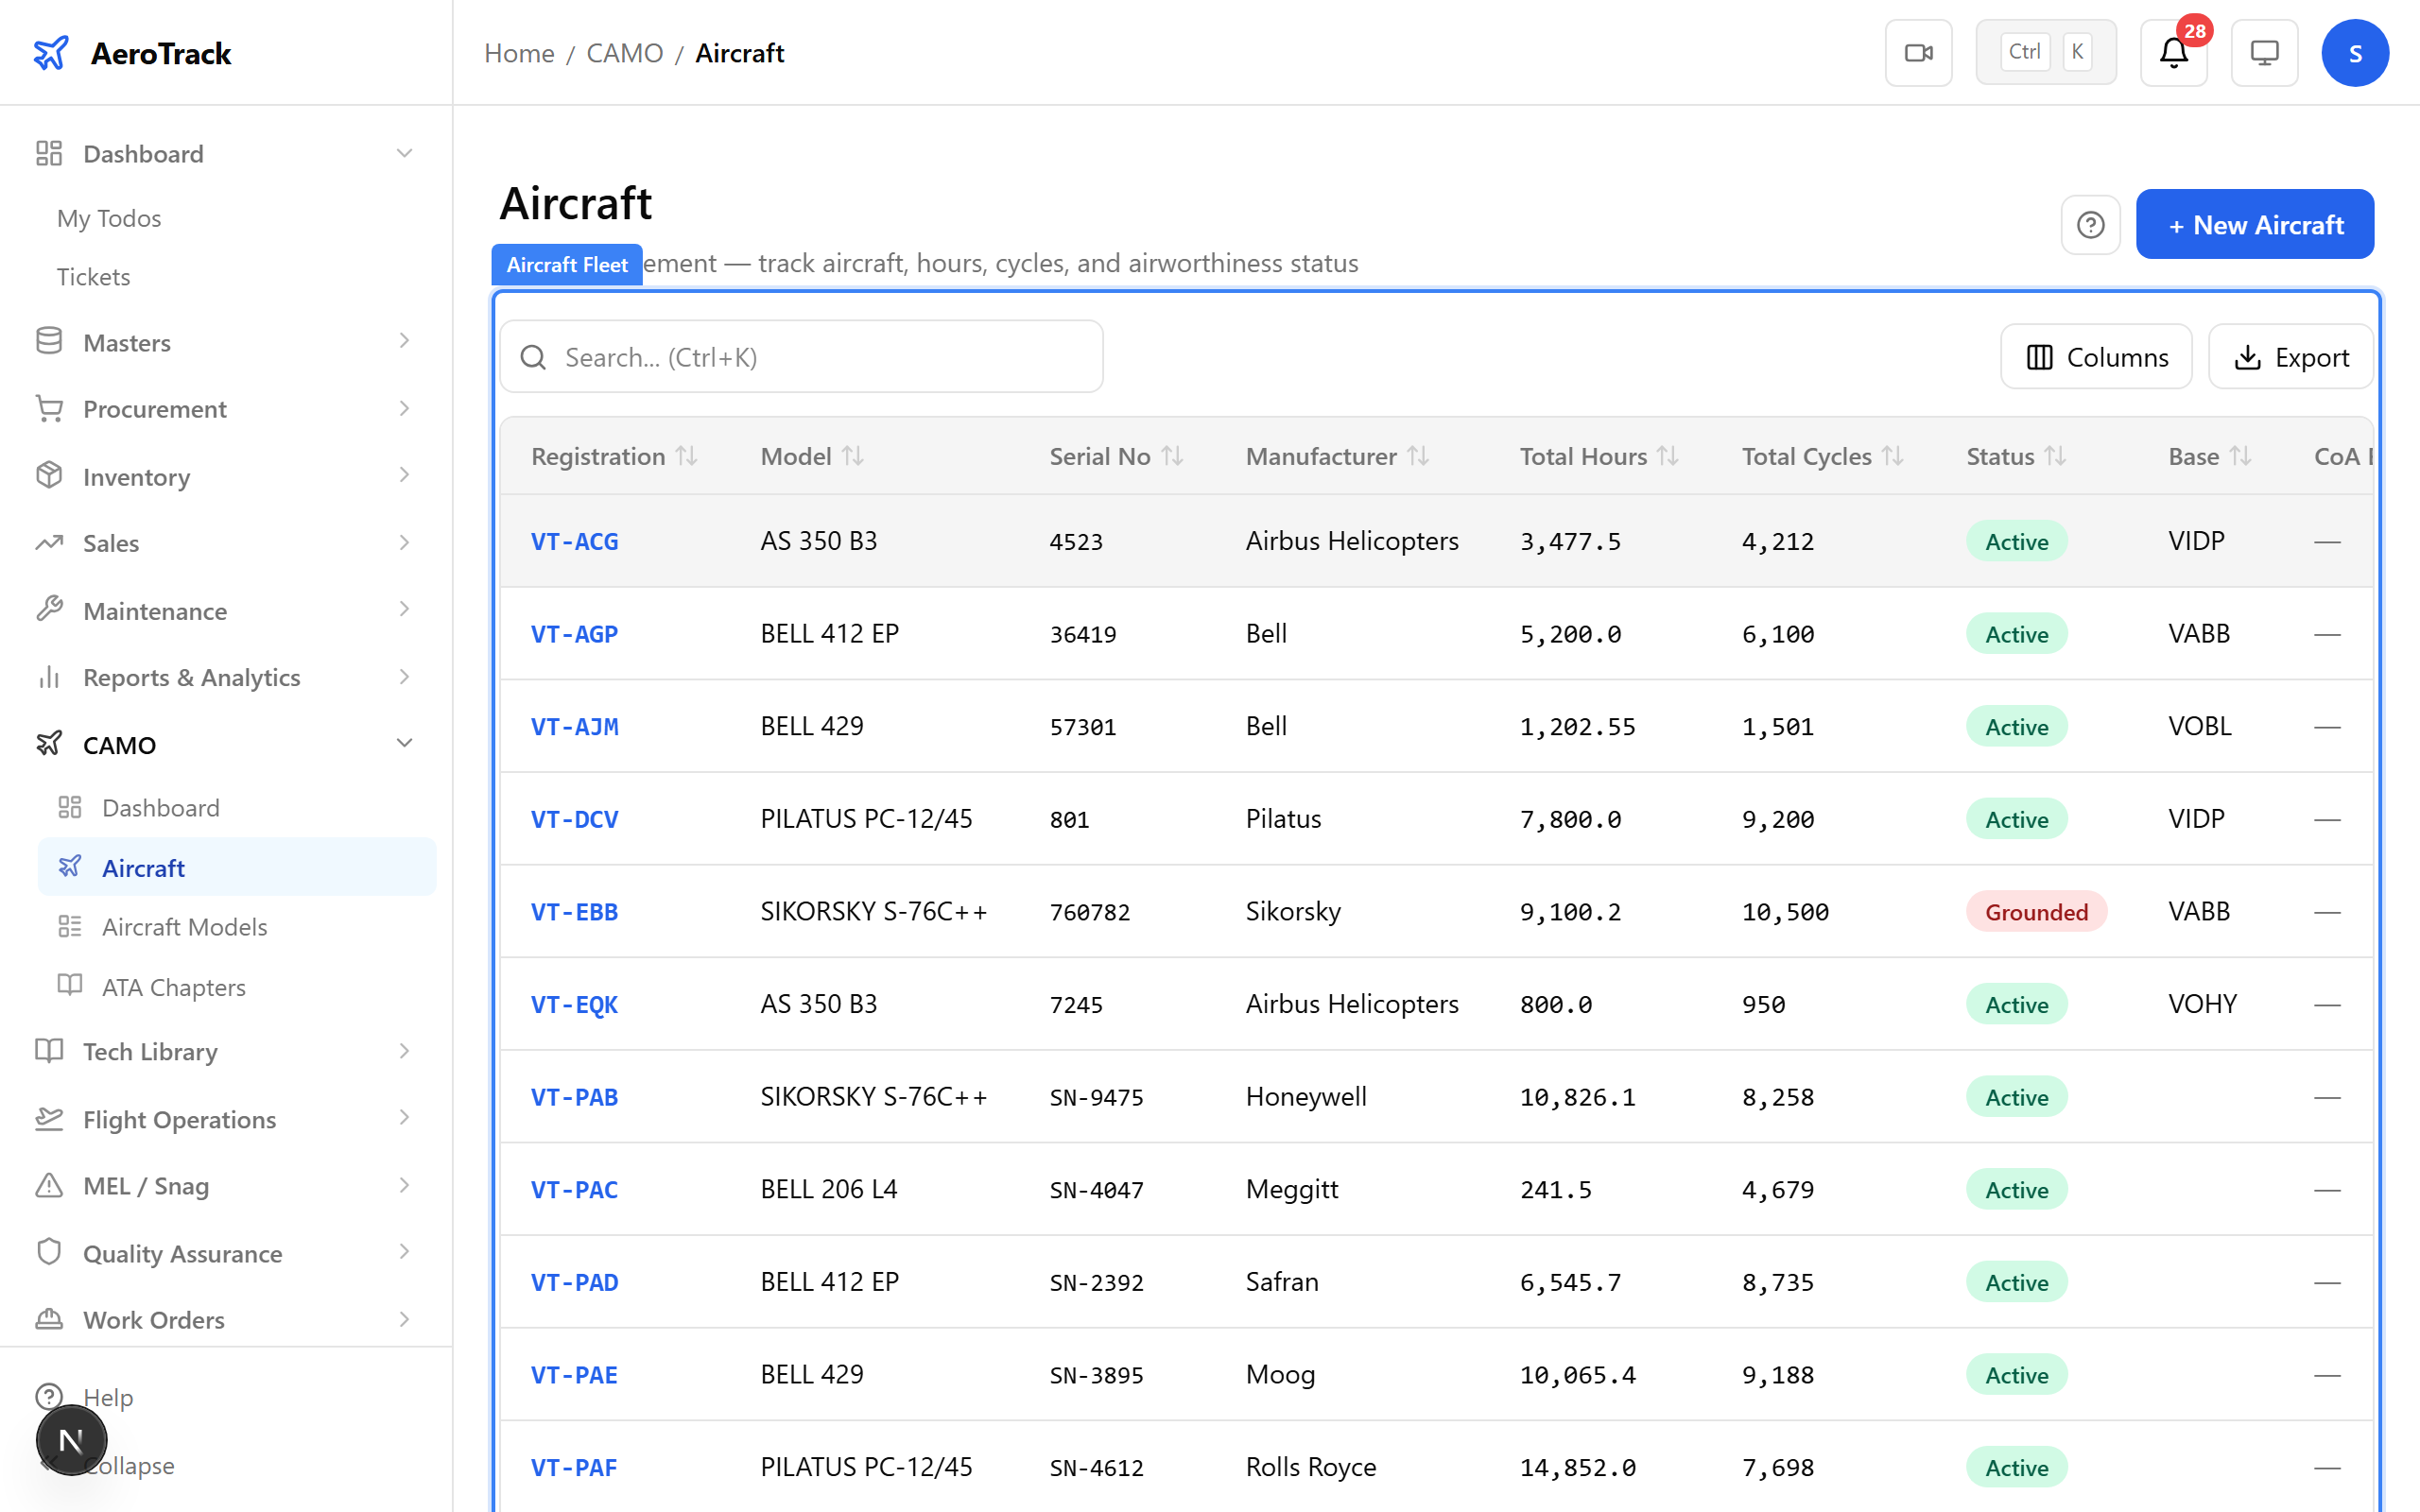
Navigate to CAMO → Aircraft. This is your fleet register — every aircraft with its registration, model, status, hours, and cycles. Status colours tell you at a glance: green = active, red = grounded, grey = stored/retired.
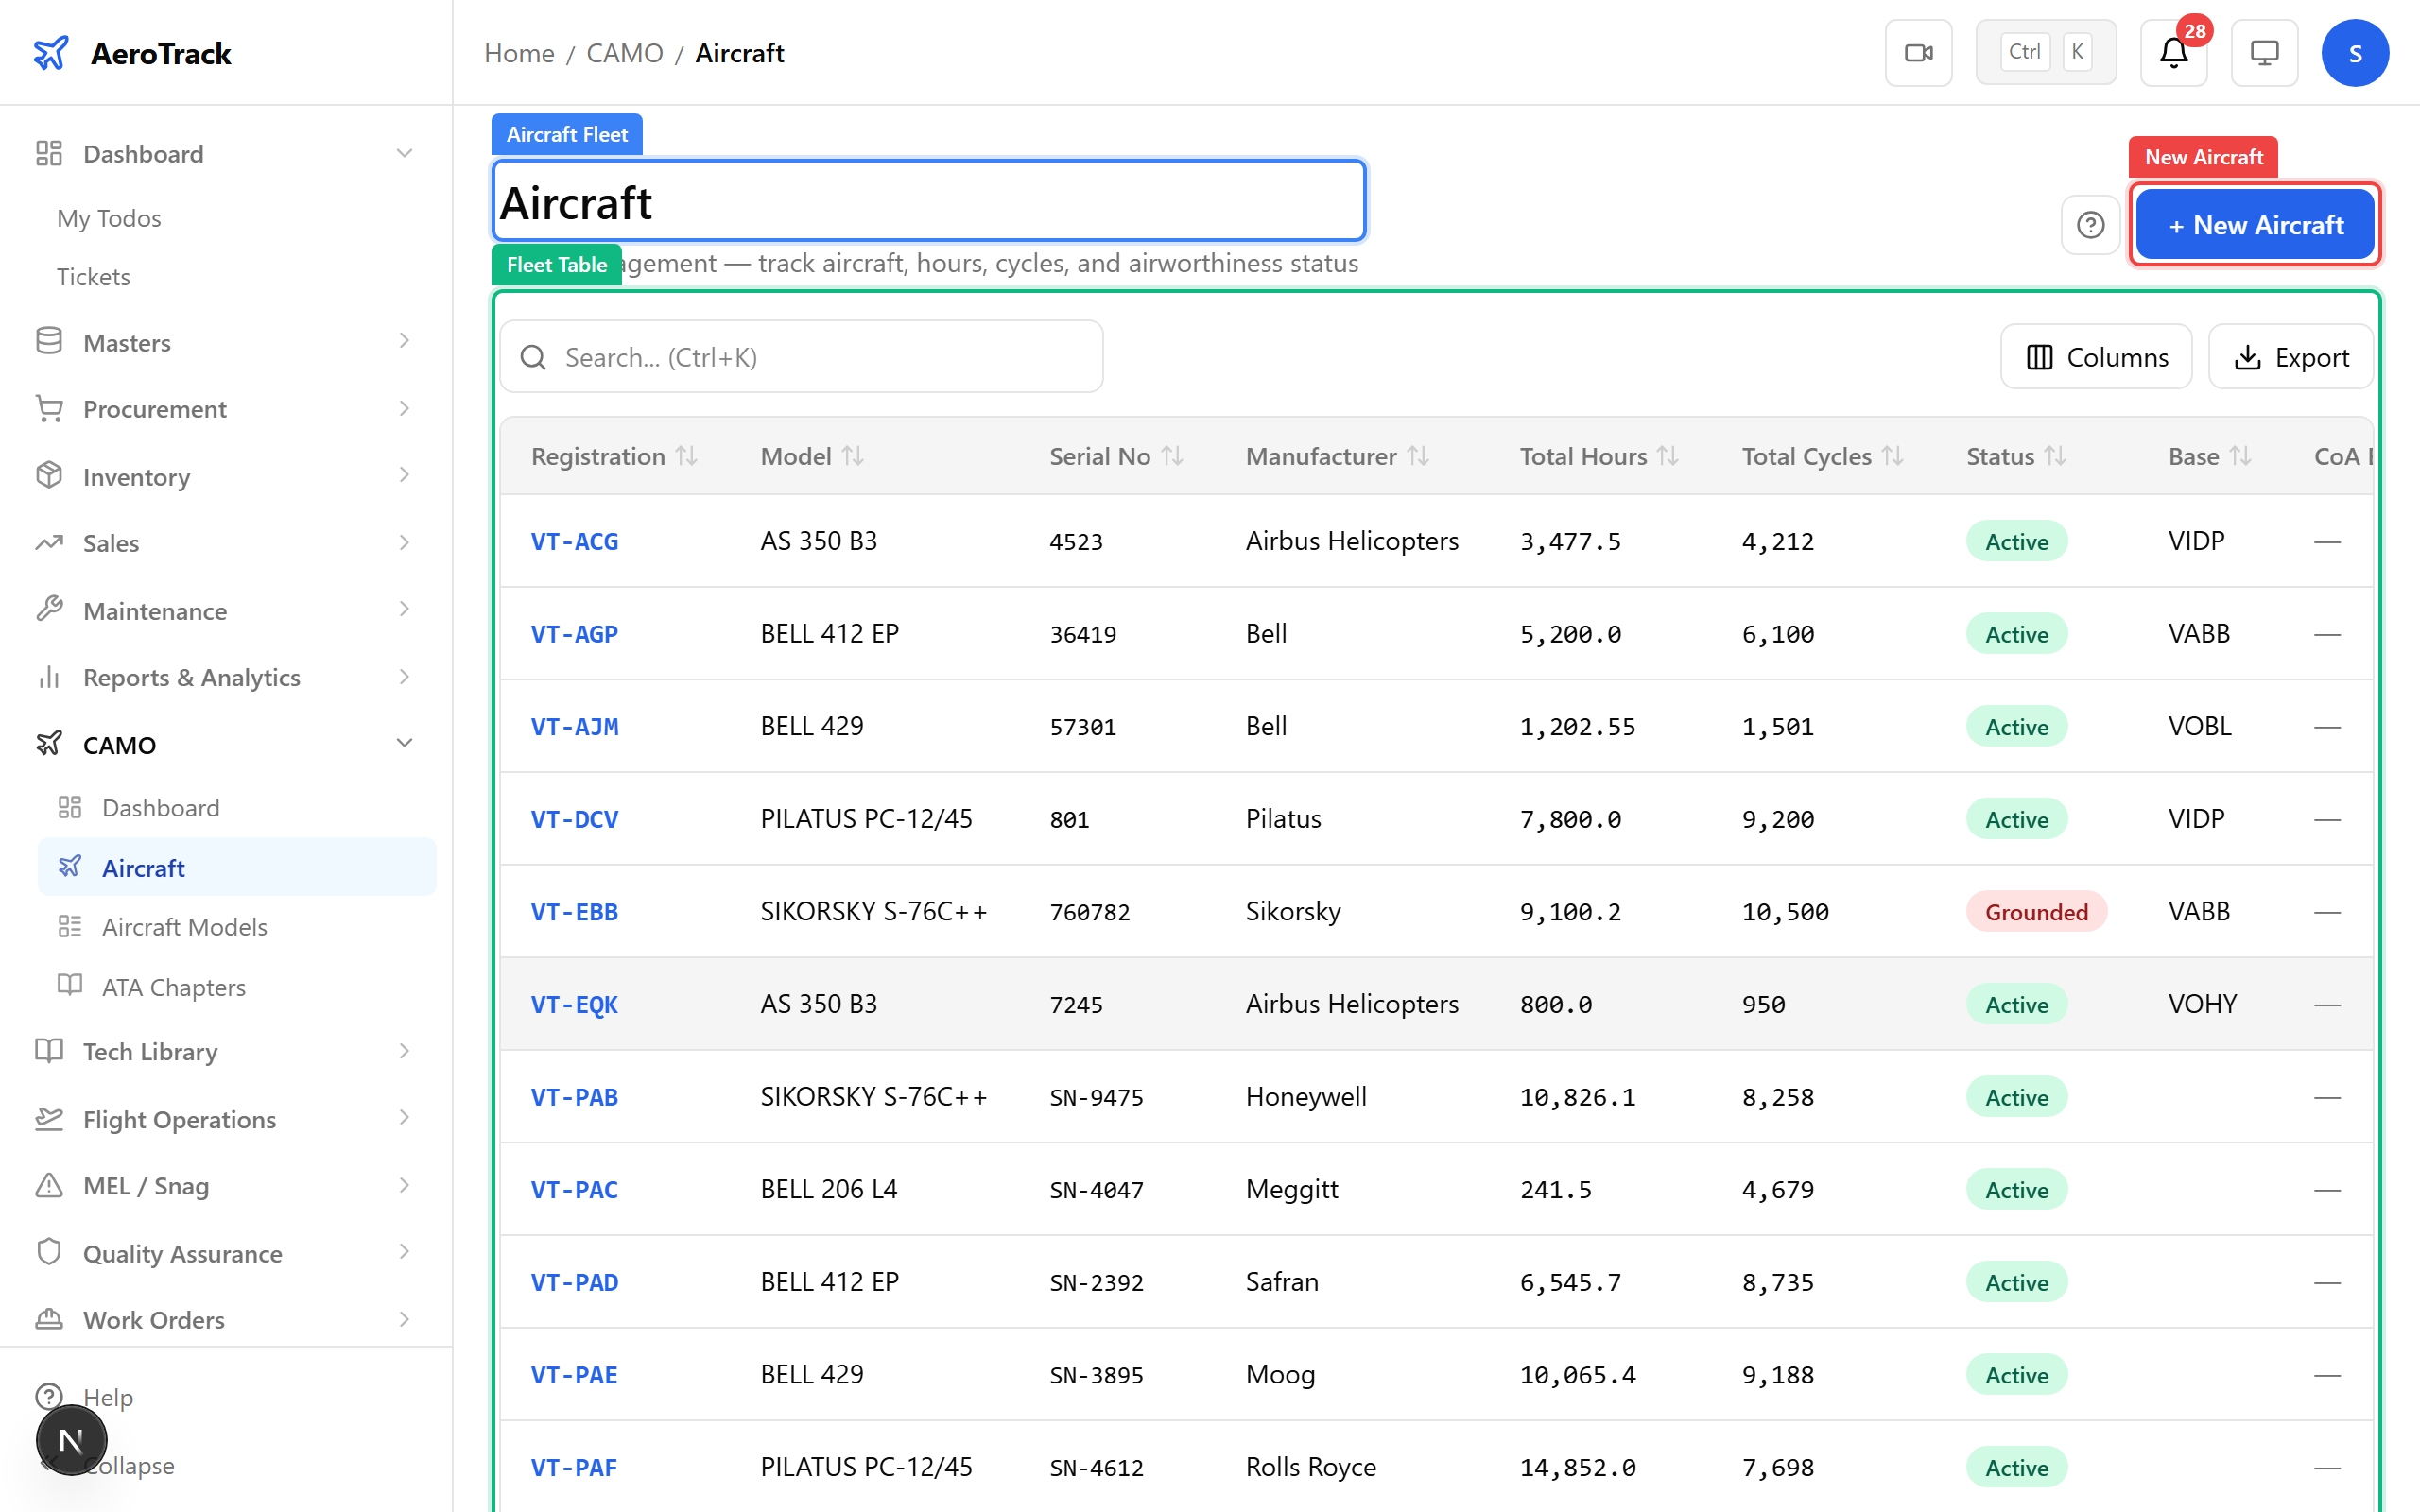
▲ Grounded and stored aircraft won't appear in active flight log dropdowns — the system enforces this automatically.
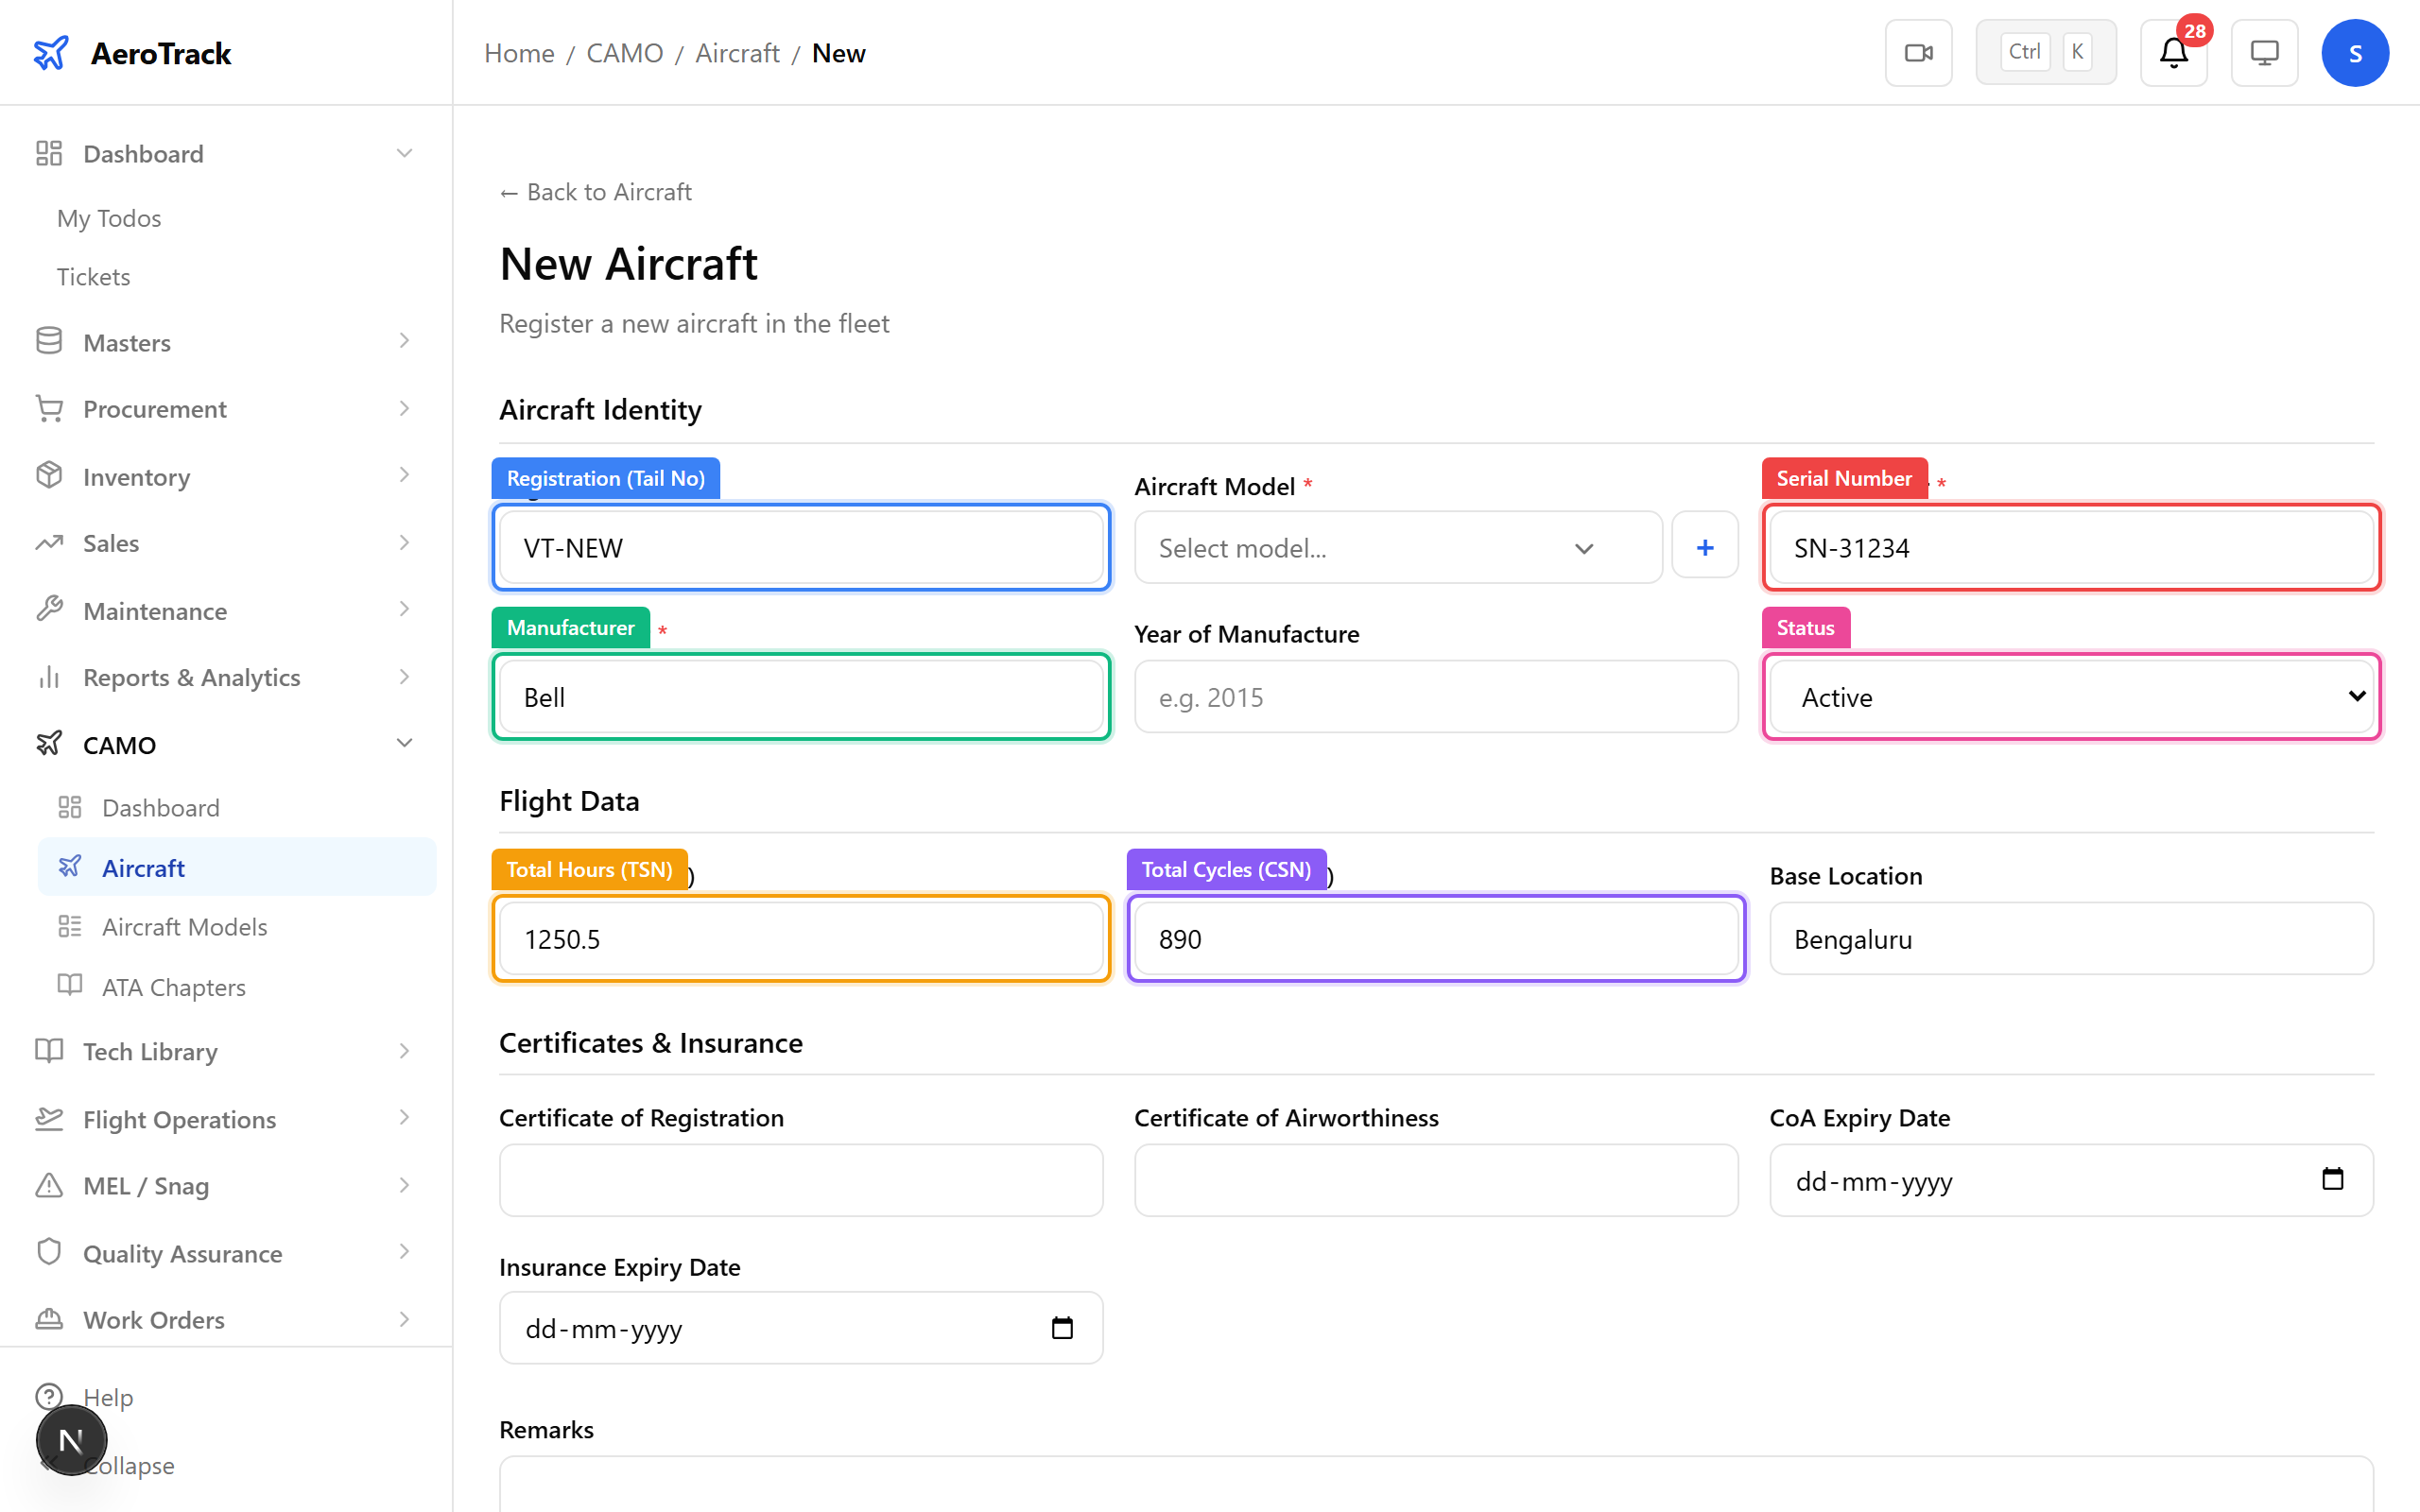
Click New Aircraft. The registration is the unique tail number (e.g. VT-ACG). Hours and cycles entered here become the starting baseline — the system counts up from here as flight logs are added.
| Field | Purpose |
|---|---|
| Registration (Tail No) | Unique identifier — VT-xxx for Indian registered aircraft |
| Model | Links to aircraft model — determines applicable task cards |
| Total Hours (TSN) | Time Since New — starting airframe hours |
| Total Cycles (CSN) | Cycles Since New — starting landing count |
| Status | Active / Grounded / Stored / Retired |
| CoA Expiry | Certificate of Airworthiness expiry — triggers reminders |
| Insurance Expiry | Insurance certificate expiry — triggers reminders |
Click any aircraft row to see its detail page — identity, flight data (current hours/cycles), certificates, installed components, and cross-links to flight logs, MELs, snags, work orders, inspections, and task history.
▲ The aircraft detail page is a hub — every related record is one click away via the cross-link cards.
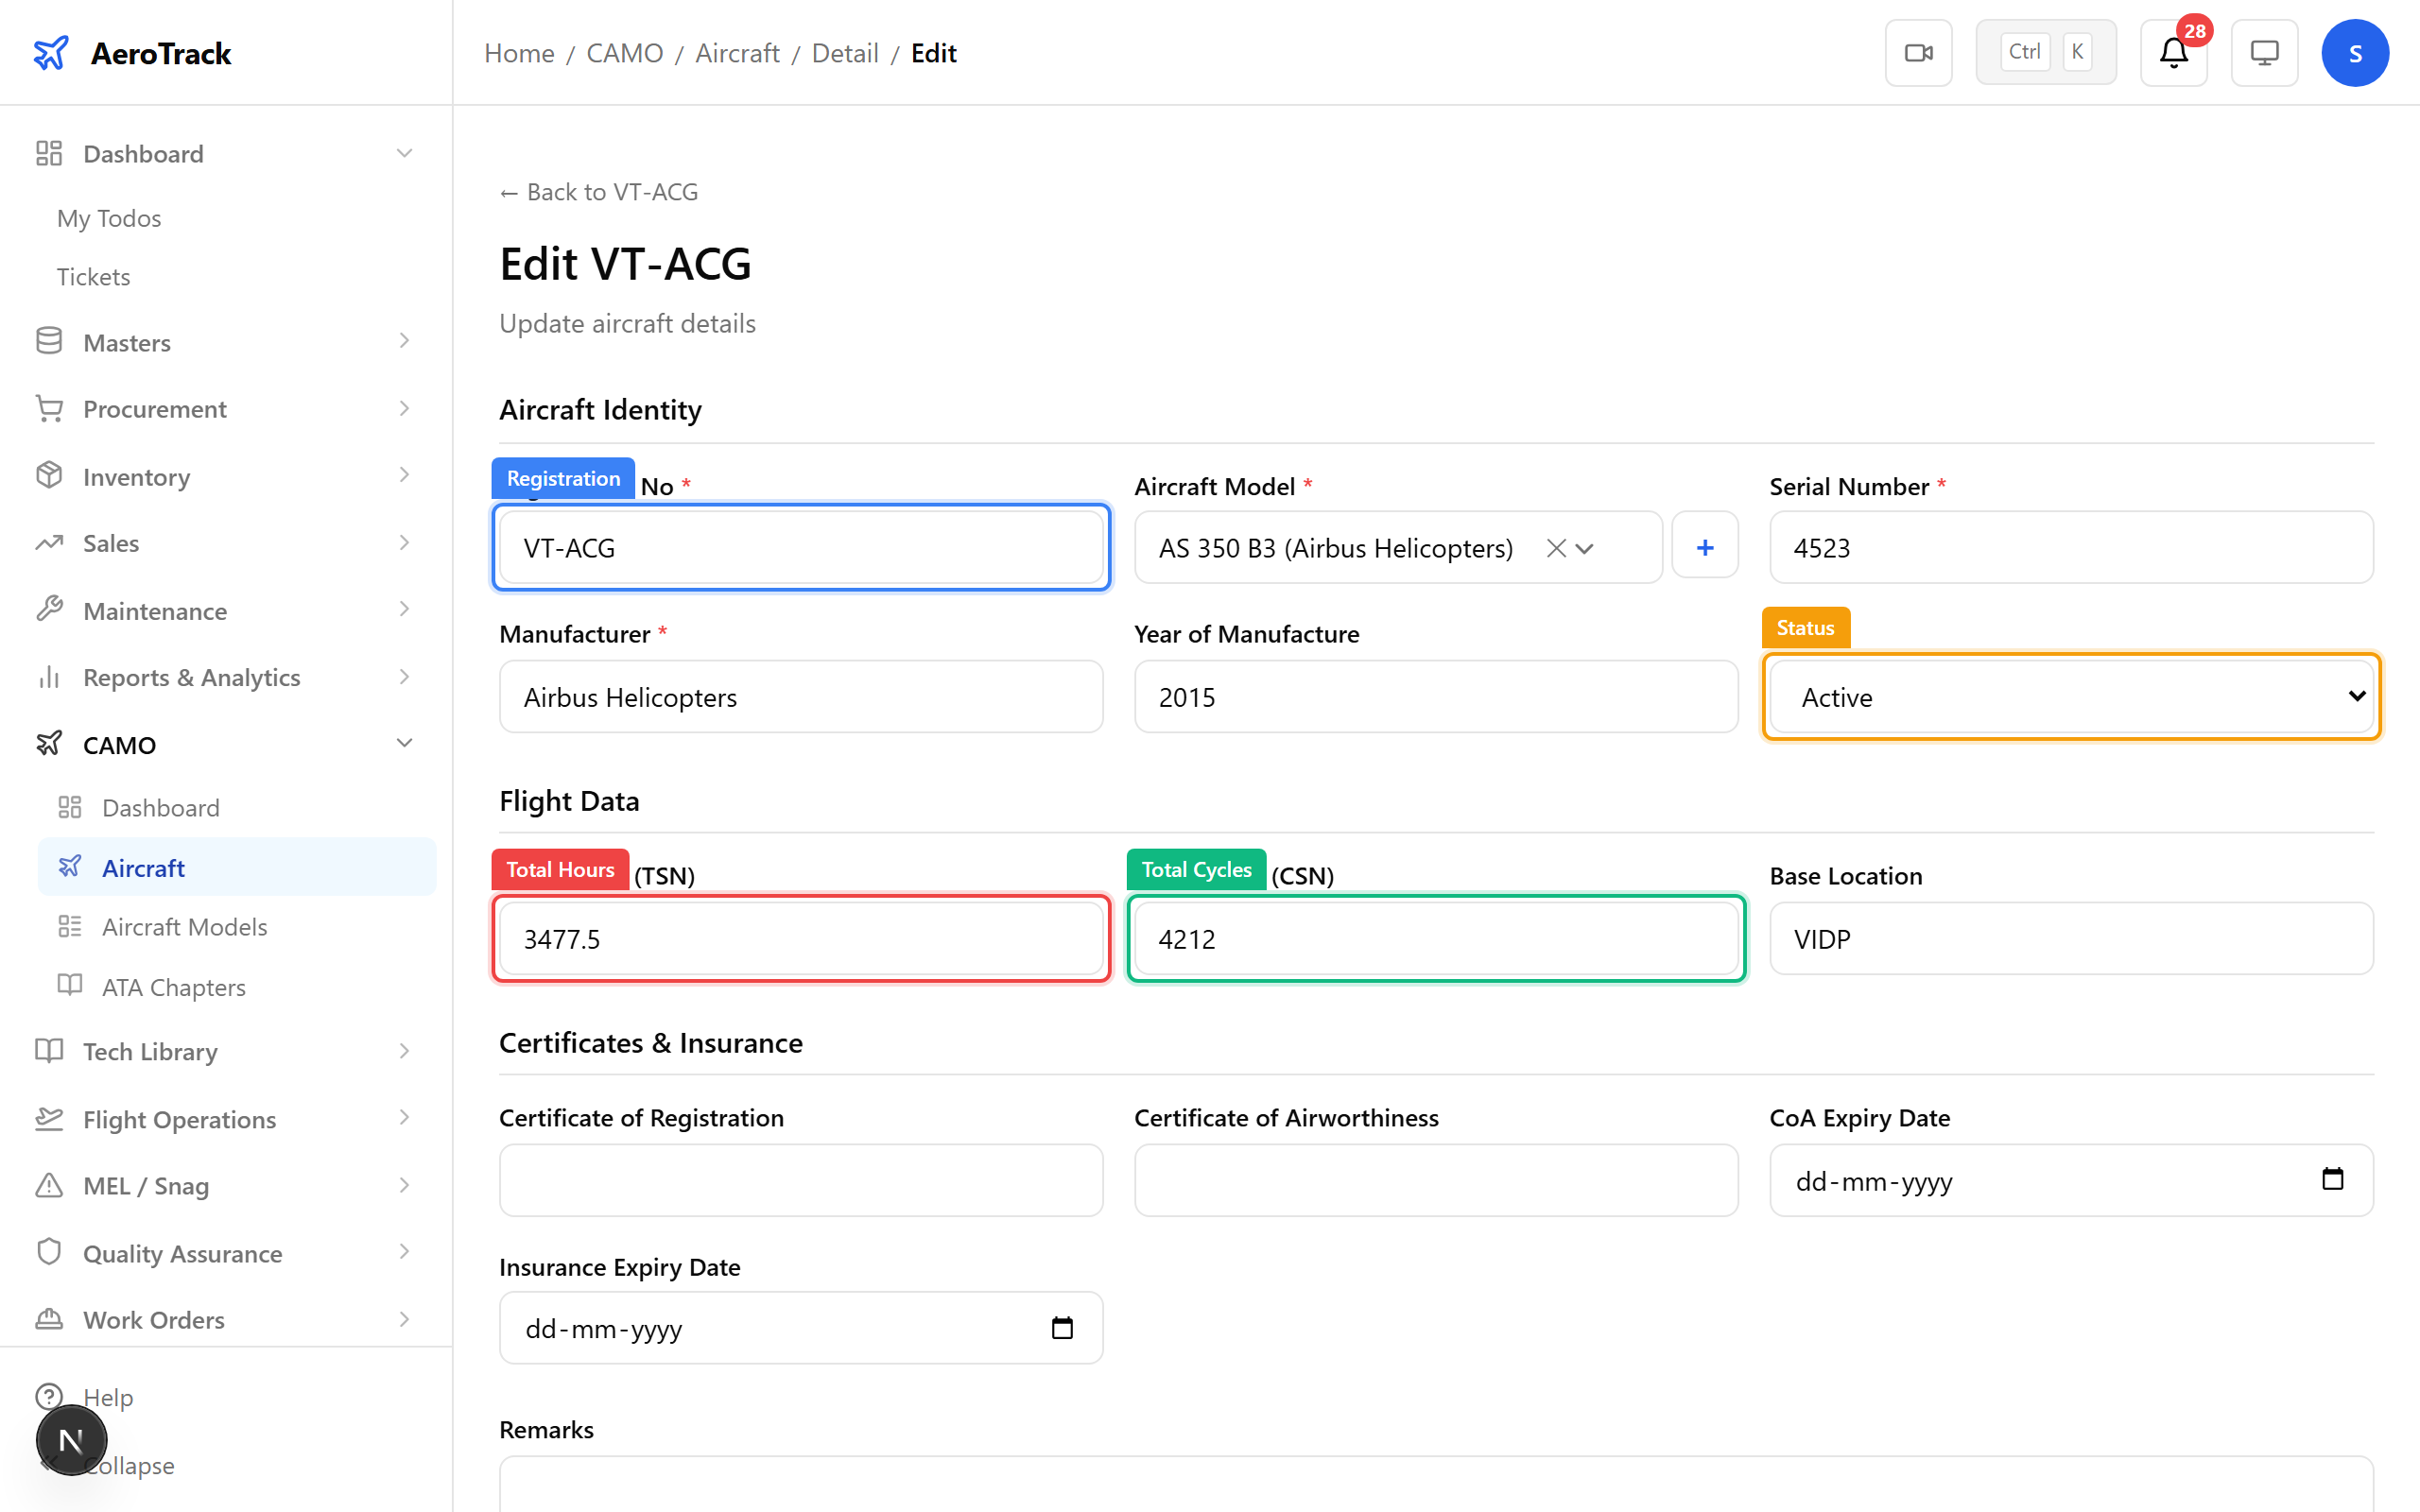
From the detail page, click Edit to update hours, cycles, status, or certificate dates. Changes to hours/cycles are audit-logged. Status changes (e.g. grounding an aircraft) take effect immediately across all modules.
The Components tab shows everything installed on this aircraft — engines, propellers, avionics, landing gear, APU. Each component tracks its own hours, cycles, and life limits independently of the airframe.
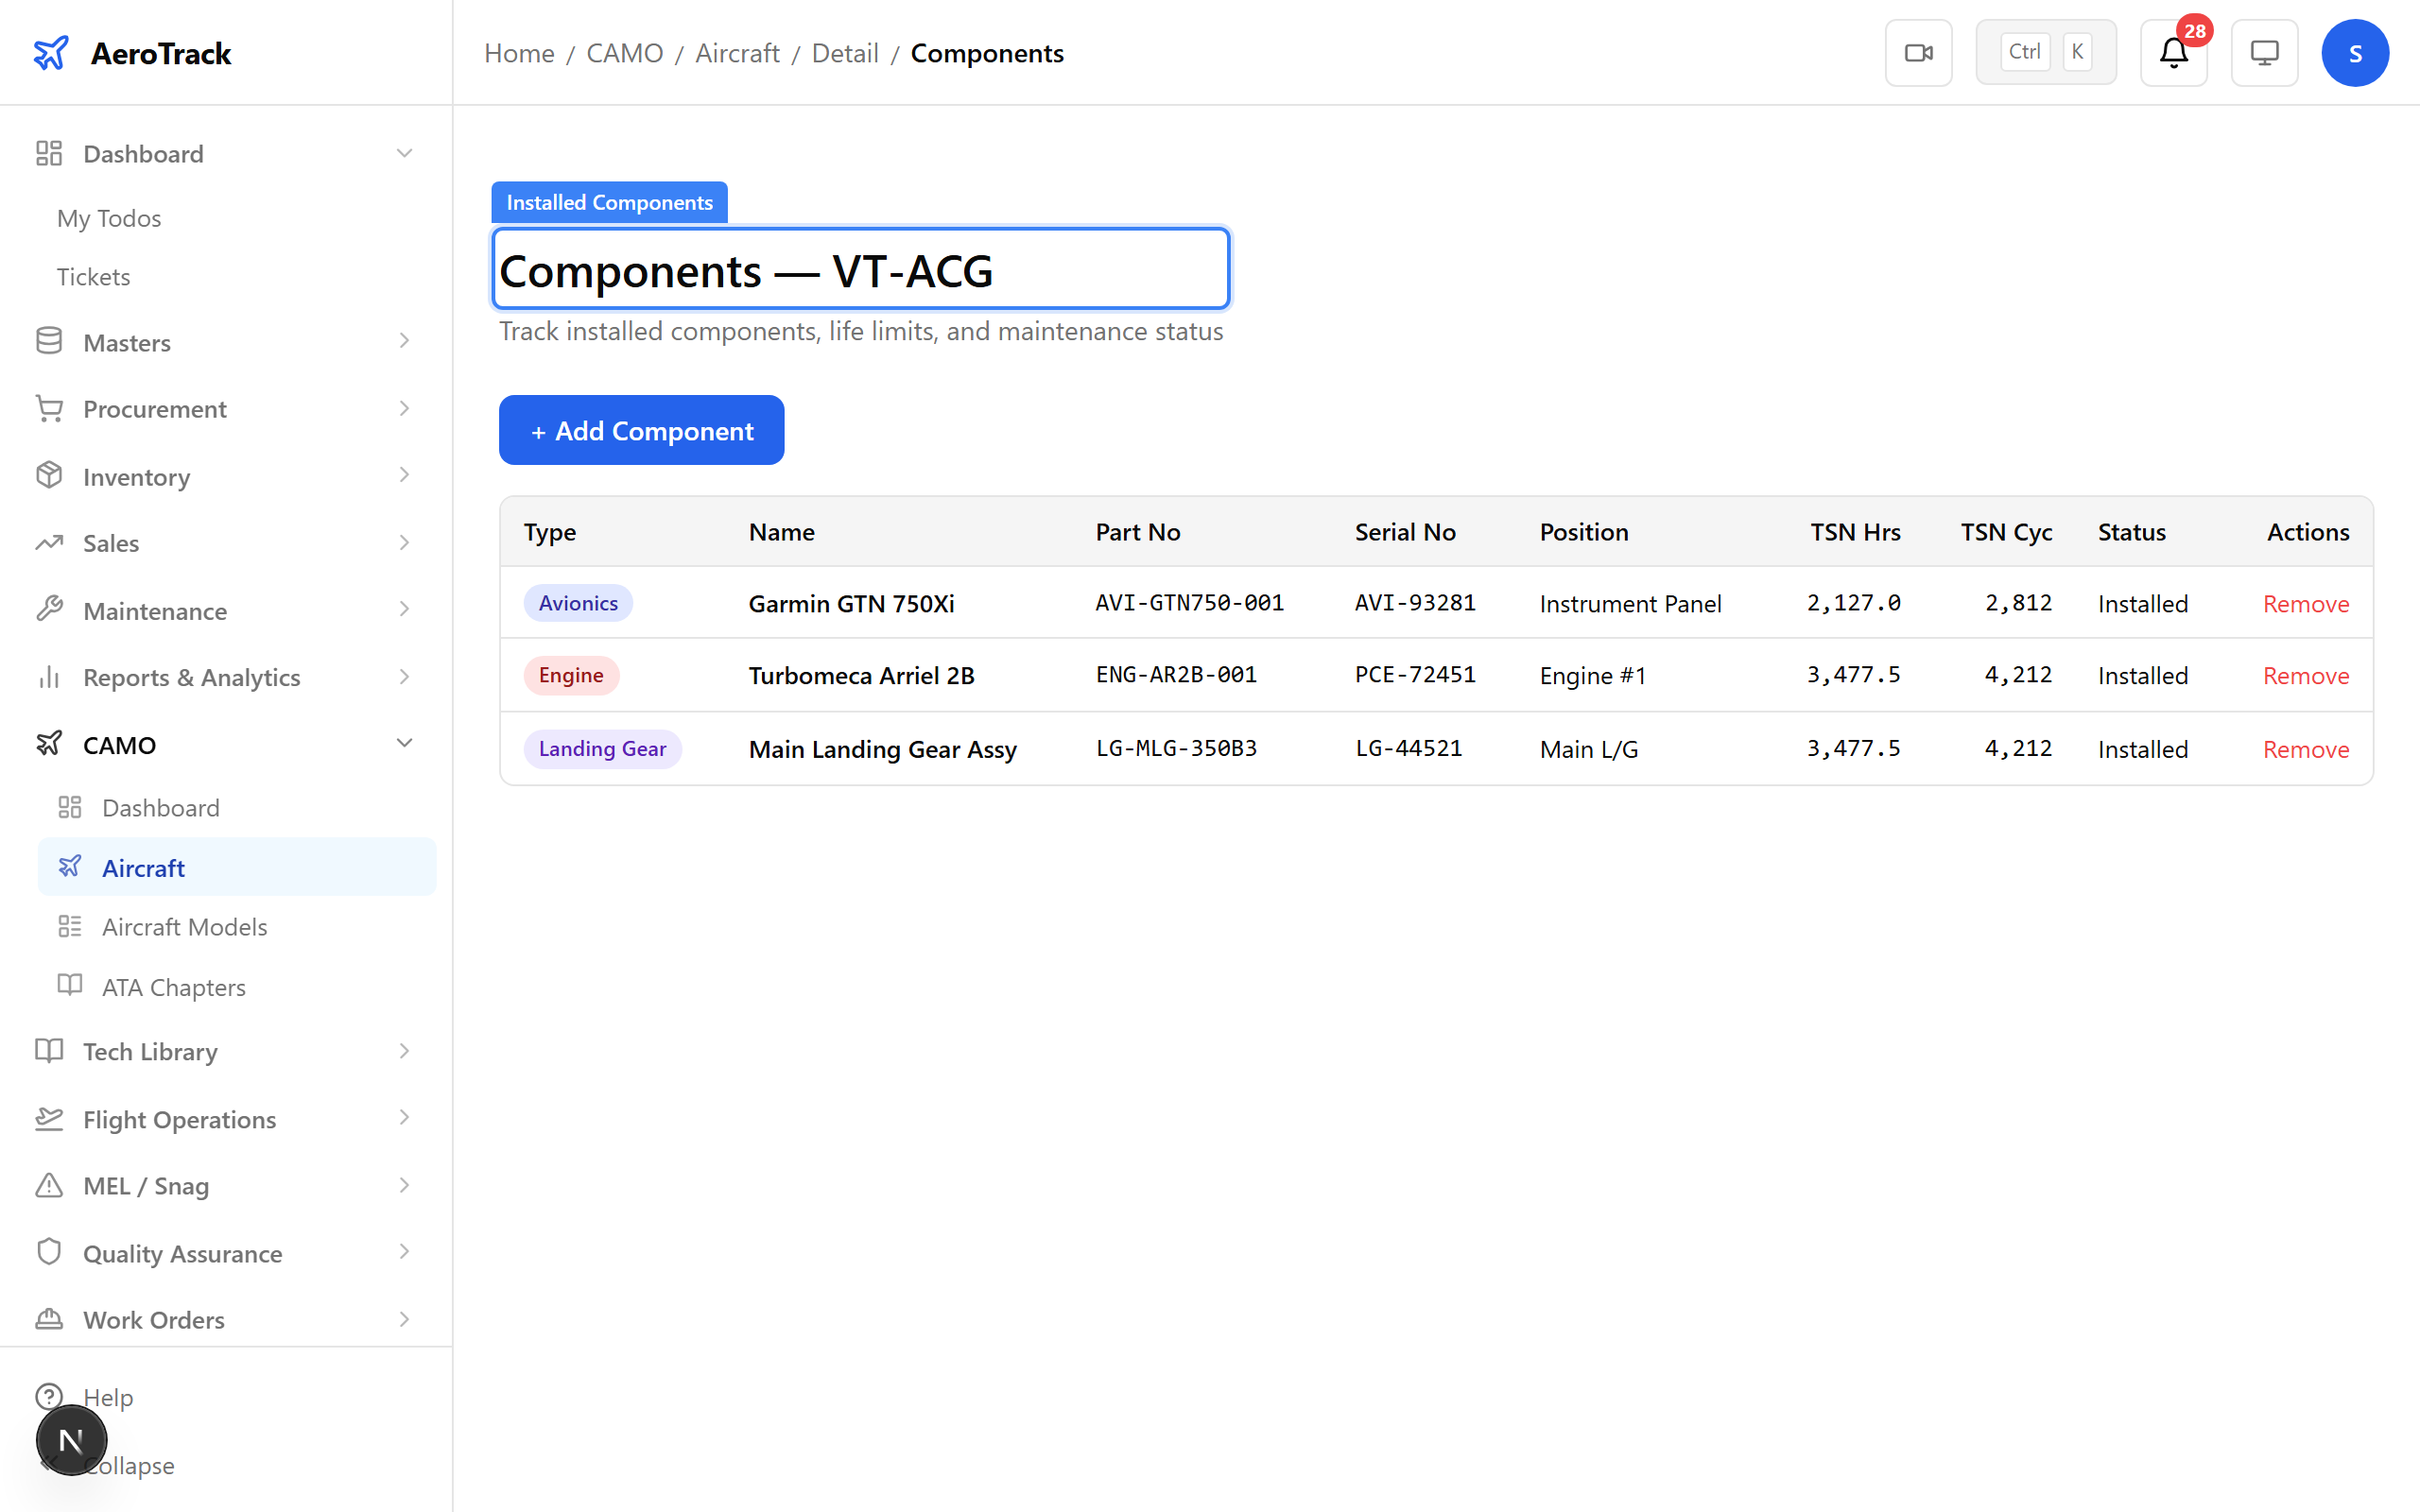
Navigate to Flight Ops → Component Status for a fleet-wide view of all tracked components. Health badges show CRITICAL (red), WARNING (amber), and OK (green) based on remaining life versus limits.

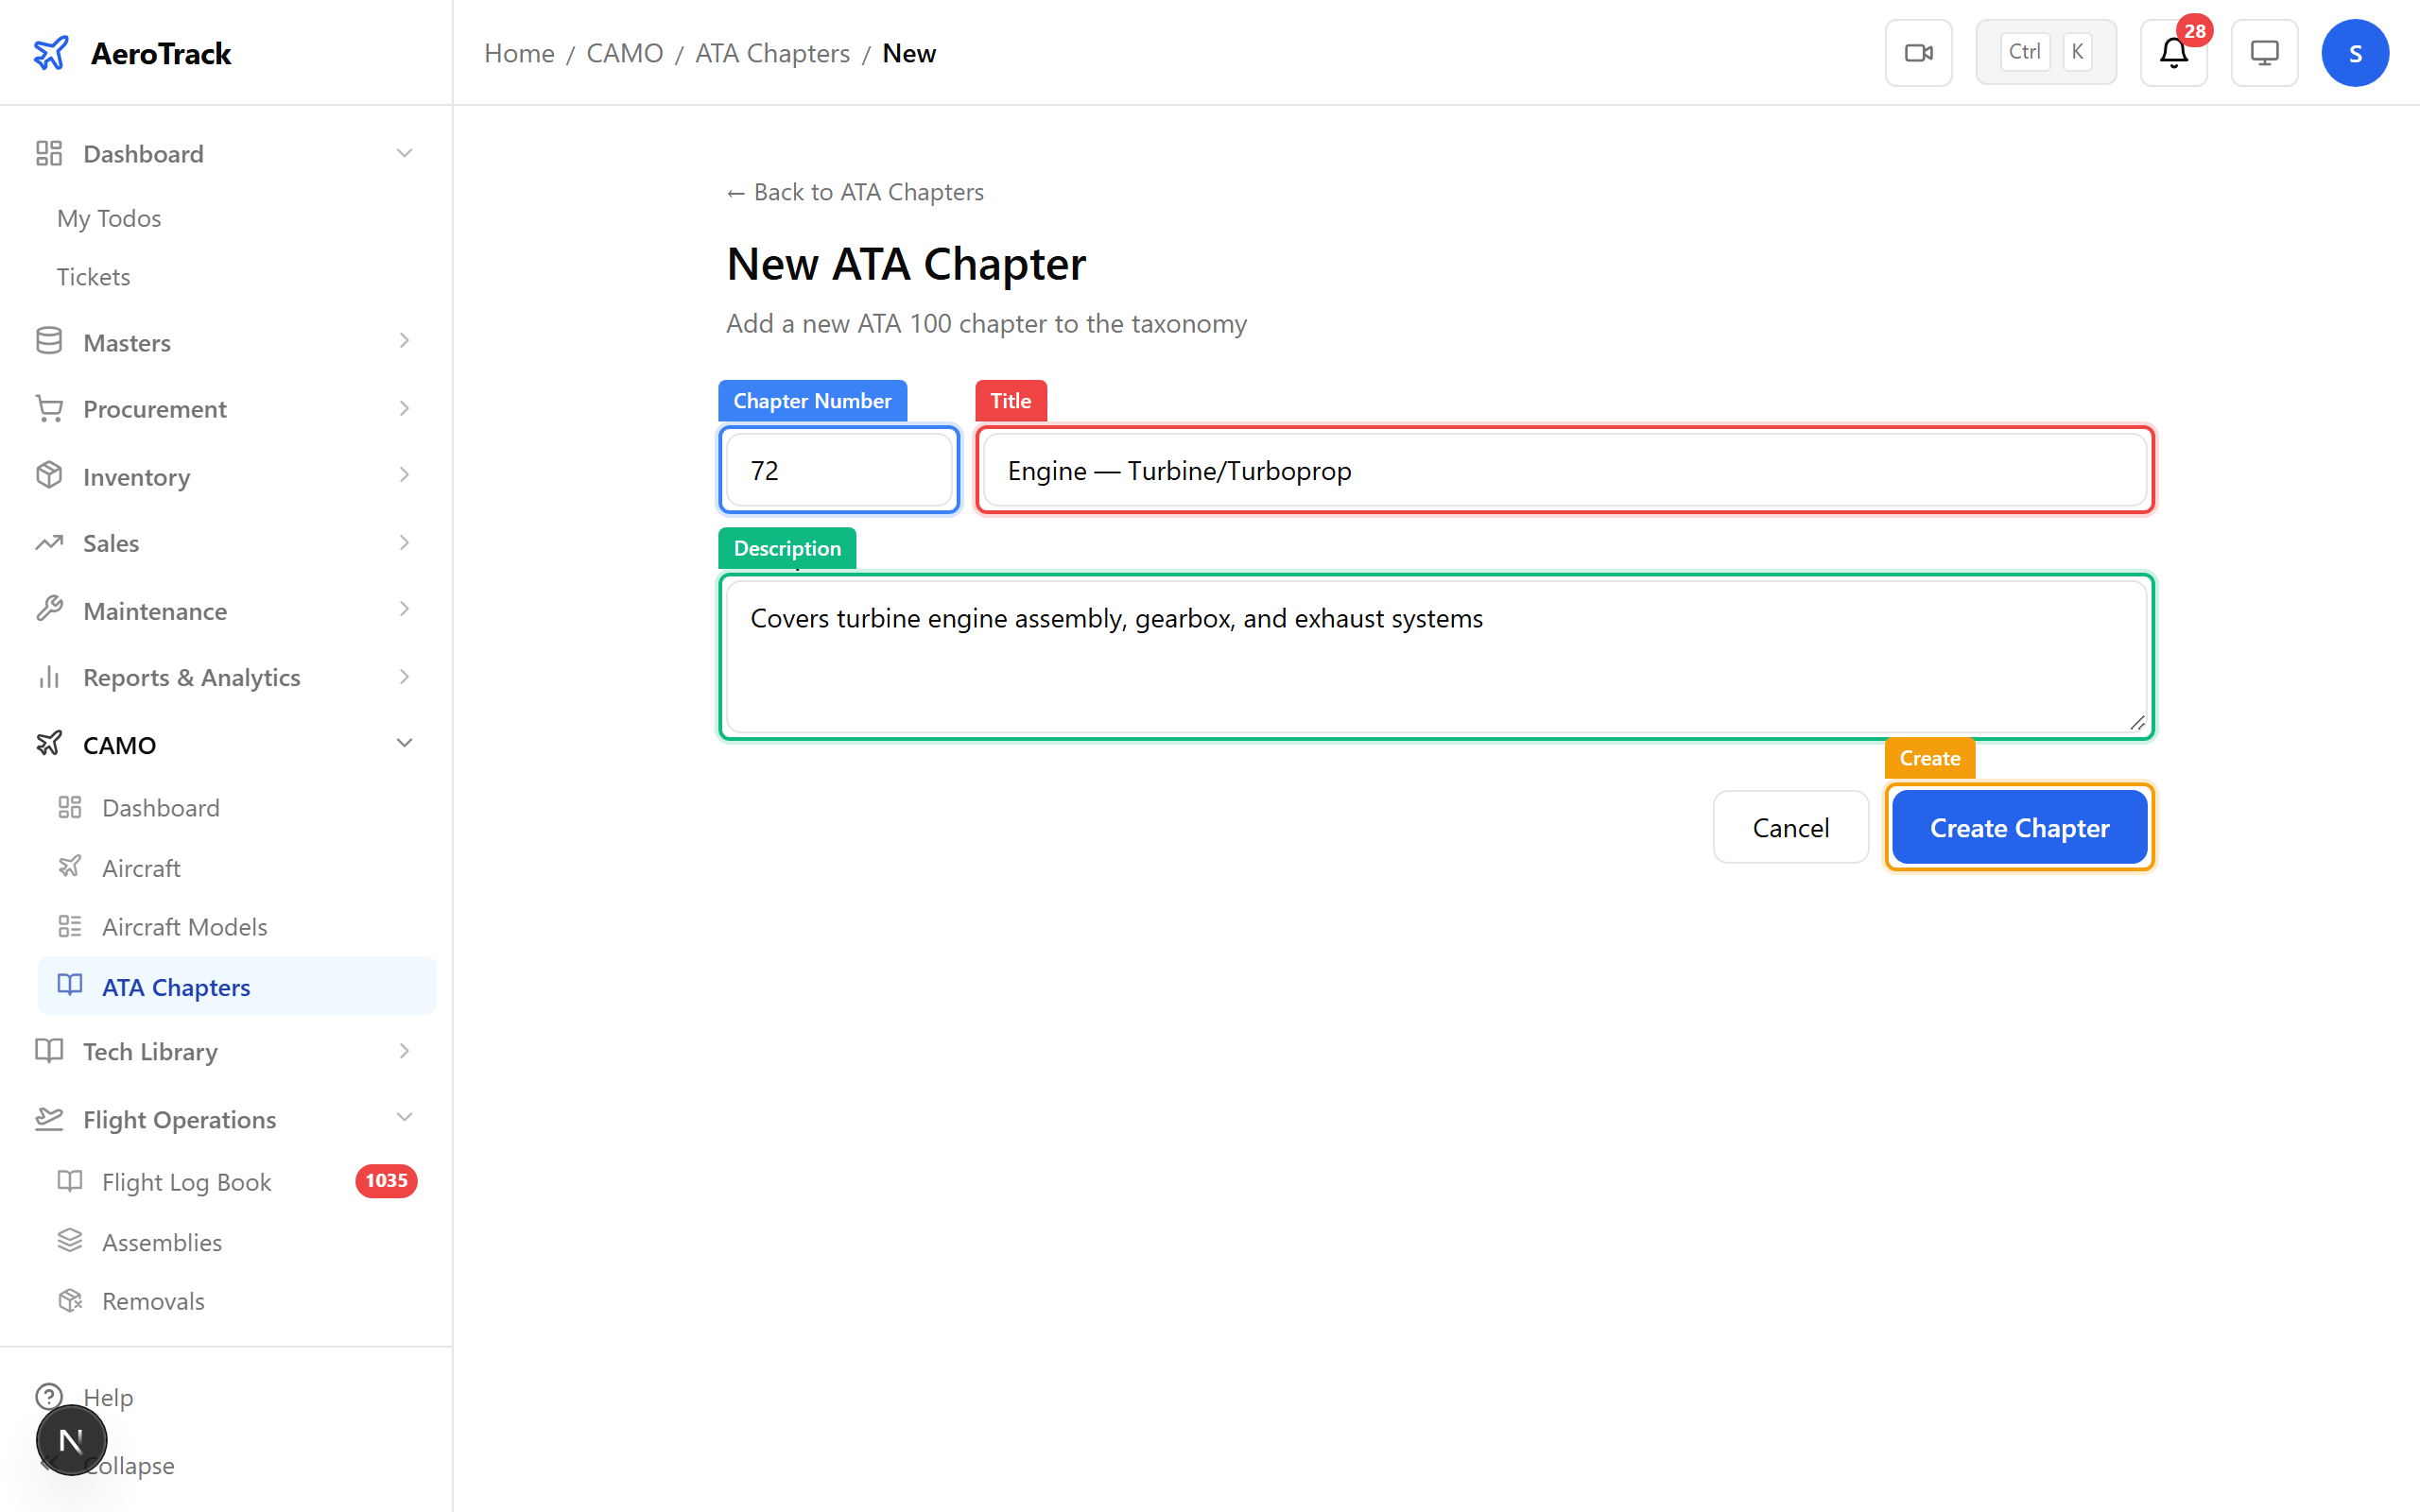
Navigate to CAMO → ATA Chapters. The ATA numbering system organises all maintenance tasks. Chapter 72 is Engine, Chapter 32 is Landing Gear, Chapter 21 is Air Conditioning, and so on. Task cards and inspections reference these chapters.
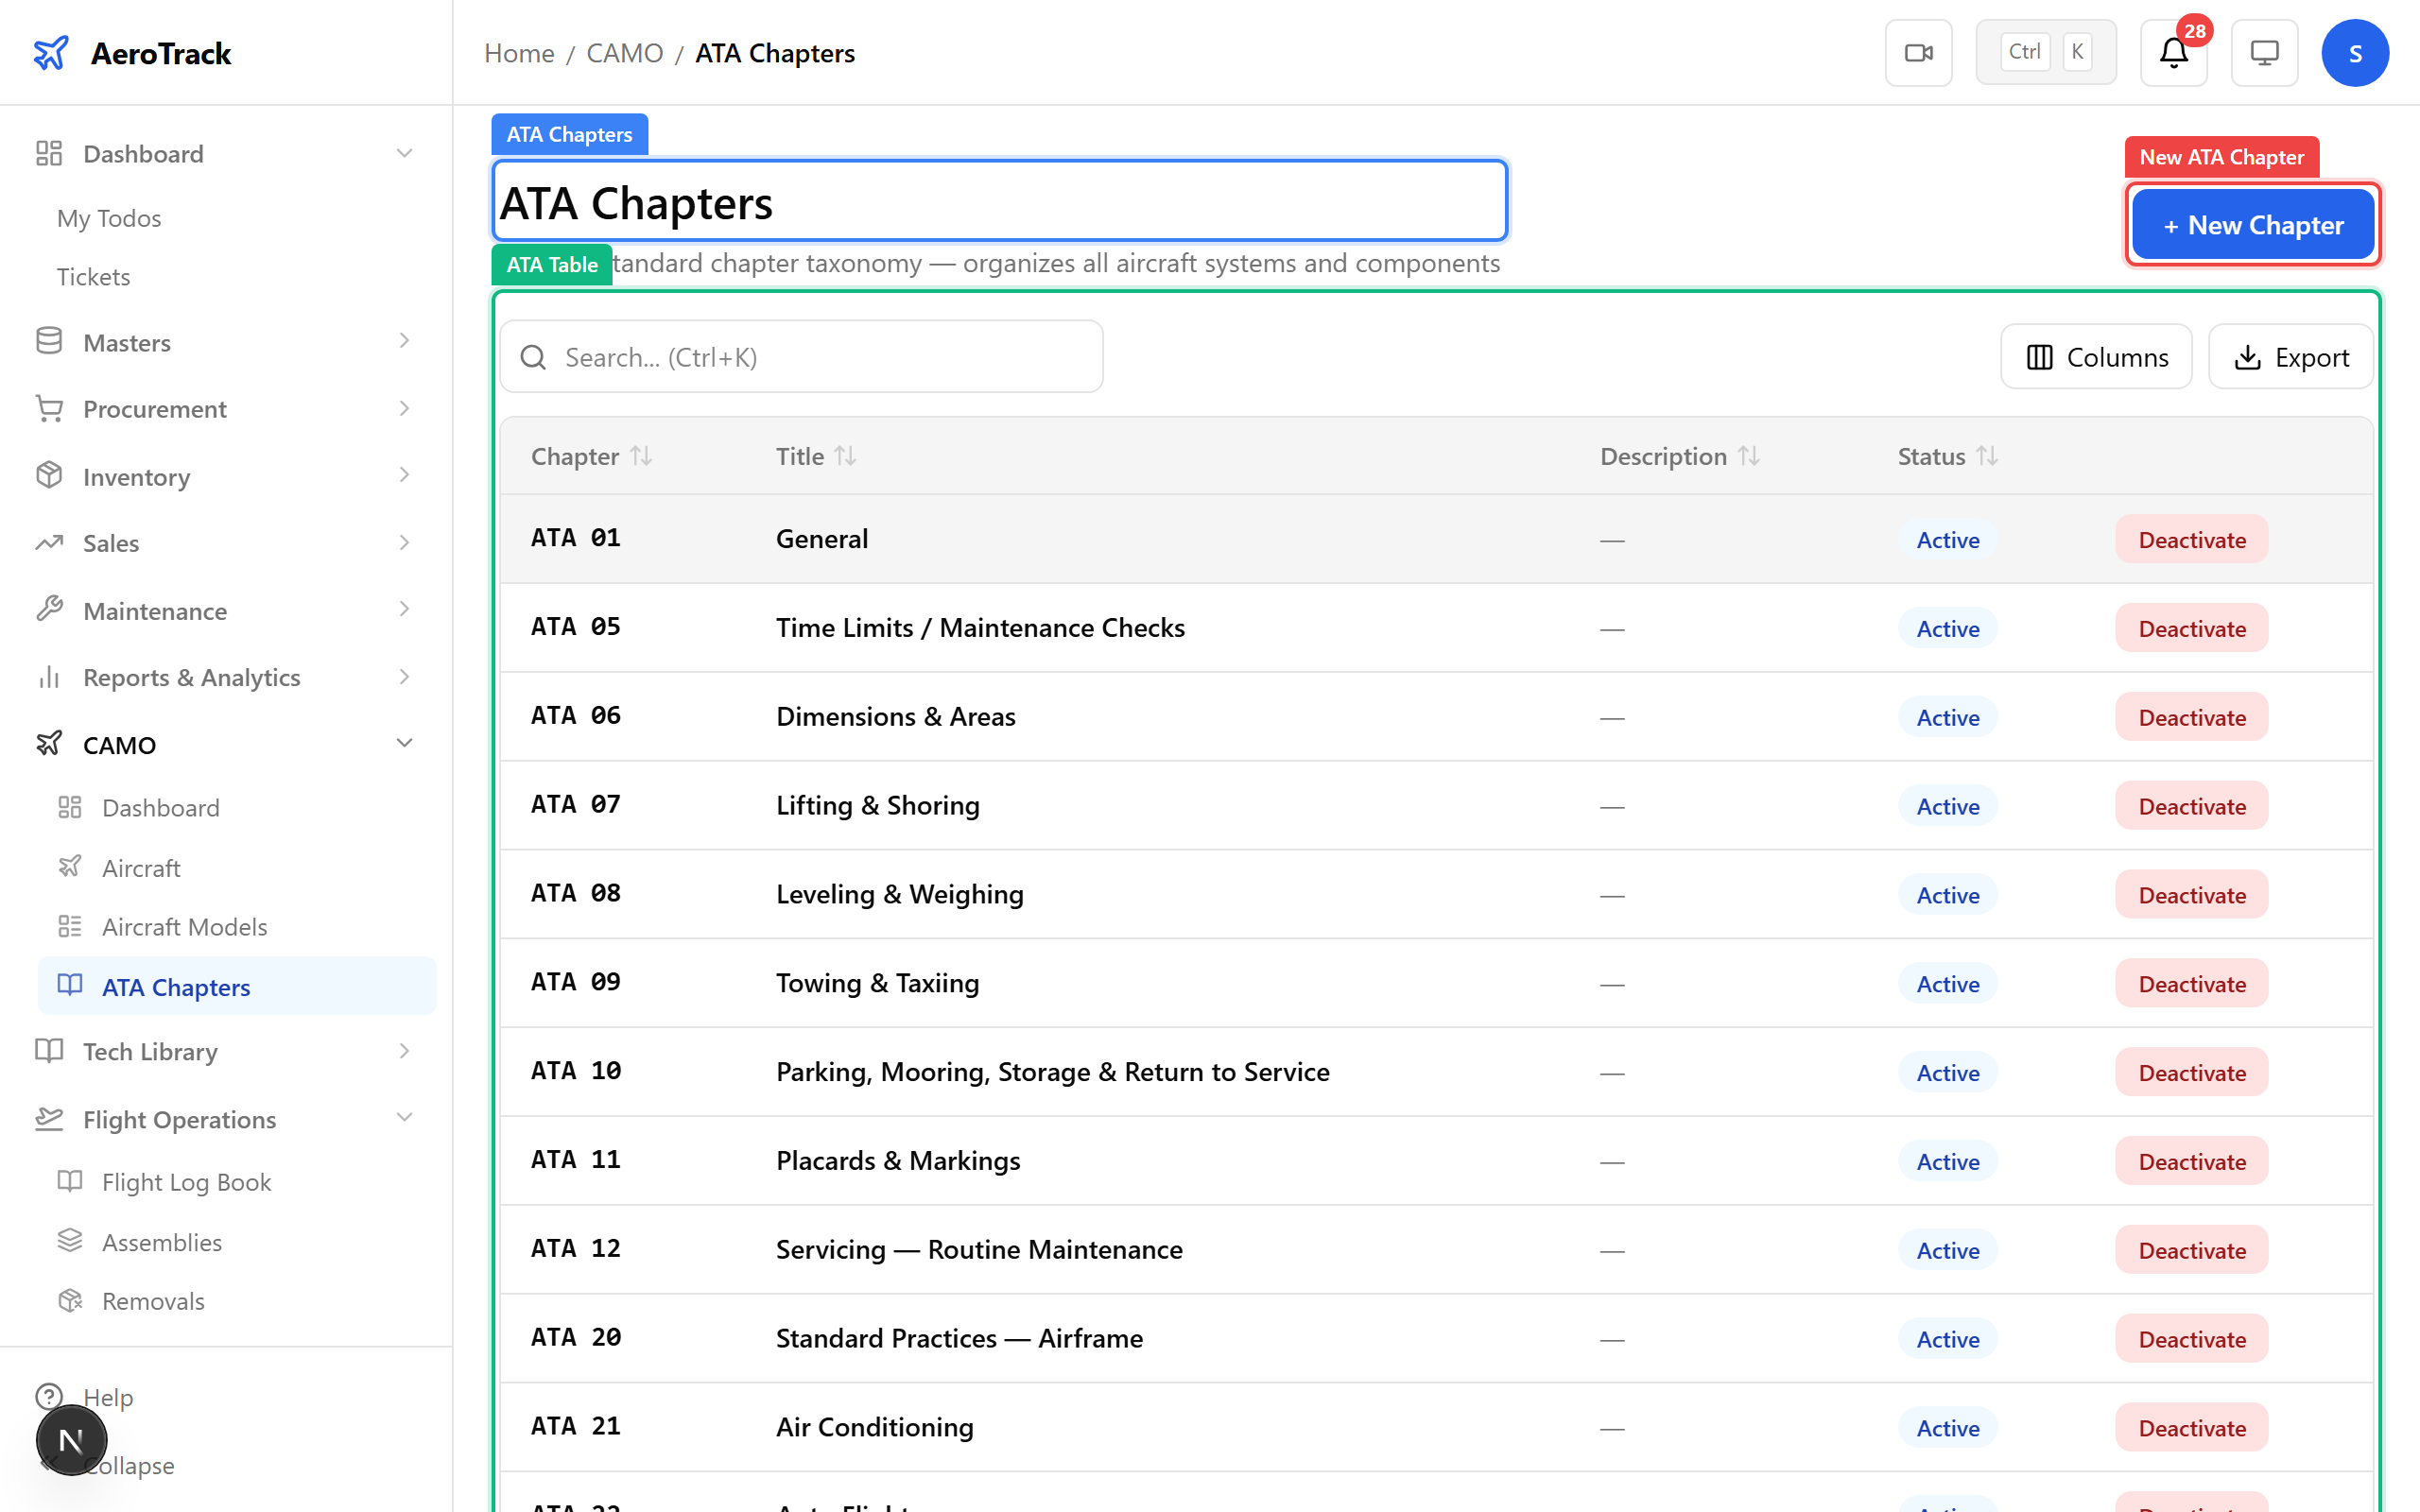
The seed includes standard ATA chapters, but you can add custom ones for STCs or operator-specific systems.
▲ ATA chapters organise all maintenance tasks. Chapter 72 is Engine, Chapter 32 is Landing Gear, etc.
Navigate to Flight Ops → Inspections. This is the inspection matrix — every scheduled check across all aircraft. Colour coding shows status: red = overdue, amber = due soon, green = OK. The Onboard Aircraft button bulk-creates inspections for new aircraft.
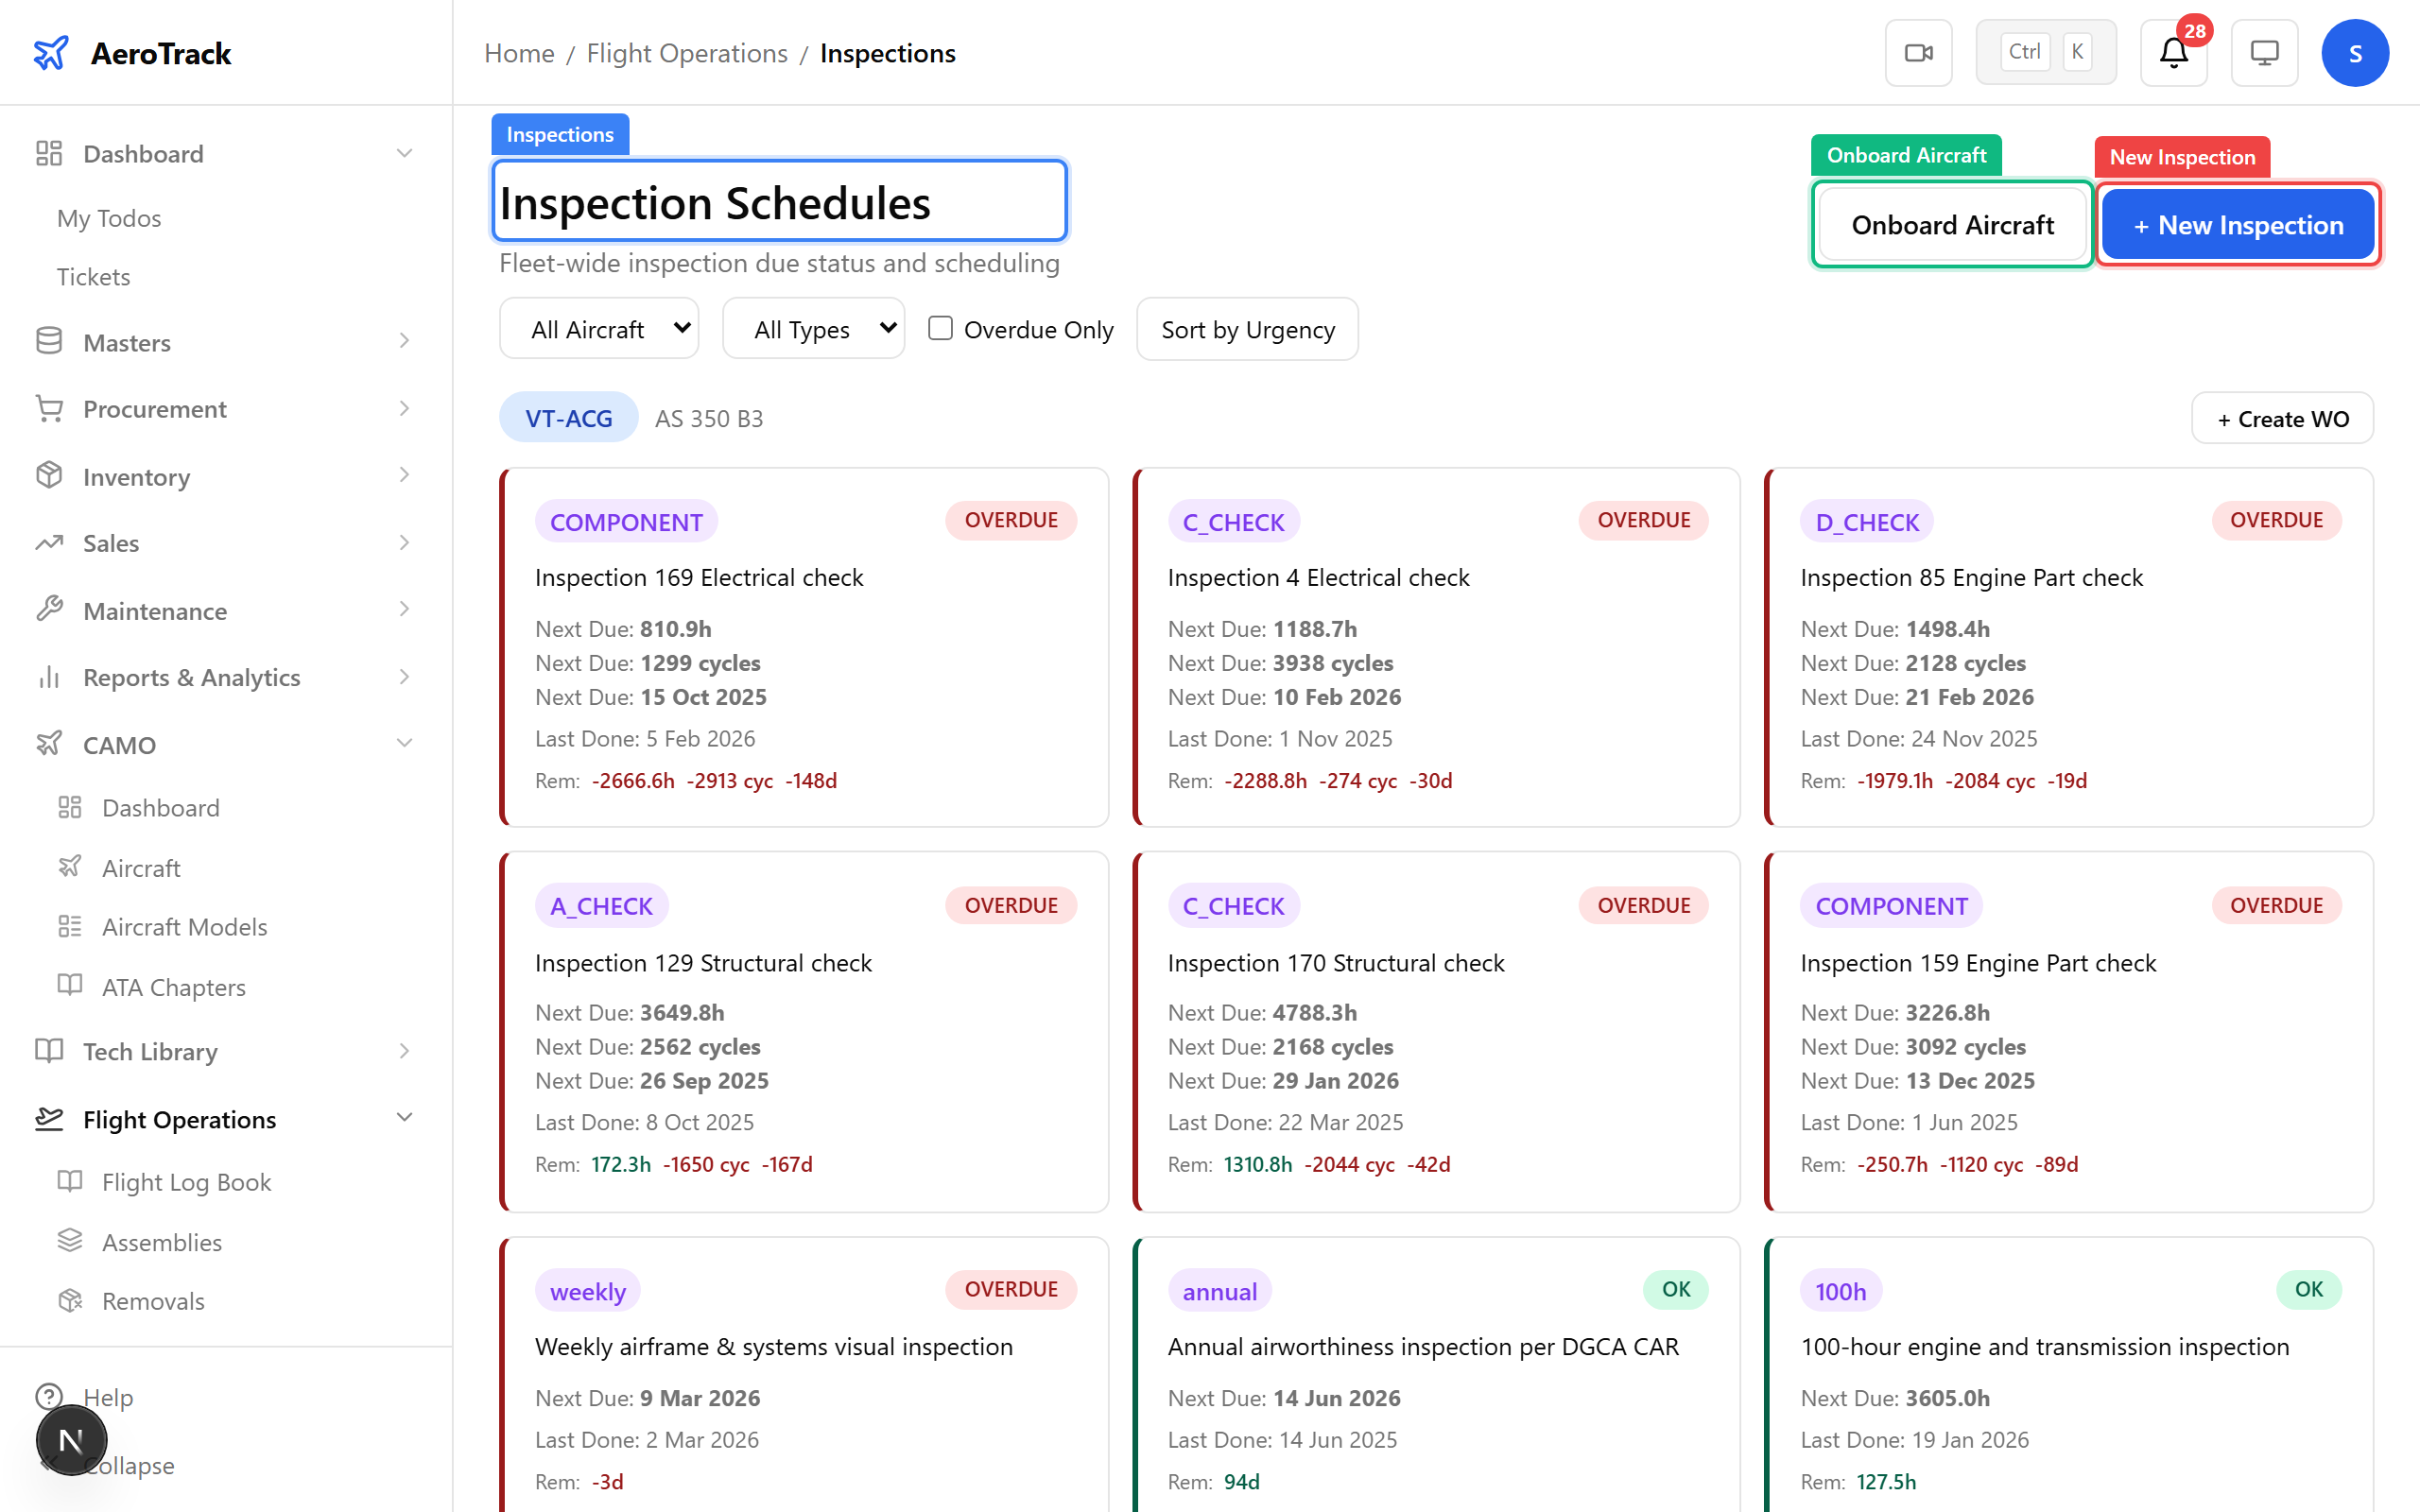
Click any inspection to see its full detail — intervals (hours, cycles, days), last done values, next due calculations, and remaining counters. The remaining values count down automatically as flight hours are logged.
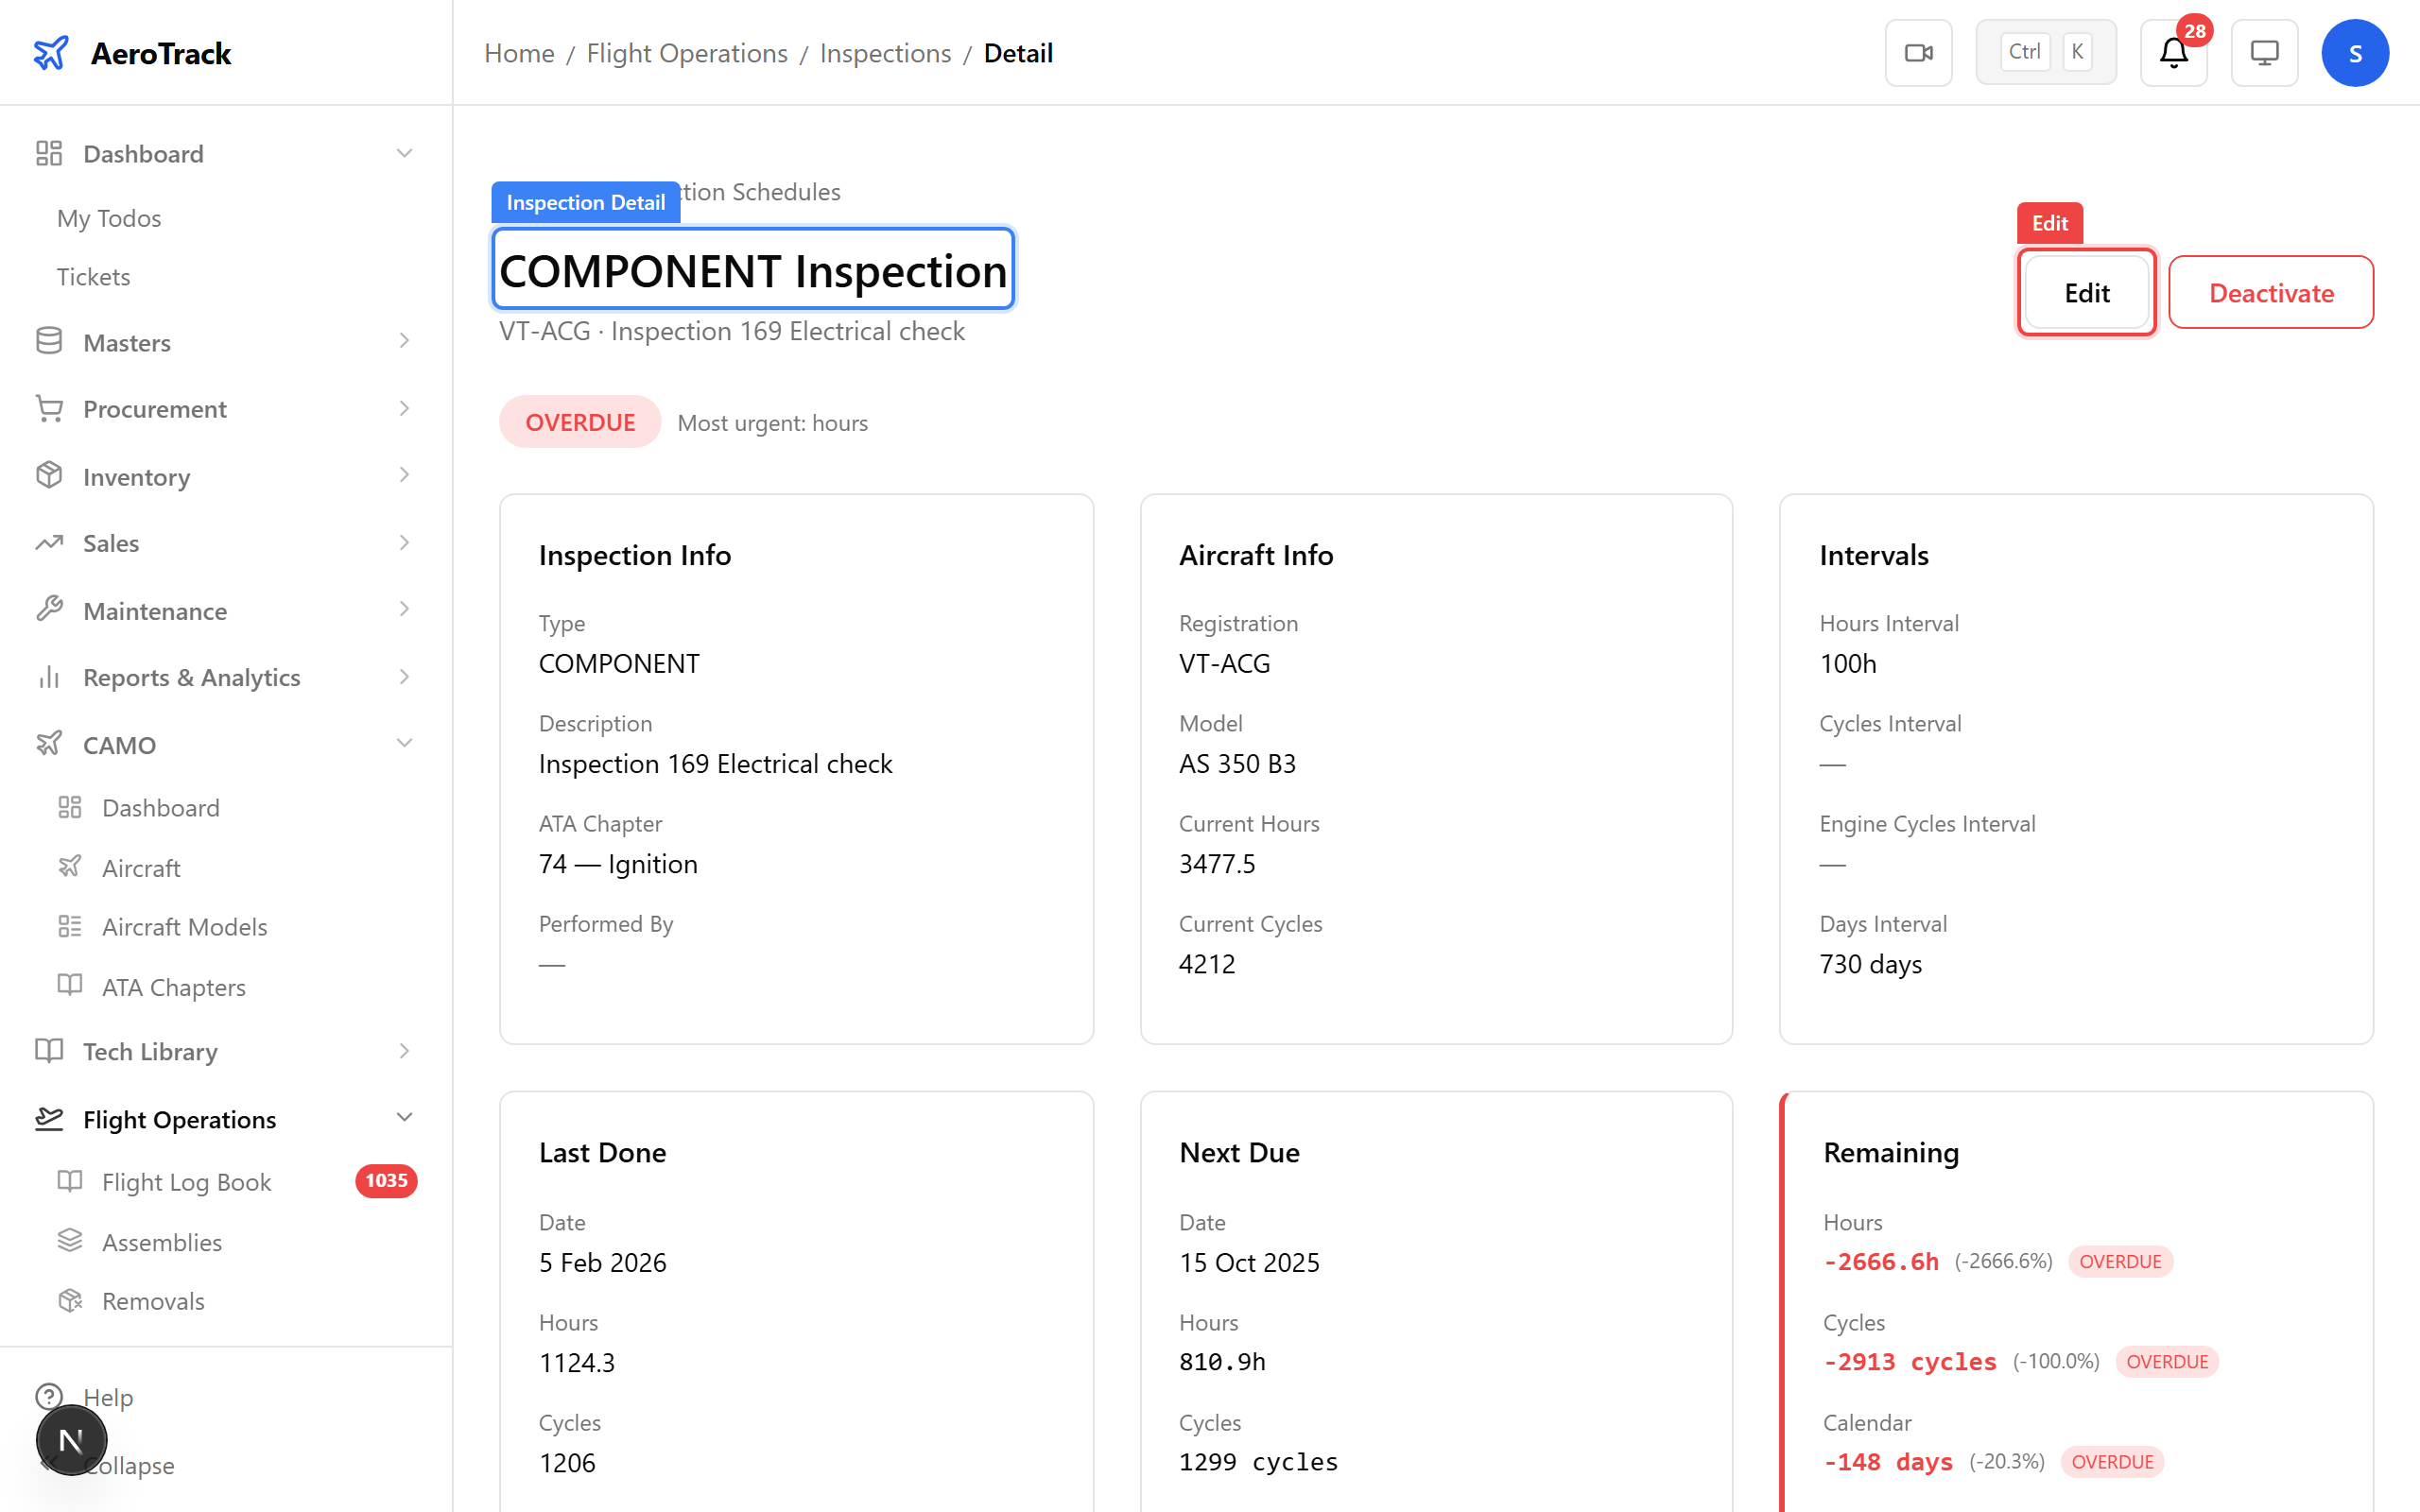
▲ Remaining values count down automatically as flight hours are logged. When they hit zero, the inspection shows as overdue.
Click Edit to modify intervals, last-done values, or remarks. Admin users must provide a reason for changes (DGCA compliance requirement). The reason is recorded in the audit log.
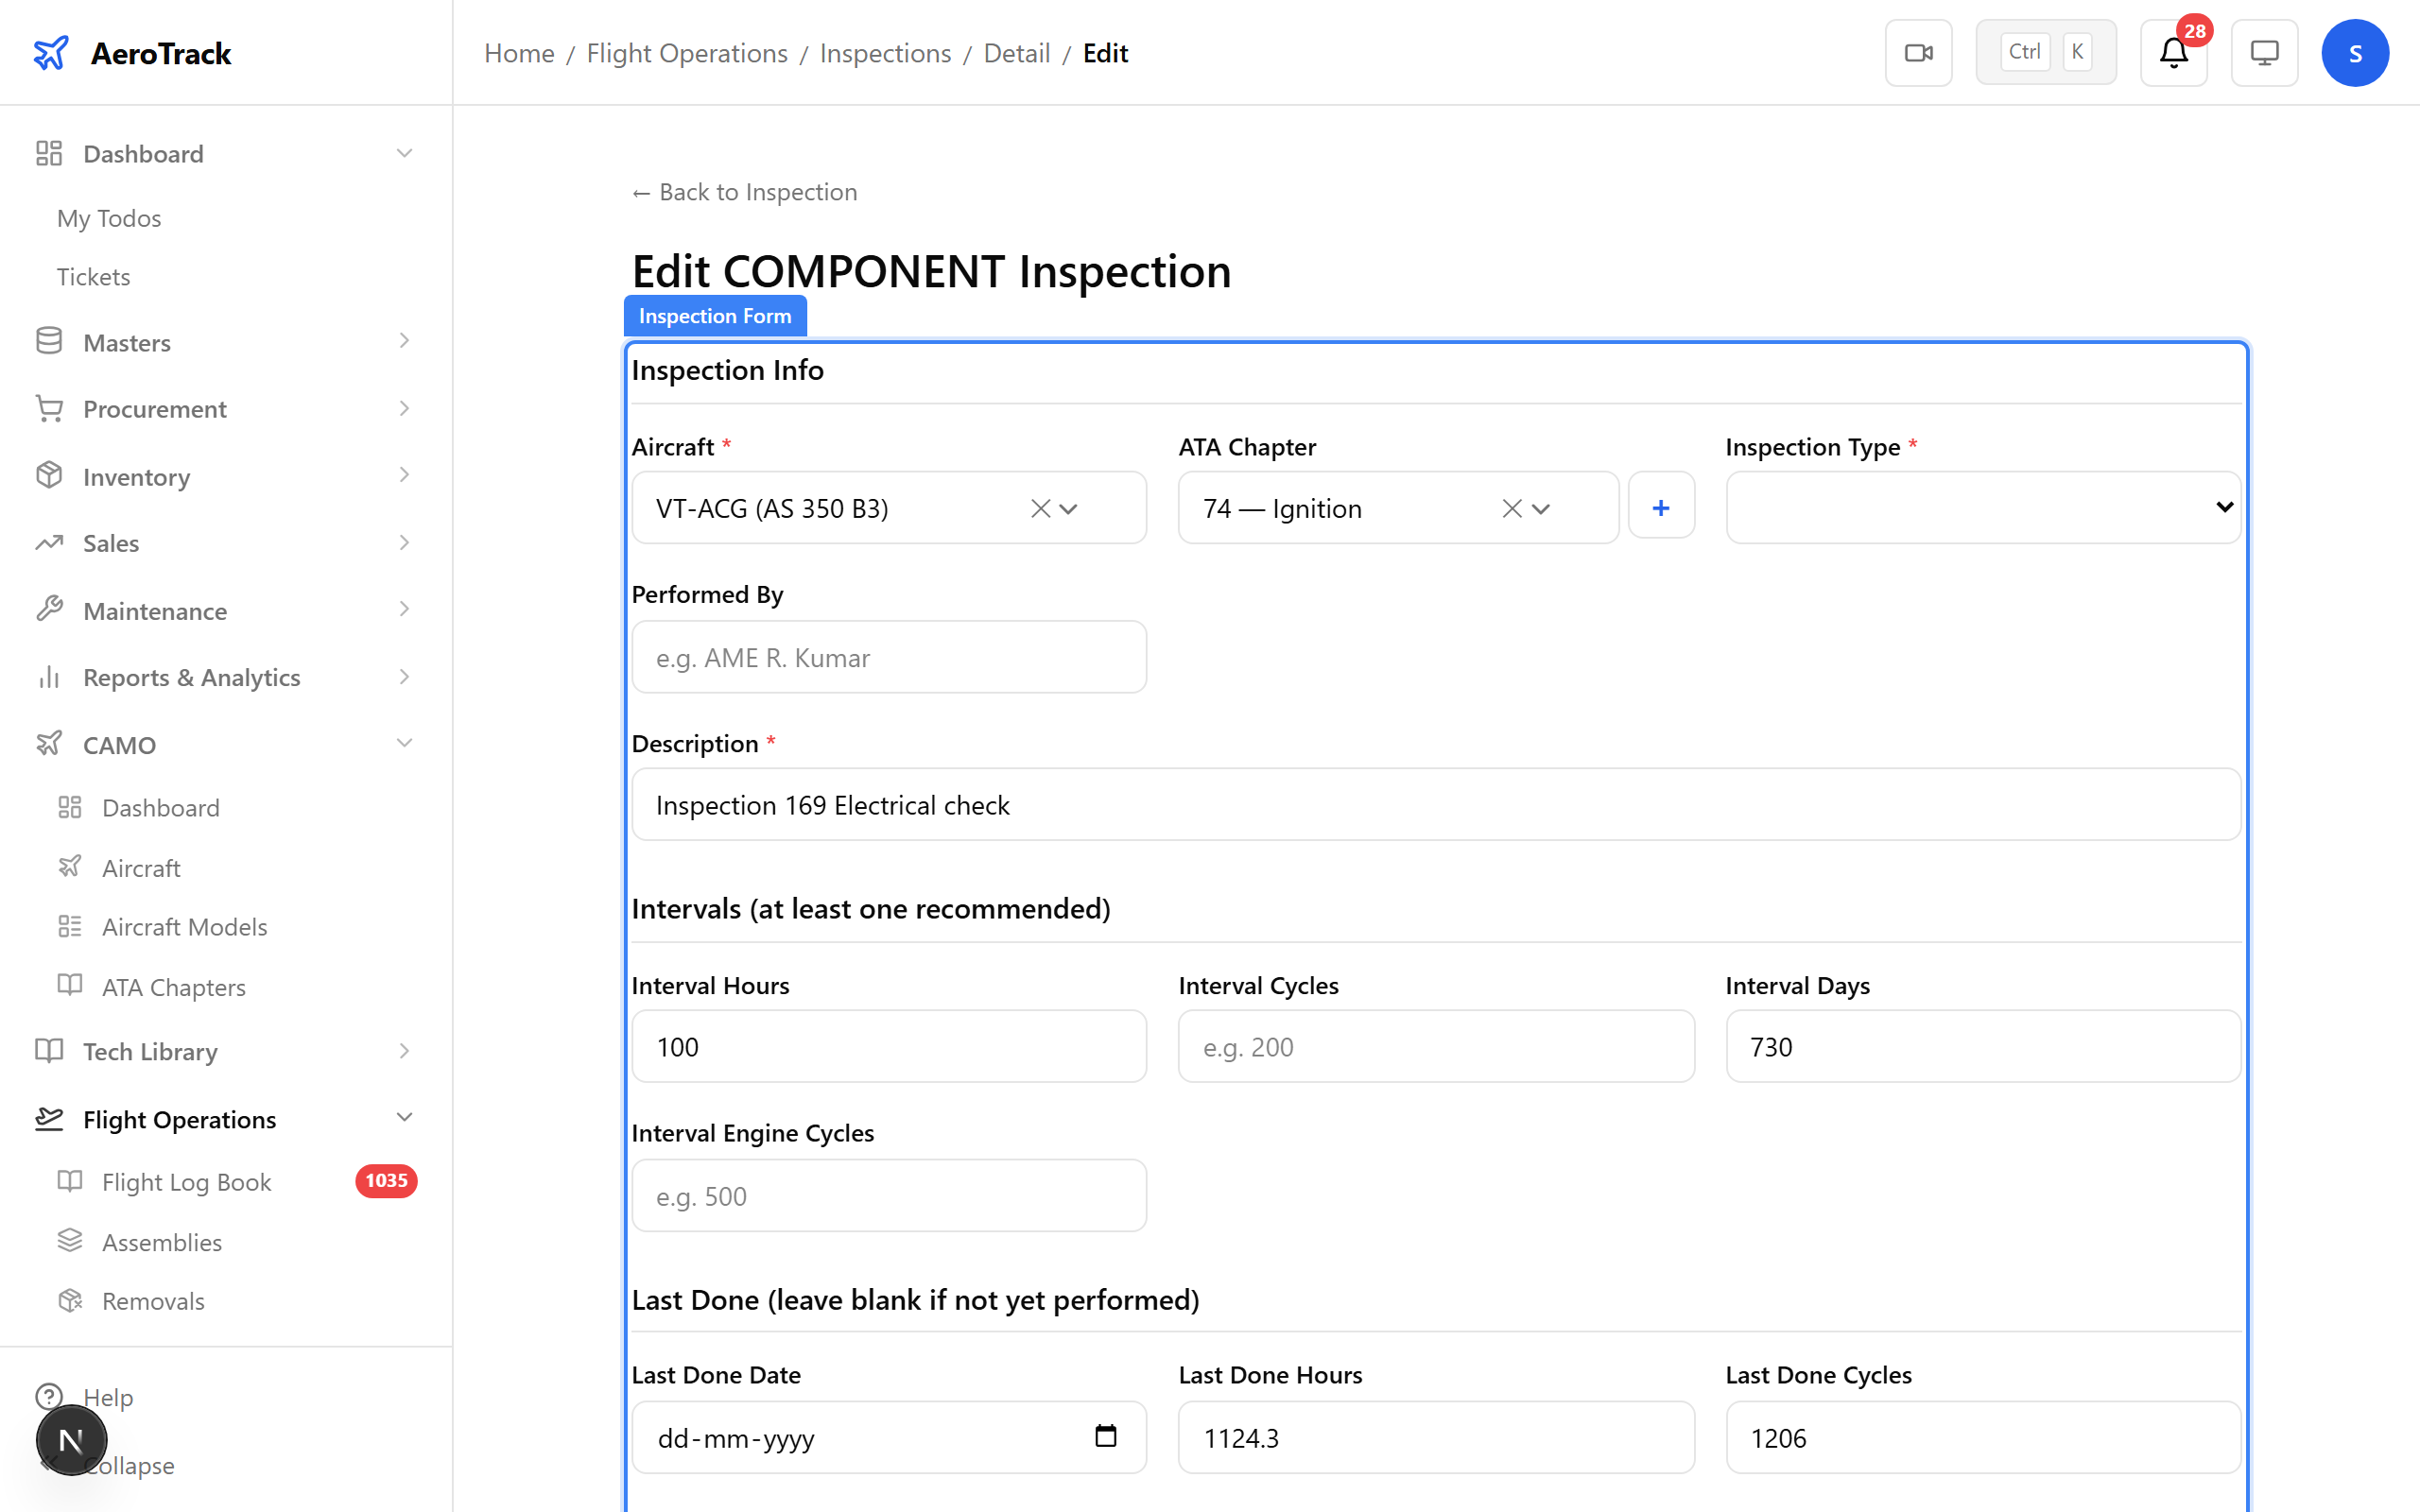
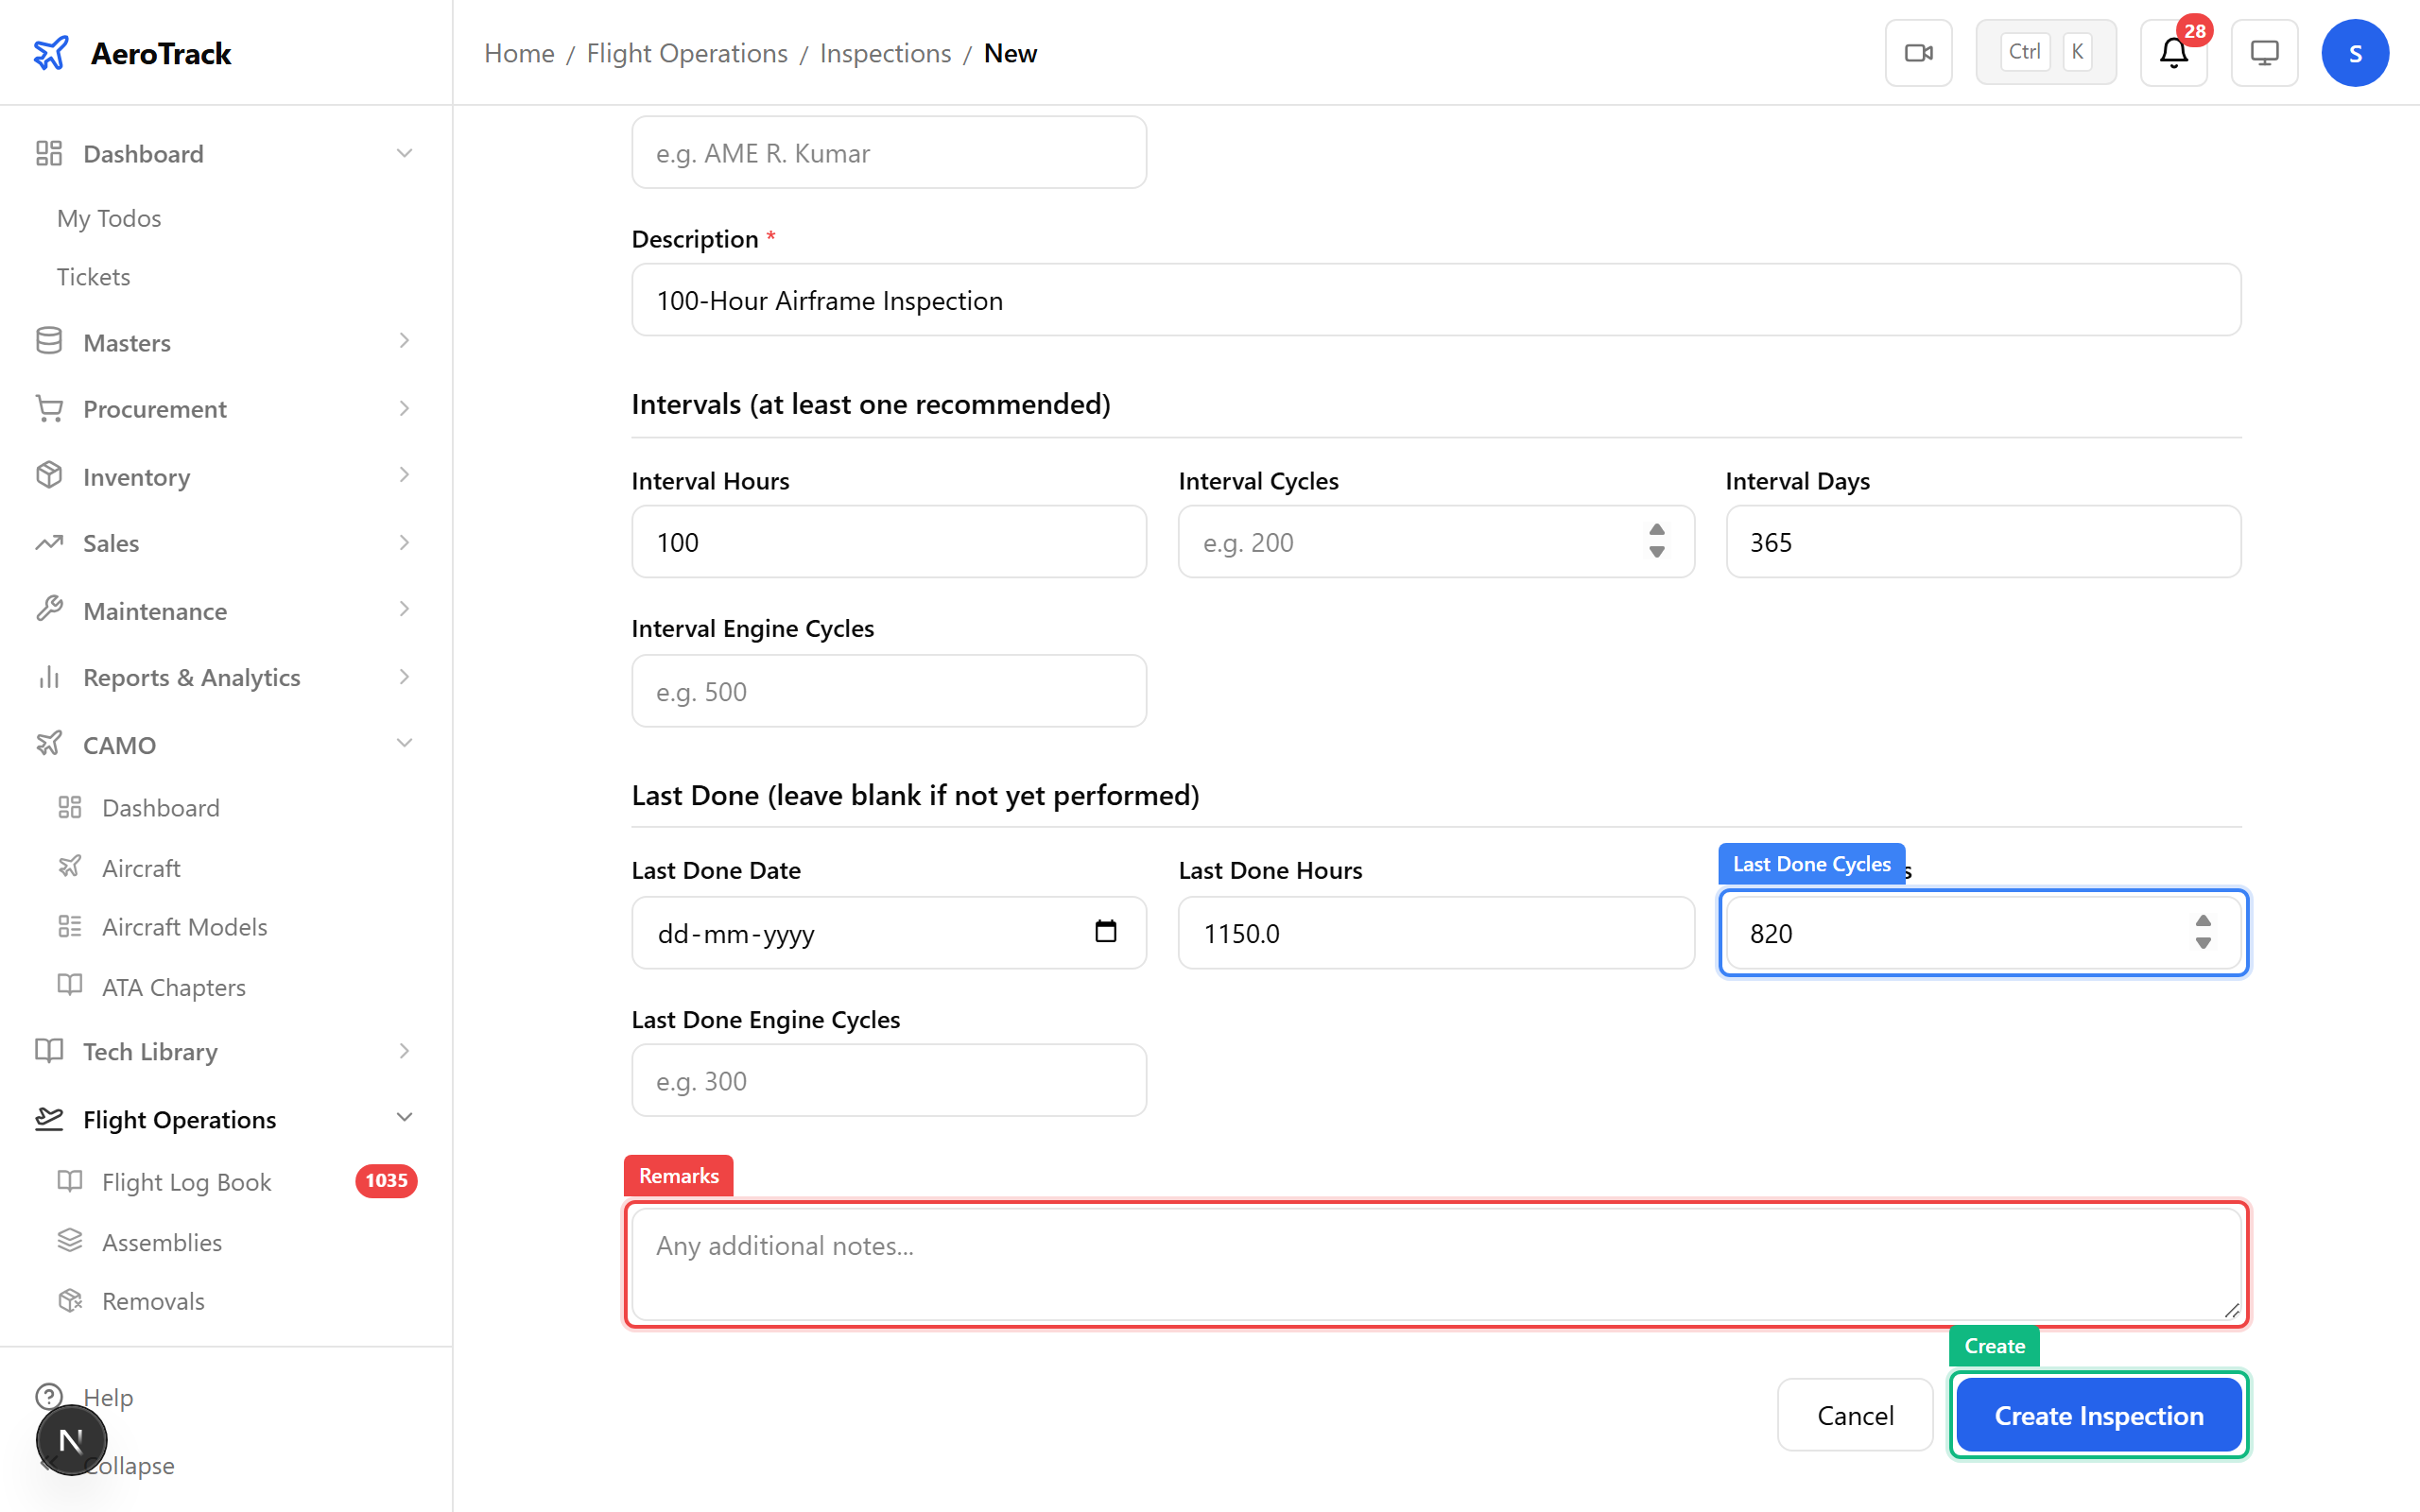
Click New Inspection to add a check manually. Select the aircraft, inspection type, and set the intervals. The "last done" fields establish the baseline from which remaining counters are calculated.
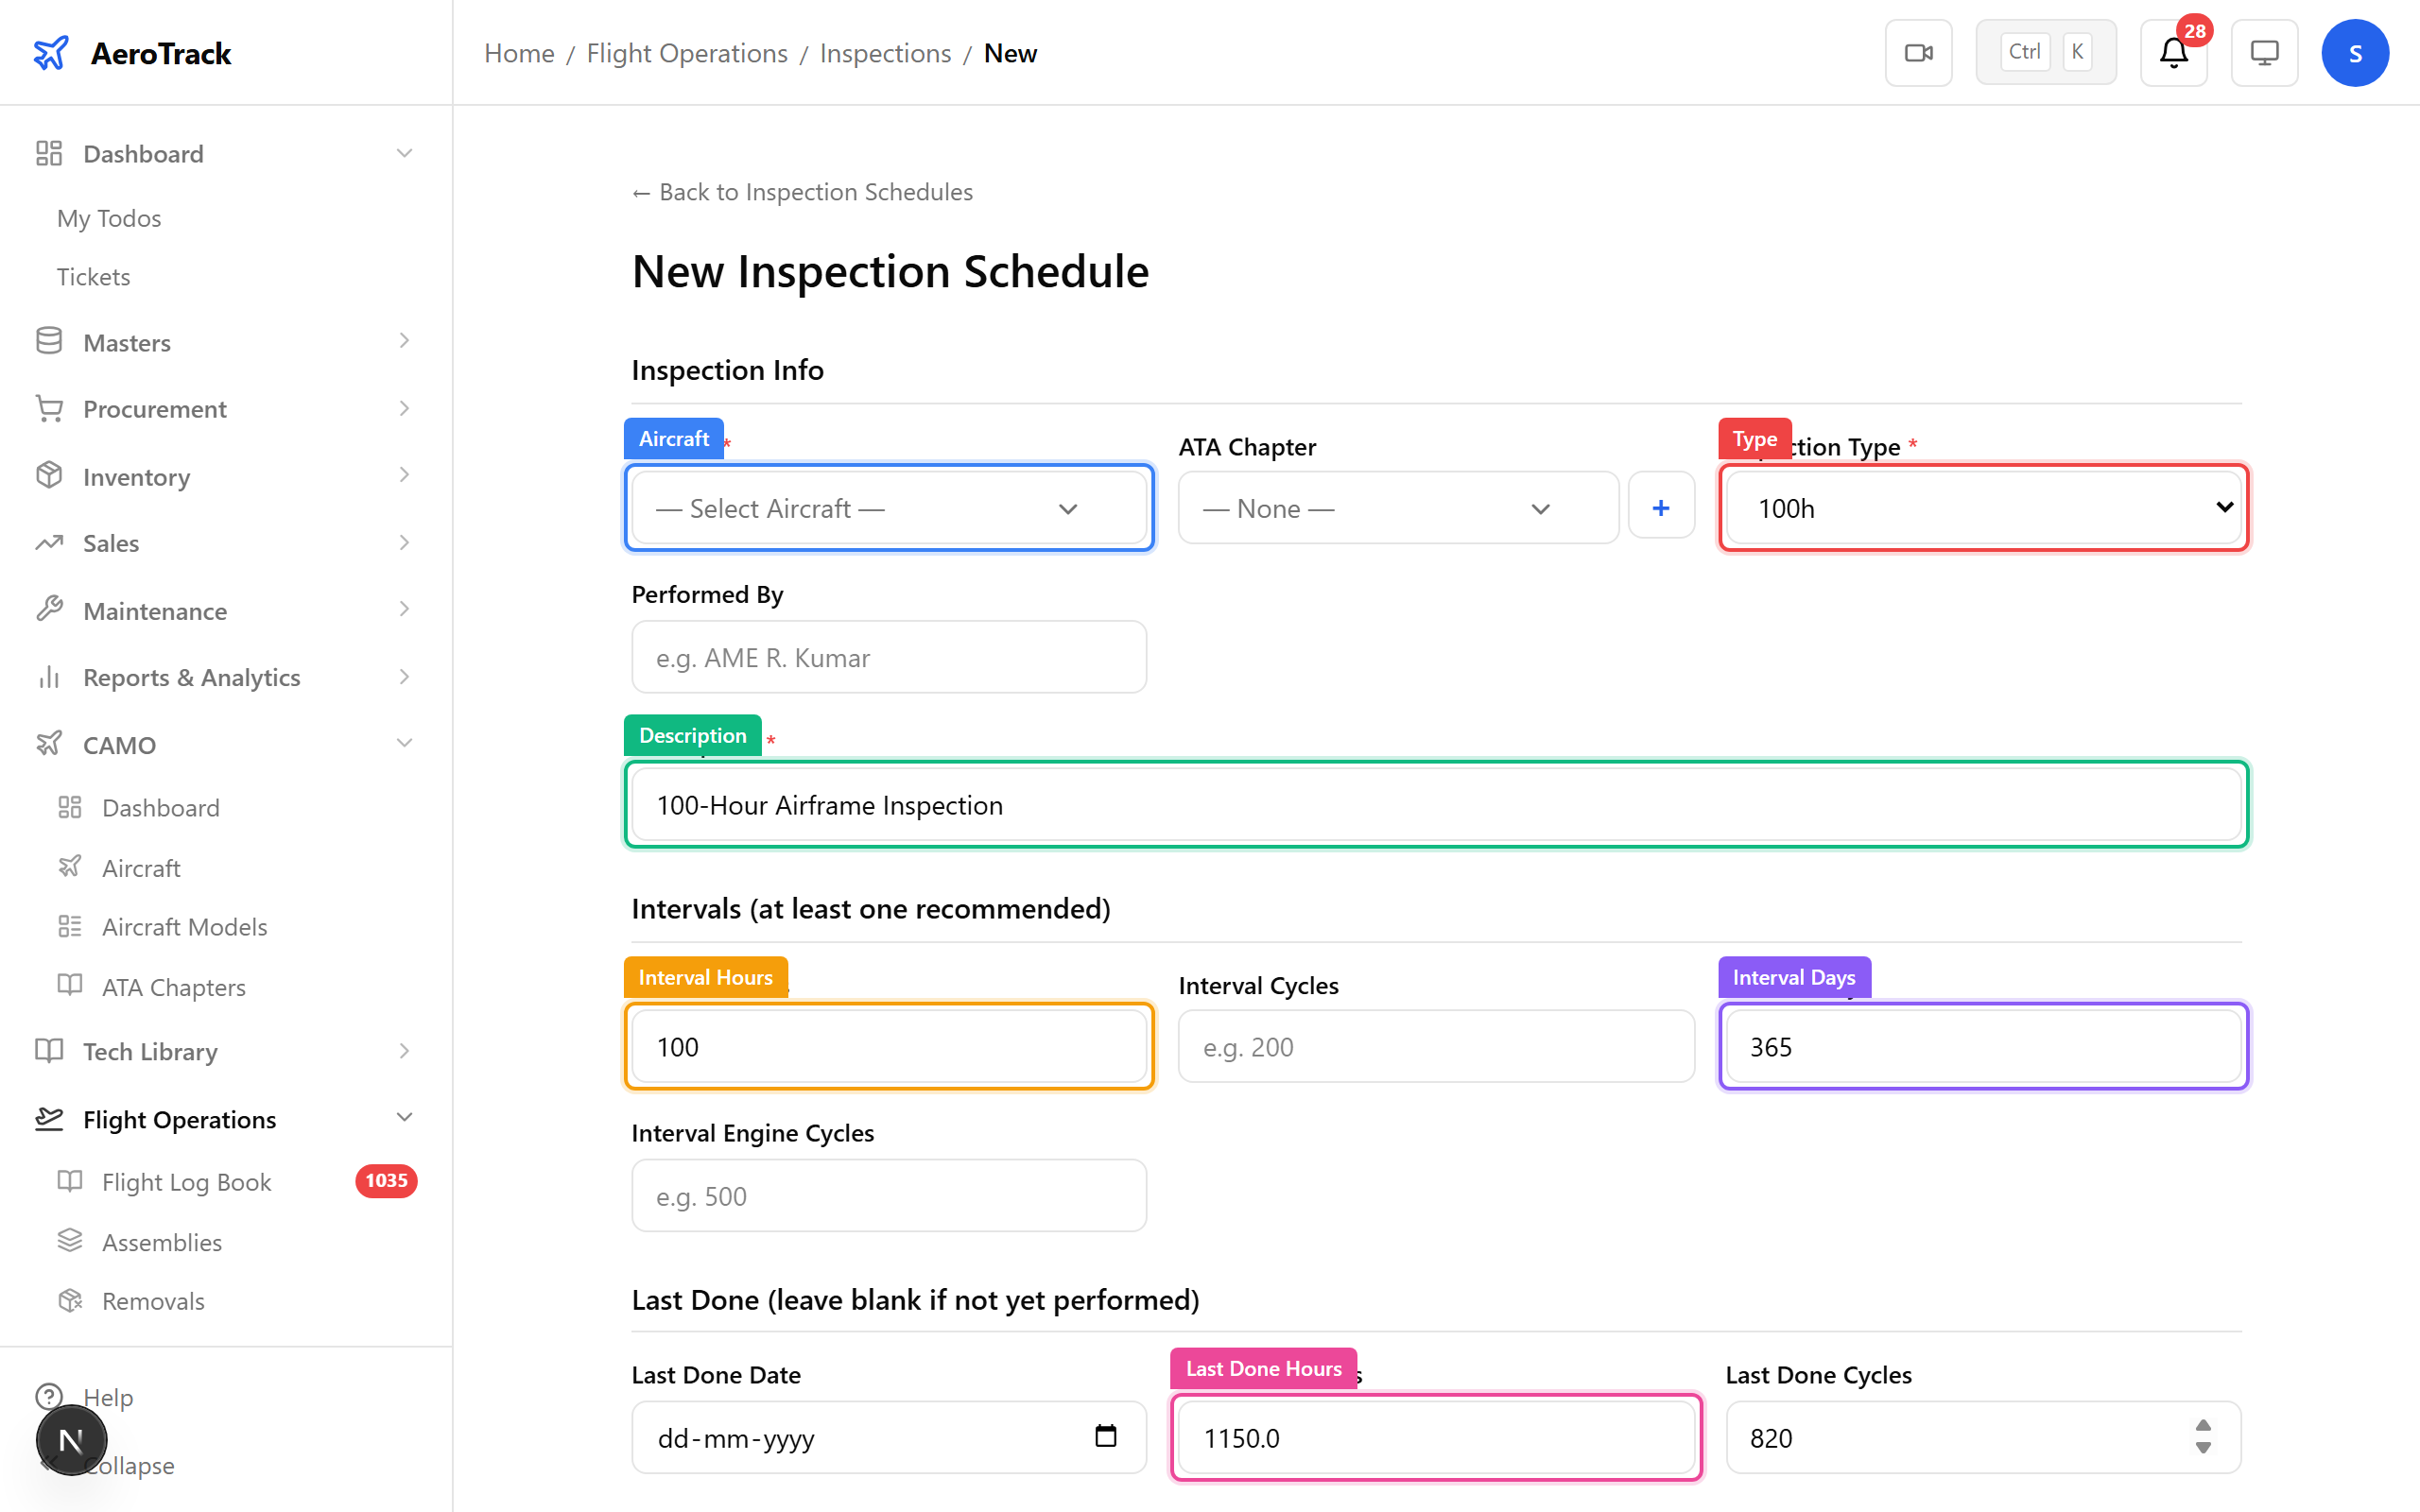
| Field | Purpose |
|---|---|
| Aircraft | Which aircraft this inspection applies to |
| Inspection Type | Daily, 100h, 200h, 500h, 1000h, annual, special |
| Interval Hours | Repeat every N flight hours |
| Interval Cycles | Repeat every N landings |
| Interval Days | Calendar interval (e.g. 365 = annual) |
| Last Done Hours | Airframe hours when last performed — baseline |
| Last Done Date | Calendar date when last performed — baseline |
Navigate to Flight Ops → Inspections → Onboard Aircraft. The wizard copies inspection schedules from an existing aircraft of the same model — no manual entry needed for your second Bell 412. Select the source aircraft, review the inspections to copy, and confirm.
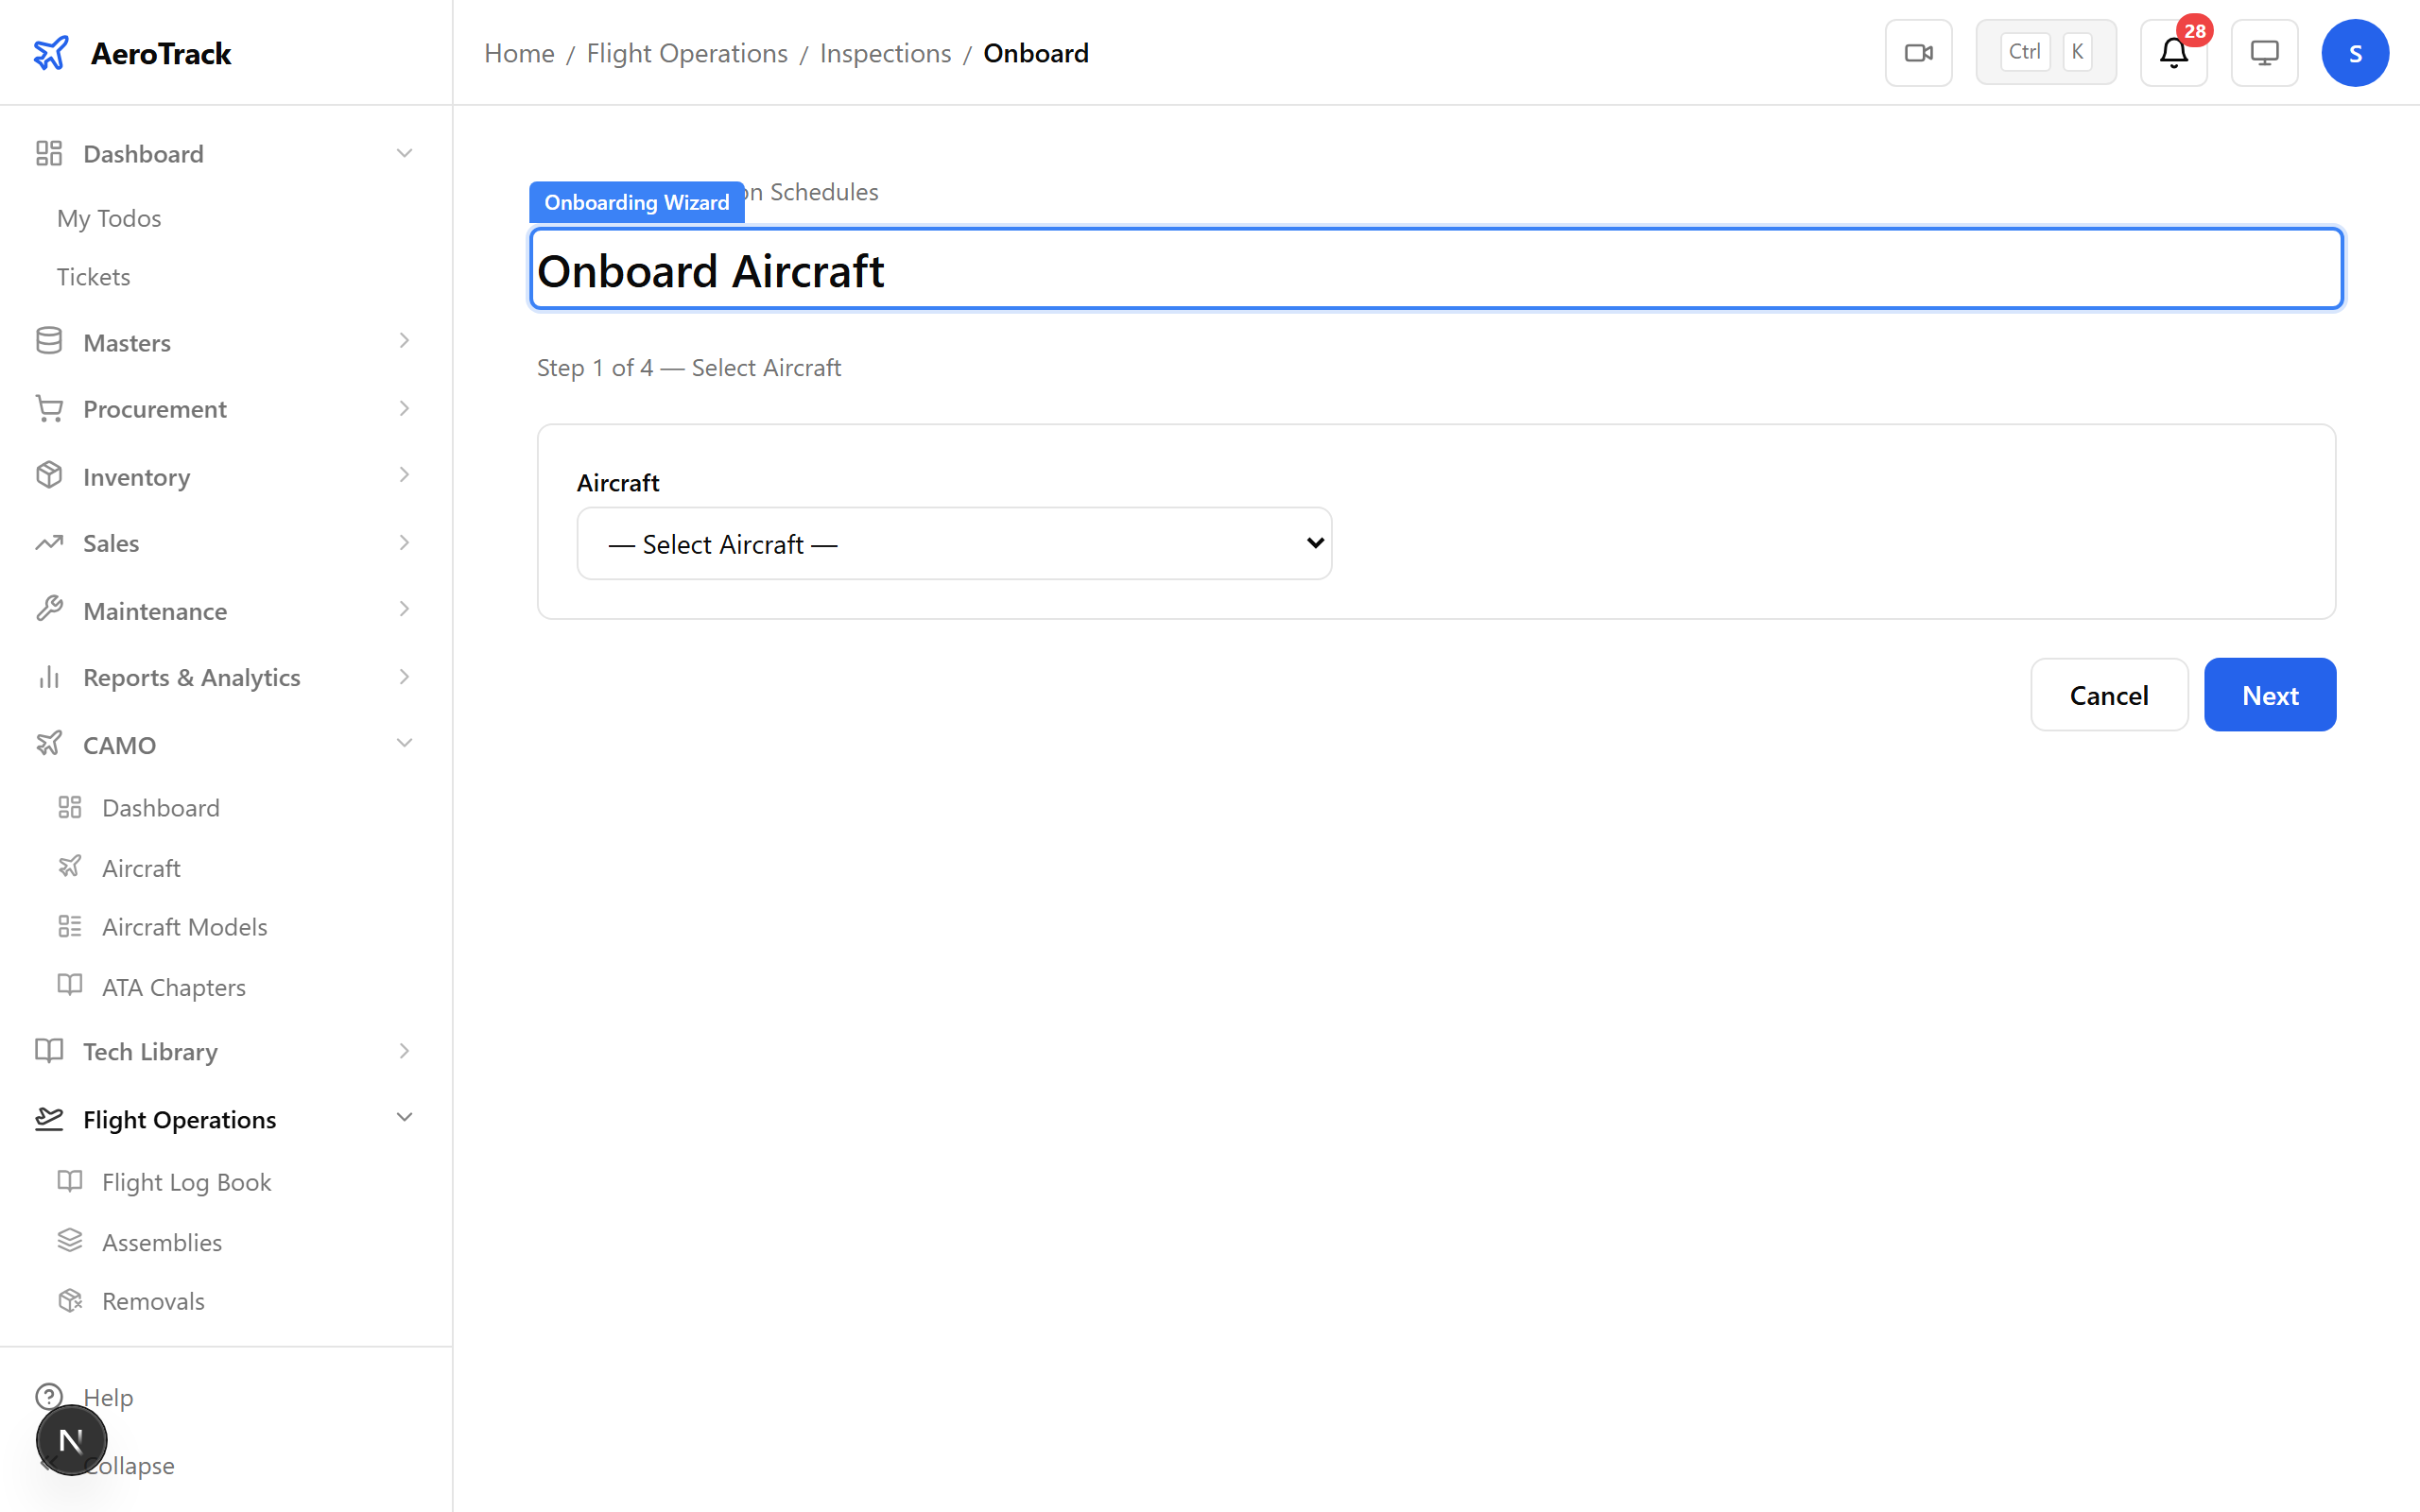
▲ The onboarding wizard copies inspections from an existing aircraft of the same model — no manual entry needed for your second Bell 412.
Navigate to CAMO → Reports → Inspection Due. This report drives daily planning — overdue items (red) need work orders raised immediately, due-soon items (amber) need scheduling, and OK items (green) are within limits.
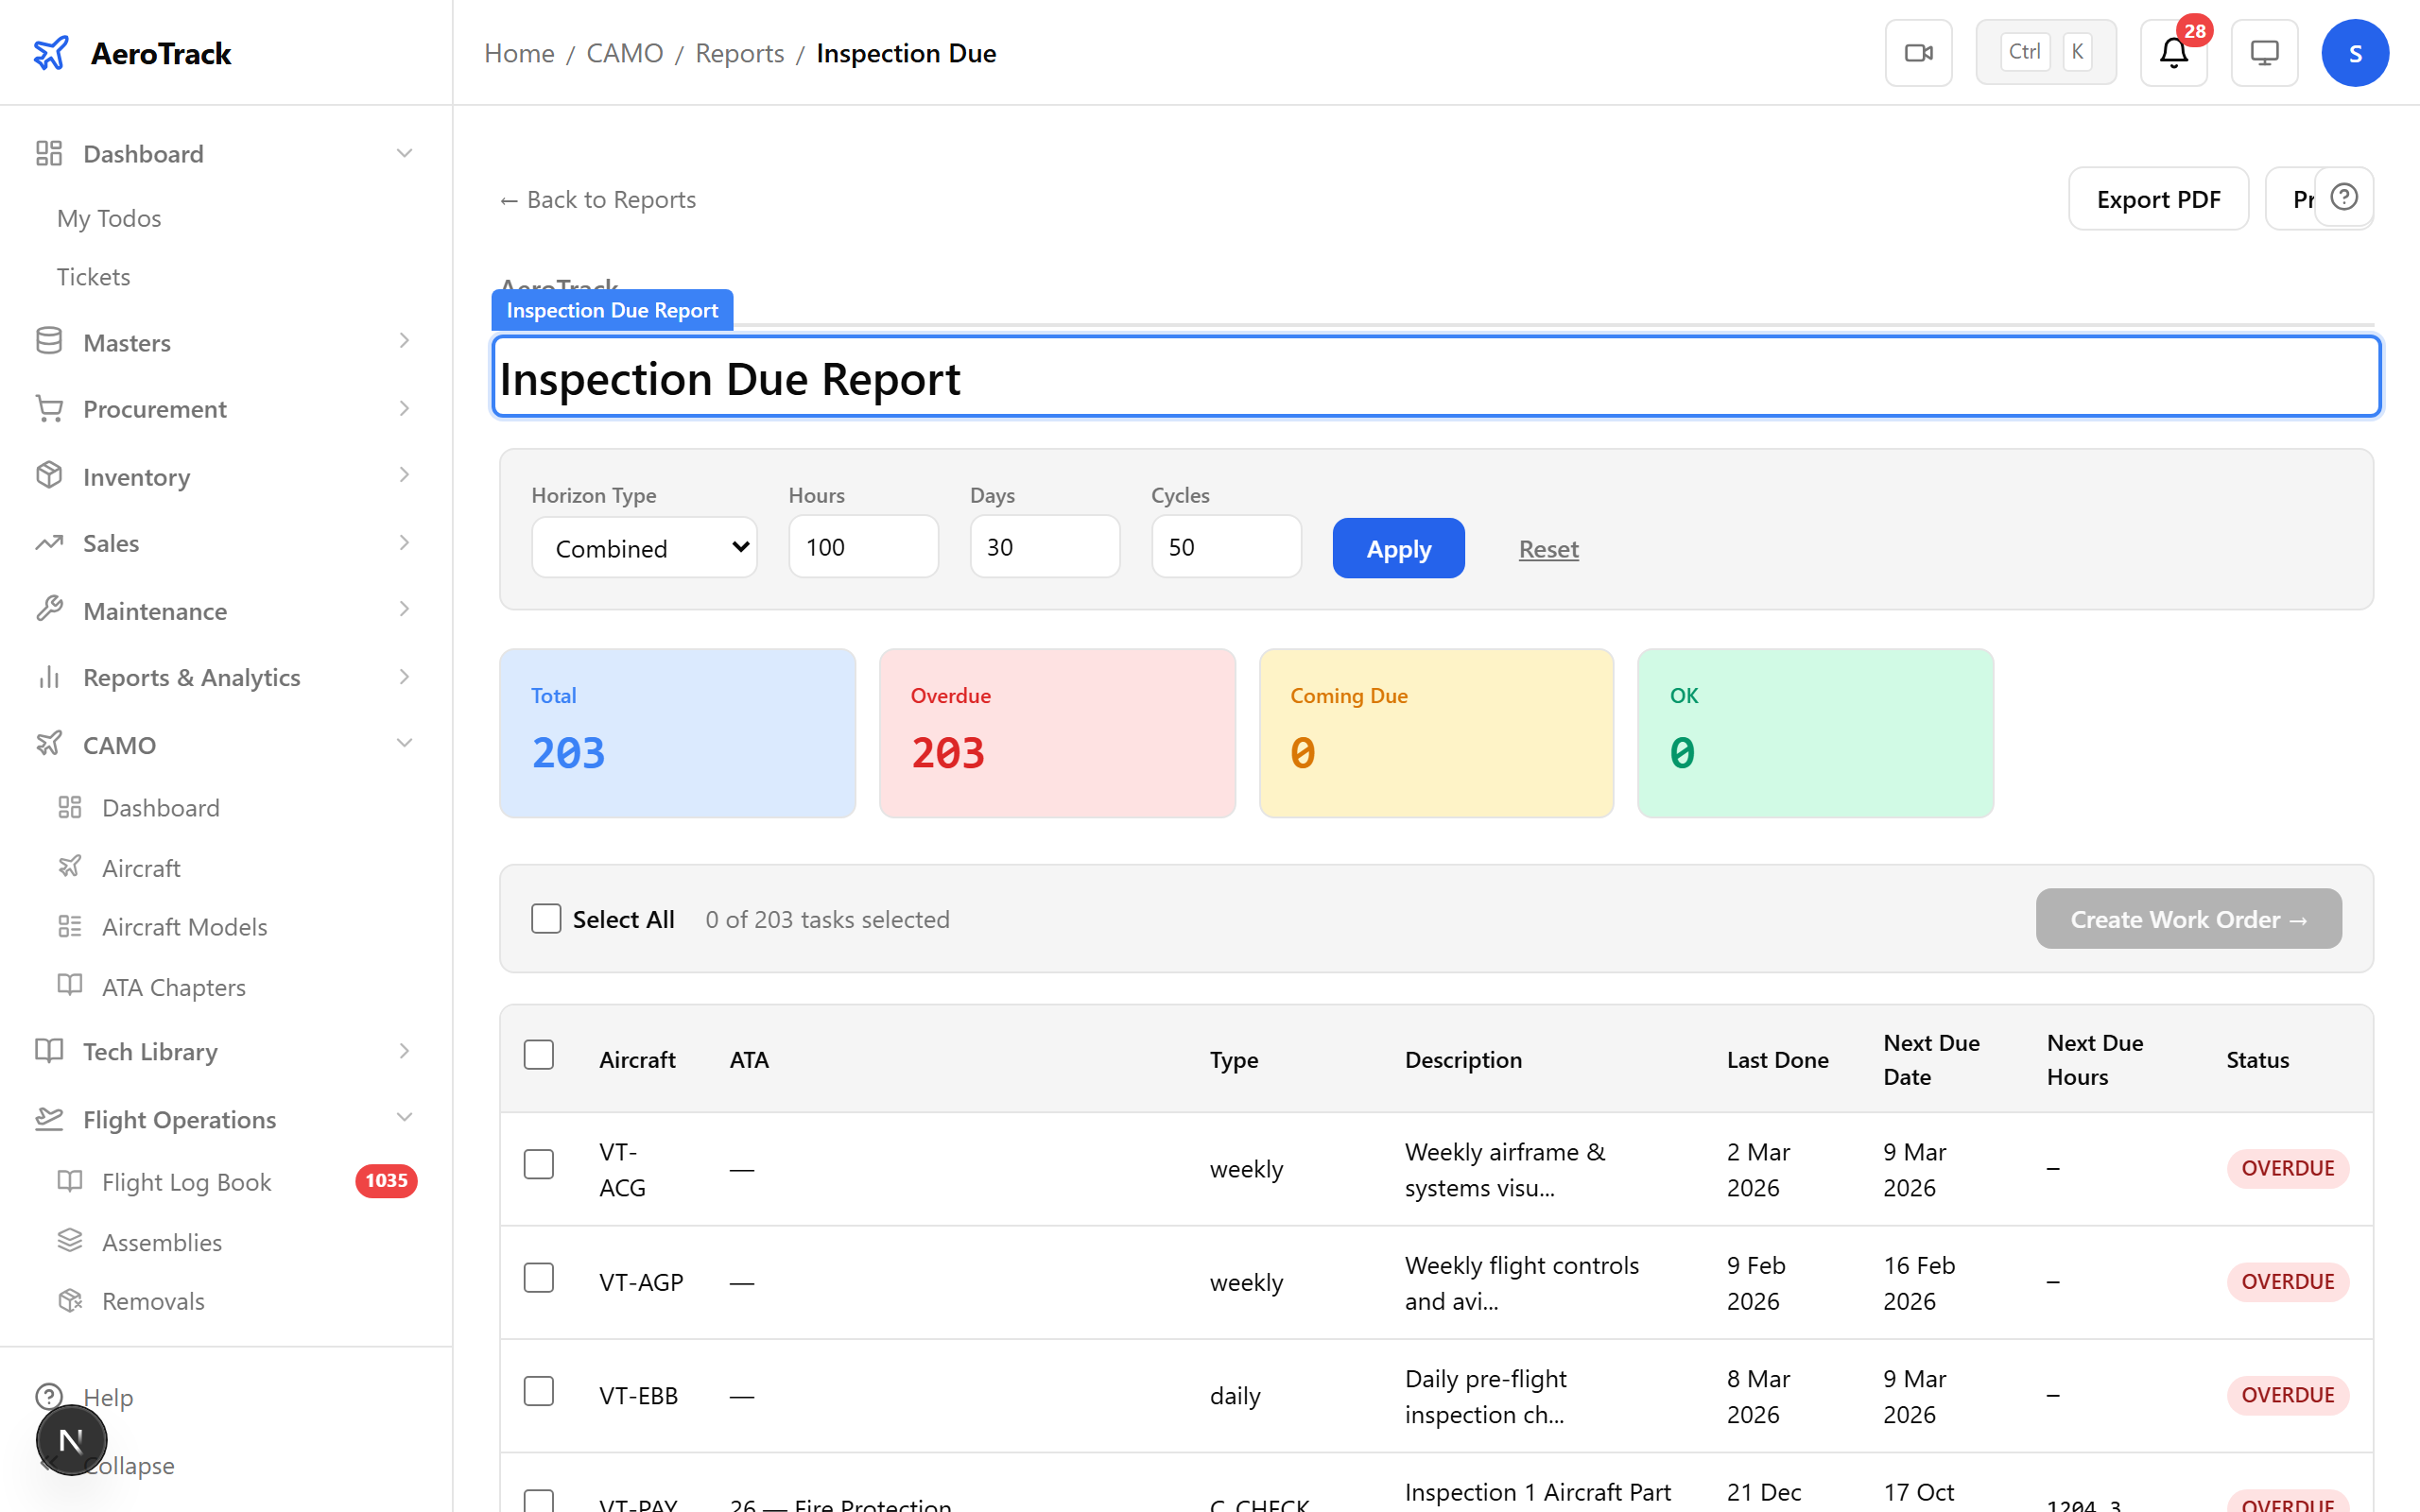
▲ This report drives daily planning. Overdue items need work orders raised immediately.
Navigate to Flight Ops → Task History. Every completed inspection creates a task history entry — your permanent maintenance record. Filter by aircraft to see the full compliance timeline.
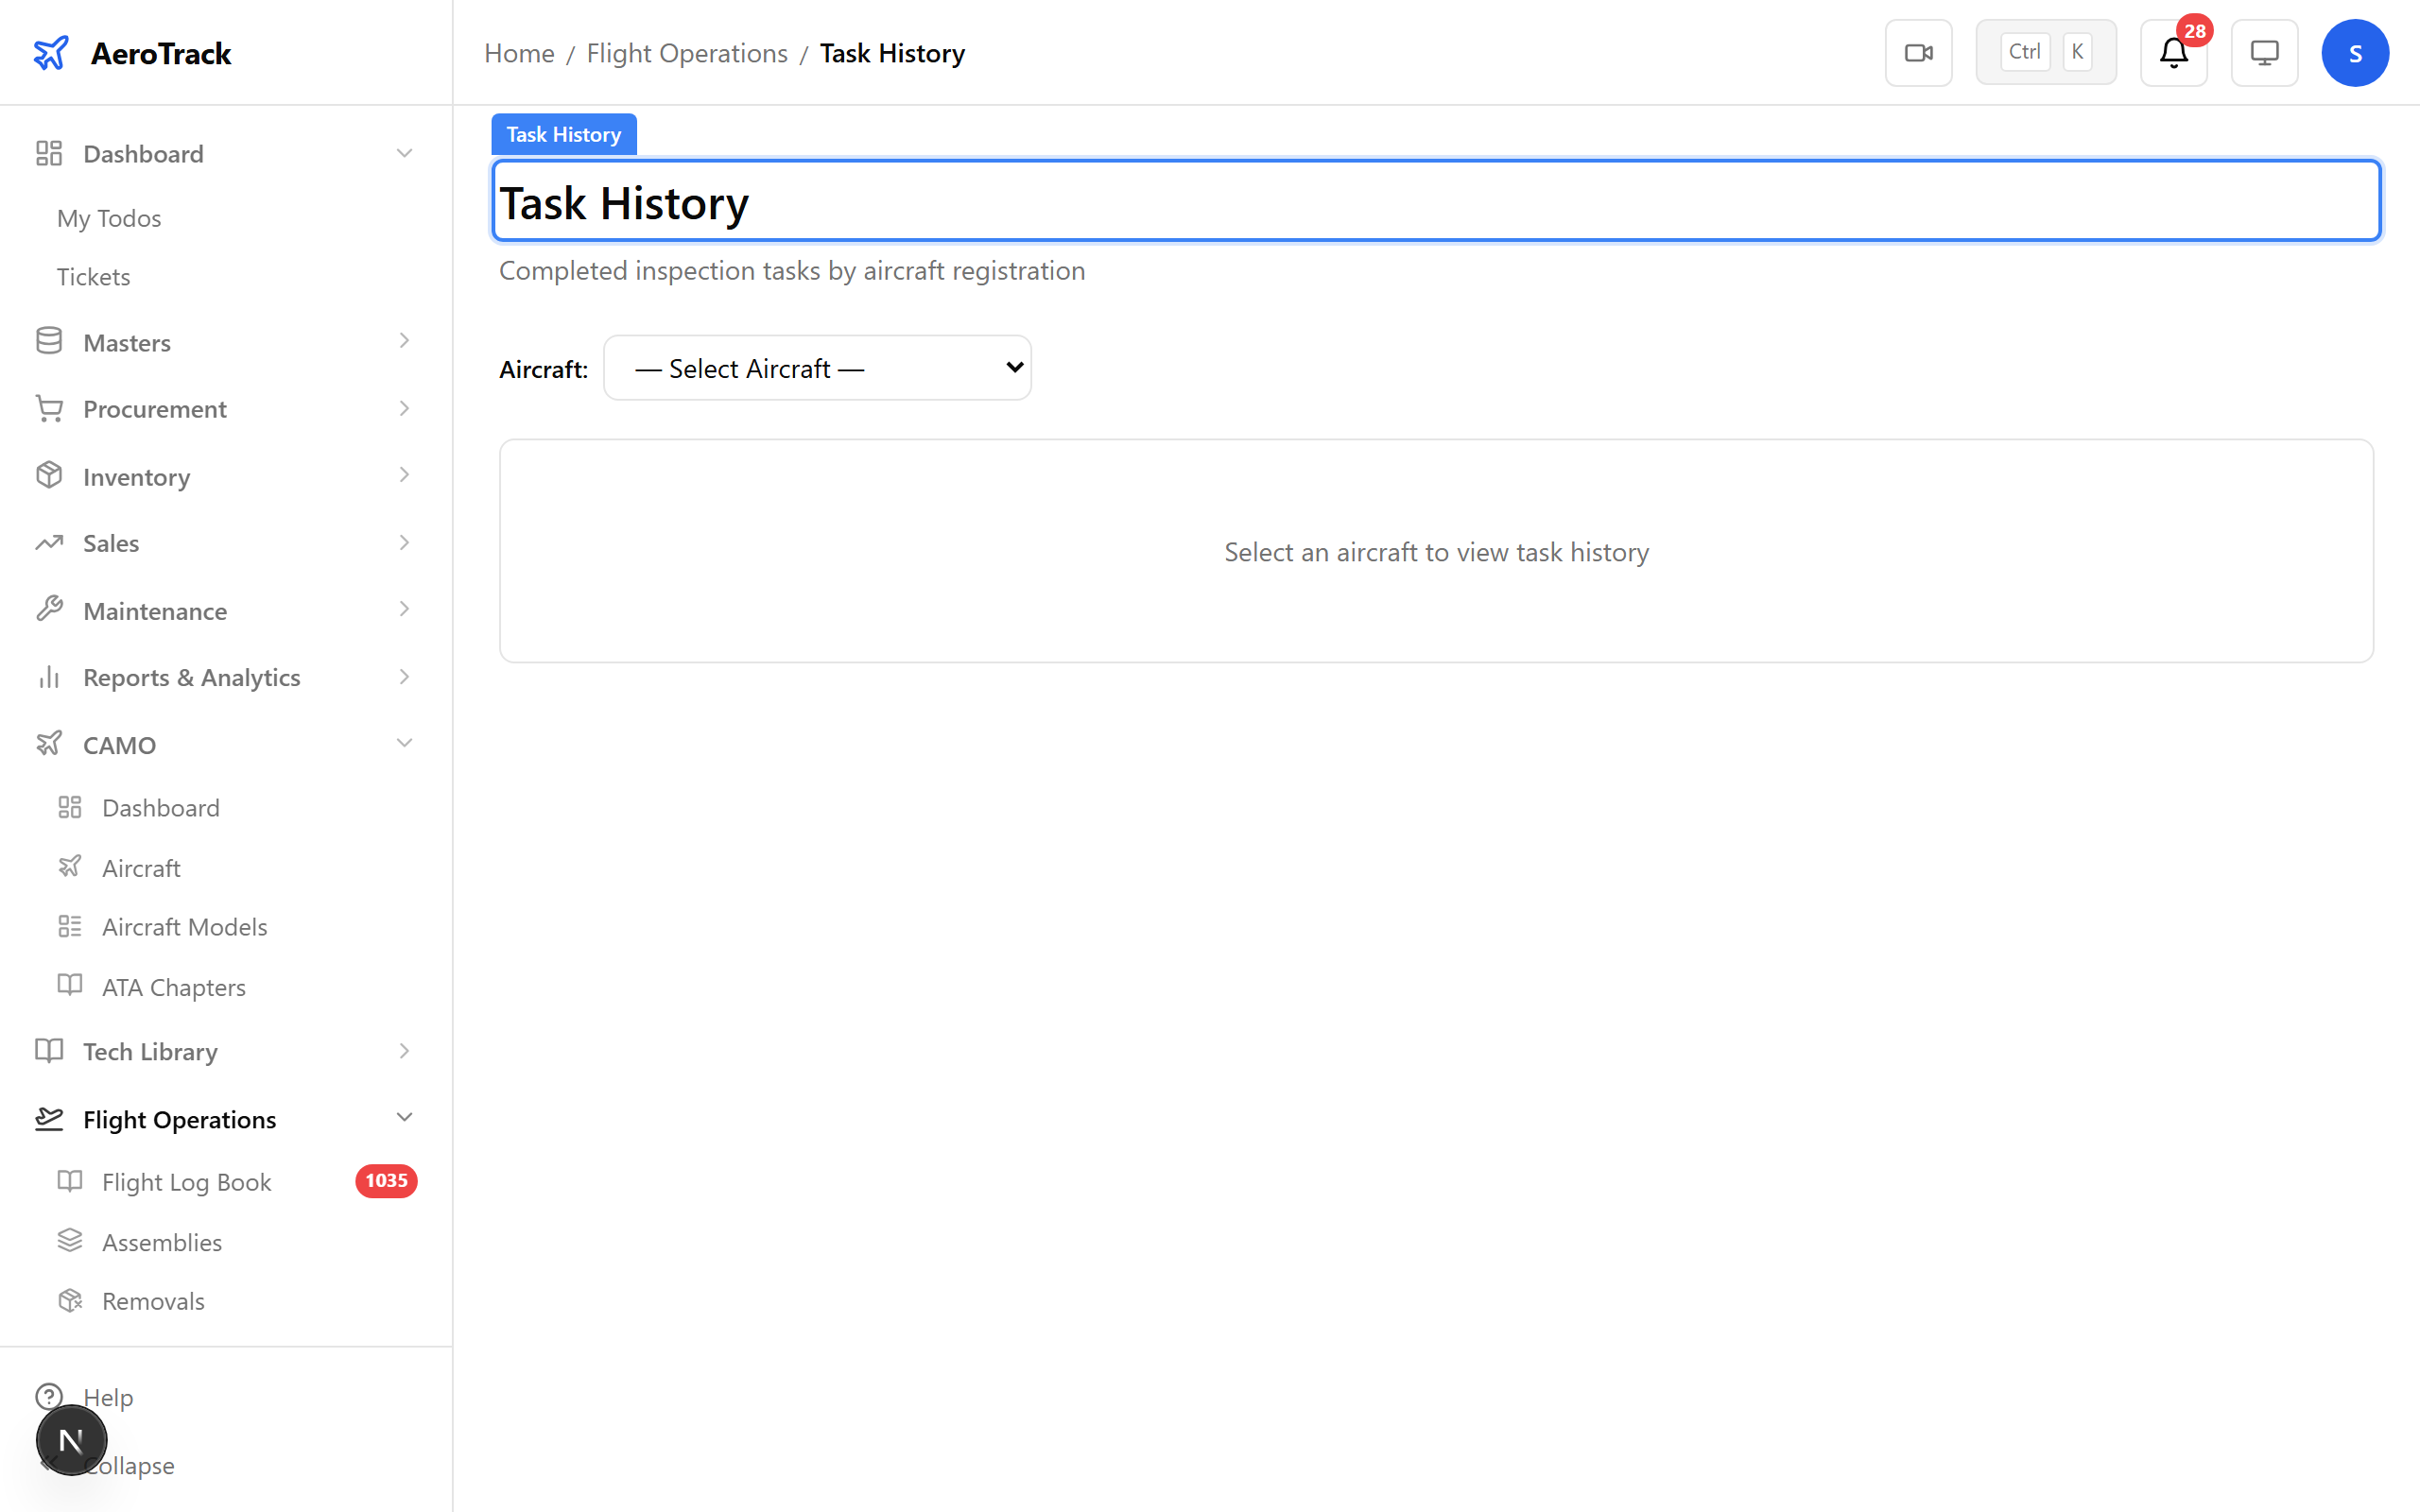
▲ Every completed inspection creates a task history entry — your permanent maintenance record.
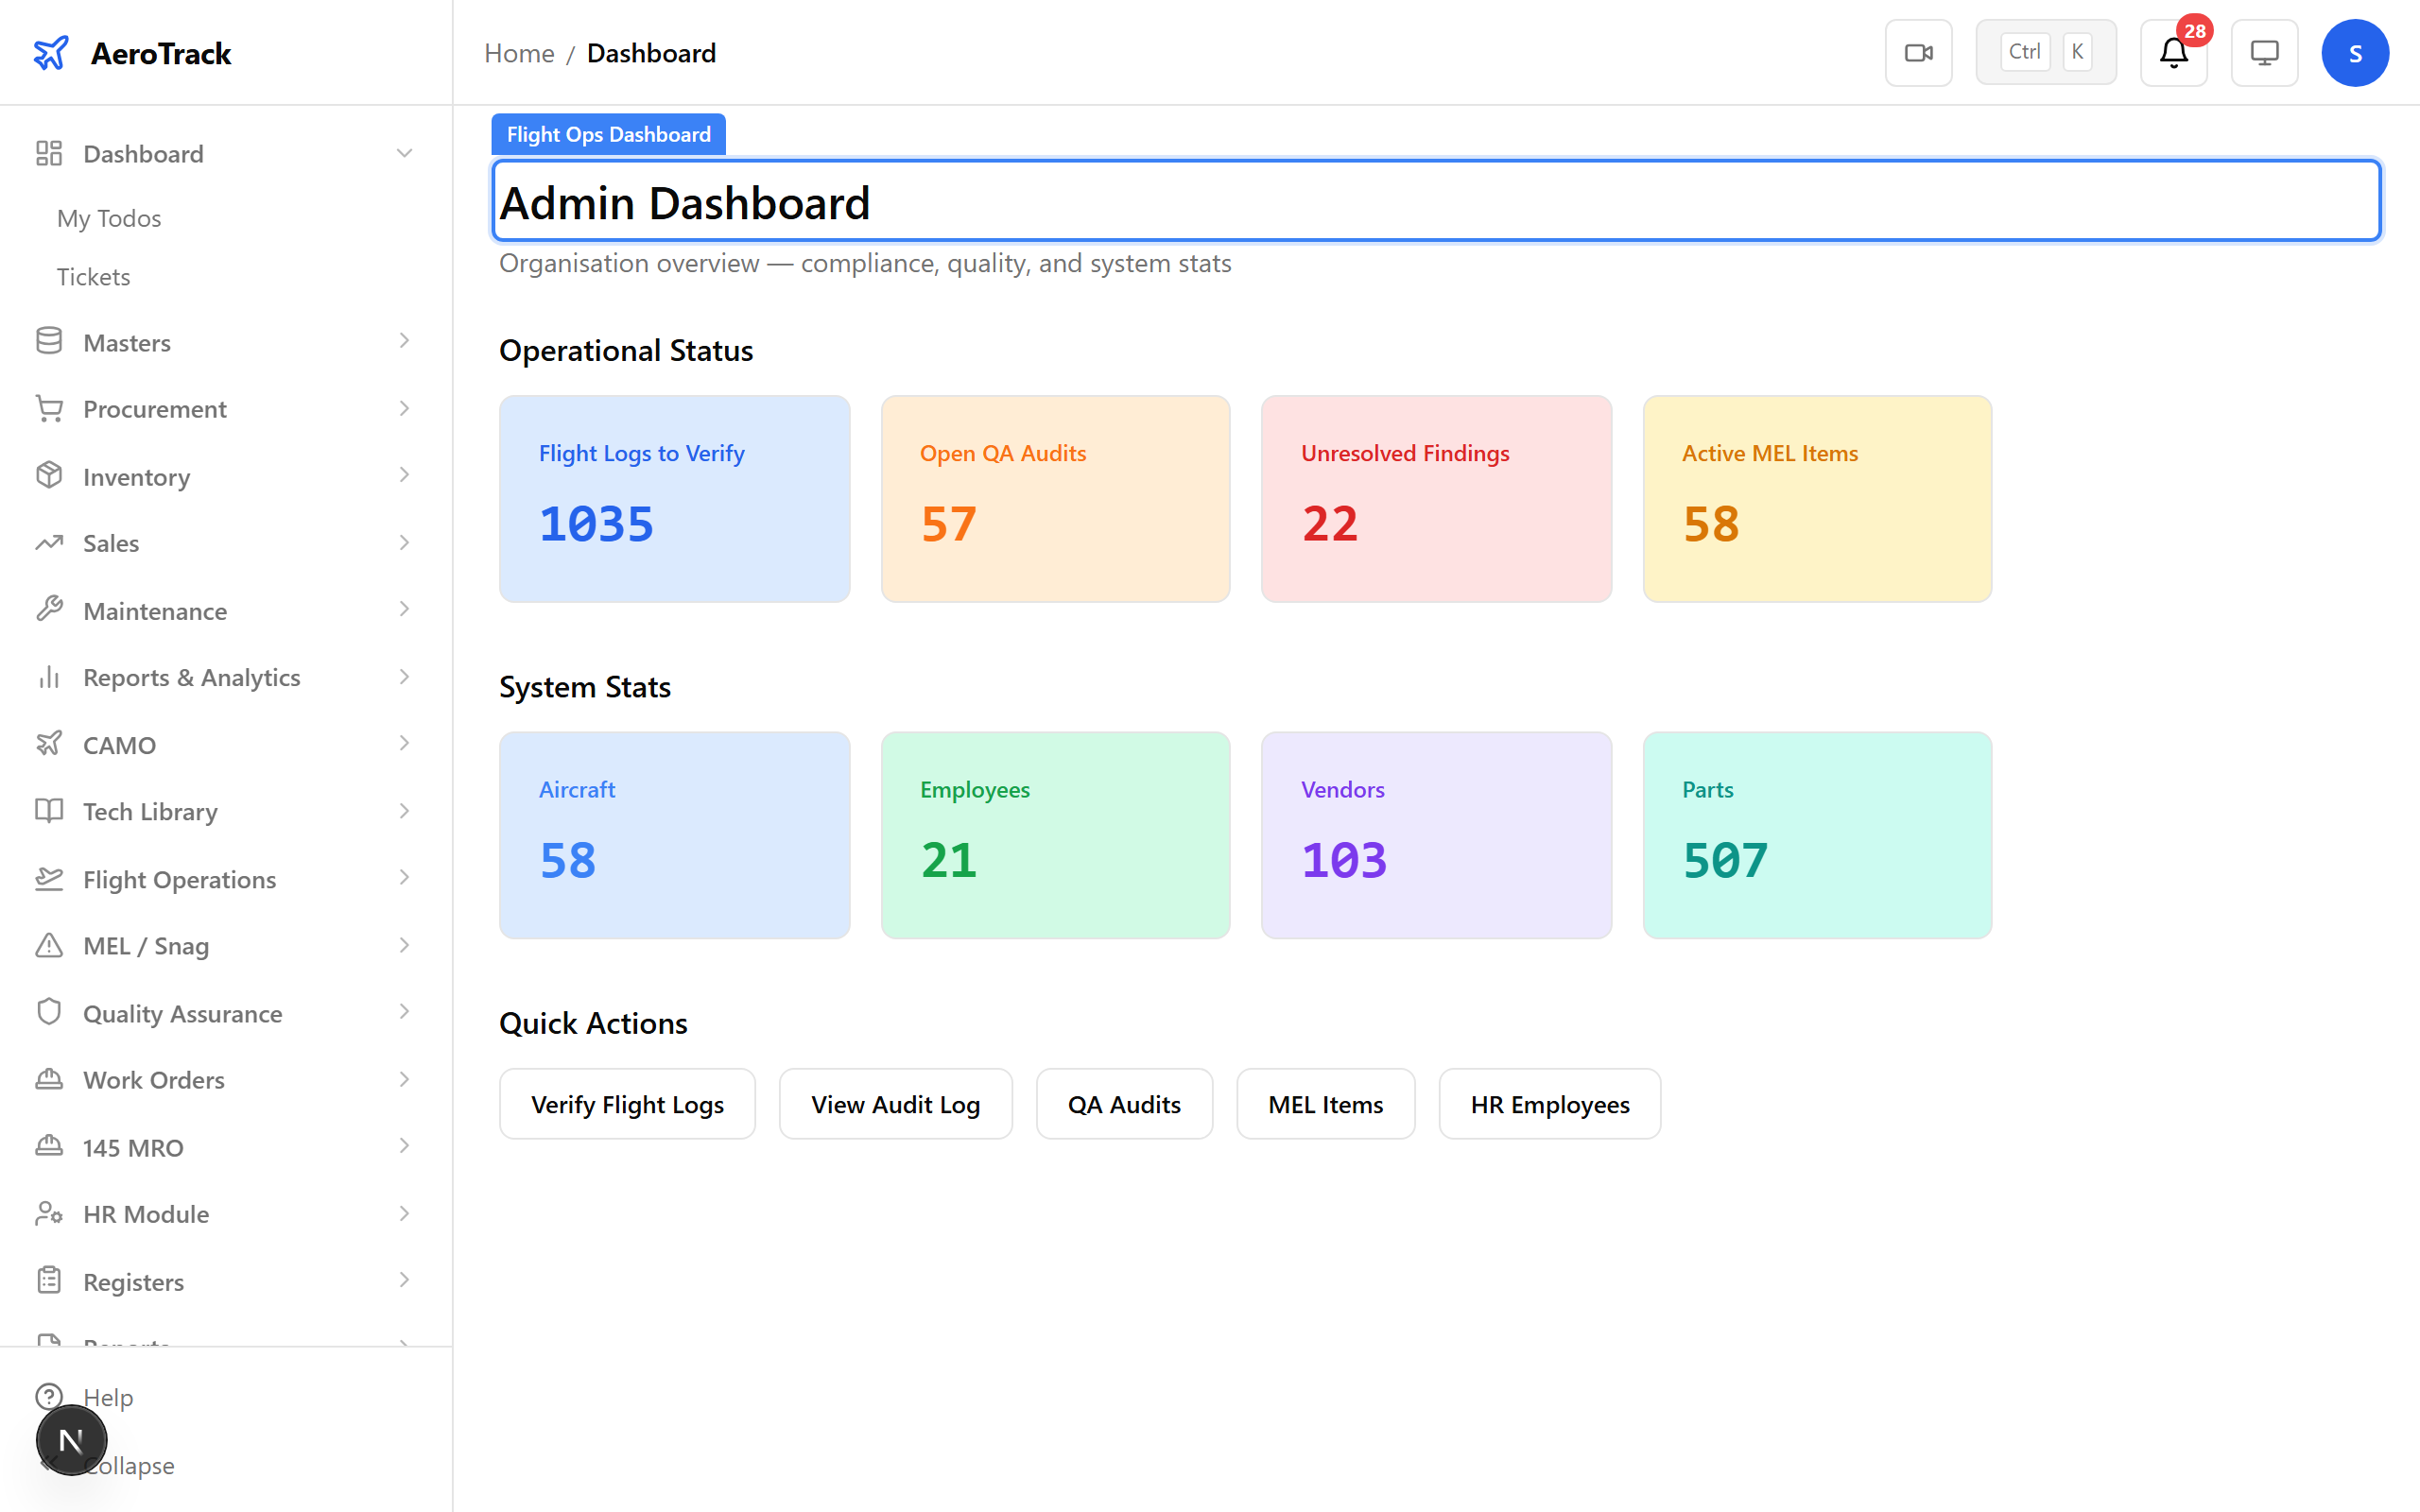
The Admin Dashboard provides a high-level operational overview — flight logs to verify, open QA audits, unresolved findings, active MEL items, plus system stats (aircraft count, employees, vendors, parts). Quick action buttons link to common tasks.