Before You Start
Before running the onboarding wizard, ensure:
- The aircraft has been registered and appears in CAMO → Aircraft.
- You are logged in as admin or super_admin. The onboarding wizard is not available to
camo_engineerusers. - If you want to copy inspections from an existing aircraft, that aircraft must be of the same model and already have inspections configured.
Run the Onboarding Wizard
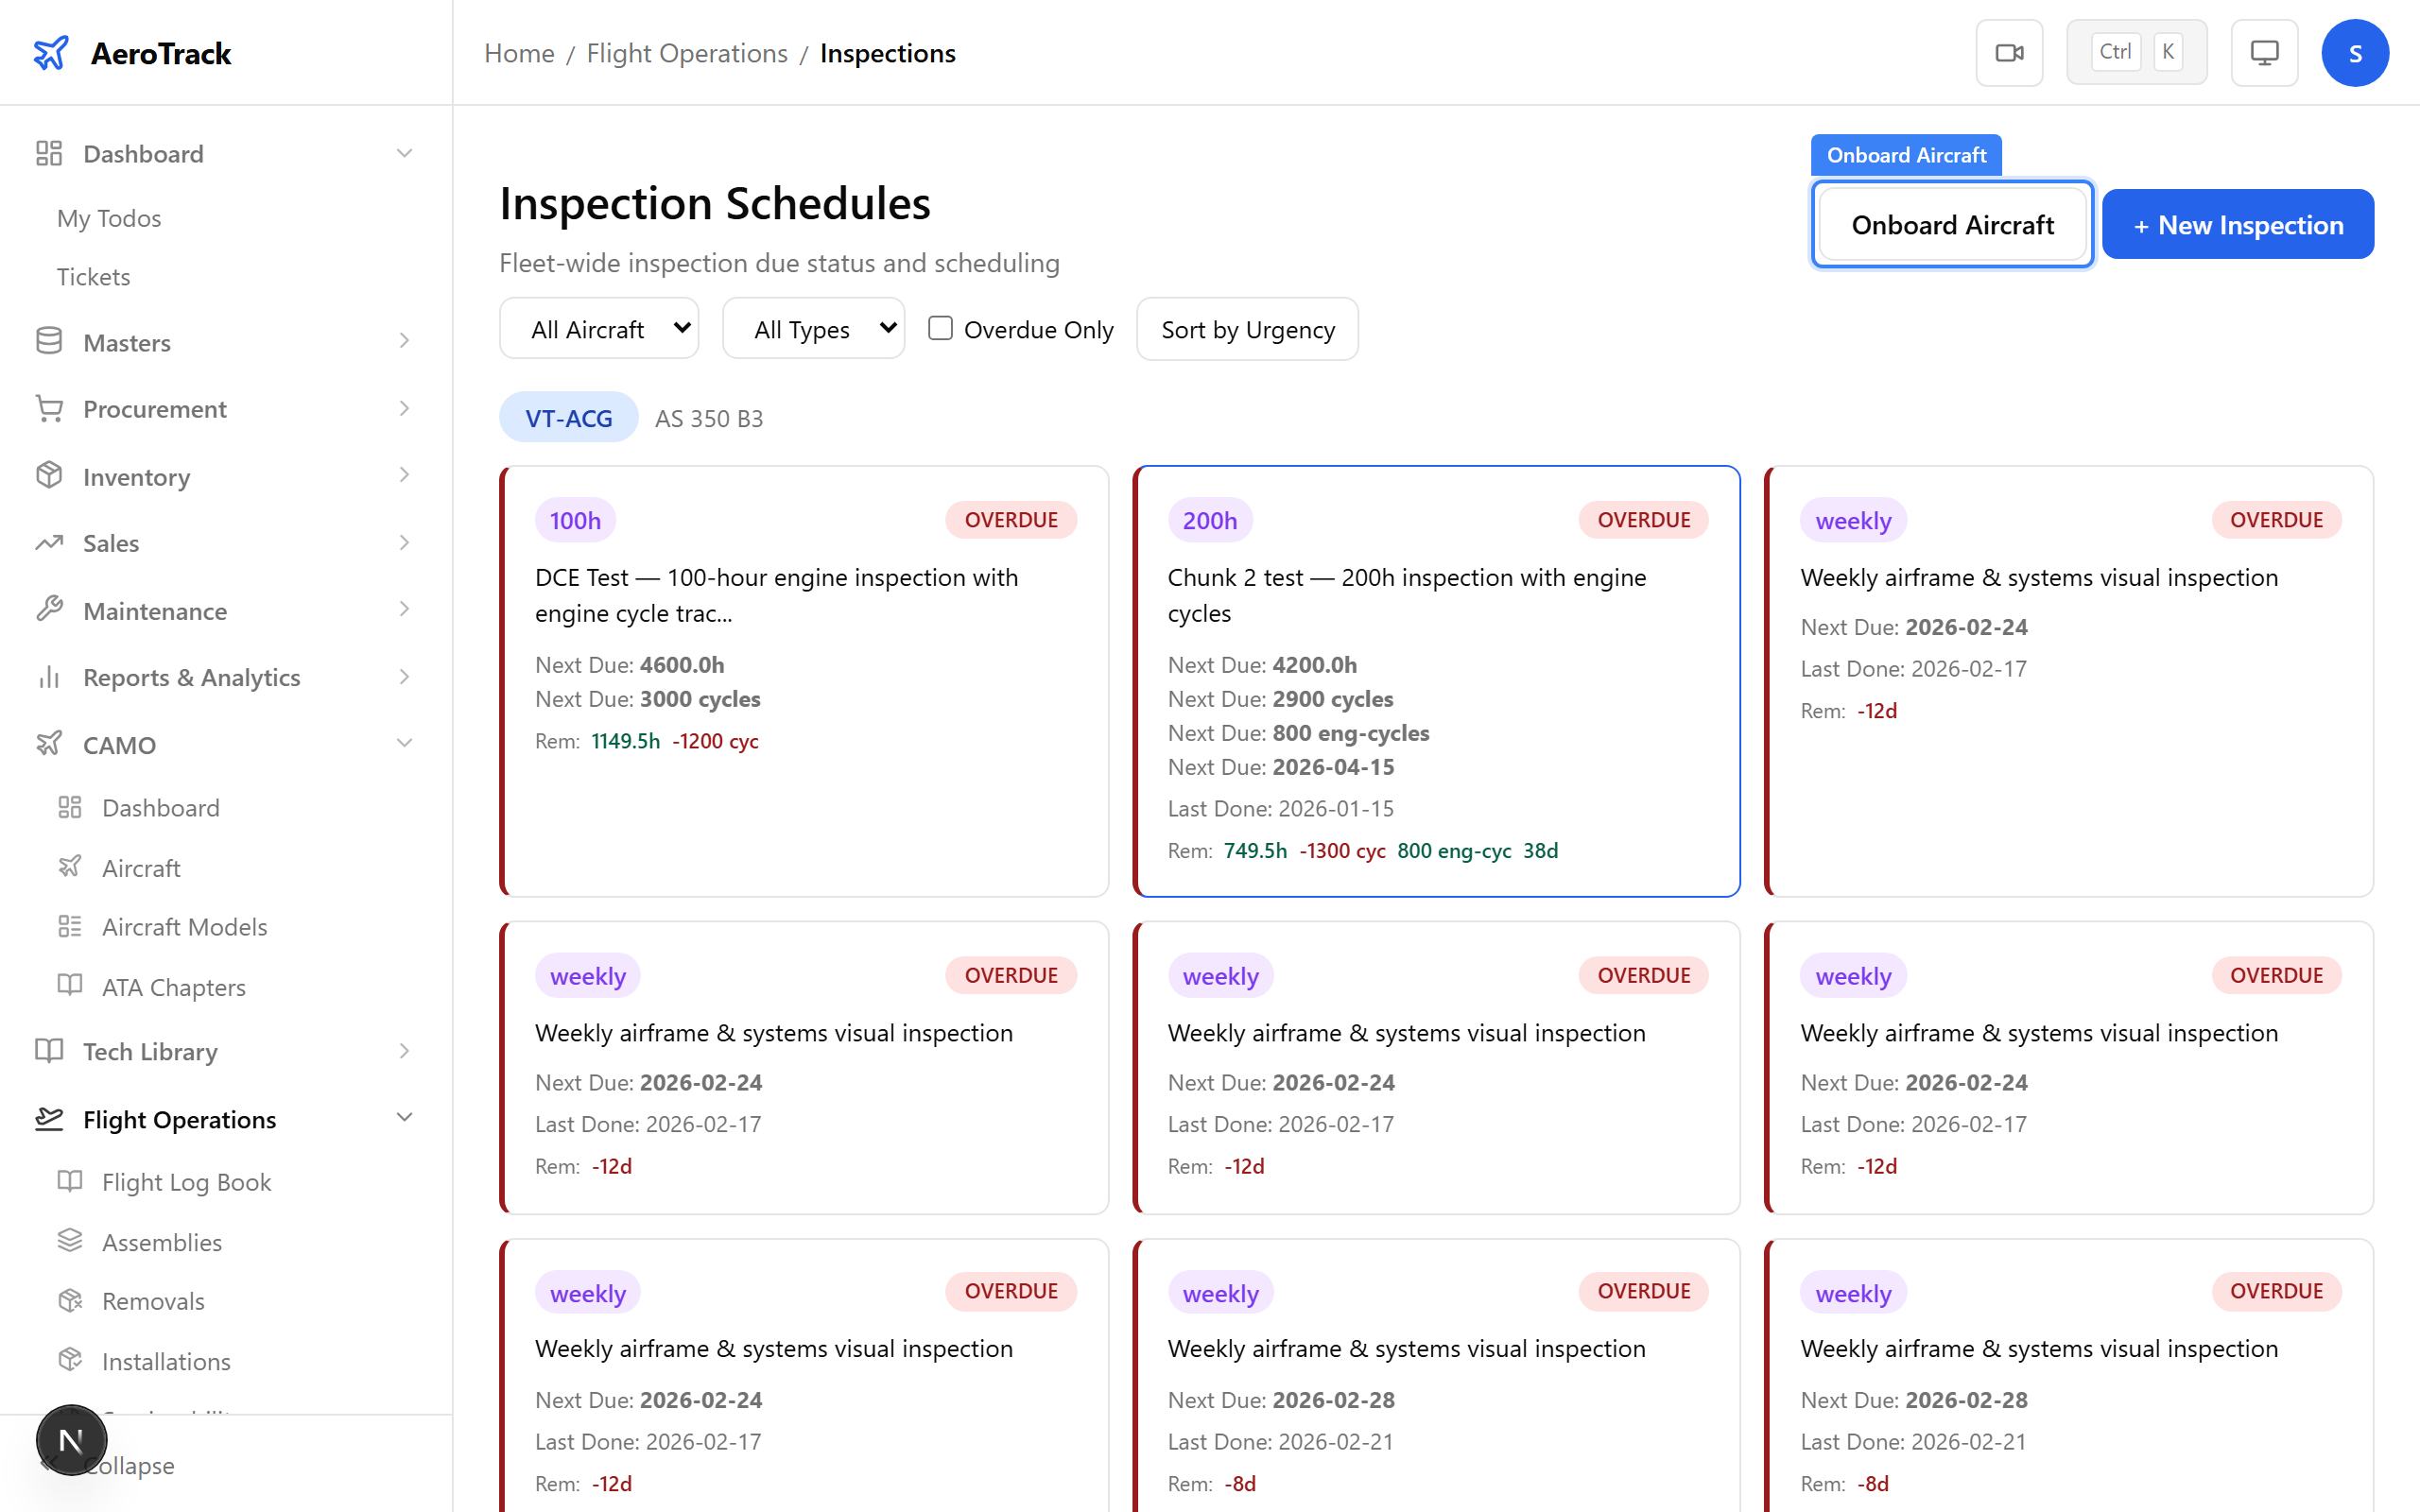
Navigate to Flight Ops → Inspections in the sidebar. At the top of the inspections page, click the Onboard Aircraft button. This button is only visible if you have admin or super_admin role.
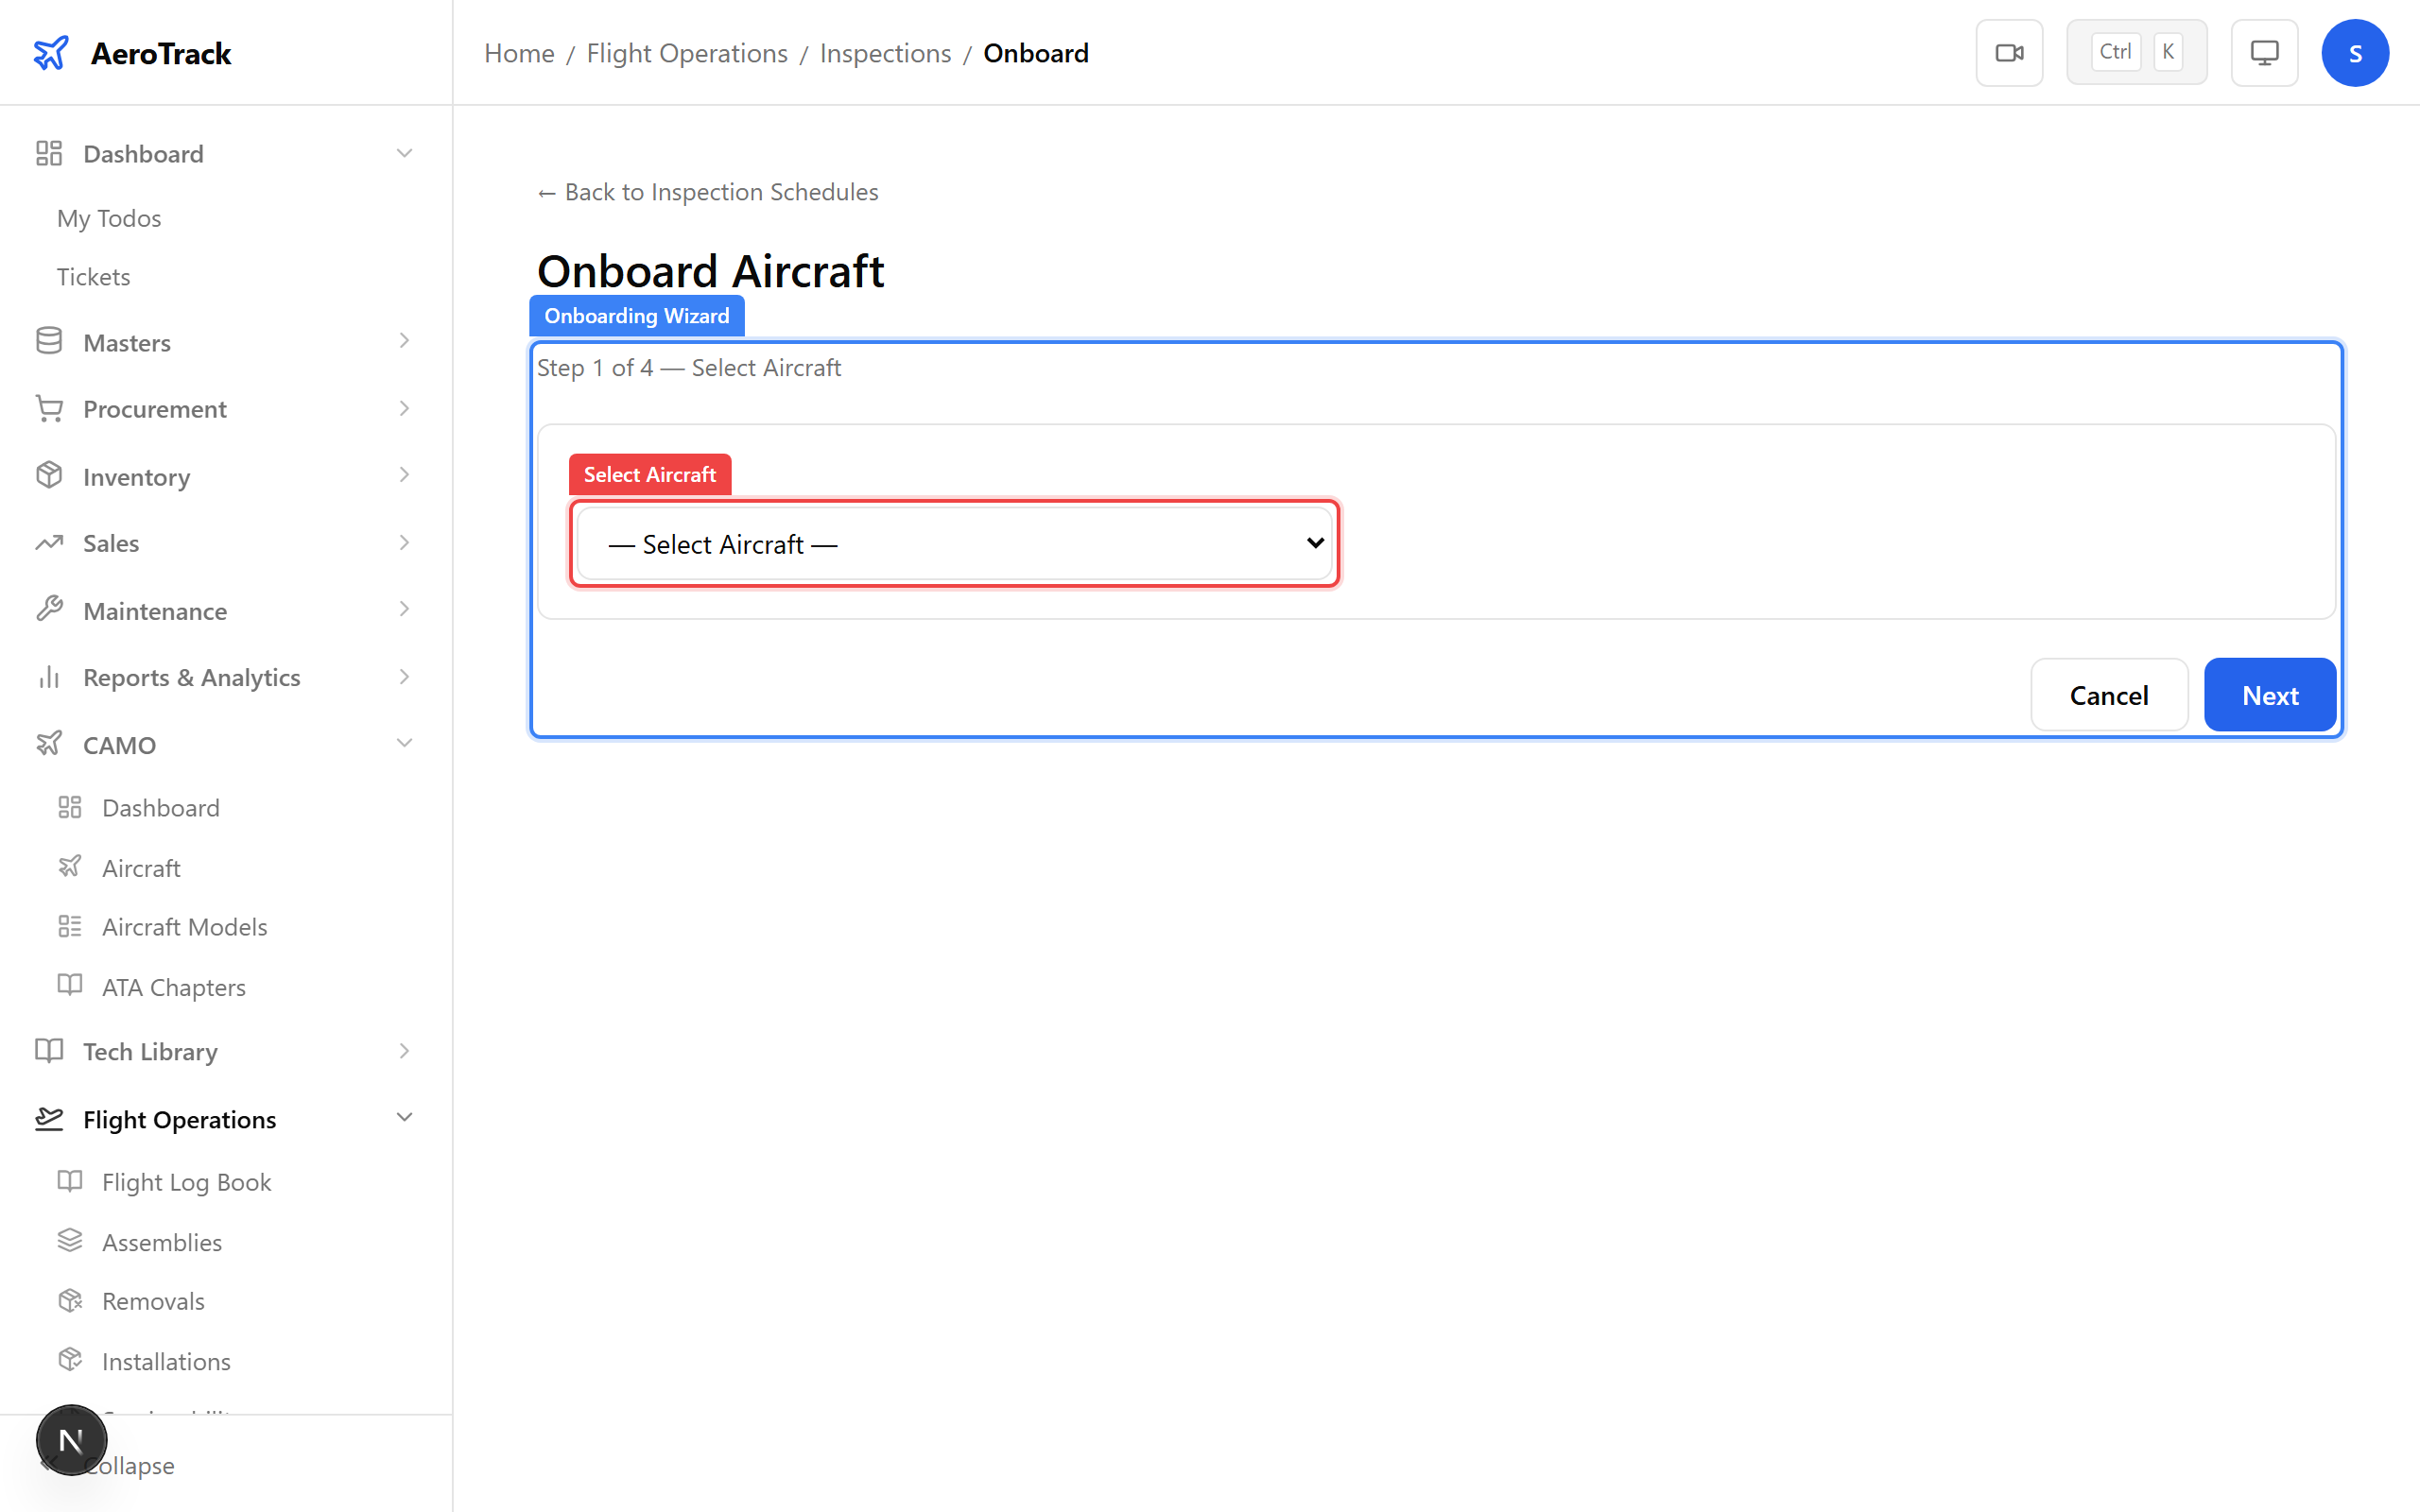
A dropdown lists all active aircraft (registration + model name). Select the aircraft you want to onboard. Click Next to proceed.
The wizard shows two options:
- Copy from another aircraft — select a sister ship (same model) from the dropdown and click Fetch. All inspection types, descriptions, ATA chapters, and intervals are copied. Last-done values are left blank so you can enter the new aircraft's baseline.
- Start from scratch — click this button to begin with one empty inspection row.
At the top of the baseline entry form, a sticky bar lets you enter common baseline values and broadcast them to every row at once:
- Last Done Date — the date all inspections were last performed.
- Last Done Hours — TSN hours at last inspection.
- Last Done Cycles — CSN cycles at last inspection.
Click Apply to All. A toast confirms the values have been applied. You can then override individual rows if some inspections had different last-done values.
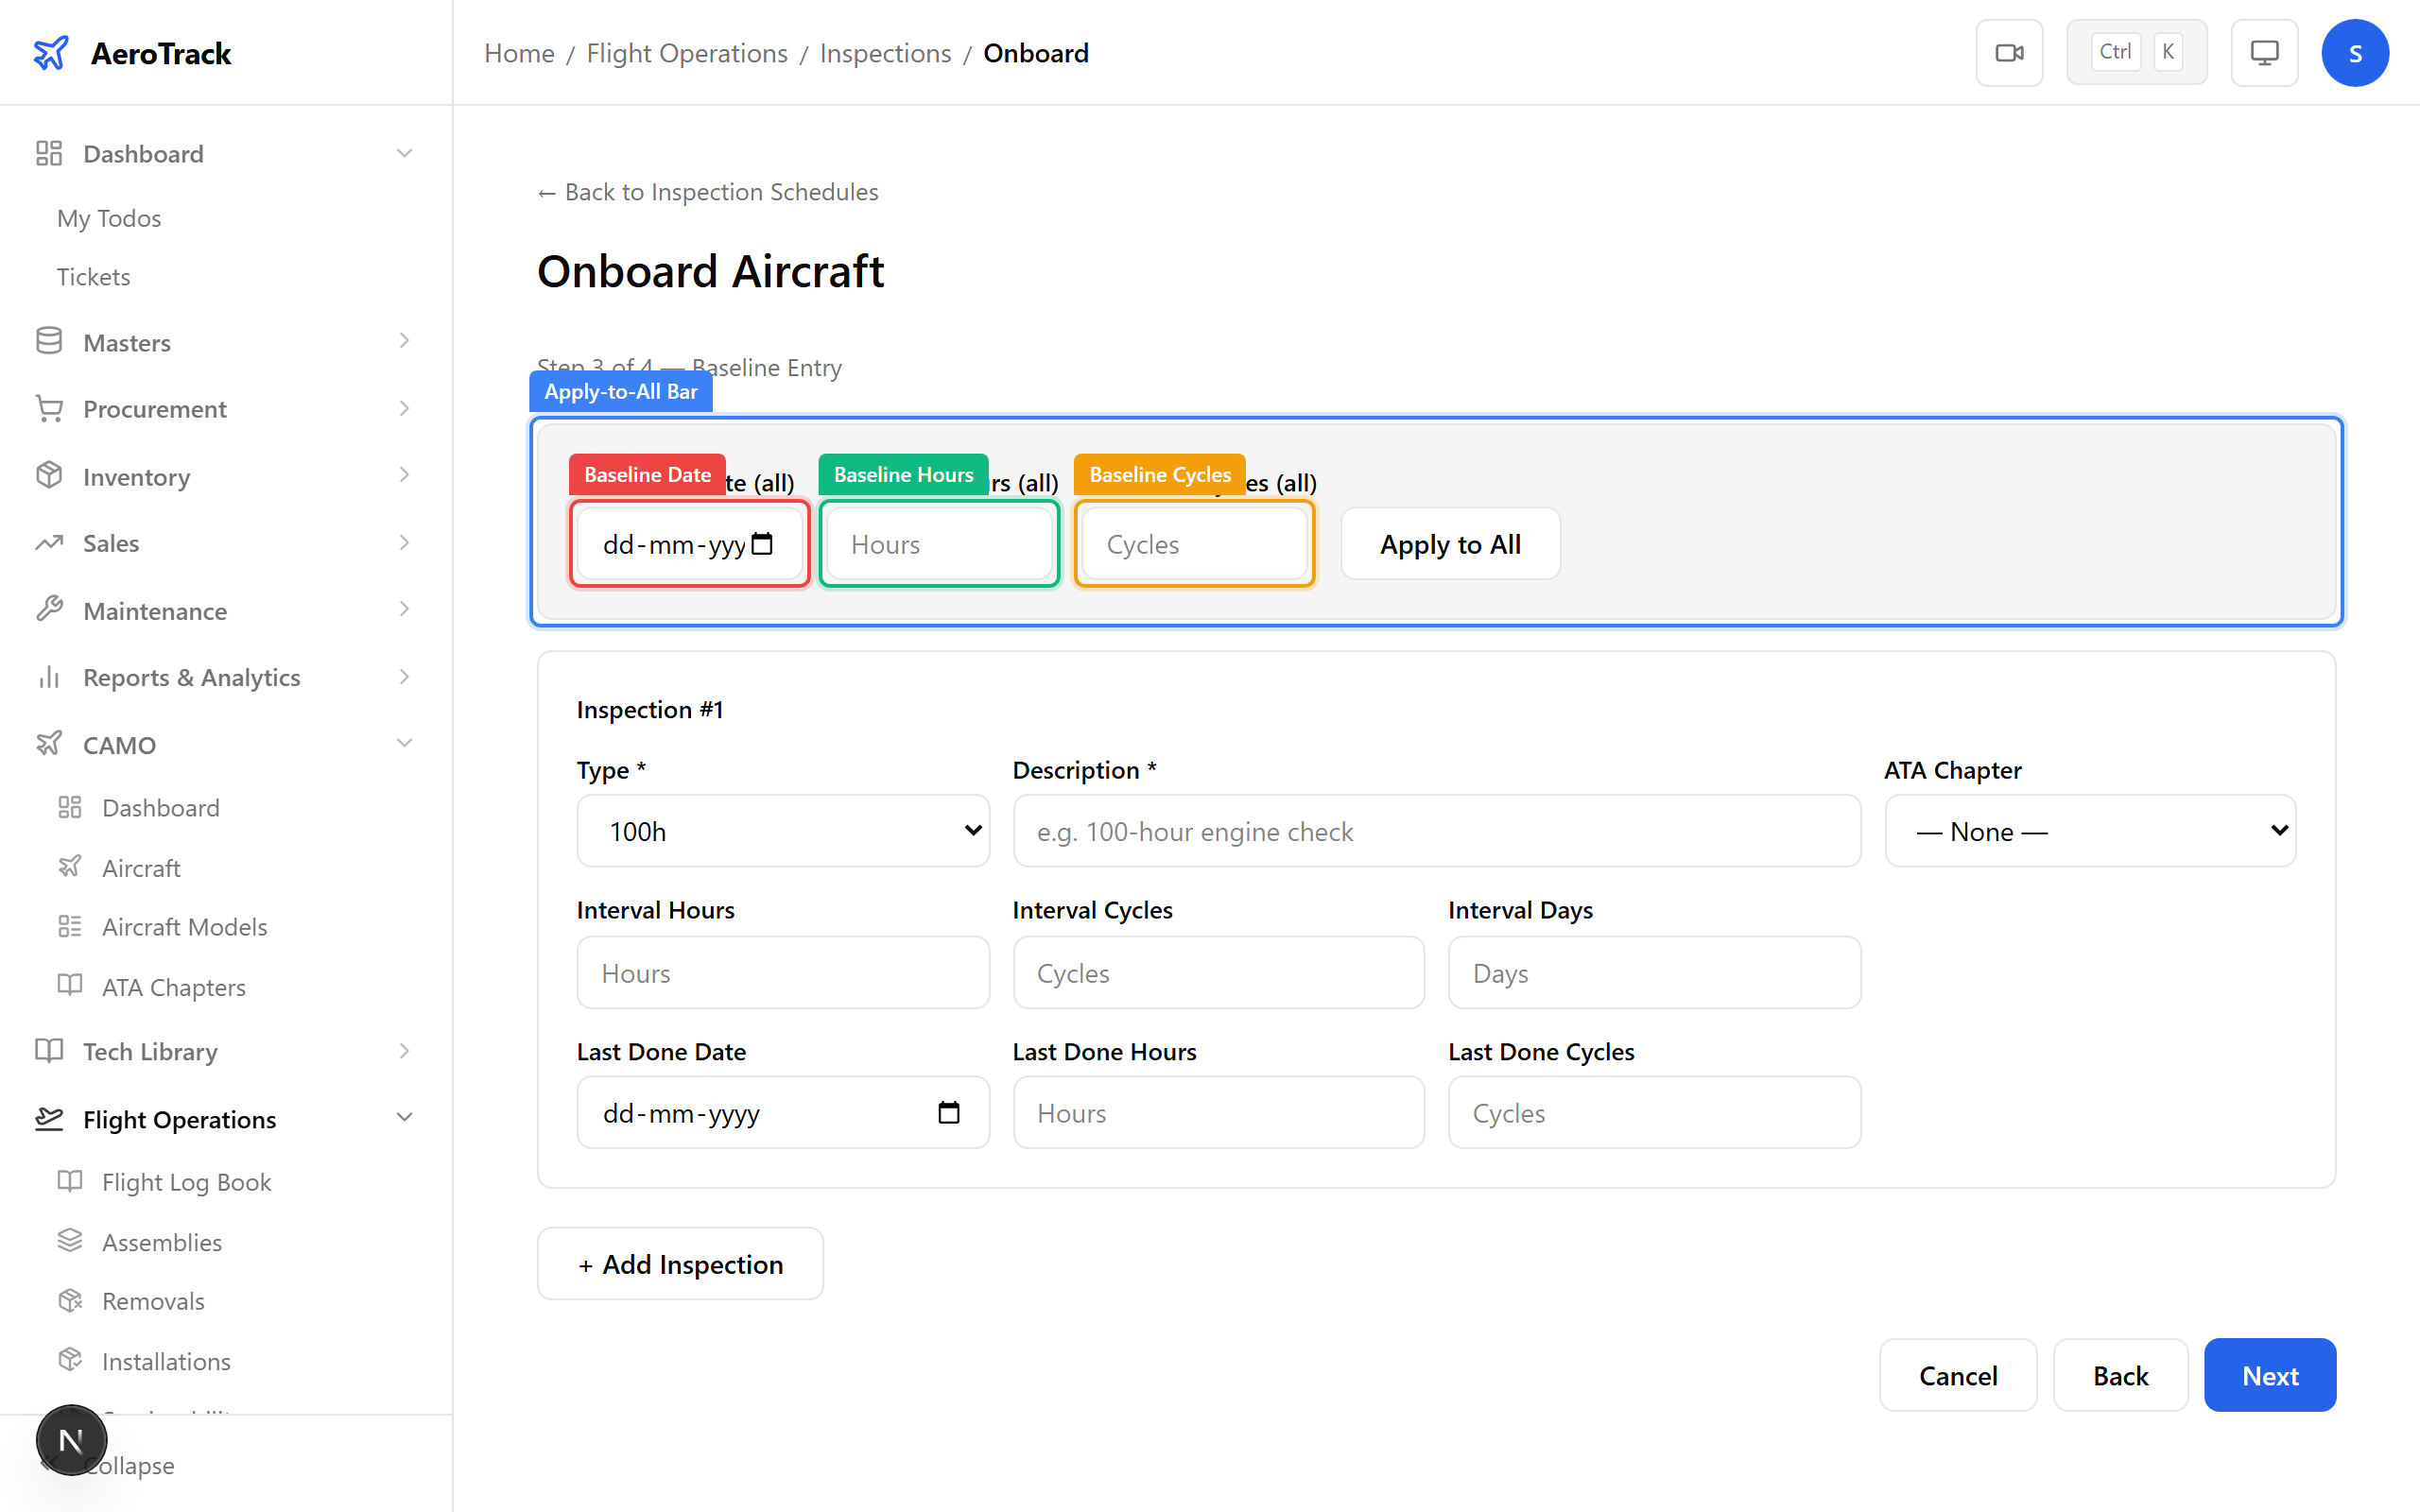
Each inspection card has these fields:
| Field | Required | Notes |
|---|---|---|
| Type * | Yes | daily, weekly, 100h, 200h, 500h, 1000h, annual, special |
| Description * | Yes | What the inspection covers. |
| ATA Chapter | No | Optional link to an ATA chapter. |
| Interval Hours | No | Hours between inspections (e.g. 100). |
| Interval Cycles | No | Cycles between inspections. |
| Interval Days | No | Calendar days between inspections (e.g. 365). |
| Last Done Date | No | Date the inspection was last performed. |
| Last Done Hours | No | TSN hours at last inspection. |
| Last Done Cycles | No | CSN cycles at last inspection. |
Click Add Row at the bottom to add another inspection. To remove a row, click the Remove button on its card header. At least one inspection row is required.
Click Next to reach the confirmation screen. A summary card shows:
- Aircraft registration and model
- Number of inspections to be created
- A preview table with columns: #, Type, Description, Interval (compact), Last Done (compact)
Review the table carefully. If something is wrong, click Back to return to the baseline entry step and correct it.
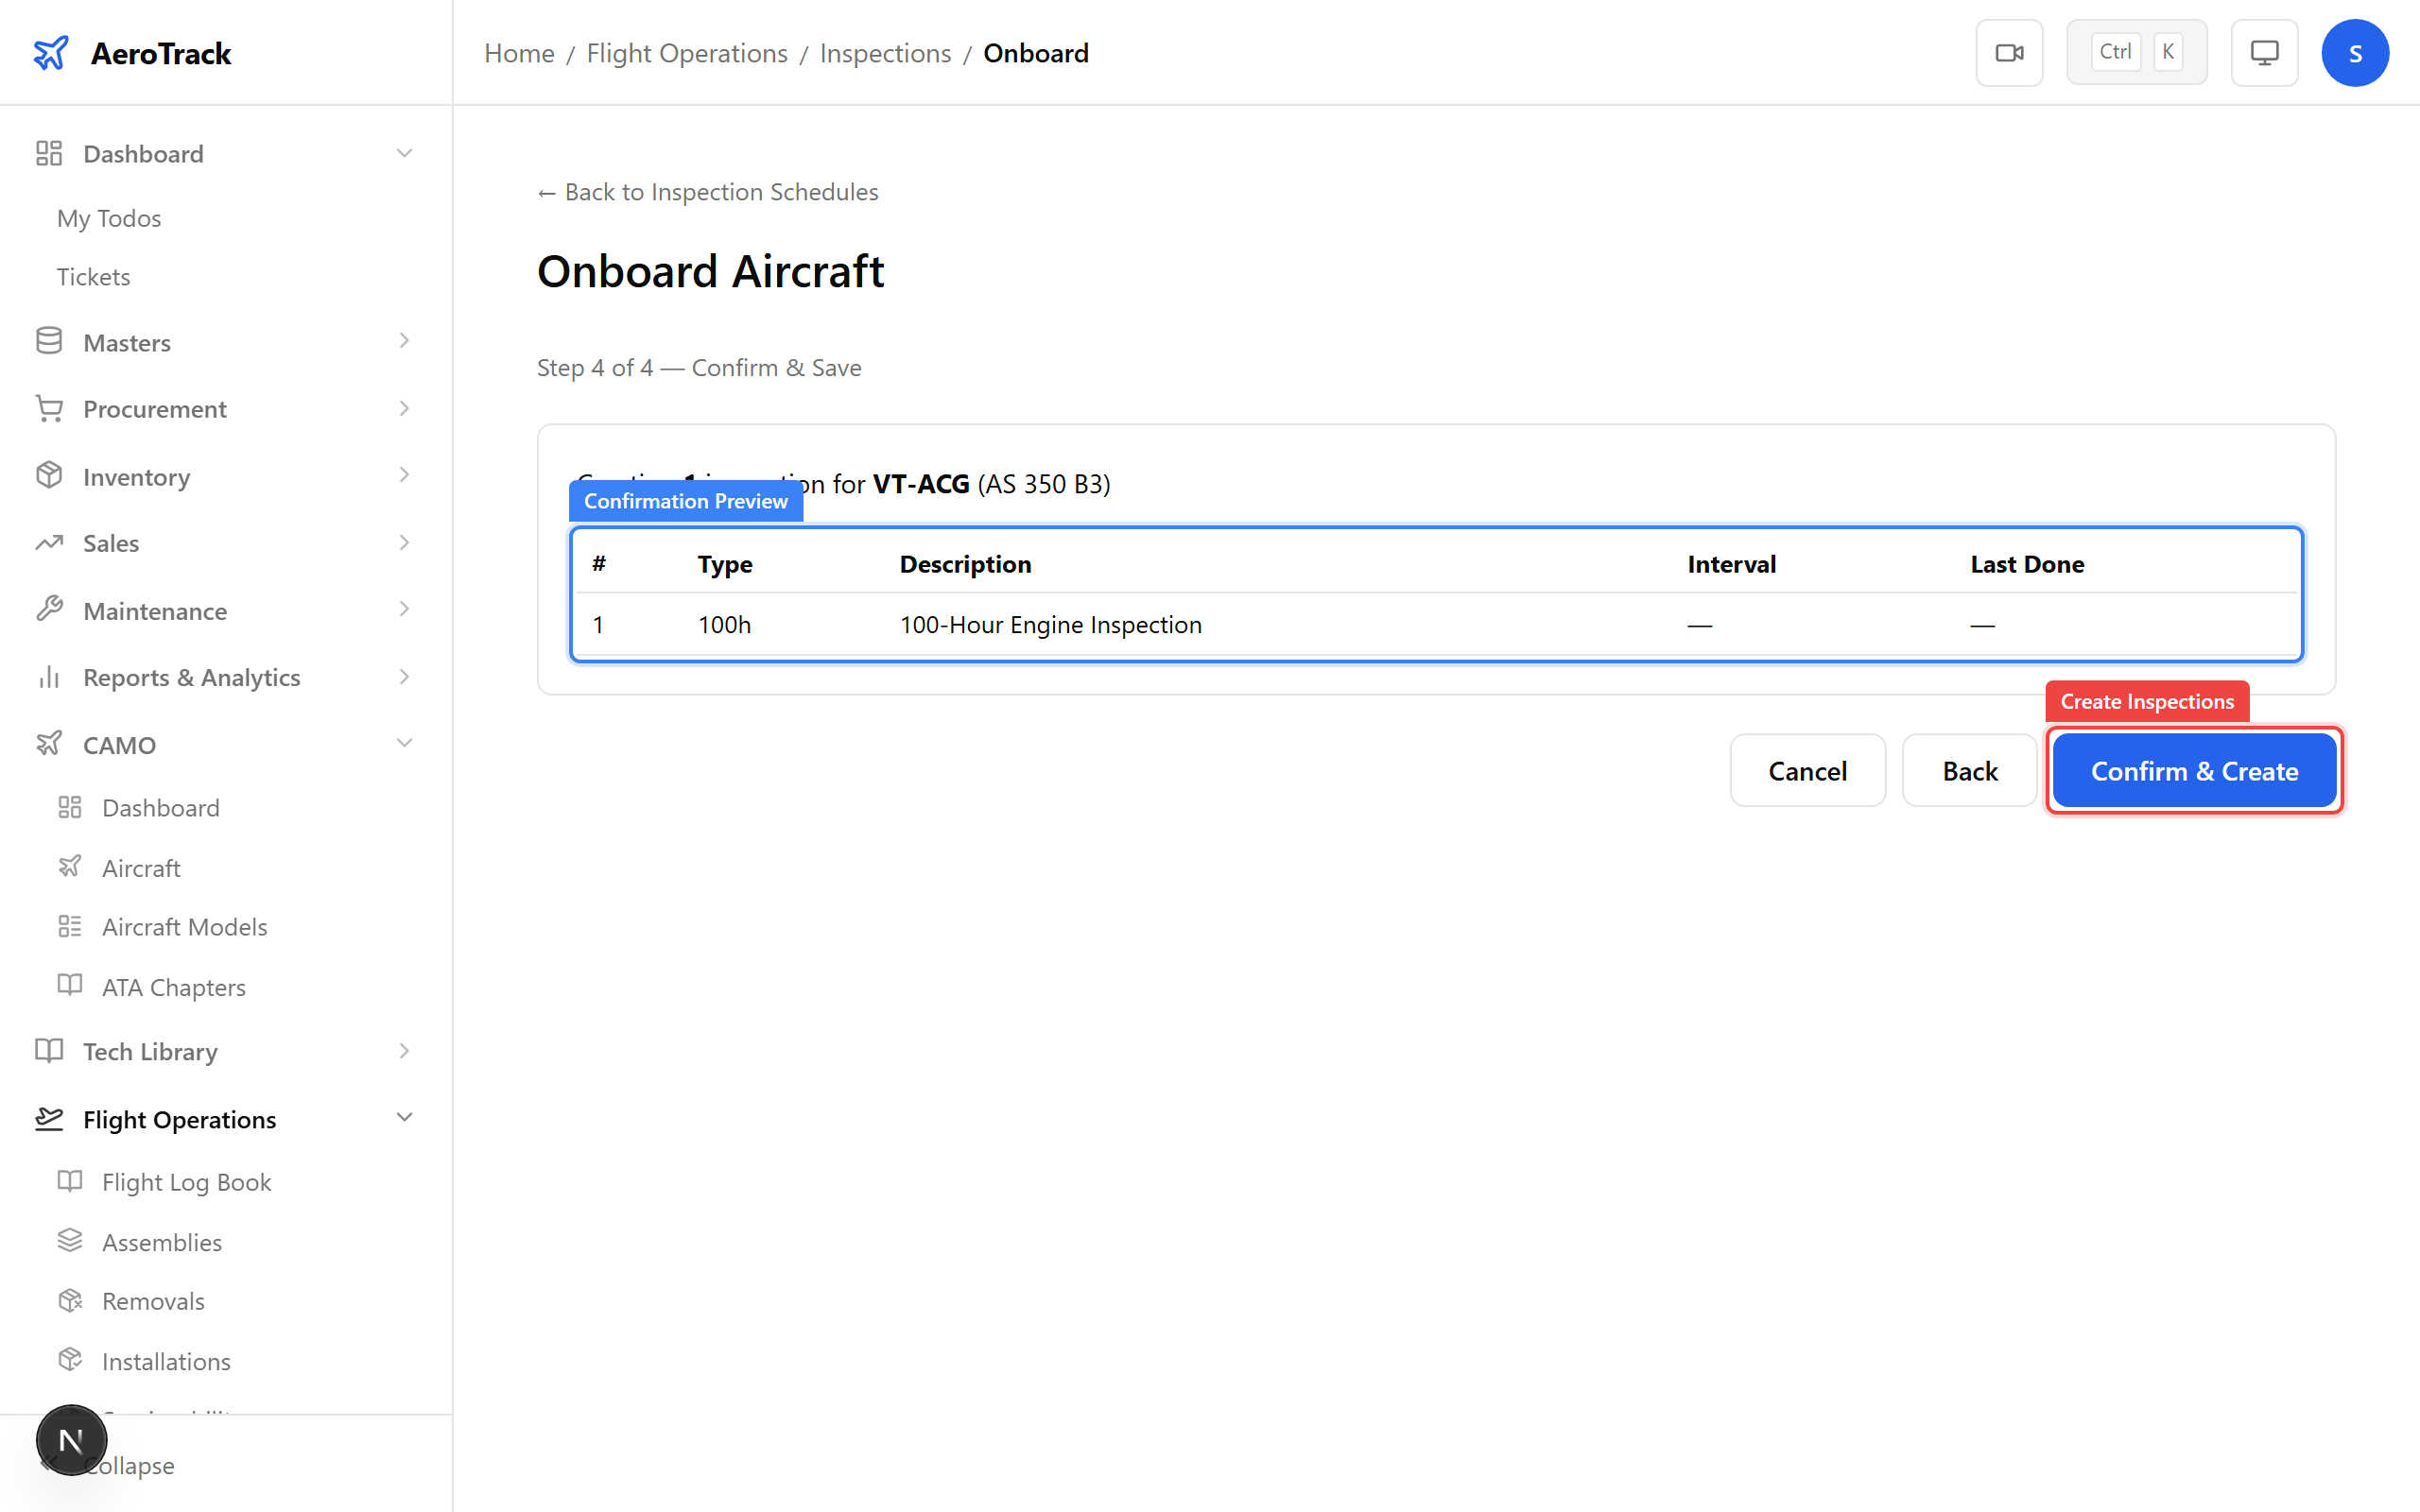
Click Create Inspections. The system bulk-inserts all
inspection schedules and calculates the initial nextDue values
for each dimension (hours, cycles, date). A toast confirms the count
created, and you are redirected to the inspections list.
Verify Onboarding
On the Flight Ops → Inspections page, use the aircraft filter dropdown to select your newly onboarded aircraft. You should see inspection cards grouped under the aircraft badge, each showing:
- Type badge and status badge (OK, COMING_DUE, or NOT_STARTED)
- Next due hours, cycles, and date
- Remaining values colour-coded: green (OK), orange (coming due), red (overdue)
You can also visit the aircraft detail page (CAMO → Aircraft → click registration) and check the Inspections cross-link card which shows the total inspection count.