Browse Purchase Orders
Navigate to Procurement → Purchase Orders in
the sidebar. The list loads at /procurement/purchase-orders
showing all POs ordered by creation date.
Each row shows the PO number, type, vendor name, total amount, status, priority, and creation date.
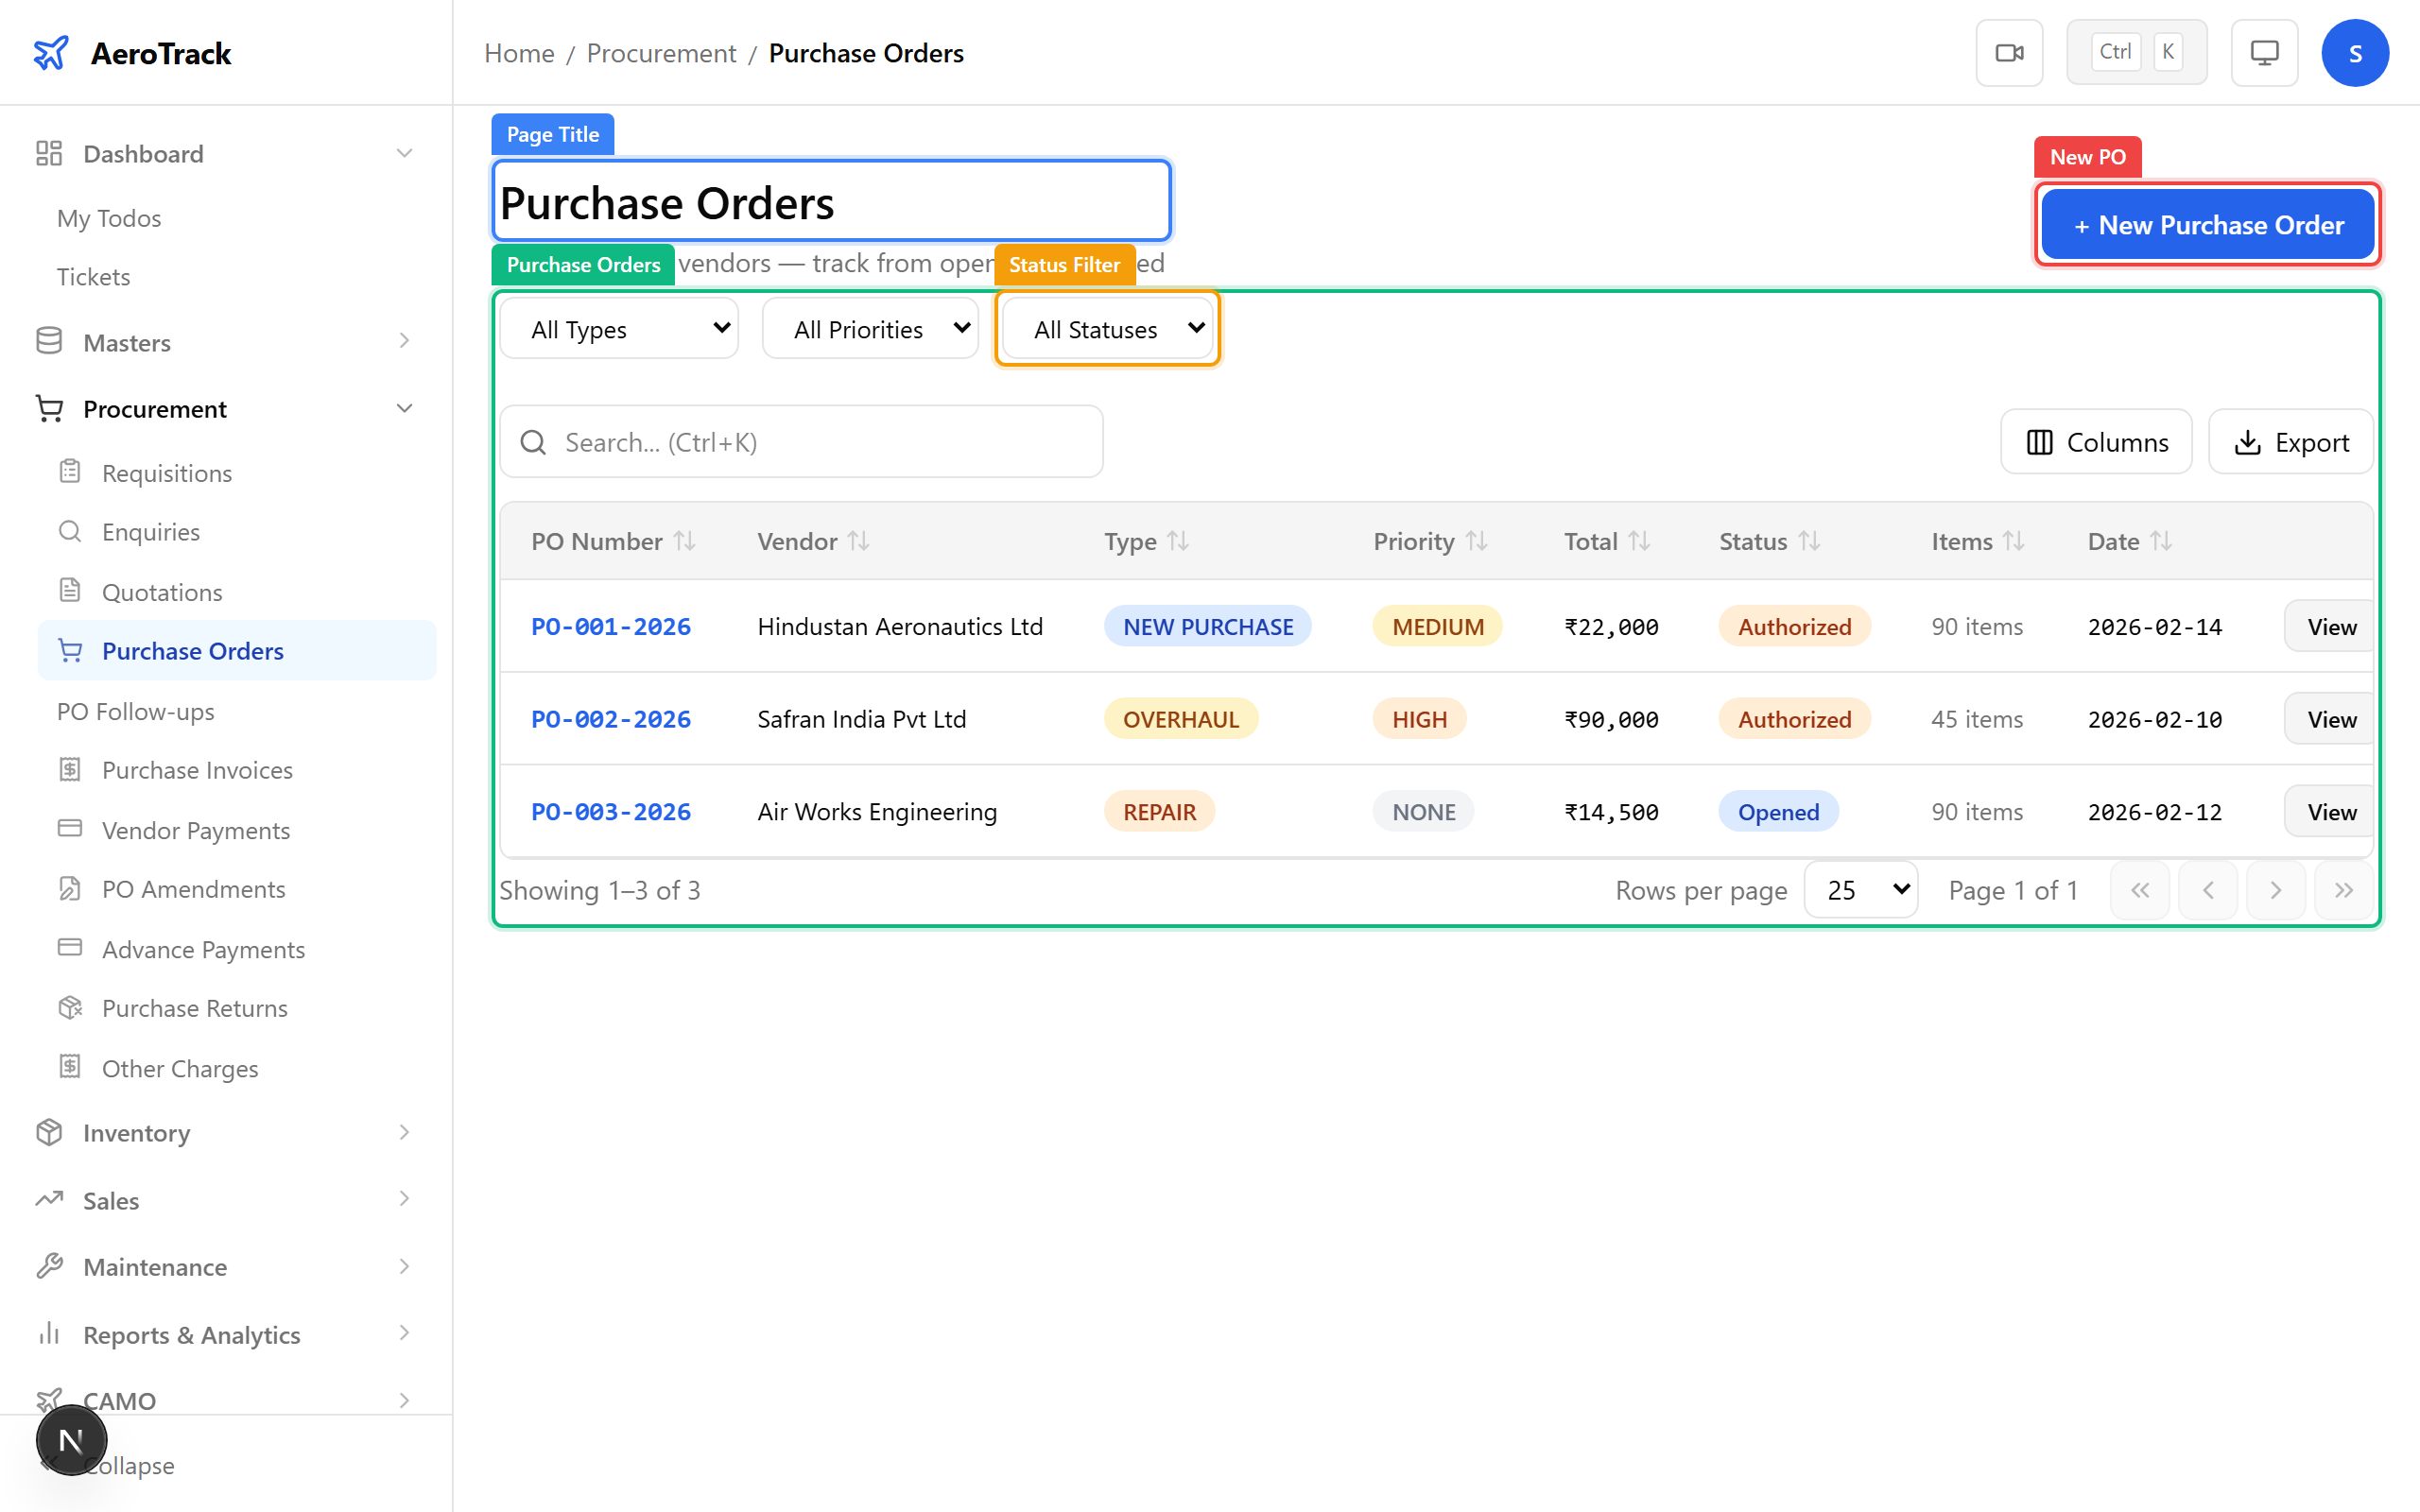
Use the filter dropdowns at the top:
| Filter | Options |
|---|---|
| Type | Standard, Blanket, Emergency. |
| Priority | Low, Medium, High, Critical. |
| Status | Opened, Authorized, Received, Cancelled. |
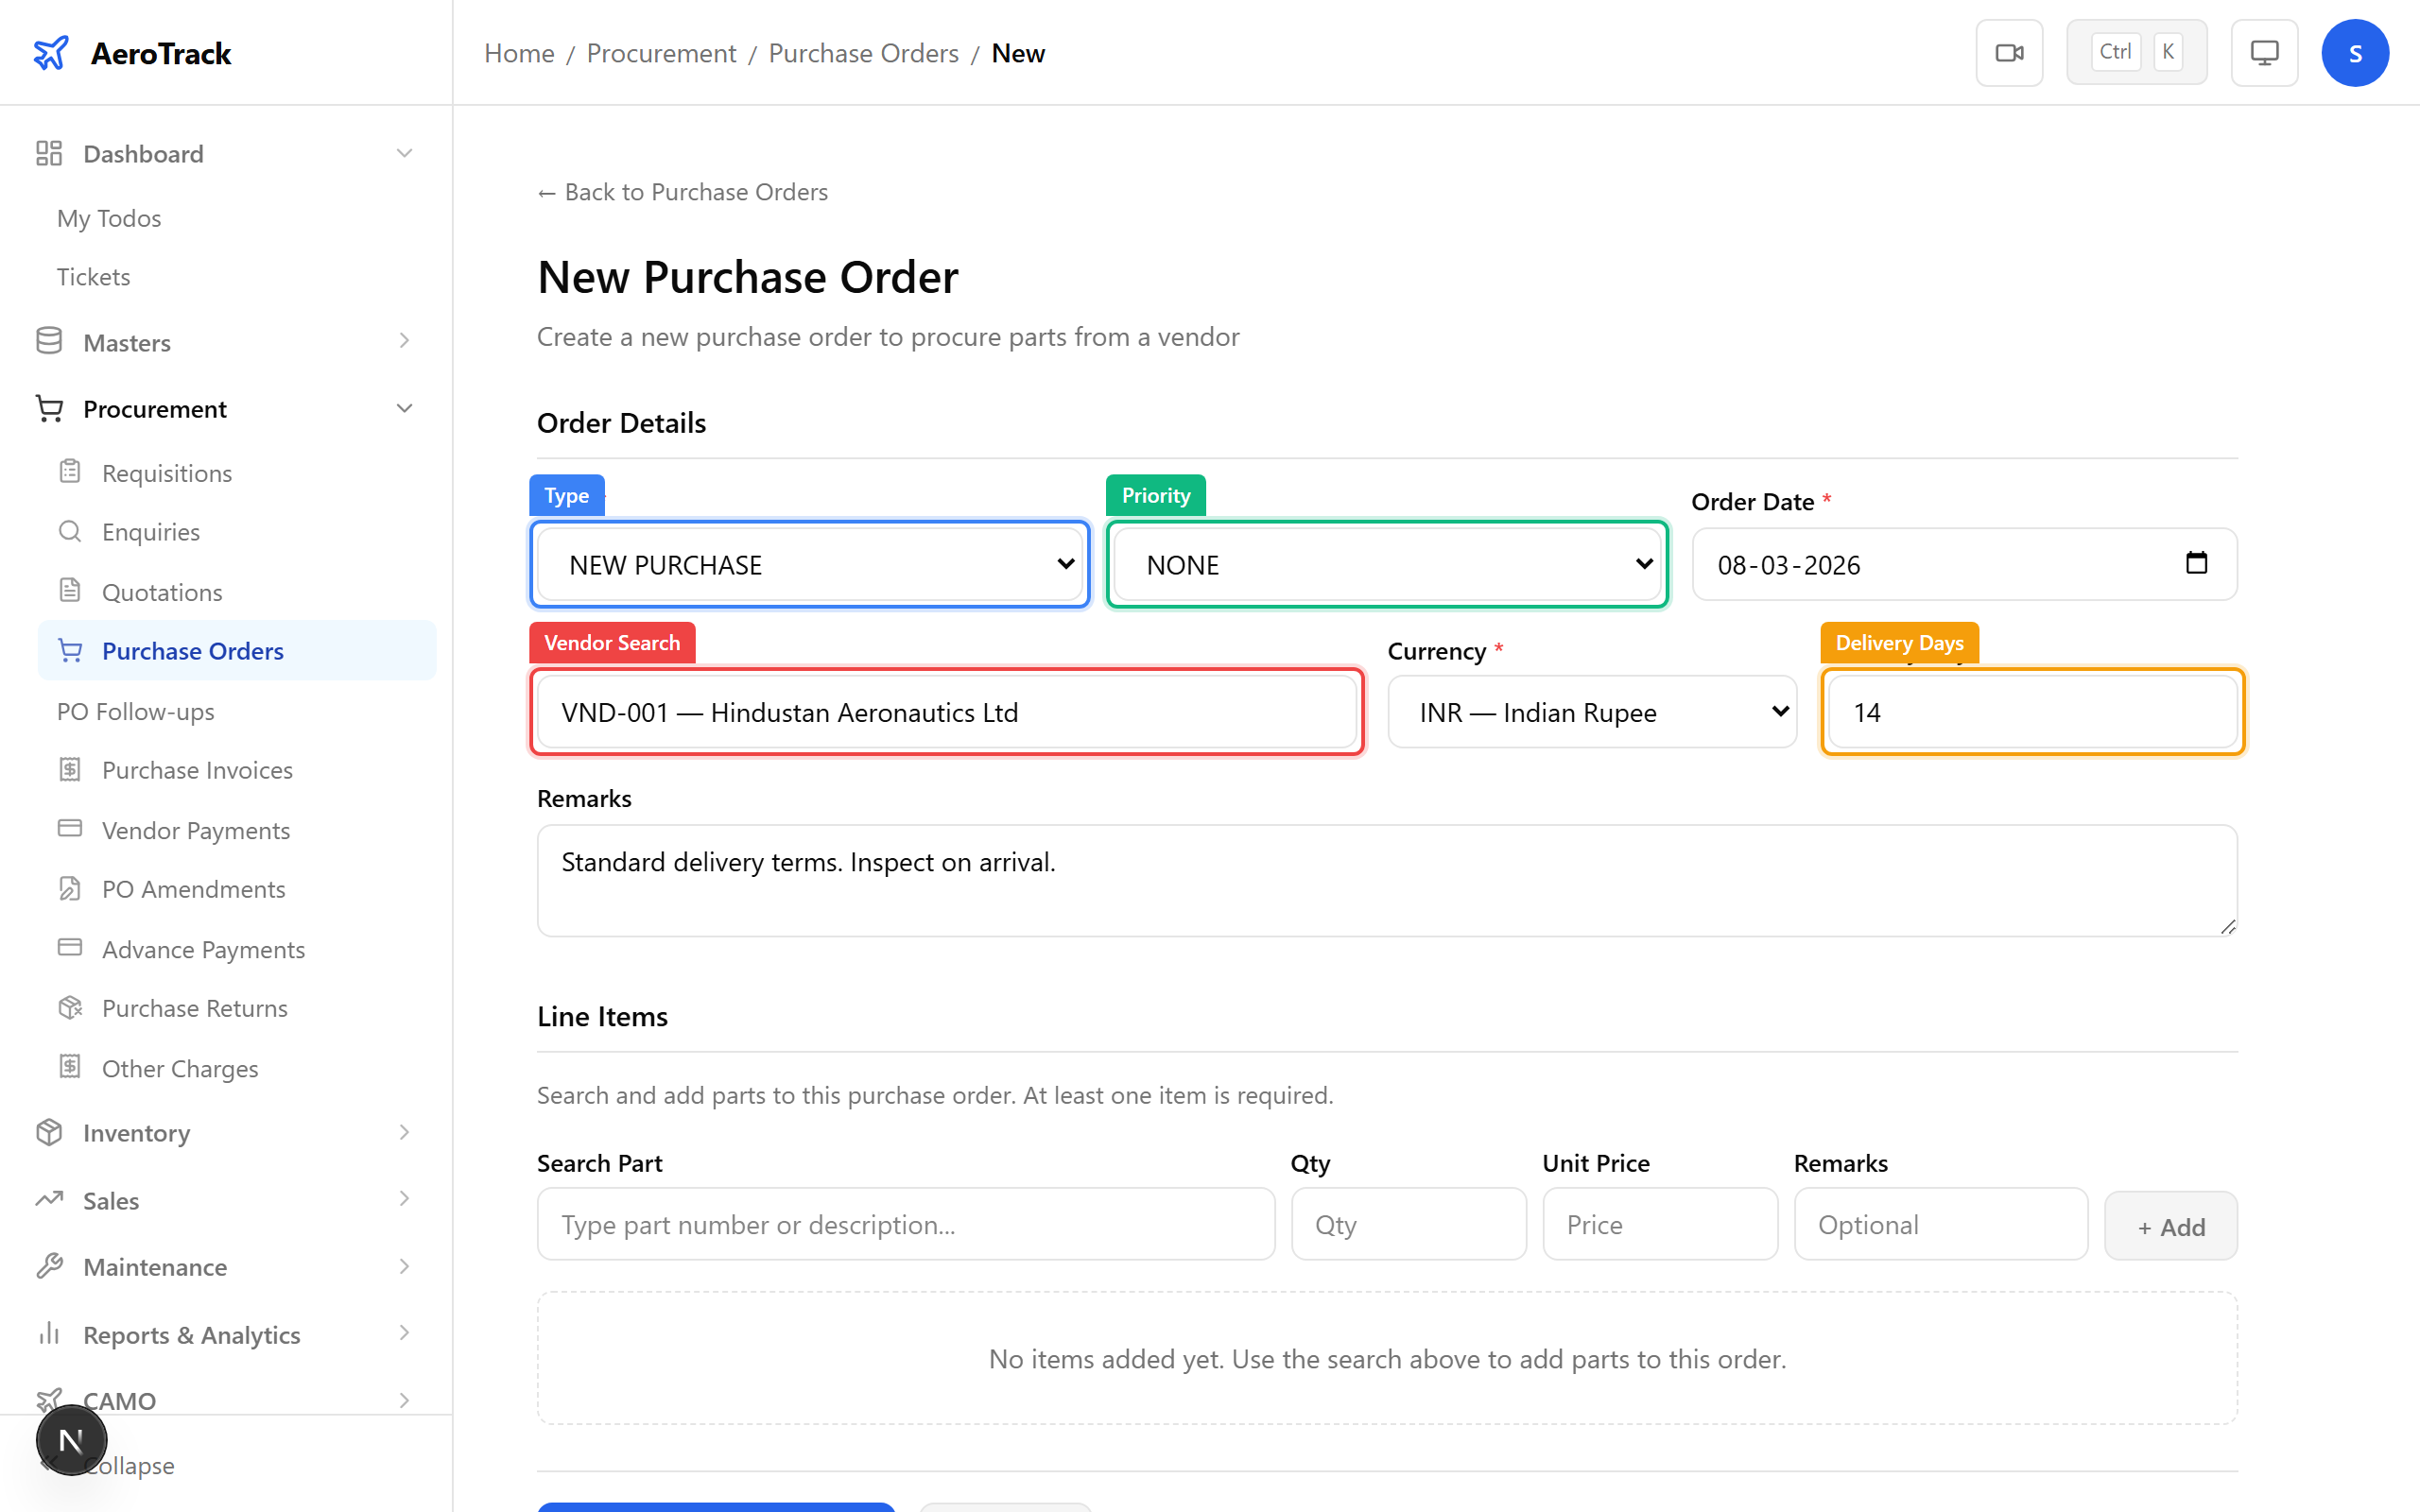
Create a Purchase Order
Click + New Purchase Order on the list page, or
navigate to /procurement/purchase-orders/new. The form
shows header fields, a vendor search, and line-item builder.
Complete the PO header:
| Field | Required | Notes |
|---|---|---|
| Type * | Yes | Standard, Blanket, or Emergency. |
| Priority * | Yes | Low, Medium, High, or Critical. |
| Date | Auto | PO date (defaults to today). |
| Vendor * | Yes | Type to search vendors by name or code. Select from the dropdown. |
| Currency | No | Transaction currency (defaults to INR). |
| Delivery Days | No | Expected delivery lead time in days. |
| Remarks | No | Internal notes or special terms. |
Use the Part Search field to find parts. Select a part, then fill in the quantity and unit price:
| Line Field | Notes |
|---|---|
| Part | Auto-filled from search. Shows part number & description. |
| Quantity * | Number of units to order. |
| Unit Price * | Price per unit in the selected currency. |
| Remarks | Per-line notes (spec, revision, etc.). |
Click Add Item to append each line. The Running Total updates as items are added.
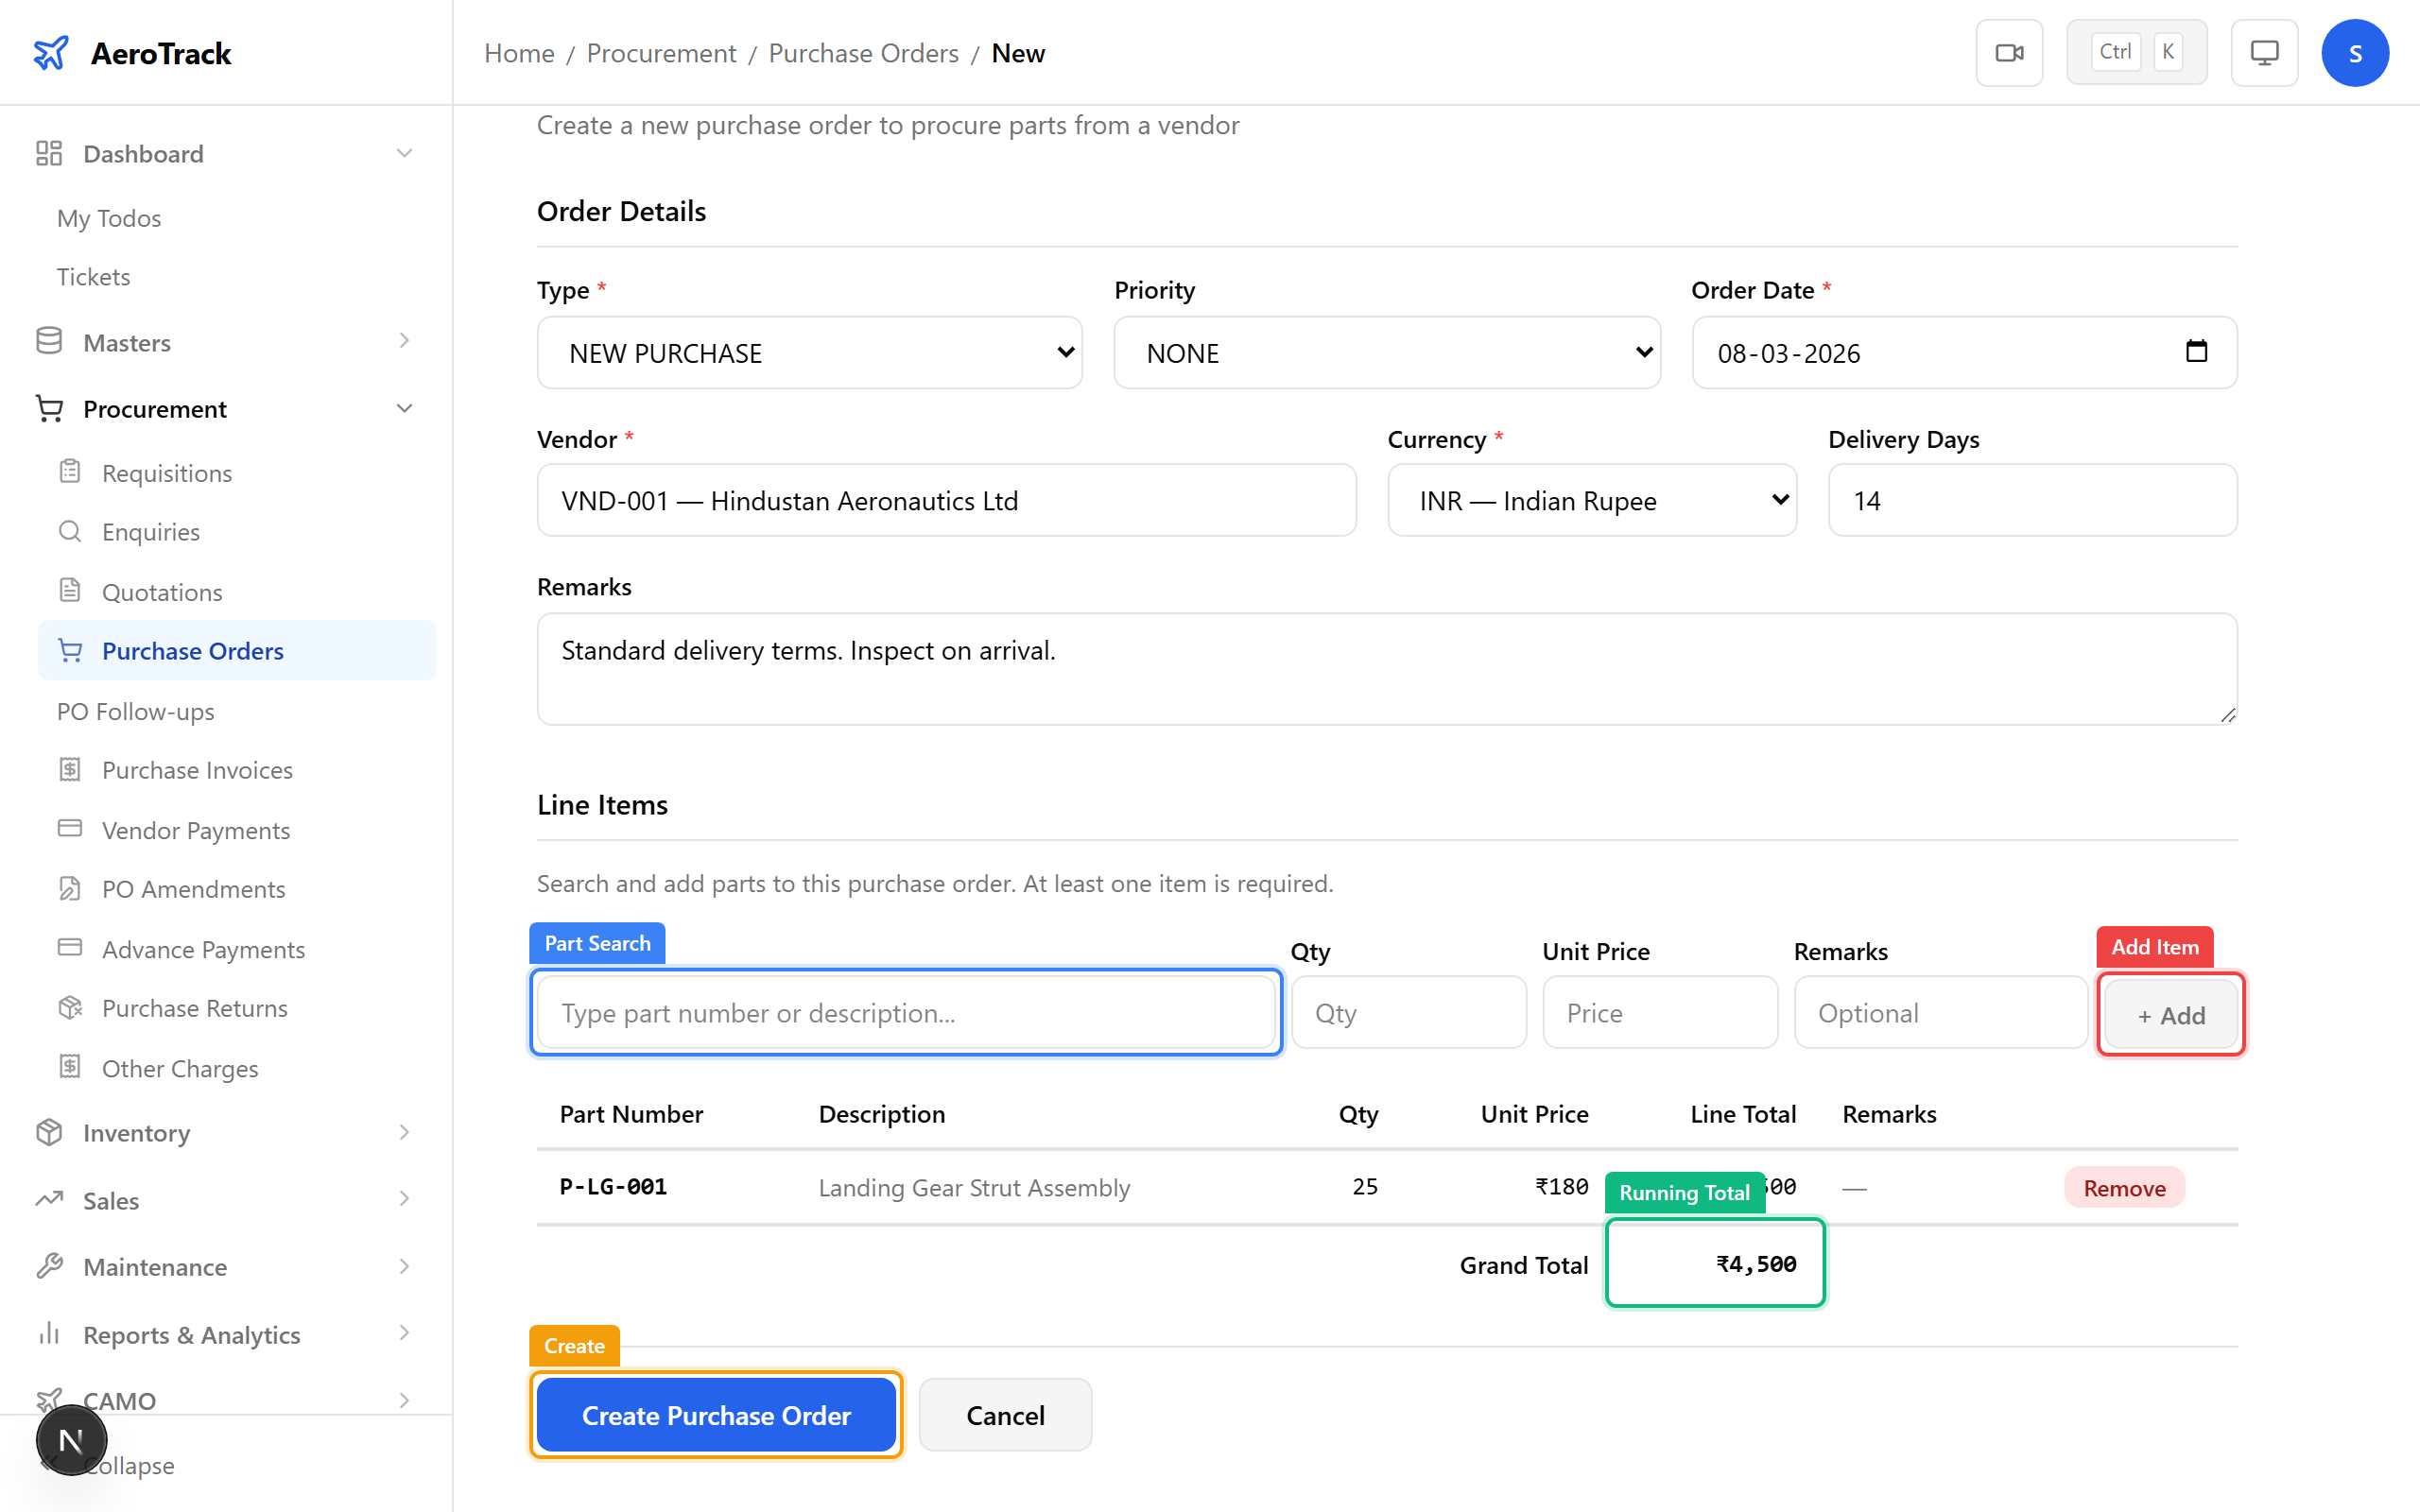
Click Create to save the PO in Opened status. You’ll be redirected to the PO detail page.
PO Detail & Workflow
The PO detail page shows the full order, including:
| Section | Contents |
|---|---|
| Header | PO number, vendor, date, status, priority. |
| Line Items | Part number, description, quantity, price, line total. |
| Grand Total | Sum of all line items. |
| Follow-ups | Delivery tracking entries linked to this PO. |
| Amendments | Quantity or price changes after authorization. |
| Other Charges | Freight, insurance, customs duties, etc. |
Purchase Orders follow this workflow:
| Status | Meaning | Next Action |
|---|---|---|
| Opened | Newly created. Editable. | Authorize (manager/admin). |
| Authorized | Approved for sending to vendor. | Record Goods Receipt when parts arrive. |
| Received | All items received against this PO. | Create Purchase Invoice. |
| Cancelled | Withdrawn or rejected at any stage. | — |