Receive a Work Order
Navigate to 145 MRO → WO Inbox in the sidebar.
The inbox loads at /mro145/inbox with two tabs:
From CAMO and Received / Manual.
The From CAMO tab is selected by default, showing work orders created by the CAMO team that are awaiting receipt by MRO.
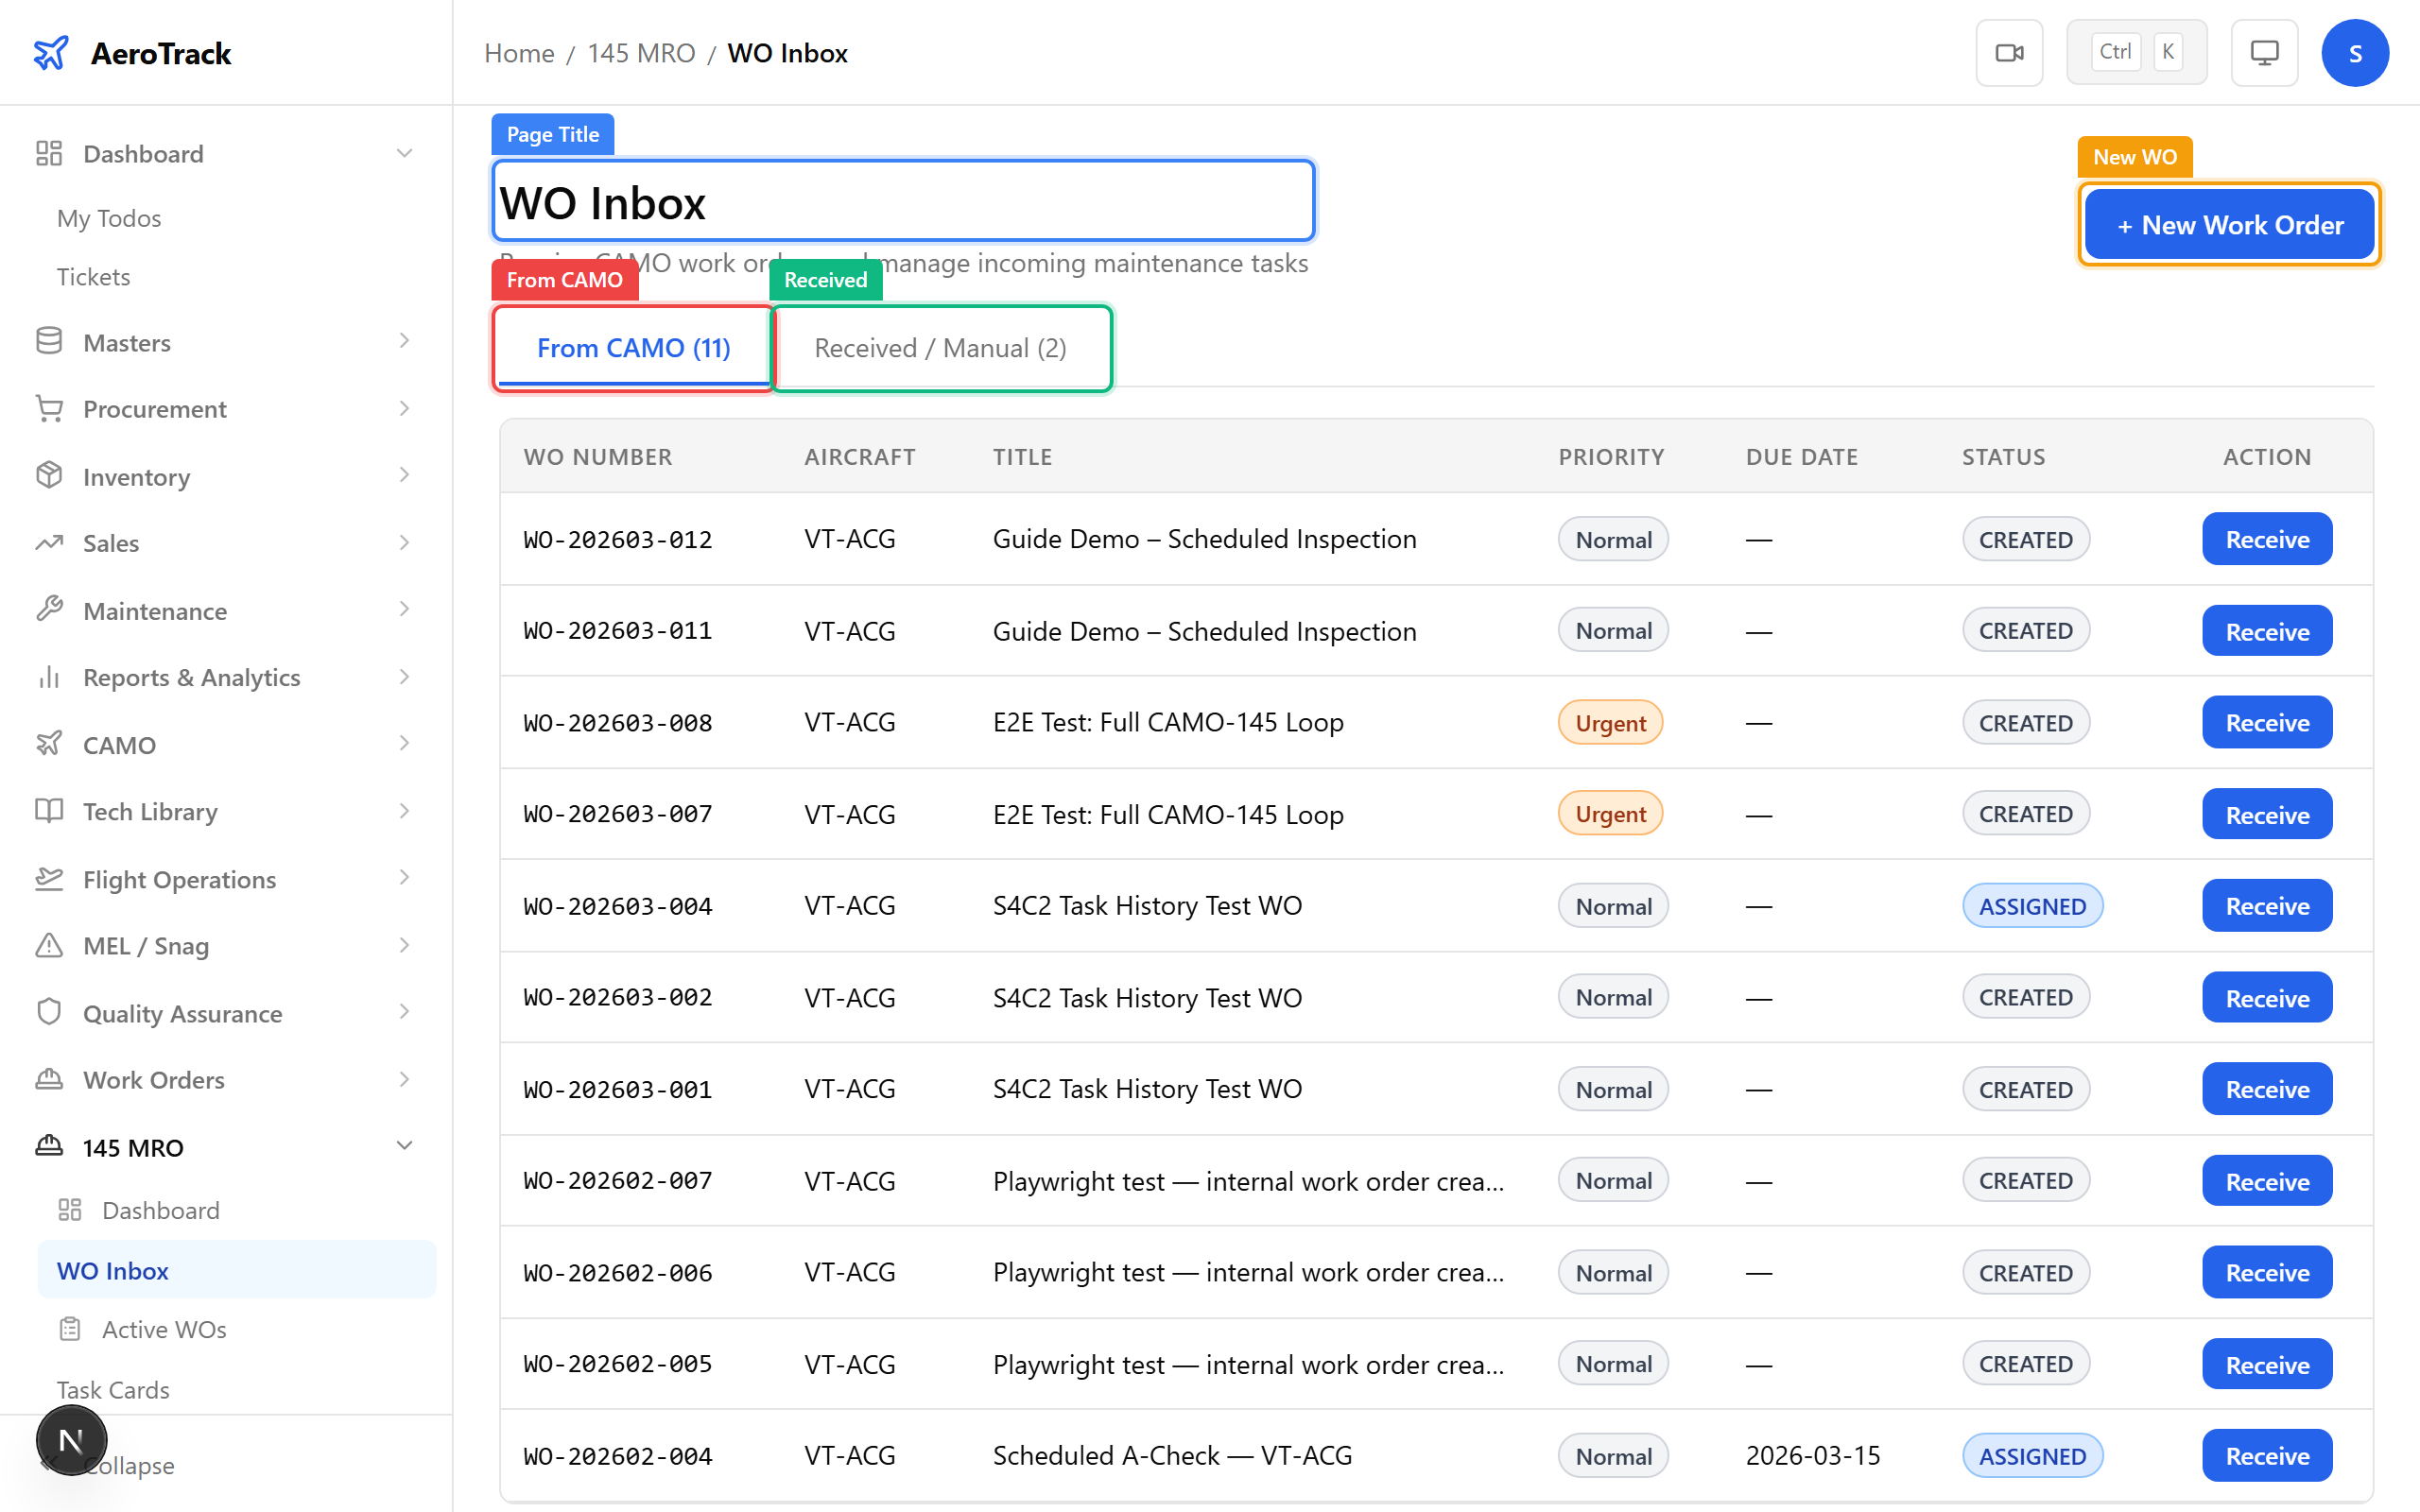
The CAMO Pending table shows work orders sent from the CAMO module. Each row displays:
| Column | Meaning |
|---|---|
| WO Number | The CAMO work order number (e.g. WO-202603-001). |
| Aircraft | Registration number of the aircraft. |
| Title | Short description of the work required. |
| Priority | Badge: Normal (gray), Urgent (orange), or AOG (red). |
| Due Date | When the work must be completed. |
| Action | Receive button to accept the order into MRO. |
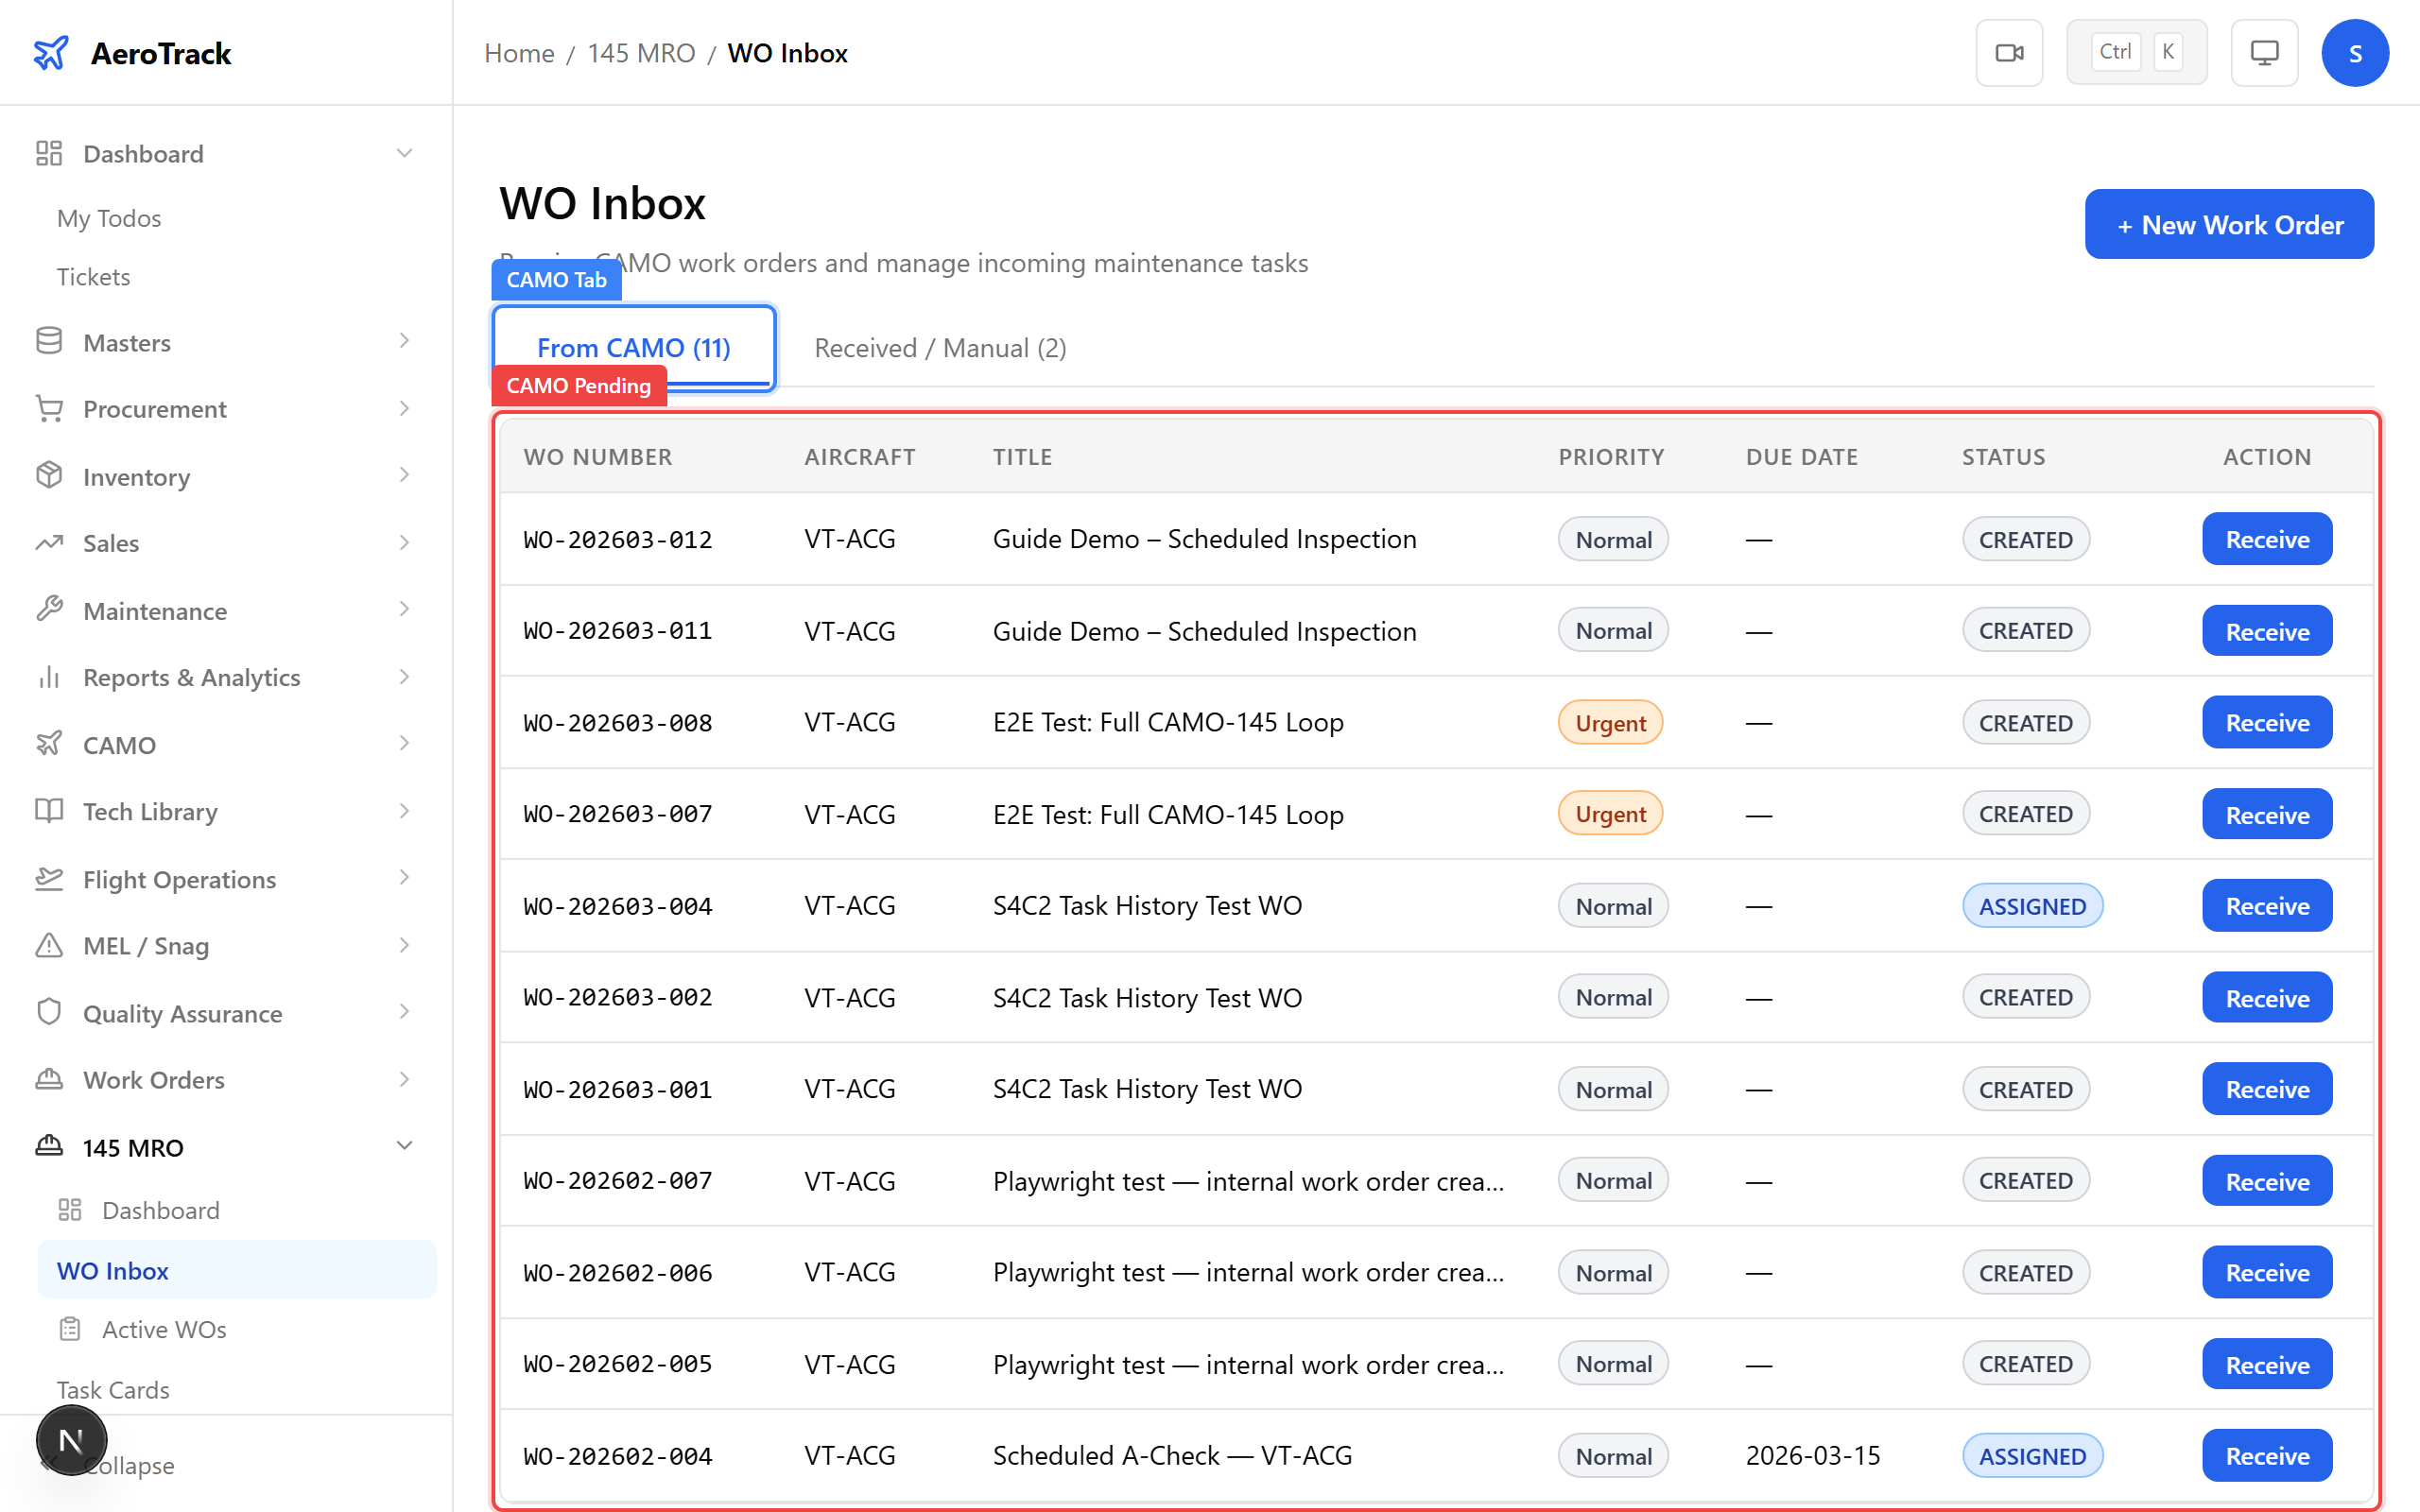
Click the Receive button on any CAMO pending row.
The system creates a corresponding MRO work order with status
RECEIVED and generates an MRO number
(e.g. MRO-202603-001).
A success toast appears: “Work order received”. The order moves from the CAMO tab to the Received tab.
Accept & Assign
Switch to the Received / Manual tab and click a row
to open the work order detail page at
/mro145/inbox/{id}.
The detail page displays the WO status badge, aircraft info, schedule, description, and action buttons. For a work order in RECEIVED status you will see:
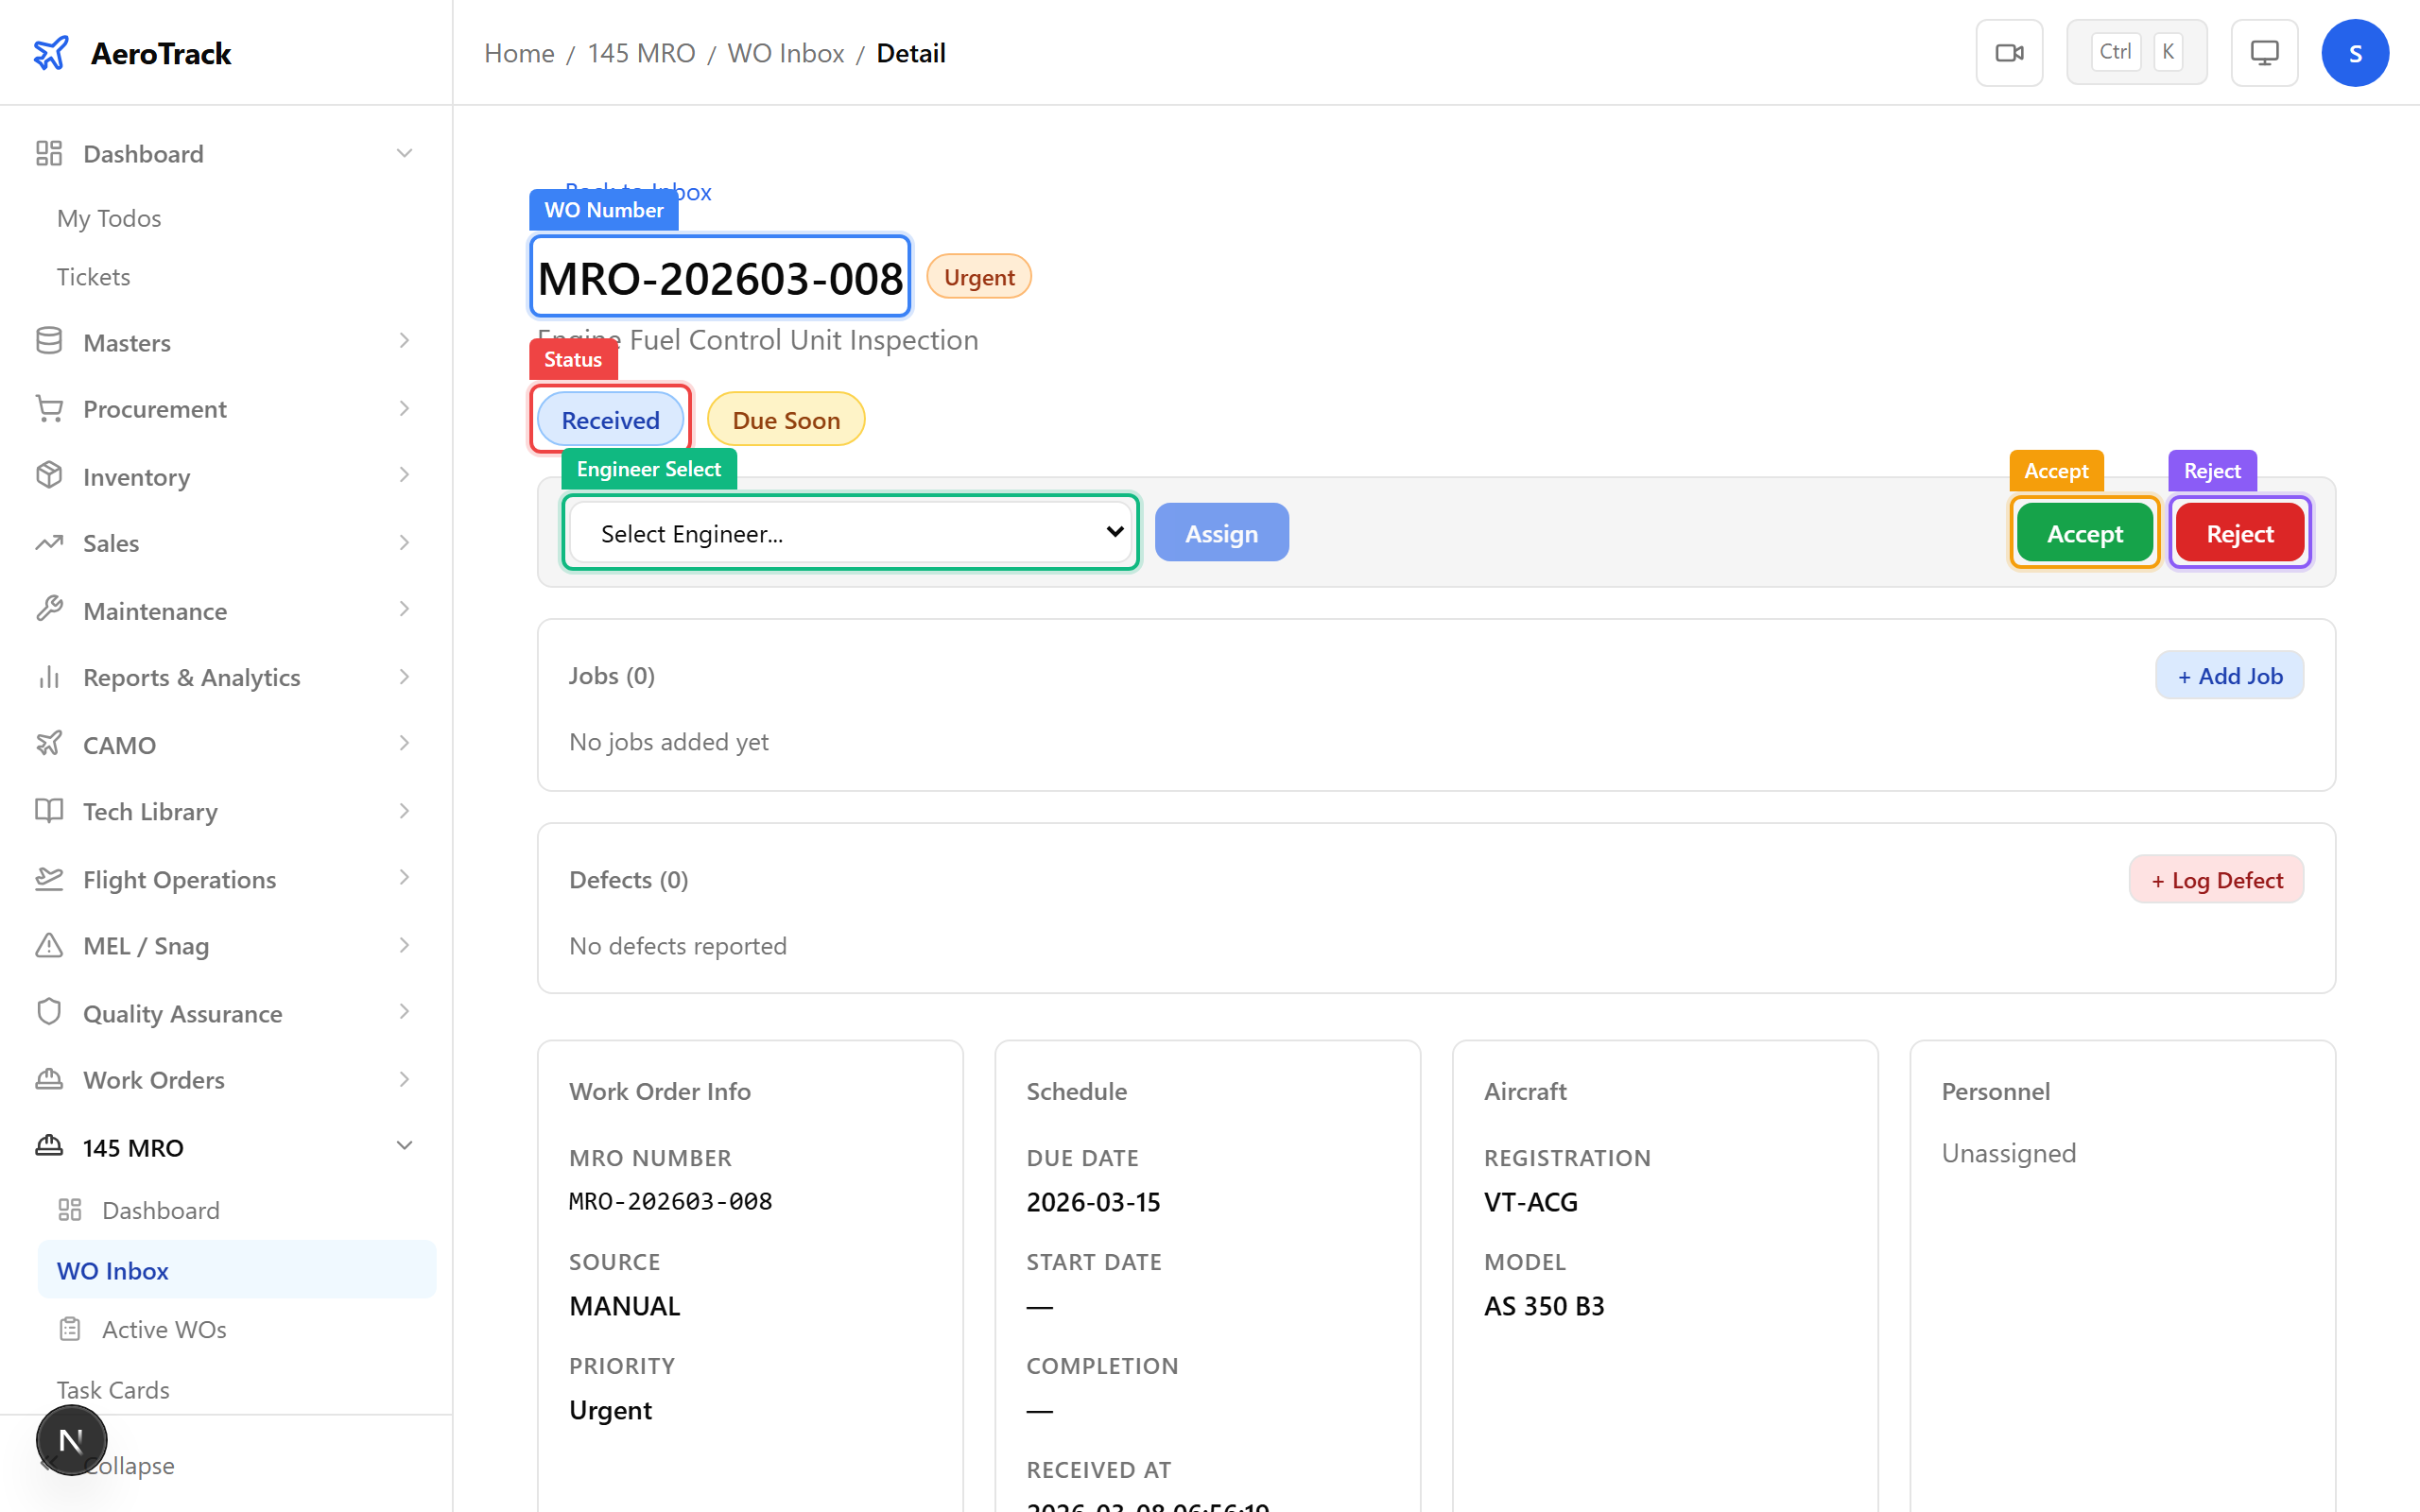
Use the Assign Engineer dropdown to select an available AME (Aircraft Maintenance Engineer). The dropdown lists all active employees with valid AME licences.
After selecting an engineer, click Assign. The system validates the engineer’s AME licence status:
| Licence Status | Result |
|---|---|
| Valid (> 90 days) | Assignment succeeds with no warnings. |
| Expiring < 90 days | Assignment succeeds with a WARNING alert. |
| Expiring < 30 days | Assignment succeeds with a CRITICAL alert. |
| Expired | Assignment is blocked. Renew the licence first. |
Click the Accept button. The work order status transitions from RECEIVED to ACCEPTED.
A success toast appears: “Work order accepted”. The WO is now visible in the Active Work Orders page and can proceed to planning and job execution.
Reject a Work Order
If the work order cannot be performed (wrong aircraft type, insufficient tooling, etc.), click the red Reject button on the detail page.
A rejection dialog appears with the title: “Reject Work Order”.
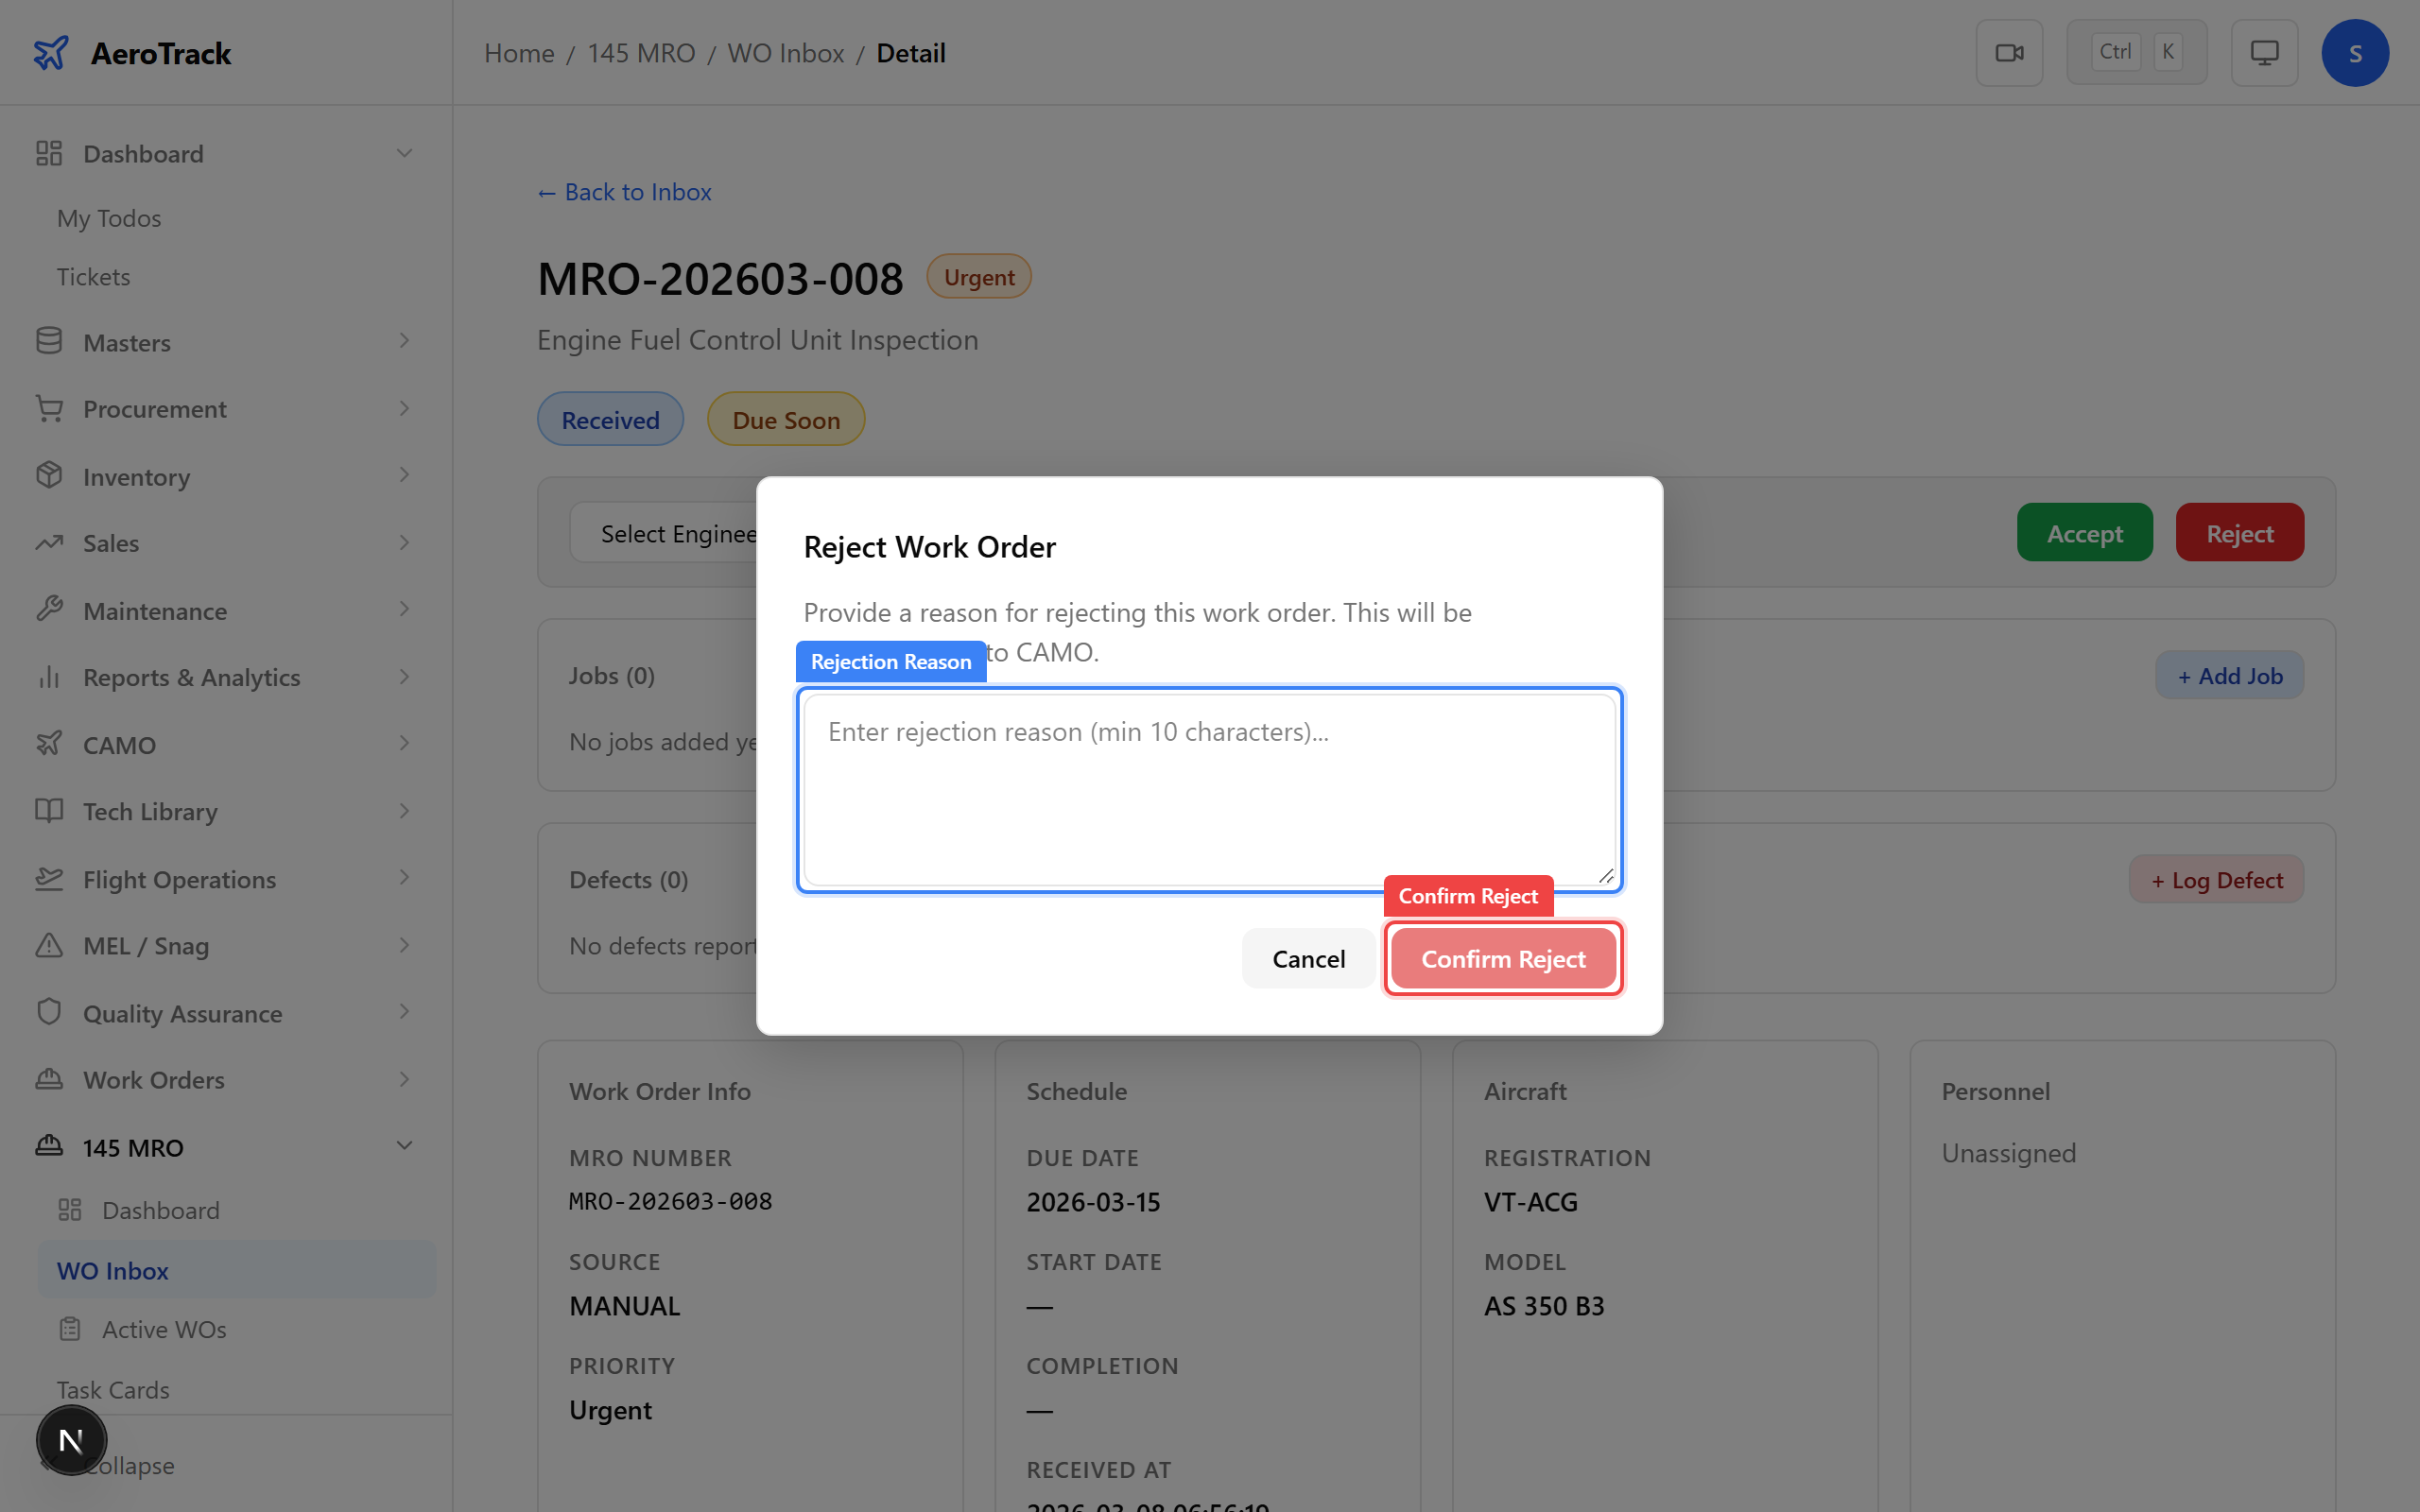
Enter a rejection reason (minimum 10 characters) and click Confirm Reject.
The system:
- Sets the MRO work order status to REJECTED.
- If linked to a CAMO WO, updates the CAMO status to REJECTED_145.
- Stores the rejection reason in the work order remarks.
- Logs the action in the audit trail.
A toast appears: “Work order rejected”. Rejected work orders no longer appear in the active list.