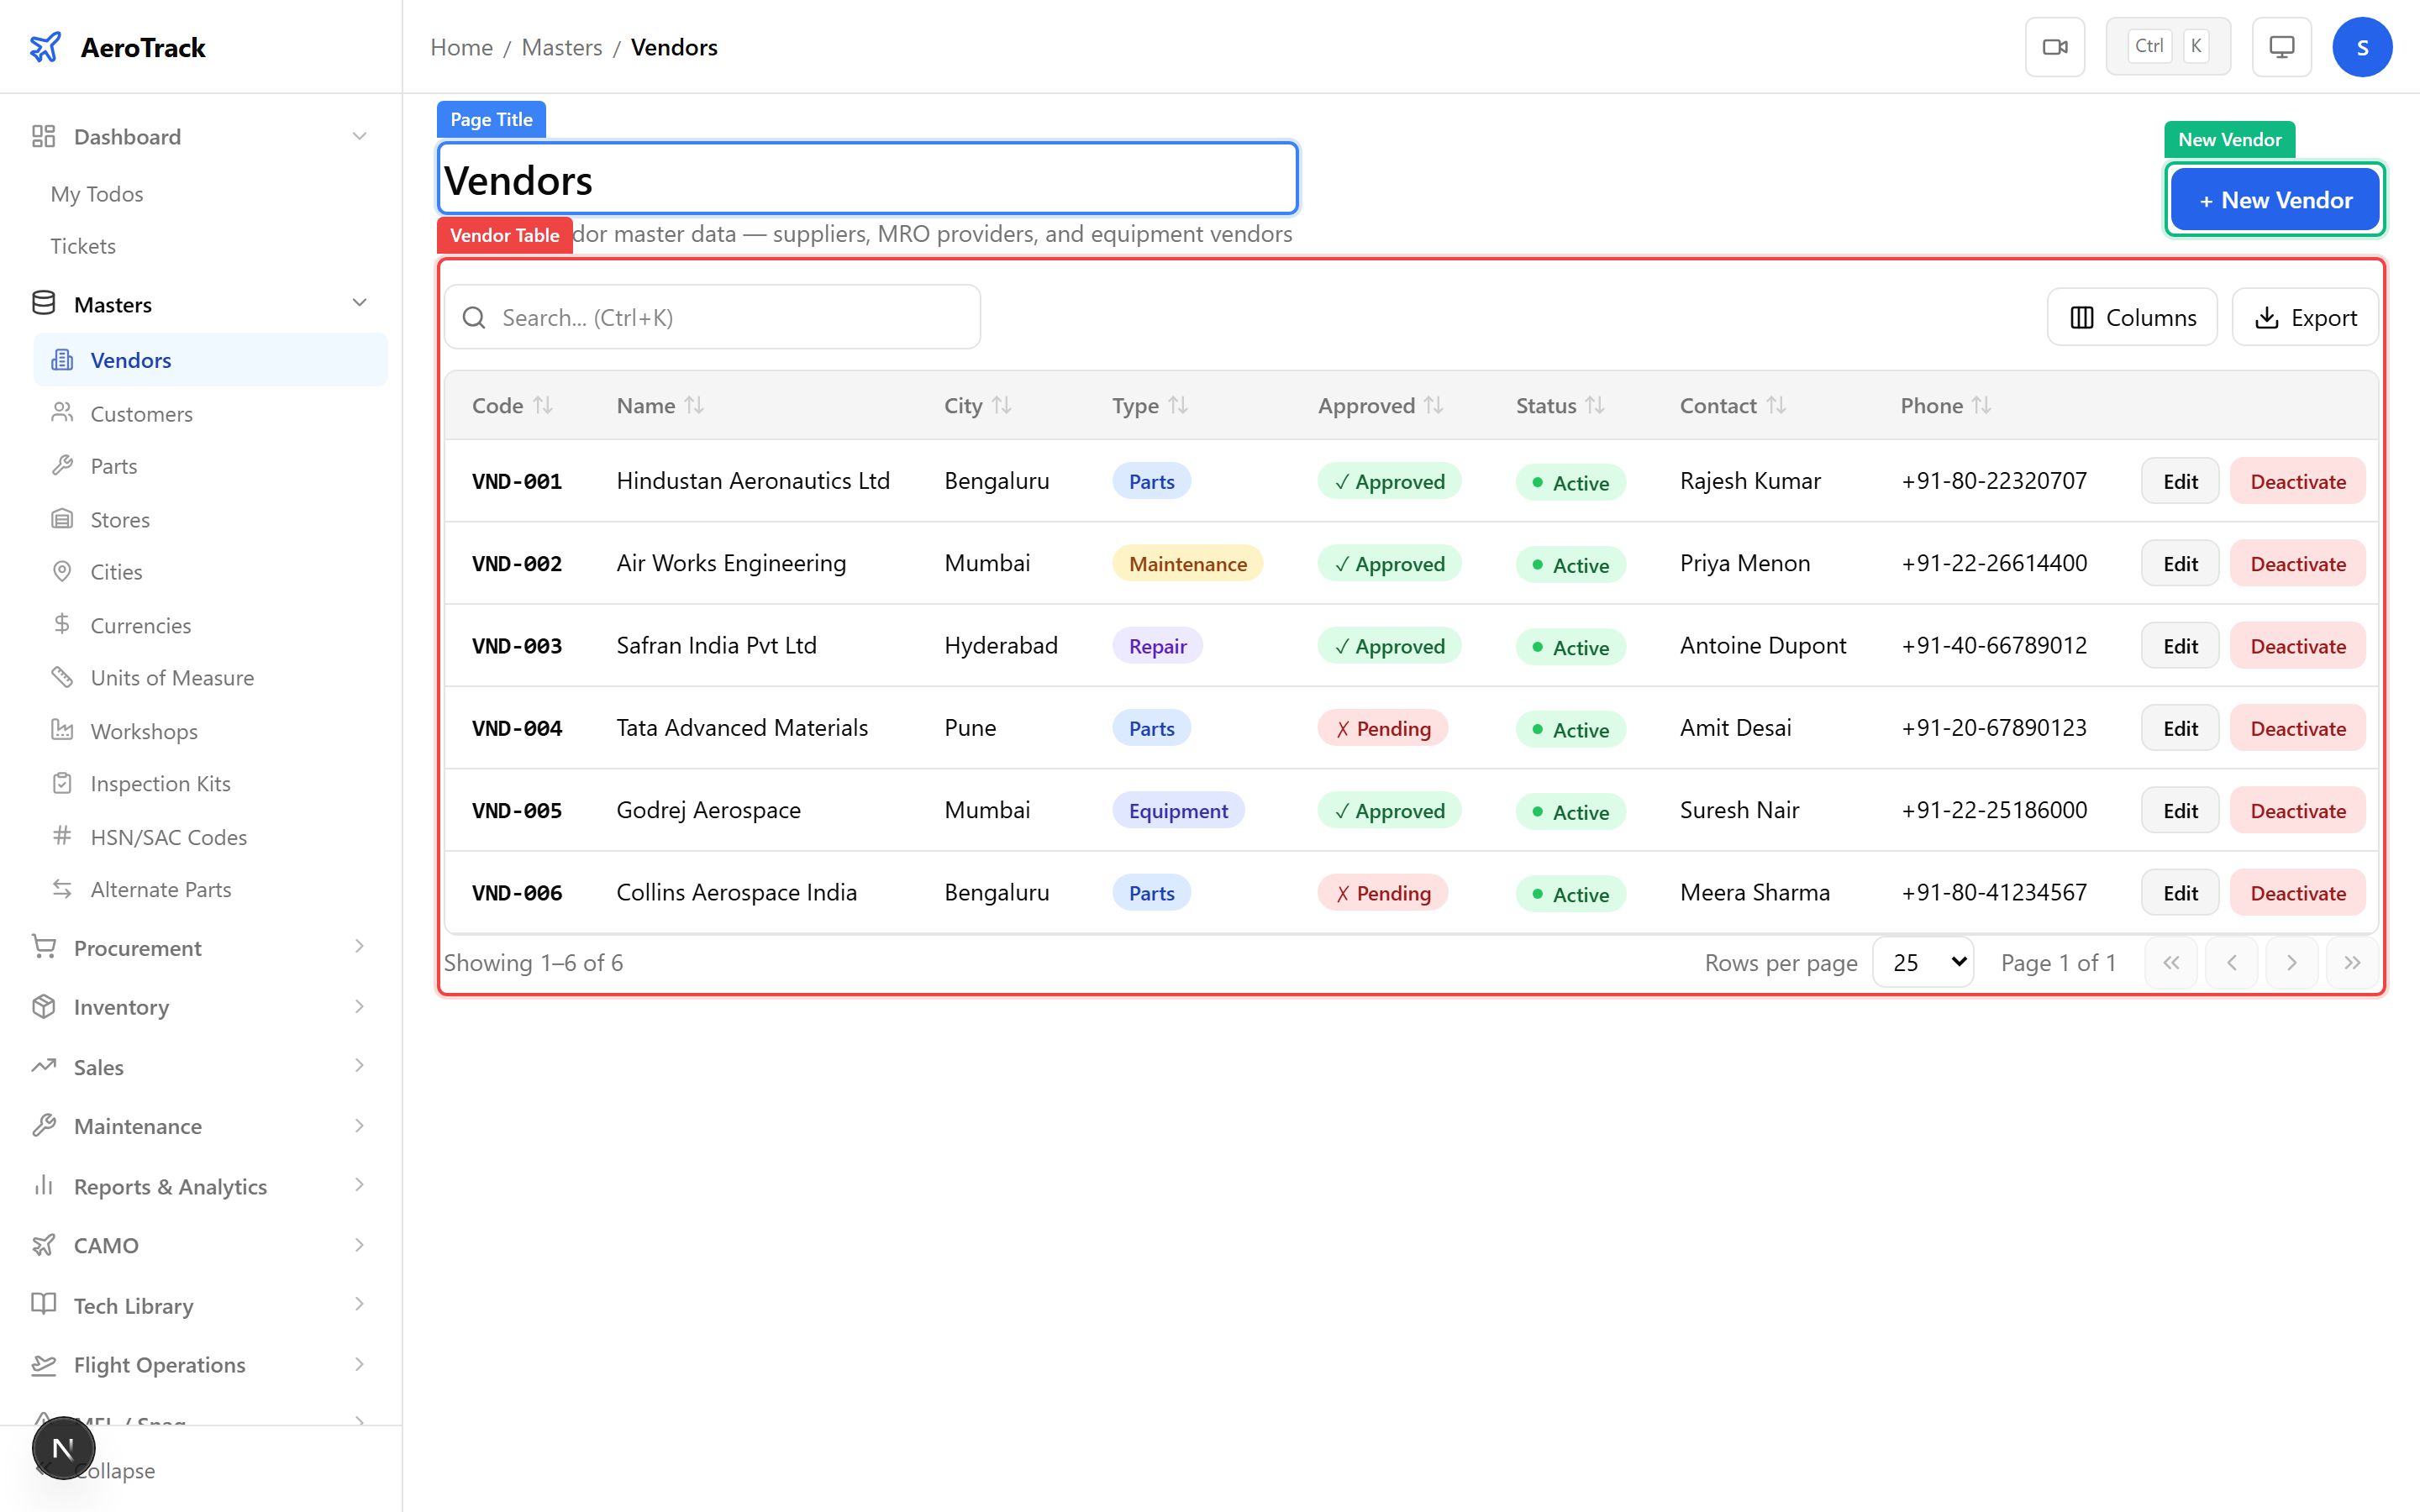
Browse Suppliers
Navigate to Masters → Vendors or go directly
to /masters/vendors. The vendor list shows all
registered suppliers with search, sort, and filter capabilities.
| Column | Description |
|---|---|
| Code | Unique short identifier for the vendor (e.g. VND-001). |
| Name | Full company or trading name of the supplier. |
| Type | Vendor classification — Supplier, Manufacturer, Service Provider, or OEM. |
| City | Location of the vendor’s registered office. |
| Contact Person | Primary contact name at the vendor. |
| Phone | Contact telephone number. |
| Approved | Whether the vendor is approved for use in procurement. |
Create a Supplier
Click the + New Vendor button at the top of the
vendor list. This opens the vendor creation form at
/masters/vendors/new.
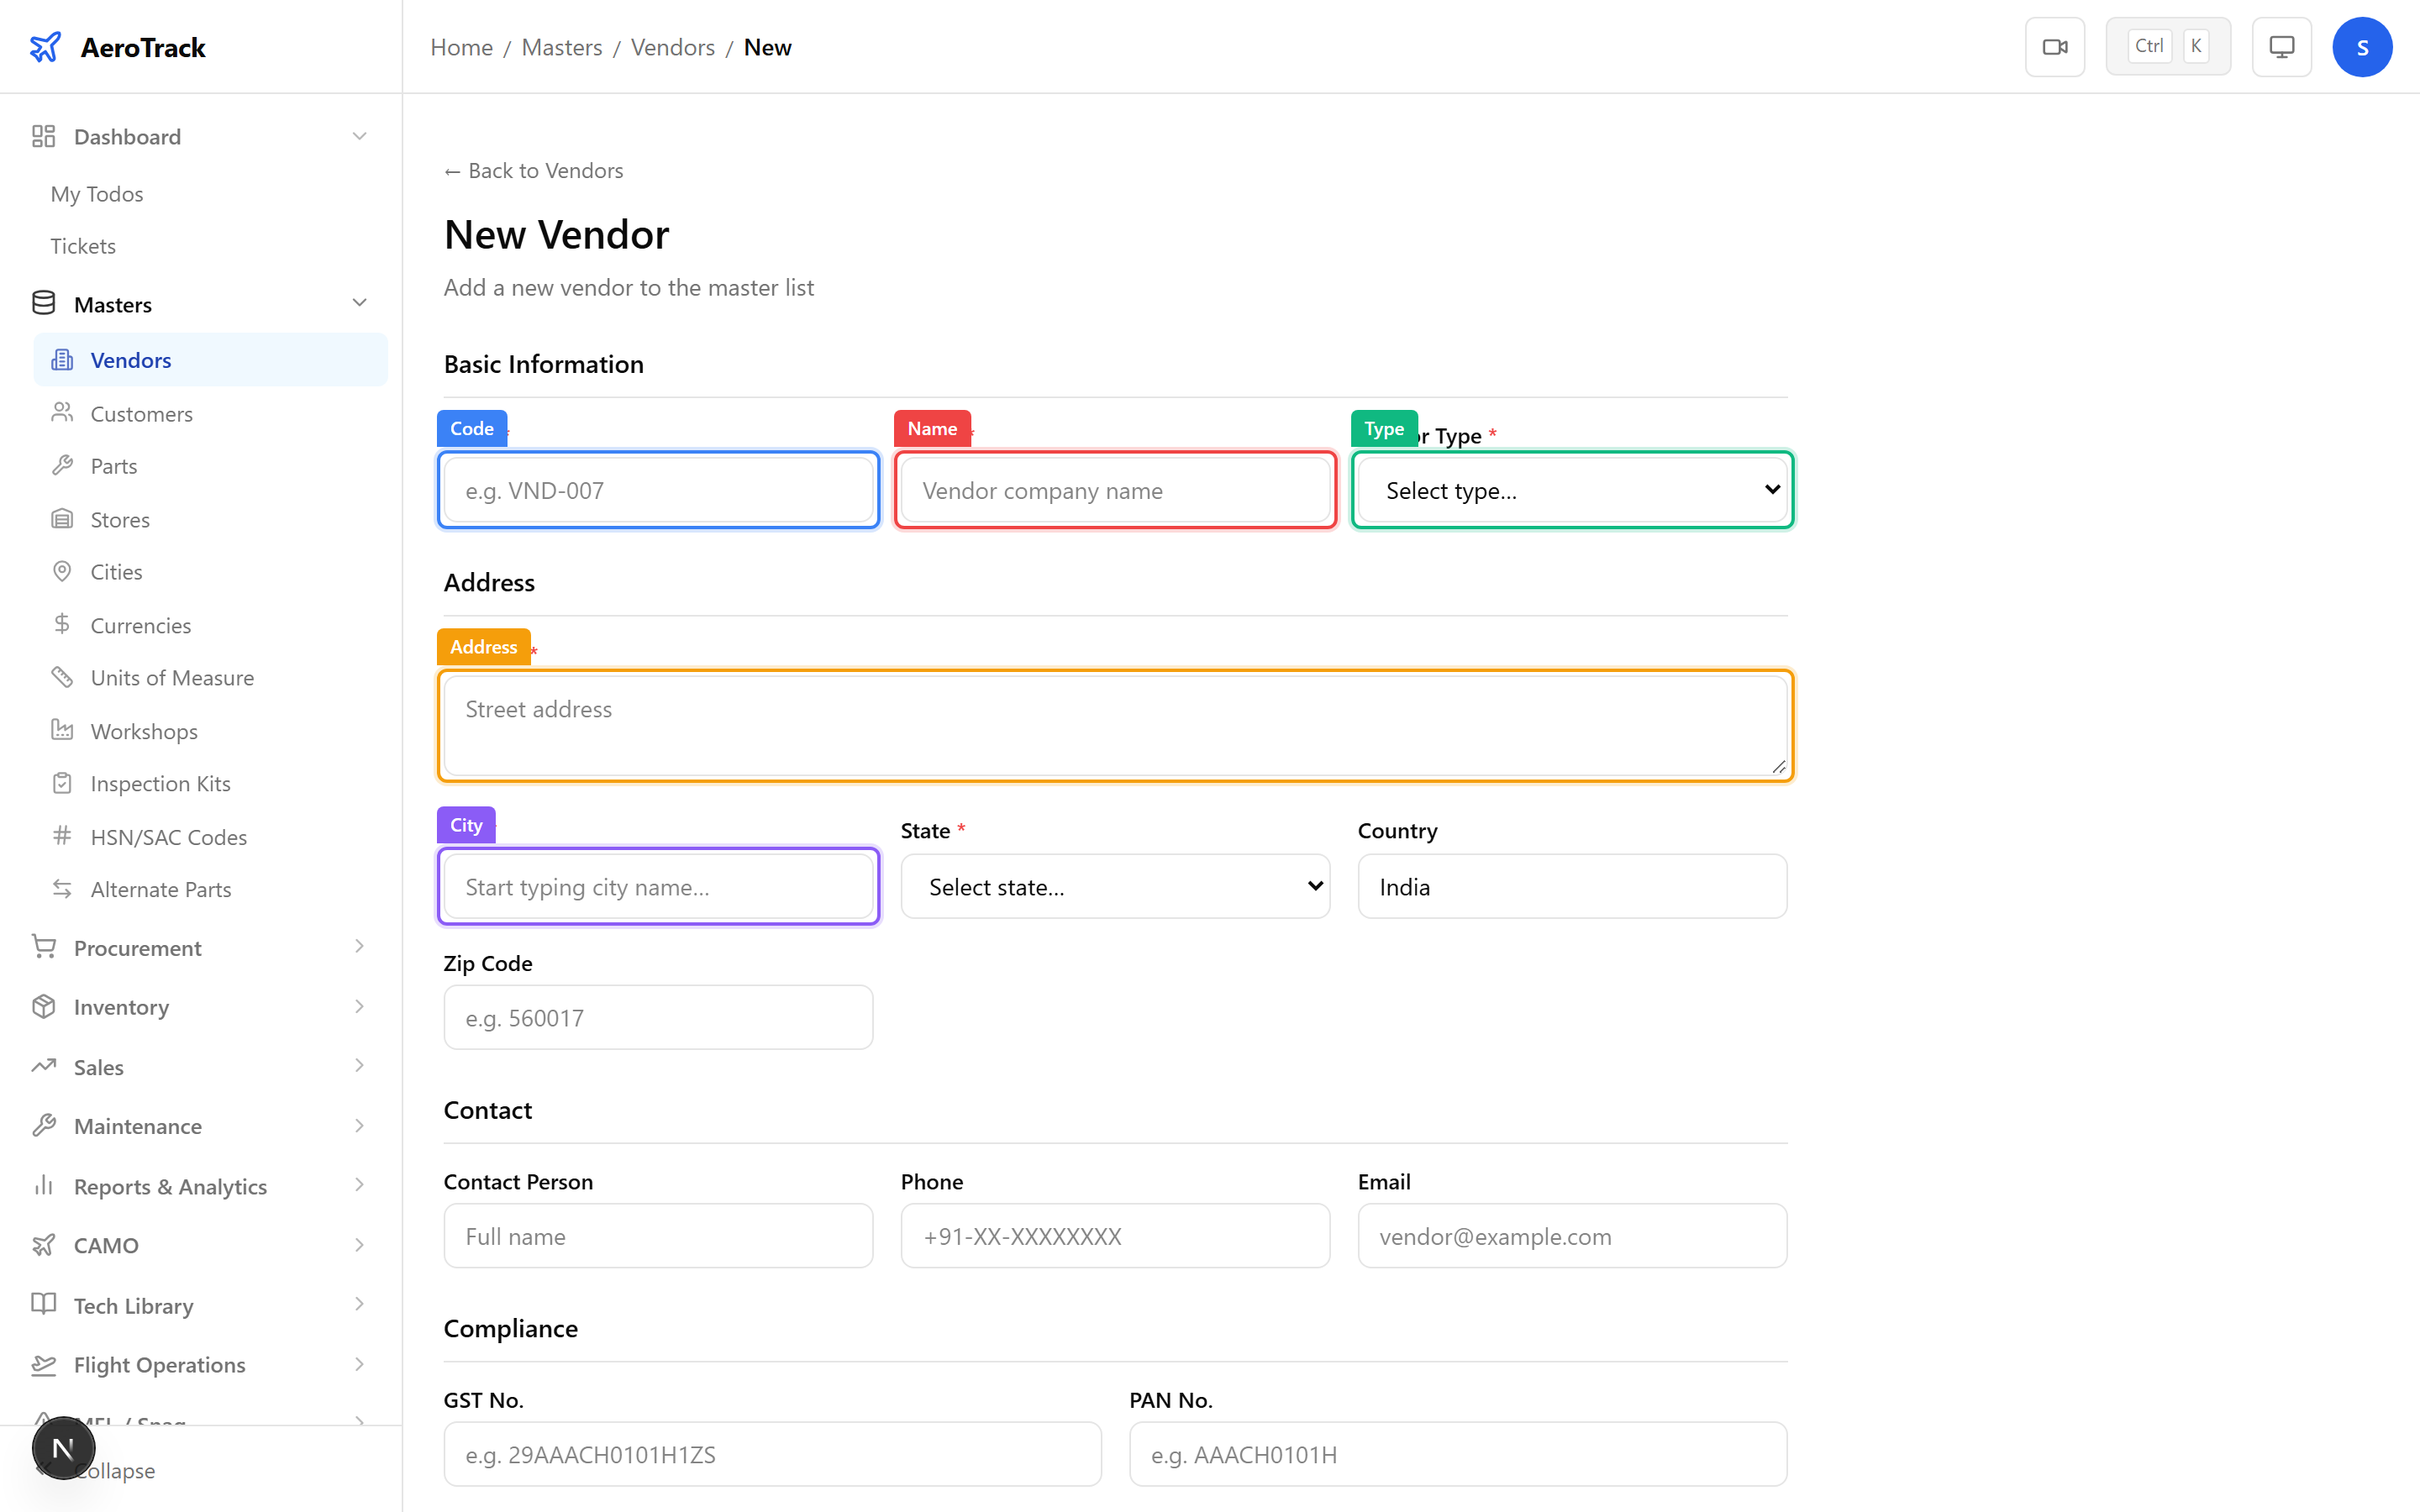
Fill in the vendor’s identity and contact details:
| Field | Required | Description |
|---|---|---|
| Code | Yes | Unique vendor code (auto-suggested or manual). |
| Name | Yes | Full company name. |
| Vendor Type | Yes | Select from Supplier, Manufacturer, Service Provider, or OEM. |
| Address | No | Registered business address. |
| City | No | Select from the City master. |
| Contact Person | No | Primary point of contact. |
| Phone | No | Contact telephone number. |
| No | Business email address. |
Scroll down to the compliance and commercial section:
| Field | Required | Description |
|---|---|---|
| GST No. | No | Goods & Services Tax identification number (15-char alphanumeric). |
| PAN No. | No | Permanent Account Number for tax compliance. |
| Payment Terms | No | Default payment terms (e.g. Net 30, Net 60, Advance). |
| Approved | No | Toggle to mark the vendor as approved for procurement use. |
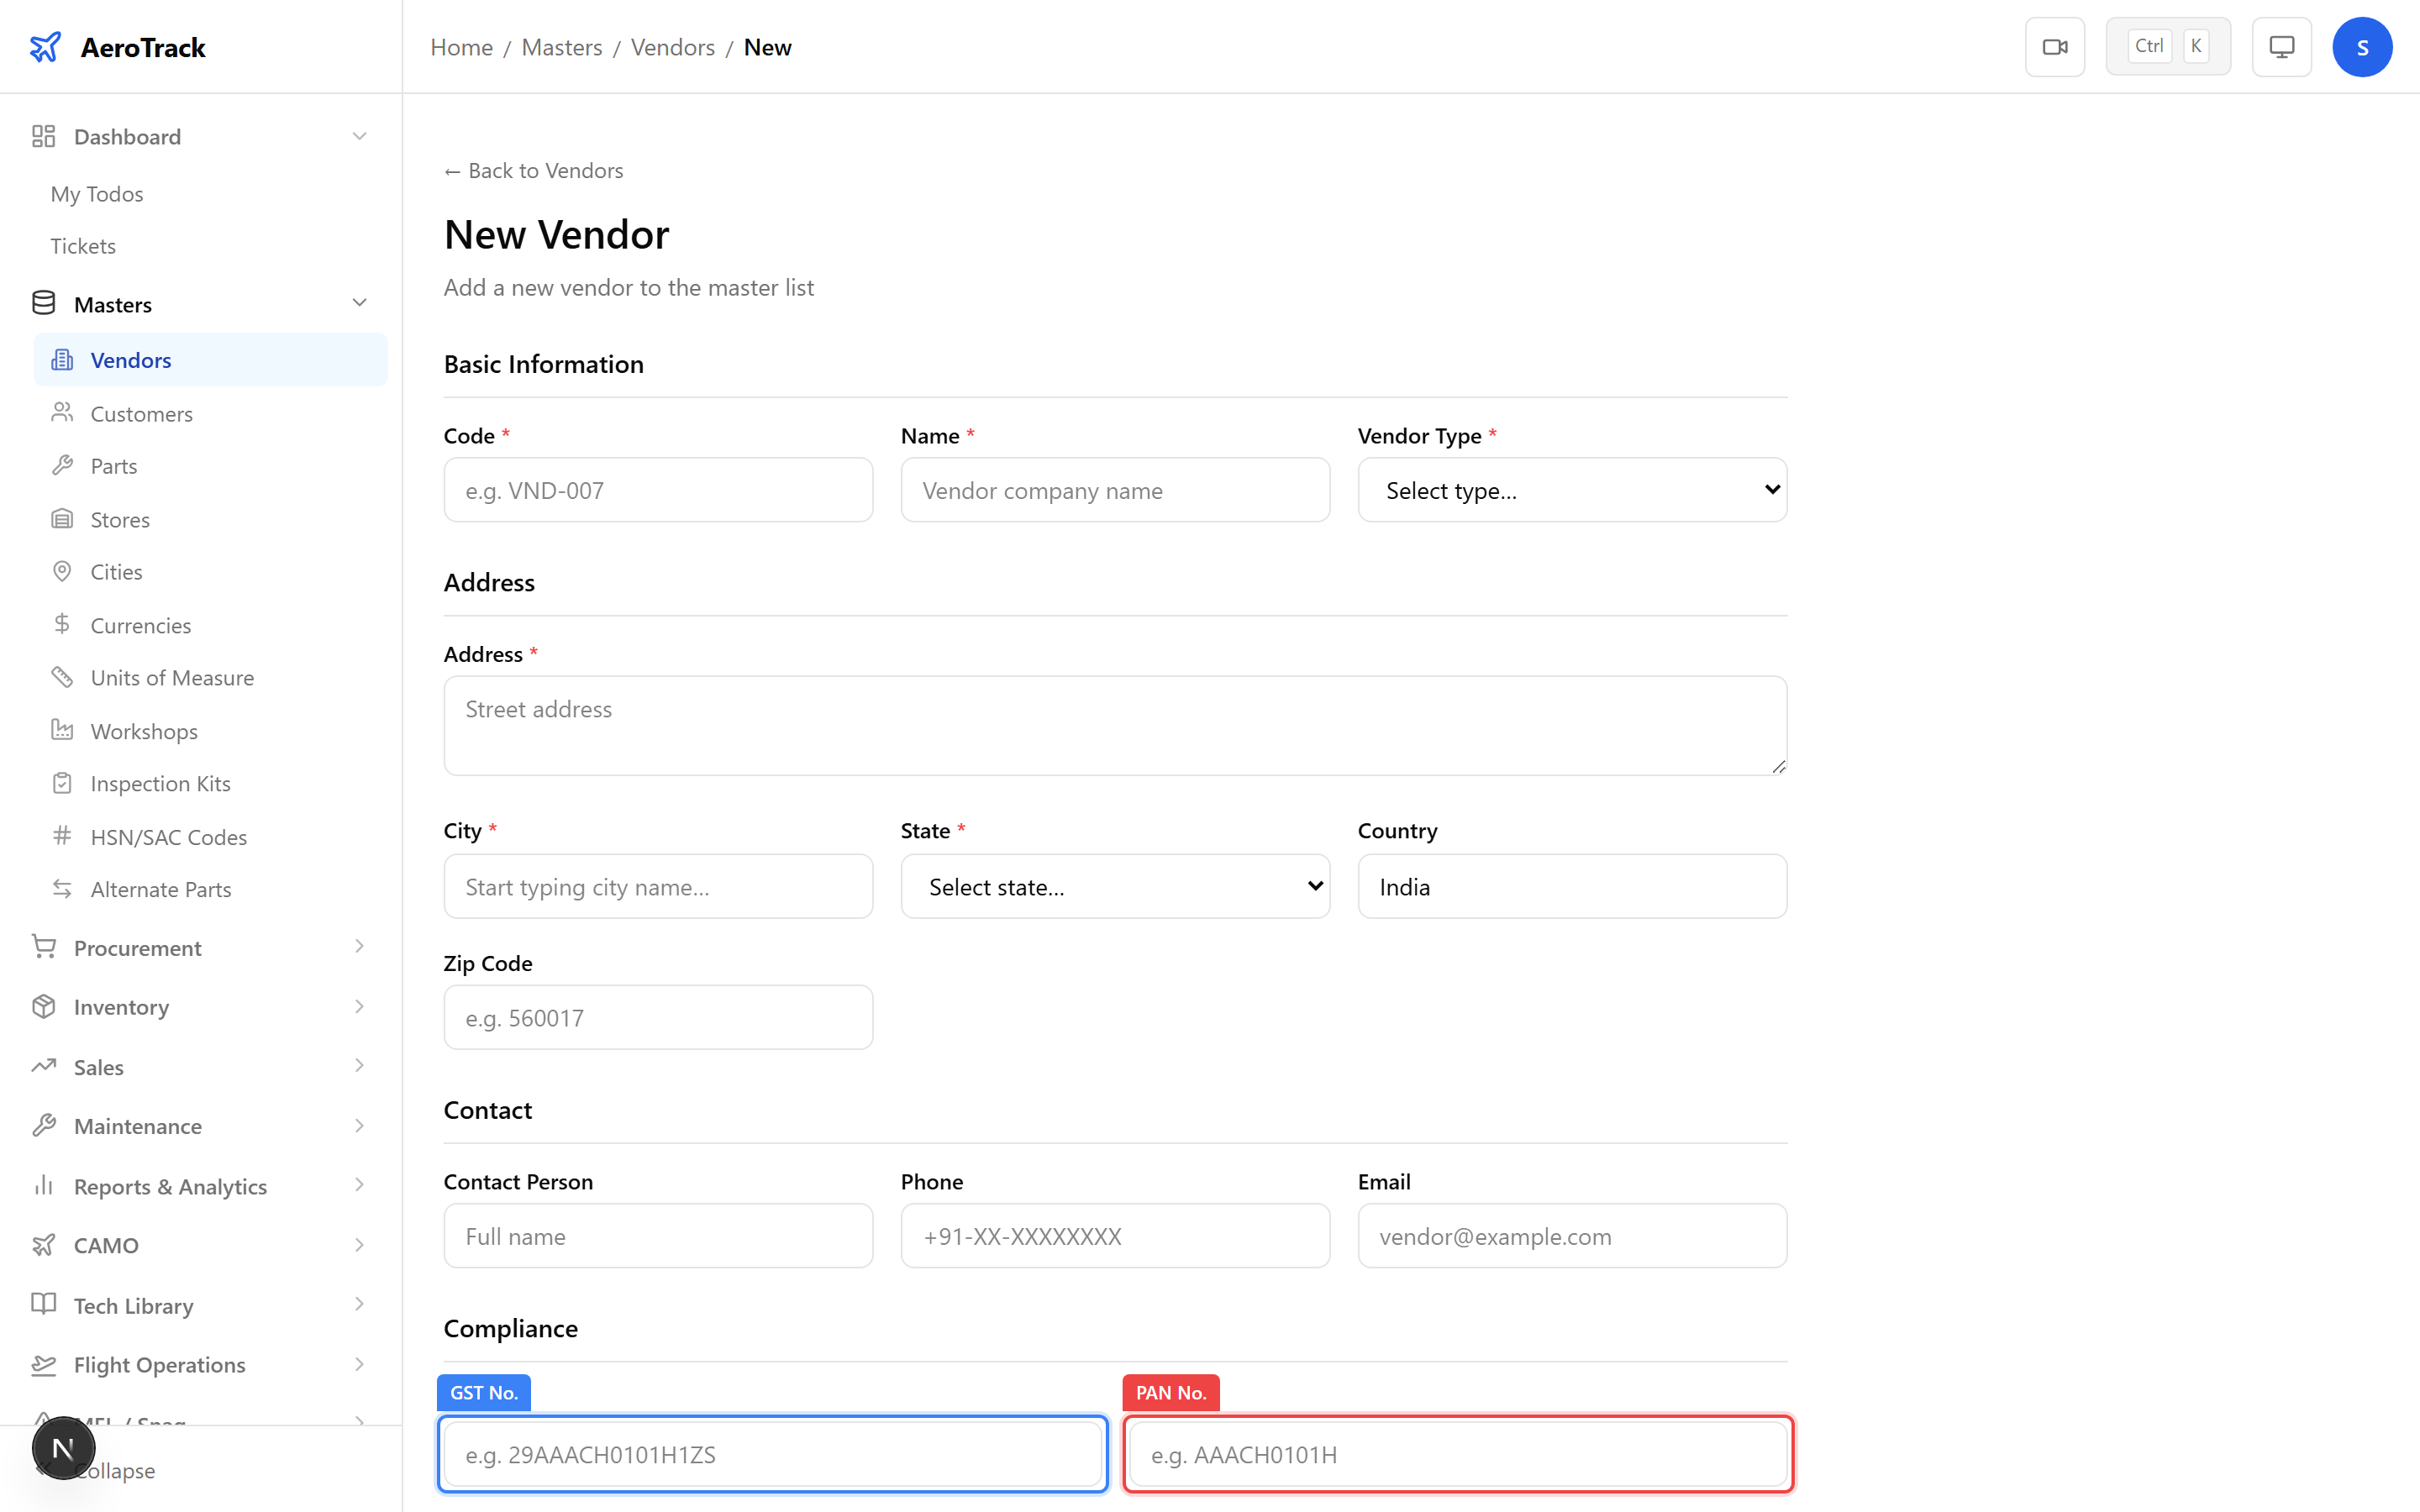
Click Save to create the vendor record. You will be redirected back to the vendor list.
Manage Suppliers
Click a vendor row in the list to open the edit form at
/masters/vendors/{id}/edit. All fields are editable.
Make your changes and click Save to update the
record. Every edit is tracked in the audit trail.
Use the Approved toggle to control whether a vendor appears in procurement dropdowns:
| Status | Effect |
|---|---|
| Approved = On | Vendor is selectable in POs, Enquiries, and Quotations. |
| Approved = Off | Vendor is hidden from procurement forms but retained for historical records. |